10
31. 08. 21. Document Number 671746
Nuaire | Western Industrial Estate | Caerphilly | CF83 1NA | nuaire.co.uk
BPS (V/T)-ES
Installation Manual
7.0 ELECTRICAL INSTALLATION
The electrical wiring must be carried out by competent persons, in
accordance with good industry practice and should conform to all
governing and statutory bodies i.e. IEE, CIBSE etc.
7.1 Main Unit Power Supply
The control is powered by a 400Vac 50Hz 3 phase & Neutral supply.
This must be isolated local to the unit and fitted with appropriate over-
current and fault protection.
7.2 Electric Heater Power Supply
For models with electric heating, the heating circuit is powered by 1 or
2 separate, higher current, 400Vac 50Hz 3 phase & Neutral supplies.
This must be isolated to the unit and fitted with appropriate over-
current protection. The main supply is still required. Electric heater
elements are protected by a fail-safe over-temperature switch which
will disconnect the heater supply if a temperature of 80°C is reached.
Once the elements cool, the switch will reset but a power cycle is
required to reset the heater supply contactor.
7.3 Power Supply Details - FLC
Unit Size
Unit (FLC)
Unit with Electric Heater
(Electric Heater Models Only)
B*07V/**ES
4.3 A
4.3 A + 17.5 A †
B*07T/**ES
8.3 A
8.3 A + 17.5 A †
B*12V/**ES
6.8 A
6.8 A + 35 A †
B*12T/**ES
10.8 A
10.8 A + 35 A †
B*17V/**ES
9.5 A
9.5 A + 52.5 A †
B*17T/**ES
13.5 A
13.5 A + 52.5 A †
B*22V/**ES
10 A
10 A + 52.5 A †
B*22T/**ES
14 A
14 A + 52.5 A †
B*32V/**ES
15 A
15 A + 35 A + 52.5 A ‡
B*32T/**ES
15 A
15 A + 35 A + 52.5 A ‡
B*42V/**ES
19 A
19 A + 52.5 A+ 52.5 A ‡
B*42T/**ES
22.5 A
22.5 A + 52.5 A + 52.5 A ‡
* Denotes any Character.
† These heater models require a separate power supply for the electric
heater section, with an appropriate over-current protection device.
‡ These heater models require two separate power supplies for the
two (2) electric heater sections, each with an appropriate over-current
protection device.
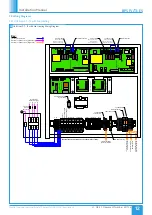
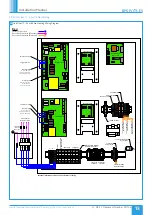
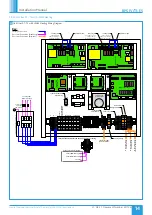
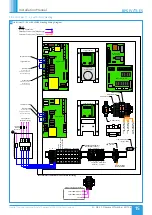
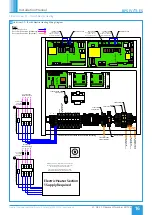
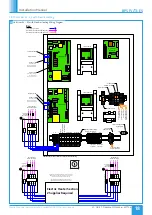
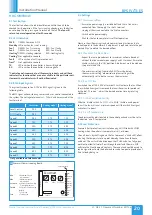
7.4 Wiring
All inter-connections between circuit boards, blowers and sensors are
made at the factory. This diagram only shows the essential field wiring
points for clarity.
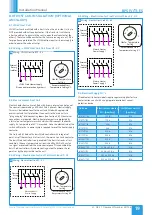
Remove link wire if switched live signal, an enabler or BMS signal is
connected.
If inlet and outlet dampers are fitted, remove the damper link
wires. This will allow a 1 minute delay before starting the fans.
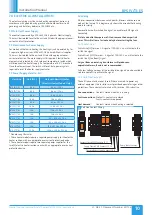
7.4.1 Switch Live
Switch Live (SL) terminal - A signal of 100-230V a.c. will activate the
switch live signal.
Switch Live 2 (SL2) terminal - A signal of 100-230V a.c. will activate the
switch live 2 (Fan Boost) signal.
A signal from an isolating transformer will produce an
unpredictable result and is not recommended.
Extra low voltage versions of the switched live signals are also available.
Link two contacts to activate the signal.
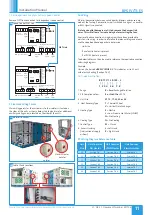
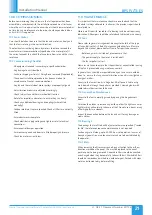
7.4.2 Volt Free Contacts
The volt free contacts are not fused. If these are used to power any
external equipment, the installer must provide adequate fusing or other
protections. These contacts are rated at 5A resistive, 0.5A inductive.
Run connections
- Contacts closed when fan is running.
Fault connections-
No Fault = contacts are closed.
Fault = contacts are opened.
Heat demand
-
Contacts closed when heating is selected.
Thermal Wheel Fault Contacts 14, 15
Supply Filter dP NC Contacts 12, 13
Extract Filter dP NC Contacts 10, 11
Pump Fault Contacts
25
Volt Free Contact Wiring


