ECO Dri Heater
For use with Drimaster, PIV and
derivative Ventilation Units
Installation Guide
ECO Dri Heater
Designed to operate with the Nuaire range of Drimaster 365
and derivative ventilation units.
Installation in Drimaster and
Drimaster 2000
Installation must be completed by competent persons, in
accordance with good industry practice and the provision of
the electrical supply and the connection of the unit to the mains
must be carried out by a qualified electrician.
1. To install the heater temporarily remove the flexible ducting
from the Drimaster.
2. Remove the top casing screw in the Drimaster in order to
open/part the casing sides. (see Figure 2).
3. Note the location slots at the end of the circular heater
assembly and offer this end into the open circular aperture in
Drimaster. Locate the duct slots behind the units internal
vertical side mouldings and ensure plate goes under clip on fan
outlet.
4. Close the casing, replace and tighten the screw clamping the
heater in position.
5. Using the nylon tie supplied, re-connect the flexible ducting
and the unit filters.
Installation in the Drimaster 365 unit
Fit the end of the circular heater assembly inside the spigot on
the Drimaster 365 casing. Ensure heater is horizontal and drill
three holes. Secure with screws.
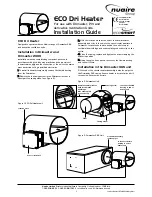
Figure 1. ECO Dri Heater unit
Figure 2. Drimaster Unit
Figure 3. Drimaster 365 Unit
Casing screw
Casing screw
Filter
Heater assembly locates
with vertical side
mouldings.
Also ensure plate
goes under lip
Control interface
Location slots
Fit heater assembly
inside spigot
re-connect flexible
ducting to end of
heater unit
re-connect flexible
ducting to end of
heater unit
The EMC Directive
2004/108/EC
The Low Voltage
directive
2006/95/EC
1
Leaflet Number 671195 February 2011
Nuaire Limited
Western Industrial Estate Caerphilly United Kingdom CF83 1NA
T: 029 2088 5911 F: 029 2088 7033 E: info@nuaire.co.uk W: www.nuaire.co.uk


