background image

CDN-34S

- The Leader in DJ Technology

©1999 Numark Industries

- 16 -

http://www.numark.com

PRE-PROGRAMMING AND
EDITING A LOOP

LOOP IN PRE-PROGRAM

To pre-program your “LOOP IN” point either play
your song or search for the desired “LOOP IN” point
using the search and jog wheels.  When you get to
the desired point press “LOOP IN”.  If you wish to
edit this point turn the jog wheel until you find the
desired point.  When you press play the CD will
begin play from the new “LOOP IN” point.  This also
is the temporary new “CUE” point.  If you then hit
play to listen to the point and cue to go back you
can continue to edit with the jog wheel.

LOOP OUT PRE-PROGRAM

To pre-program your “LOOP OUT” point play your
song until you get to the desired “LOOP OUT” point
and press “LOOP OUT”.  To rapidly advance over a
long distance you can use the search wheel with no
center cue- jog.    DO NOT USE THE TRACK
BUTTONS**.
   If the CD player is presently in play
mode, the song will return to the “LOOP IN” point
and continue playing the LOOP.

If you wish to precisely set the “LOOP OUT” point
while searching;

a. press “PAUSE” once only before you reach
the desired point, if you are currently in play.
b. turn the jog wheel until you find the desired
point.
c.  hit “LOOP OUT” .

REVIEW YOUR LOOP

To review, press “RELOOP” only and the CD will
begin playing the LOOP from the “LOOP IN” point
so you may listen to the entire LOOP.   DO NOT
PRESS PLAY OR YOU WILL SET A NEW “CUE”
AND “LOOP IN” POINT AND ERASE THE “LOOP
OUT” POINT! 
  If you wish to advance quickly
through a long loop, use the search wheel only.

If you wish to edit this point again;

a. Press “LOOP OUT” to release the loop.
b. Repeat the above steps.

To review your loop while the CD is already playing
press “CUE”.  This returns the CD to the
“LOOP IN” point, then press play.

** Pressing the track buttons puts the CD player
into an auto-cue mode.  Multiple tracks are
often found for single songs on remix service
CDs.  The track select mode automatically sets
new cue points and would set a new “LOOP IN”
point if set after the original “LOOP IN” point.

PLAYING YOUR LOOP

To return to the beginning of the song and play after you are happy with
the loop:

1.


Press “PAUSE” to stop the play action of the CD or “CUE” to
return to the “LOOP IN” point.

2.


Track backwards until you reach the beginning of the song.
(Remix CD’s often contain multiple track numbers for the same
song.)

3.


Auto-cue to the beginning of the track will then occur.   Once this
occurs your cue button will return you to this point until you pass
over the “LOOP IN” point.  Then “LOOP IN” will be the new
“CUE” point.

4.


The “LOOP OUT” LED will be flashing indicating a preset loop is
ahead and will be played when reached.

5.


When the “LOOP IN” point is reached both “LOOP IN” and
“LOOP OUT” LEDs should flash.

6.


The LOOP should occur as preset by you until you release it with
the “LOOP OUT” button.

7.


Both “LOOP IN” and “LOOP OUT” LEDs should then go solid
again indicating the possibility of RELOOP.

NOTE:  If you should decide that you do not want to automatically play a
preset loop after you start a song, just press “LOOP OUT” anytime before
you actually reach the “LOOP OUT” point and the “LOOP OUT” LED will
remain solid.   (You can press it again before the “LOOP IN” point if you
change you mind.)   The “LOOP IN” LED will come on solid when this
point is reached indicating the possibility of RELOOP.  This will allow you
to use the selection for reloop purposes. However, until you pass the
“LOOP OUT” point the “RELOOP/STUTTER” button only acts as a
STUTTER function as explained in STUTTERING FFFUN.
If you turned off your “LOOP OUT” while practicing your loop, remember
to turn it on again before reaching the “LOOP IN” point.

ERASING YOUR LOOP

To erase presets loop either;

a. Open and close the door.
b. Press the program button twice.
c. Select a track, a new “CUE” point, or new “LOOP IN” point beyond
the “LOOP OUT” point.
d. Press “LOOP IN” prior to the old point to set a new loop

.

DESCRIPTION OF LED DISPLAY

LOOP IN on /LOOP OUT off: This means that there is a LOOP IN point

available for looping and stuttering, but no LOOP OUT point is set yet.

LOOP IN flashing /LOOP OUT flashing : This indicates that the CD

player is actively looping from LOOP IN to LOOP OUT.

LOOP IN on /LOOP OUT on: This indicates that the LOOP IN and LOOP

OUT points are set and a RELOOP will return to the LOOP IN to play
the loop.

LOOP IN off /LOOP OUT off : This indicates that:

1.


There is a LOOP IN point stored into memory, but this looping
function and this STUTTER point are disabled until the music plays
through the point.

2.


There is no LOOP OUT point set yet.

LOOP IN off /LOOP OUT on: A future loop has been stored into memory.

This loop will be inactive until either LOOP OUT is pressed prior to the
CD playing through the LOOP IN point or RELOOP is pressed after the
LOOP IN point.

LOOP IN off /LOOP OUT flashing : An active loop is stored into memory

and will automatically play after the music plays through the LOOP IN
point.

Summary of Contents for CDN-34S

Page 1: ...Professional Disc Jockey Products CDN 34S PROFESSIONAL DUAL CD PLAYER with Buffered memory OPERATING MANUAL 1999 Industries http www numark com ...

Page 2: ...ord 10 Object and Liquid Entry Take care that objects do not fall into and that liquids are not spilled into the inside of the mixer 11 Cleaning The appliance should be cleaned only as recommended by the manufacturer 12 Non use Periods The power cord of the appliance should be unplugged from the outlet when left unused for long periods of time 13 Damage Requiring Service only qualified personnel s...

Page 3: ...tlet so that it is on a different circuit from the other equipment This note is in accordance with Section 15 838 of the FCC Rules This unit does not exceed the Class B limits for radio noise emission from digital apparatus set out in the radio interference regulations of the Canadian Department of Communications DOUBLE INSULATED When servicing use only identical replacement parts For 220 volt use...

Page 4: ...mation before attempting to operate the unit Once again congratulations and thank you for making the CDN 34 your choice in professional CD players FEATURES Full buffered Anti Shock memory Seamless looping entire CD with edit function Instant stutter start with settable stutter points Fader start Relay play True buffered instant start 16 pitch bend jog wheel Infinite full CD continuous play 3 speed...

Page 5: ...on Play Pause and Cue Operations 10 Matching the Tempo 11 Beat Matching Using Pitch Bend 11 Relay and Fader Start 12 Example of Mixing 13 Looping Explained 14 Stuttering Fun 17 Before Switching off the Power 18 Troubleshooting Guide 18 Information and Specifications 19 Warranty 20 CHECK TO BE SURE THE FOLLOWING ITEMS ARE IN THIS BOX 1 DUAL TRANSPORT PLAYER UNIT 1 REMOTE CONTROL UNIT 1 OWNERS MANUA...

Page 6: ...bout 5 seconds As you play the track the CD Player continues to read ahead of the music and stores this information in the buffer If the unit is bumped the CD Player will continue to play from this buffer until the unit recovers and can start filling the buffer again The buffer should be long enough to allow recovery from most situations however continual shocks can erase the buffer memory If the ...

Page 7: ...wo jacks in the rear of your CD player POWER ATTACHMENT Your CD player is equipped with an IEC style power connector Please first select the proper voltage for your location Next plug in your supplied power cable into the rear of the unit then plug into the appropriate power outlet DIGITAL OUTPUTS This CD player is specially equipped with digital outputs The format is type 2 form 1 also known as S...

Page 8: ...of one disc with respect to the other the beats can be matched 10 SEARCH WHEEL OUTER RING This wheel has 3 forward and 3 reverse speed positions for searching through songs The more you turn the wheel in either direction the faster you search through the music 11 JOG WHEEL INNER RING This jog wheel serves 2 functions depending on the current mode a The jog wheel will act as a slow frame search con...

Page 9: ...he CD Player breaks down a second into 75 frames for accurate cueing This shows the frames elapsed or remaining depending on mode setting 16 LOOP shows when the CD is repeating a particular area with the music on the CD 17 RELOOP shows when the CD has had a loop set previously and can go back to it to loop again TRANSPORT FEATURES 19 DISC TRAY Place your CD in here 20 OPEN CLOSE Disc Tray Open Clo...

Page 10: ...will reset the disc to the last place where the disc was started This is called the cue point By alternately pressing the PLAY PAUSE button and the CUE button the disc may be returned and played from the cue point any number of times This function is called back cue PLAY PAUSE and CUE EDITING CUE POINT When the inner search dial is turned while a cue point is set a new cue point can be located The...

Page 11: ...display on the side of the CD player that you wish to set Tap the Counter button to the beat of the music You will see the BPM number appear in the display The more times you tap the more accurate your number will be When you adjust the pitch slider the display number will change by an equal percentage BEAT MATCHING USING PITCH BEND If you find the BPM s Beats Per Minute or Tempos are the same how...

Page 12: ...ext track When CD2 has completed play CD1 will start Note The play command is sent at the end of specified play If the unit is in SINGLE mode the play command will start at the end of the track If the unit is in CONTINUOUS mode the play command will be sent at the end of the full CD Two CDs will play continuously alternating from side to side This feature will also work in program mode however if ...

Page 13: ...LOSE button PLAYER 2 Load a disc and press the OPEN CLOSE button PLAYER 2 Press the Pause button of PLAYER 2 PLAYER 2 Listen with the monitor and press the play button PLAYER 2 With a matching downbeat from Player 1 press the play button PLAYER 1 Select the track to be played PLAYER 2 Select the track to be played PLAYER 2 Rapidly search for a cue point using the outer wheel PLAYER 2 Press the cue...

Page 14: ...IN LED will turn off This indicates that the CD player has stored a LOOP IN point but the point is not accessible until the CD player plays through the LOOP IN point The CUE button will return you to the start position until you play through the LOOP IN point Then it will return to LOOP IN LOOP OUT The LOOP OUT determines the end point for a loop The first time you press this button while a CD is ...

Page 15: ...p points setting a new cue point this will also set a new LOOP IN point The LOOP OUT point can also be moved while a loop is playing just by first pressing this button to release the old LOOP OUT point and pressing it again at the new desired point RELOOP The RELOOP STUTTER button performs 2 different functions depending on your state of play The Reloop function is possible only if LOOP points hav...

Page 16: ... Auto cue to the beginning of the track will then occur Once this occurs your cue button will return you to this point until you pass over the LOOP IN point Then LOOP IN will be the new CUE point 4 The LOOP OUT LED will be flashing indicating a preset loop is ahead and will be played when reached 5 When the LOOP IN point is reached both LOOP IN and LOOP OUT LEDs should flash 6 The LOOP should occu...

Page 17: ...rn to the start position and seamlessly restart playing 4 If a LOOP IN point but no LOOP OUT point has been set and you have passed this point then the song will return to the LOOP IN point and start playing The reason for this is that every time you set a LOOP IN point you are also resetting the CUE point 5 If a LOOP IN point and LOOP OUT point have been set and the CD is in the middle of playing...

Page 18: ...C outlet or IEC Power cord loose from rear of unit Insert the power plug firmly into the AC outlet and make sure connection is good in unit rear Disc play does not start The disc is loaded upside down The disc is too dirty Reload the disc with the label side up Clean the disc No sound Improper output cable connections Improper amplifier operation Connect the output cables correctly Check amplifier...

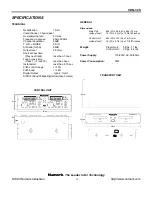
Page 19: ...access time Track 1 Track 20 less than 3sec Instant start less than 015 sec Pitch control range 12 Pitch bend 16 Digital Output type 2 form 1 S PDIF Sony Phillips Digital Interface Format CONTROL UNIT 132mm 74mm 60mm 482mm GENERAL Dimensions Main Unit 482 W x 88 8 H x 264 D mm without feet 19 W x 3 5 H x 10 3 8 D inches Control Unit 482 W x 132 H x 74 D mm without feet 19 W x 5 1 4 H x 2 7 8 D inc...

Page 20: ...CULAR PURPOSE ARE LIMITED TO THE DURATION OF THIS LIMITED WARRANTY EXCEPT TO THE EXTENT PROHIBITED BY APPLICABLE LAW NUMARK SHALL NOT BE LIABLE FOR ANY SPECIAL INCIDENTAL CONSEQUENTIAL INDIRECT OR SIMILAR DAMAGES LOSS OF PROFITS DAMAGES TO PURCHASER S PROPERTY OR INJURY TO PURCHASER OR OTHERS ARISING OUT OF THE USE MISUSE OR INABILITY TO USE ANY NUMARK MIXER BREACH OF WARRANTY OR NEGLIGENCE INCLUD...

Reviews: