background image

CDN 36


SETUP & CONNECTIONS 


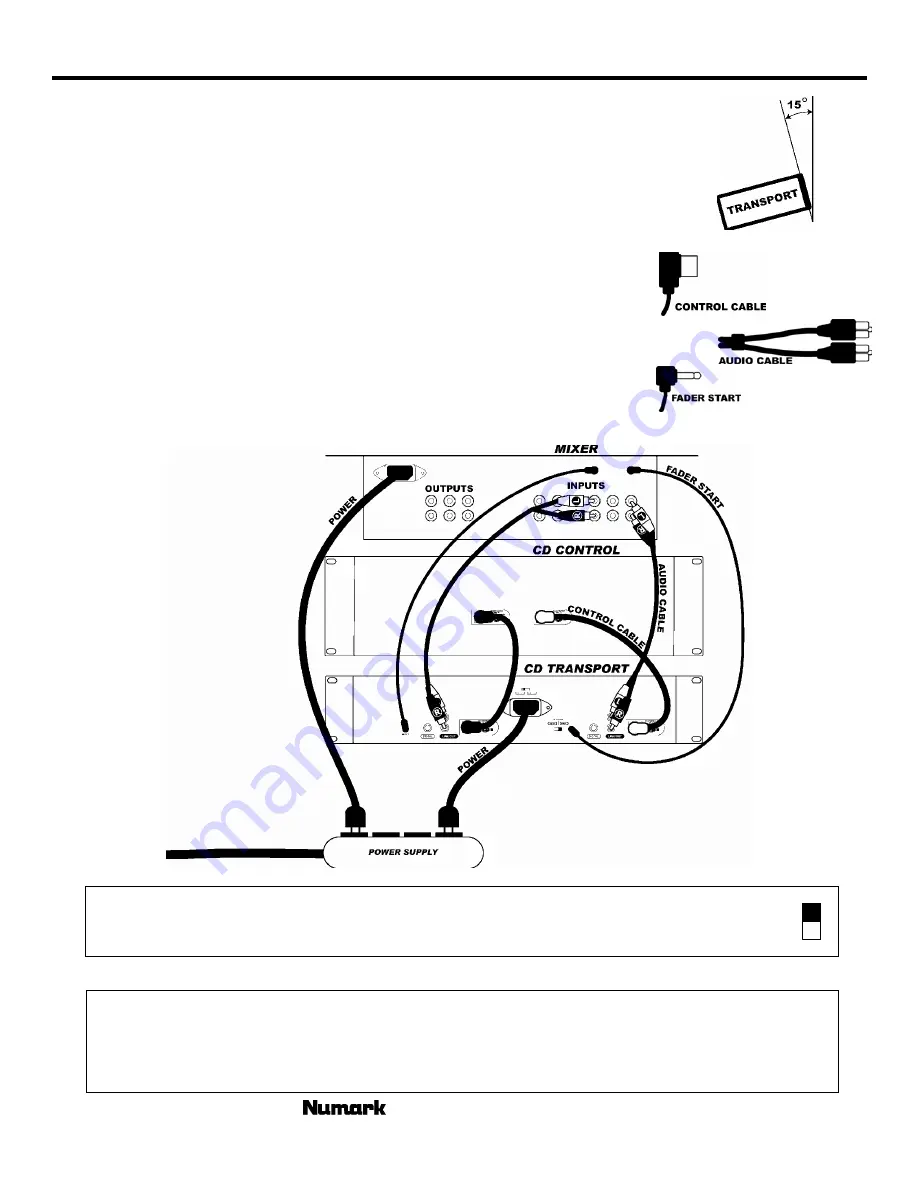
Typical connection with a mixer is illustrated below.   

1.


Mount the units in your console or rack with 19” EIA rails. 

2.


The transport should be mounted not to exceed an angle of 15 degrees. 

3.


Your CD player can be affected by excess vibration so mount the units in a 
secure environment if possible. 

4.


Connect the supplied Control Cables between the CD Remote and CD Transport 

unit.  

Note: Be careful to attach the marked connection jacks together, (yellow 

–yellow and black-black)


5.


Connect the line output connections using the supplied audio cables from the 

CD Player to the line inputs of your mixer. 

6.


Connect Fader start cable.  Attach your CD play to a similarly equipped DJ 
mixer.  


(This connection can also be used with a remote switch)


7.


Connect IEC power cord to appropriate power source. 


LINE VOLTAGE SELECTION 

115V

230V

1) The desired voltage may be set with the VOLTAGE SELECTOR switch on the rear panel of the unit. 

2) Do not move the VOLTAGE SELECTOR switch with excessive force as this may cause damage.  
3) If the VOLTAGE SELECTOR switch does not move smoothly contact a qualified serviceman. 


DIGITAL OUTPUTS


This CD player is specially equipped with digital outputs.  The format is type 2, form 1, also known as 

S/PDIF (Sony/Phillips Digital Interface Format).  When the digital output is used the variable pitch slider 

and pitch bend buttons or pitch wheel should not be used.   

Note:

 If digital information is allowed to change in pitch, other devices may not read the digital output 

properly. 

- The Leader in DJ Technology 

©2002 Numark Industries 

- 5 - 

http://www.numark.com 

Summary of Contents for CDN 36

Page 1: ...CDN 36 PROFESSIONAL DUAL CD PLAYER OWNER S MANUAL 2002 Industries http www numark com ...

Page 2: ...rce and uneven surfaces may cause the appliance and cart combination to overturn DANGER INVISIBLE LASER RADIATION WHEN OPEN AND INTERLOCK FAILED OR DEFEATED AVOID DIRECT EXPOSURE TO BEAM USE OF CONTROLS OR ADJUSTMENTS OTHER THAN THOSE SPECIFIED HEREIN MAY RESULT IN HAZARDOUS RADIATION EXPOSURE CAUTION TO REDUCE THE RISK OF ELECTRIC SHOCK DO NOT REMOVE ANY COVER NO USER SERVICEABLE PARTS INSIDE REF...

Page 3: ...ed rotary track access and sequence programming Back lit rubber buttons Relay play and fader remote start Sleep mode to extend laser life Transport bay illumination light CDR compatible digital output Power switch protector CHECK TO BE SURE THE FOLLOWING ITEMS ARE IN THIS BOX CD PLAYER TRANSPORT UNIT CD PLAYER CONTROL UNIT OWNERS MANUAL THIS BOOKLET IEC POWER CORD 1 set CONTROL CABLE 2 sets RCA CO...

Page 4: ... Operation Play Pause and Cue Operations 10 Relay Play Fader Start Remote Switch Start 11 Looping 12 BPM Counter 15 Matching the Tempo 16 Beat Matching Using Pitch Bend 16 Example of Mixing 17 Before Switching off the Power 18 Troubleshooting Guide 18 Information and Specifications 19 Warranty 20 The Leader in DJ Technology 2002 Numark Industries 4 http www numark com ...

Page 5: ...ed DJ mixer This connection can also be used with a remote switch 7 Connect IEC power cord to appropriate power source LINE VOLTAGE SELECTION 115V 230V 1 The desired voltage may be set with the VOLTAGE SELECTOR switch on the rear panel of the unit 2 Do not move the VOLTAGE SELECTOR switch with excessive force as this may cause damage 3 If the VOLTAGE SELECTOR switch does not move smoothly contact ...

Page 6: ...e jog wheel and rapidly scan the music to find a cue point The search function automatically shuts off after 8 seconds of non use or you may toggle it off 8 LOOP IN Used for setting a start loop point and new cue points during play 9 LOOP OUT Used for setting the end loop point and releasing the loop action 10 RELOOP STUTTER Depending on mode as explained further this button is used for either rep...

Page 7: ...st the pitch When the tempo of the music of the CD you wish to match is slow compared to the tempo of the other music move the slider to the side and match the speed When faster move the pitch slider to the side By making this adjustment the speeds will be matched though the beats may not yet be aligned 18 BPM Switches the numeric display between pitch and BPM 19 TAP Tapping this button with the b...

Page 8: ... with the switch PLAY CUE and PLAY PAUSE The factory setting is PLAY CUE mode This means that when the unit is remotely stopped it will go back to the cue point automatically To change modes hold down the time button for 3 seconds and the display will flash the play and pause icons In PLAY PAUSE mode moving the crossfader away from the unit side pauses right where it is and resumes when the fader ...

Page 9: ...layer alone 10 AUTOSTART will light when the unit is set to relay from CD unit to CD unit 11 CONTINUOUS PLAY Shows when the unit is set to play back the entire CD without stopping between tracks 12 SINGLE PLAY Shows when the unit is set to play just one track at a time 13 CD IN indicates a standard CD is in the unit 14 TIME BAR Shows either track elapsed time remaining track time or remaining tota...

Page 10: ...oint any number of times This function is called back cue PLAY PAUSE CUE When Play is paused and then started again the return position for the back cue will be updated as the new cue point EDITING CUE POINT When the jog wheel is turned while a cue point is set a new cue point can be located The CD player will repeatedly play small parts of the CD as you move it to the desired position By pressing...

Page 11: ...p mode hold the time button for 3 seconds If the display shows then the CD will pause when the crossfader is moved away If the display shows then the CD will CUE when the crossfader is moved away REMOTE SWITCH START Remote switch start is achievable by attaching your CD player to a switch like a foot switch found in most music shops Foot switch connector plugs are often and an adapter to 1 8 will ...

Page 12: ...you remove the CD from the unit If you change tracks and you previously set a LOOP IN on another track pressing will jump to that point LOOP OUT The LOOP OUT determines the end point for a loop The first time you press while a CD is in play mode the LOOP OUT LED will turn on and flash while the song automatically returns to the LOOP IN point with no breaks and continues to play When the song reach...

Page 13: ...UT point The LOOP IN point can also be edited while paused Rotate the wheel to search for a new cue point and then press to set the new point Check your point by pressing then backtrack to get back to the beginning of the track MOVING LOOP OUT POINT The LOOP OUT point can also be moved while a loop is playing Press to release the old LOOP OUT point and pressing it again at the new desired point Th...

Page 14: ...our last set cue point or stutter point Simply set your stutter point by follow the directions for setting Loop in because the points are the same Remember the button serves also for the reloop function so if a loop out has been set the unit will also loop until released If you set a loop in point on a track then return to a point previous to it by using the track function you will be able to stut...

Page 15: ...you wish to set Tap the Counter button to the beat of the music You will see the BPM number appear in the display The more times you tap the more accurate your number will be When you adjust the pitch slider the display number will change by an equal percentage The Leader in DJ Technology 2002 Numark Industries 15 http www numark com ...

Page 16: ...pared to PLAYER 1 slow down PLAYER 2 MATCHING BEATS USING PITCH BEND If you find the BPM s Beats Per Minute or Tempos are the same however the drumbeats are not matched you will need to temporarily change the pitch This description is for the case of matching the beat of PLAYER 2 to the beat of the music being played on PLAYER 1 This procedure can be done on either PLAYER After matching the BPM s ...

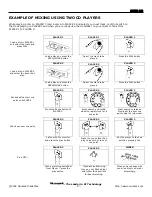
Page 17: ...PLAYER 2 PLAYER 2 Listen with the monitor and press the play button PLAYER 2 With a matching downbeat from Player 1 press the play button PLAYER 1 Select the track to be played PLAYER 2 Select the track to be played PLAYER 2 Press search and rotate wheel to rapidly look for a cue point PLAYER 2 Press the cue button then play to be sure of the set cue point PLAYER 2 If you are beat mixing turn on y...

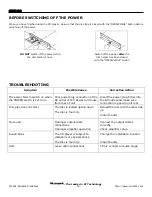
Page 18: ... outlet or IEC Power cord loose from rear of unit Insert the power plug firmly into the AC outlet and make sure connection is good in unit rear Disc play does not start The disc is loaded upside down The disc is too dirty Reload the disc with the label side up Clean the disc No sound Improper output cable connections Improper amplifier operation Connect the output cables correctly Check amplifier ...

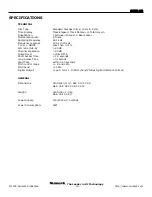
Page 19: ...A 90 dB Channel separation 90 dB Output level 2 Volts R M S Short Access Time 1 5 seconds Long Access Time 3 seconds Start Time within 0 03 seconds Pitch control range 8 and 16 Pitch bend 16 Digital Output type 2 form 1 S PDIF Sony Phillips Digital Interface Format GENERAL Dimensions Controller mm 482 X 132 X 38 Main Unit 482 X 88 5 X 257 Weight Controller 2 3 Kg Main Unit 4 9 Kg Power Supply 115 ...

Page 20: ... SHALL NOT BE LIABLE FOR ANY SPECIAL INCIDENTAL CONSEQUENTIAL INDIRECT OR SIMILAR DAMAGES LOSS OF PROFITS DAMAGES TO PURCHASER S PROPERTY OR INJURY TO PURCHASER OR OTHERS ARISING OUT OF THE USE MISUSE OR INABILITY TO USE ANY NUMARK MIXER BREACH OF WARRANTY OR NEGLIGENCE INCLUDING BUT NOT LIMITED TO NUMARK S OWN NEGLIGENCE EVEN IF NUMARK OR ITS AGENT HAS BEEN ADVISED OF SUCH DAMAGES OR FOR ANY CLAI...

Reviews: