background image

15

Only use brushes provided with the appliance or those specified in the instruction manual. 

The use of other brushes may impair safety.


A full range of brushes and accessories are available for this product. 

Only use brushes or pads which are suitable for the correct operation of the machine for the specific task being

performed.

It is essential that this equipment is correctly assembled and operated in accordance with current safety regulations.

When using the equipment always ensure that all necessary precautions are taken to guarantee the safety of the 

operator and any other persons who may be affected. 

Wear non-slip footwear when scrubbing. Use a respiratory mask in dusty environments.

When cleaning, servicing or maintaining the machine, replacing parts or converting to another function the power 

source shall be switched off.

Mains operated machines shall be disconnected by removing the power plug, and battery operated machines shall be 

disconnected by switching off the isolating key.

Machines left unattended shall be secured against unintentional movement.

Operators shall be adequately instructed as to the correct use of the machine.

When detergents or other liquids are used, read the manufacturer’s instructions.

Do not allow the supply cord to come into contact with the rotating brushes.

When detergents or other liquids are used, read the manufacturer’s instructions.

Do not allow the supply cord to come into contact with the rotating brushes.

WARNING

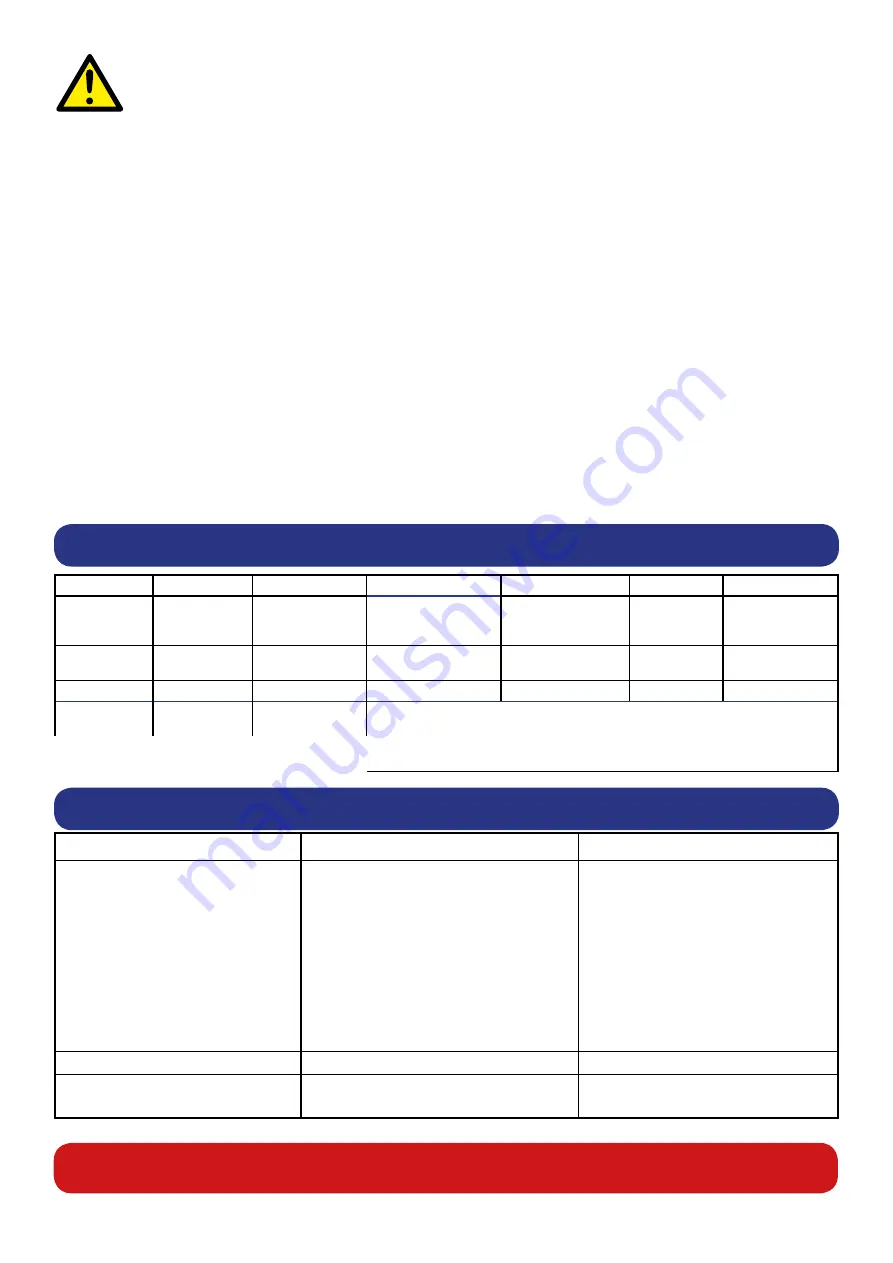
Data

Brush Motor

Vac Motor

Power

Noise

Speed

Brush

Dimensions

400 W

300 W

220-240v 50/60 Hz

115v 50Hz

71 dB(A)

50Hz = 150rpm

400 mm

Width - 520 mm

Length - 880 mm

Height - 1132 mm

Gross Weight 

Full

Protection 

Class

Hand Arm 

Vibration

Pad

Net Weight

Cleaning 

Range

Water Capacity

56.5 Kg

IPX 4

1.4 +/- 0.06ms²

360 mm

38.5 Kg

42 m

18 L

Fluid Flow

tap @40

0

Brush / Pad 

Pressure

Cleaning Speed

0.35 LPM

27.4 / 26.2 

G/ cm

2

0-4.2 Kph

Failure to rectify the problem or in the event of a breakdown contact your

Numatic dealer or the Numatic Technical help line +44 (0)1460 269268

PROBLEM

CAUSE

SOLUTION

Poor water pick-up

Waste-water tank full
Clogged / blocked vacuum hose
Loose hose connections 
Debris basket filter clogged/blocked
Separator filter clogged / blocked
Poor separator seal
Damaged separator seal
Damaged / split vacuum hose
Damaged floor-tool blades

Empty waste-water tank
Remove and clean
Push tight connections 
Remove and clean
Remove and clean 
Clean and refit
Renew (contact service dept)
Renew (contact service dept) 
Renew (contact service dept)

No brush / scrub function

No brushes fitted

Check and fit

Little or no water flow

Clean-water tank empty
Clean-water tank filter blocked/ clogged

Fill clean-water tank
Remove and clean

Trouble-Shooting

Summary of Contents for TT 1840

Page 1: ...Owner Instructions Warning Read instructions before using the machine www numatic com TT 1840 Scrubber Dryer...

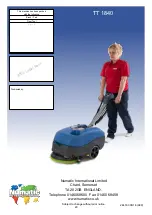
Page 2: ...on off tap 9 Clean water emptying cap 10 Rear moving wheels 11 Floor tool vacuum hose 12 Vacuum hose 13 Separator 14 Clean water filler cap 15 Clean water level indicator 16 Clean water tank fill poi...

Page 3: ...ver move the handle into the upright position Fig 1 Fit the Brush Pad Fig 2 Swing the floor tool carrier from behind the brush Fig 3 Use the two locking knobs fitted to the floor tool secure to the fl...

Page 4: ...y by pushing and twisting to lock in place making fitting and removal a simple process Fit the brush pad onto the Nulock drive chuck twist to lock the brush pad in place Fig 7 Only use manufacturer su...

Page 5: ...gned for quick fitting allowing easy squeegee blade replacement and a safety knock off feature if the floor tool gets snagged whilst in transit The floor tool carrier can be raised and locked from mov...

Page 6: ...nd fully understood Before performing the cleaning operation place out appropriate warning signs and sweep or dust mop the floor Fig 16 WHEN HANDLING AND MIXING CHEMICALS Always ensure that chemical m...

Page 7: ...ted to a maximum of 450 Fig 19 When the top tank waste water is full the machine can be tilted to a maximum of 100 for transporting to dumping area Fig 18 CAUTION Ensure both tanks are empty before at...

Page 8: ...rier is central to the machine Fig 22 Lift the lever near the base of the handle and lock into position Fig 23 The clean water chemical mix is dispersed via THRU FEED system The waste water is then re...

Page 9: ...NY PERSON OR COMPANY TITLE DIMNs IN MILLIMETERS NOT TO SCALE FINISH ITEM No s DRG No TOLERANCES UNLESS OTHERWISE STATED DRAWN DATE APPD REVISION CHANGE DETAIL Numatic INTERNATIONAL LTD THIRD ANGLE PRO...

Page 10: ...Avoid over tightening the clean water draining cap The TT1840 has been designed with ease of use in mind this included easy stripping down and cleaning Remove the two filters clipped into the separat...

Page 11: ...cap and large debris basket Refit the separator and reconnect the vacuum and suction hose Fig 36 Refit the separator restraining strap Fig 37 Regular Maintenance Notes 34 35 36 37 Clean Water Filter M...

Page 12: ...n lugs Refit the blade holder retain using the two outer knobs Fig 46 Refitting the Floor Tool Blades Ensure the slotted blade goes to the front of the floor tool Fig 47 Refit the floor tool using the...

Page 13: ...se CE Mark WEEE Logo Splash Proof Rating Machine yr wk Serial number 10 Ear Protection Safety Footwear Head Protection Safety Gloves Dust Allergens Protection Eye Protection Protective Clothing Hi Vis...

Page 14: ...machine clean Keep your brushes in good condition Replace any worn or damaged parts immediately Regularly examine the power cord for damage such as cracking or ageing If damage is found replace the c...

Page 15: ...pply cord to come into contact with the rotating brushes When detergents or other liquids are used read the manufacturer s instructions Do not allow the supply cord to come into contact with the rotat...

Page 16: ...er 237268 Filler Cap Lid 303985 TT 1840 Filler Cap Assembly 208448 Tank Drain Cap 303961 Clean Tank Filter Assembly Inside 208455 M5 Knob Black 303997 TT 1840 dump Hose Assembly 208471 Constant Tensio...

Page 17: ...17 TT 1840 220v 240V 115V DRW 13476 A01 19 03 2013...

Page 18: ...18...

Page 19: ...10 IEC 60335 2 72 2002 A1 IEC 62233 2005 EN 55014 1 2006 EN 55014 2 1997 A1 EN 61000 3 2 2006 EN 61000 3 3 1995 A1 A2 A technical construction file for this equipment is retained at the manufacturer s...

Page 20: ...6 A09 TT 1840 Numatic International Limited Chard Somerset TA20 2GB ENGLAND Telephone 01460 68600 Fax 01460 68458 www numatic co uk Subject to change without prior notice This machine has been packed...

Reviews: