background image

09

08

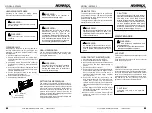
NON-MARRING PAD

The non-marring pad attached to the nose of the 

tool  helps  prevent  marring  and  denting  when 
working with softer woods.

Make  sure  there  is  no  fastener  in 

magazine before clearing a jam.

WARNING:

!

Disconnect  the  tool  from  the  air  source 

whenever  clearing   a  jam.   After 
disconnecting  the  tool  from  the  air 
compressor, there should still be enough 

air pressure to fire the tool. After the air 
hose is disconnected, always fire the tool 

into scrap wood repeatedly to make sure 
all of the compressed air is expended.

WARNING:

!

Disconnect the tool from the air resource 

before  removing  or  replacing  the  non-
marring pad. Failure to do so could result 
in serious personal injury.

WARNING:

SETTING THE AIR PRESSURE

The  amount  of  air  pressure  required  depends  on 

the size of the fasteners and the workpiece material. 
Begin testing the depth of drive by driving a test nail 
into the same type of workpiece material used for 

the  actual  job.Drive  a  test  fastener  with  the  air 
pressure  set  at  90-95psi.  Raise  or  lower  the  air 
pressure to find the lowest setting that will perform 

the job with consistent results.
It may be possible to achieve the desired depth with 

air pressure adjustments alone. 

Always know the operational mode of the 

tool  before  using.  Failure  to  know  the 
operational mode could result in death or 
serious personal injury.

WARNING:

!

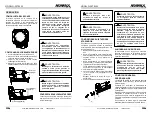
FIRING THE TOOL 

This  mode  requires  the  trigger  to  be  pulled  each 

time a fastener is driven. The tool can be actuated 
by depressing the  WCE against the work  surface 
followed pulling the trigger.

The trigger must be released to reset the tool before 
another fastener can be driven.

An  improperly  functioning  tool  must  not 

be used. Do not actuate the tool unless the 
tool  is  placed  firmly  against  the  work 
place.

WARNING:

!

WORK CONTACT ELEMENT (WCE) 

Disconnect the air supply from the tool.

Remove all fasteners from the magazine.
Make sure the trigger and work contact element 
move  freely  up  and  down  without  sticking  or 

binding.
Reconnect air supply to the tool.
Depress the work contact element against the 

work surface without pulling the trigger. The tool 
must  not  operate.  Do  not  use  the  tool  if  it 

operates  without  pulling  the  trigger.  Personal 
injury may result.
Remove  the  tool  from  the  work  surface.  The 

work contact element (WCE) must return to its 
original  down  position.  The  tool  must  not 
operate. Do not use the tool if it operates while 

lifted from the work surface. Personal injury may 
result.

Pull  the  trigger  and  depress  the  work  contact 
element(WCE)  against  the  work  surface.  The 
tool must not operate.

Depress  the  work  contact  element  (WCE) 
against  the  surface.  Pull  the  trigger.  The  tool 
must operate.


UNLOADING FASTENERS

Unloading  is  the  reverse  of  loading.  Always 

disconnect the air source before unloading.

Always unload all fasteners before removing 

tool from service.

WARNING:

!

Always  disconnect  the  air  source  before 

unloading.

WARNING:

!


Check the operation of the work contact 

element trip mechanism before each use. 
The  WCE  must  move  freely  without 
binding through its entire travel distance. 

The WCE spring must return the WCE to 
its  fully  extended  position  after  being 

depressed. Do not operate the tool if the 
WCE  trip  mechanism  is  not  operating 
properly. Personal injury may occur.

CAUTION:

MAINTENANCE

Any  time  inspection,  maintenance,  and 

cleaning are done:

Disconnect the tool from the air source.
Empty the magazine completely.


WARNING:

!

Each tool is packed with an anti-dust cap on the air 

connector.
Keep the anti-dust cap cover on the air connector 
when the tool is not in use.

ANTI DUST

-

MODEL: SST9032

MODEL: SST9032

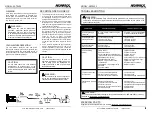
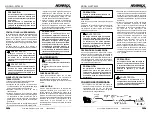
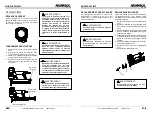
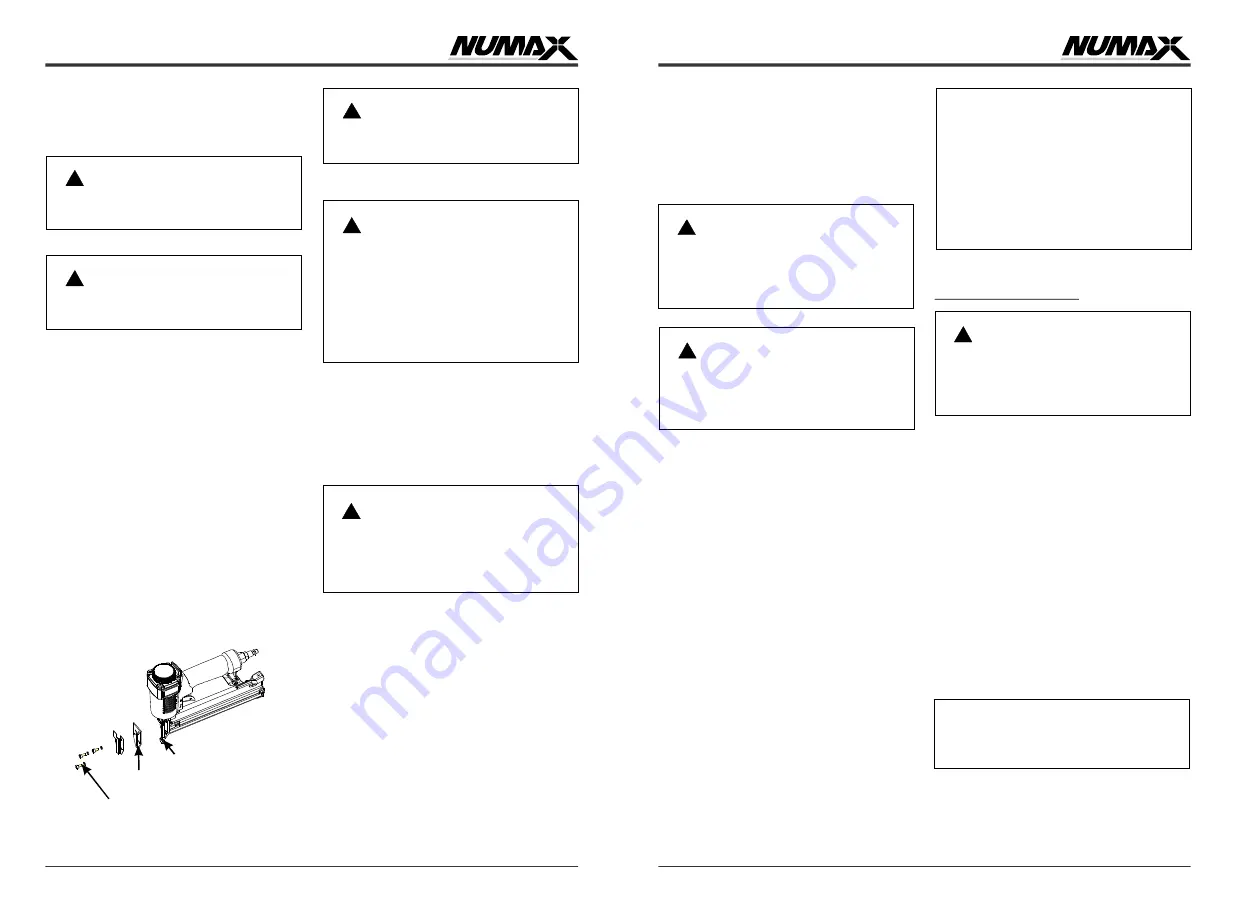
CLEARING JAMS

Disconnect the tool from air source.

Remove fasteners from the tool. Failure to do 
so will cause the fasteners to eject from the front 
of the tool.

Completely  remove  the  small  nose  screws(E) 
and the top nose plate(F) to reveal the jammed 
fastener.

Using caution not to bend or damage the driver 
blade, using pliers or a screwdriver if required to 

clear the jammed fastener.
Put  the  nose  plate(F)  back  on  the  nose(G), 
fastening it with the screws(E).

Reconnect the tool to the air source.
Reload the tool with fasteners.

Occasionally,  a  fastener  may become  jammed  in 

the  firing  mechanism  of  the  tool,  making  the  tool 
inoperable.  To  remove a jammed fastener,  follow 
the steps below: 

Nose screws(E)

Nose plate(F)

Nose(G)

1.
2.

HTTP://WWW NUMAXTOOLS COM        1-888-669-5672

.

.

HTTP://WWW NUMAXTOOLS COM        1-888-669-5672

.

.

!

LUBRICATION

Lubricate  tool  only  with  specified 

lubricants.

CAUTION:


Frequent, but not excessive, lubrication is required 

for best performance. Oil for the tool added through 
the air line connection add will lubricate the internal 
parts.  Do  not  detergent  oil  or  additives  as  these 

lubricants will cause accelerated wear to the seals 
and  bumpers  in  the  tool,  resulting  in  poor  tool 
performance and frequent tool maintenance.

Summary of Contents for SFN64

Page 1: ......

Page 2: ......

Page 3: ......

Page 4: ......

Page 5: ......

Page 6: ......

Page 7: ......

Page 8: ......

Page 9: ......

Page 10: ......

Page 11: ......

Page 12: ......

Page 13: ...M 1 888 669 5672 PRIME GLOBAL PRODUCTS INC SAVE THIS MANUAL FOR FUTURE REFERENCE WARNING Failure to follow warnings could result in DEATH OR SERIOUS INJURY IMN100701AV 08 13 HTTP WWW NUMAXTOOLS COM 1...

Page 14: ...The tool creates a spark which may ignite flammable liquids gases or dust Always use caution to avoid accidentally firing Do not point towards yourself or anyone whether it contains fasteners or not I...

Page 15: ...h or serious personal injury Also actuate the trigger lock to the safe position when not in use Do not use a check valve or any other fitting which allows air to remain in the tool Death or serious pe...

Page 16: ...accessories from the box Inspect the tool carefully to make sure no breakage or damage occurred during shipping Do not discard the packing material until you have carefully inspected and satisfactoril...

Page 17: ...to its original down position The tool must not operate Do not use the tool if it operates while lifted from the work surface Personal injury may result Pull the trigger and depress the work contact e...

Page 18: ...valve housing are damaged Replace O rings Check operation of Work Contact Element WCE Air leaking between housing And nose Loose screws in housing 1 Damaged O rings 2 Damaged to bumper Tighten screws...

Page 19: ...buse improper maintenance neglect or accident or caused by use of the Numax Product after partial failure or use with improper accessories The Numax Product is intended for use by individuals and not...

Page 20: ...888 669 5672 NOTE MODEL S T9032 O S HTTP WWW NUMAXTOOLS COM 1 888 669 5672 PRIME GLOBAL PRODUCTS INC ADVERTENCIA No seguir las advertencias correctamente puede causar LA MUERTE O LESIONES GRAVES GUARD...

Page 21: ...s cuales pueden causar lesiones graves en los ojos La exposici n prolongada a ruidos de alta intensidad puede causar la p rdida de la audici n Se deben usar una m scara antipolvo calzado de seguridad...

Page 22: ...os fijadores se dirijan hacia cualquier otra cosa que no sea la pieza de trabajo Nunca utilice gasolina ni ning n otro l quido inflamable para limpiar la herramienta No retire fuerce ni haga que el ga...

Page 23: ...y podr a disparar fijadores incluso con la l nea de aire desconectada y ello puede causar lesiones Use nicamente aire comprimido filtrado lubricado y regulado El uso de gas reactivo en lugar de aire...

Page 24: ...herramienta del compresor de aire deber a haber suficiente presi n de aire para disparar Luego de desconectar la manguera de aire siempre dispare la herramienta varias veces sobre un trozo de madera q...

Page 25: ...excesiva Si se agrega aceite a la herramienta a trav s de la conexi n de la l nea de aire se lubricar n las piezas internas No utilices aceite detergente ni aditivos puesto que estos lubricantes caus...

Page 26: ...888 669 5672 HTTP WWW NUMAXTOOLS COM 1 888 669 5672 GARANT AS DE LOS PRODUCTOS PGP INC Garant a limitada de 1 a o Garant a limitada de 30 d as Esta garant a de las pistolas de clavos N se extiende ni...

Page 27: ...n y refuerzo de los t rminos de dichas garant as limitadas debe estar sujeto a las leyes del estado de Georgia Todo problema relacionado a la venta o al uso del Producto N que sea objeto de estas gar...

Page 28: ...g chette lorsque vous n tes pas en train d enfoncer une fixation Portez toujours des lunettes de s curit Portez toujours des protecterus auriculaires lorsque vous utilisez l outil Portez un quipement...

Page 29: ...tre r par L outil appropri fera mieux le travail et de fa on plus s curitaire la vitesse pour laquelle il a t con u Maintenir l outil avec votre main ou contre votre corps est instable et risque de c...

Page 30: ...entra ner des blessures N utilisez aucun type de gaz r actifs notamment l oxyg ne et les gaz combustibles comme source d nergie N utilisez qu une source d alimentation en air comprim dont la pression...

Page 31: ...la source d alimentation en air avant de d charger D GAGER LES BLOCAGES Parfois une attache se coince dans le m canisme de d clenchement de l outil rendant celui ci inutilisable Pour retirer une atta...

Page 32: ...pas fonctionner Appuyez l l ment de contact contre la surface de travail Appuyez sur la d tente L outil doit fonctionner 8 V rifiez le fonctionnement du m canisme de d clenchement de l l ment de conta...

Page 33: ...mplacez les joints toriques V rifiez le fonctionnement de l l ment de contact avec l ouvrage Fuite d air entre le bo tier et l embout Vis desserr es dans le bo tier 1 Joints toriques endommag s 2 Tamp...

Page 34: ...UMAX PGP INC D CLINE TOUTE GARANTIE IMPLICITE DE QUALIT MARCHANDE OU D AD QUATION UN USAGE OU UN BUT PARTICULIER DE M ME QUE TOUTE AUTRE GARANTIE PGP INC NE SAURAIT EN AUCUN CAS TRE TENUE RESPONSABLE...

Reviews: