11
10
HTTP://WWW.NUMAXTOOLS.COM 1-888-669-5672
HTTP://WWW.NUMAXTOOLS.COM 1-888-669-5672
MODEL: SFR2890
MODEL: SFR2890
During normal use the tool will recoil
immediately after driving a fastener. This is
a normal function of the tool. Do not
attempt to prevent the recoil by holding the
tool against the work. Restriction to the
recoil can result in a second fastener being
driven from the tool. Grip the handle firmly
and let the tool do the work. Failure to heed
this warning can result in serious personal
injury.
MAINTENANCE
WARNING:
!
Each tool is packed with an anti-dust cap on the
air connector.
Keep the air connector covered with the anti-
dust cap when the tool is not in use.
Lubricate the tool only with specified
lubricants.
CAUTION:
Do not at any time let brake fluids,
gasoline, petroleum-based products,
penetration oils, ect., come in contact
with plastic parts. Chemicals can
damage, weaken or destroy plastic which
may result in serious personal injury.
WARNING:
!
Avoid using solvents when cleaning plastic
parts. Most plastics are susceptible to damage
from various types of commercial solvents and
may be damaged by their use. Use clean cloths
to remove dirt, dust, oil, grease, etc.
CLEANING
Do not store tools in a cold weather
environment to prevent frost or ice
formation on the tool's operating valves
and mechanisms that could cause tool
failure.
CAUTION:
COLD WEATHER OPERATION
For cold weather operation, near and below
freezing, the moisture in the air line may freeze
and prevent tool operation. We recommend the
use of air tool lubricant or permanent antifreeze
(ethylene glycol) as a cold weather lubricant.
ANTI
-
DUST CAP
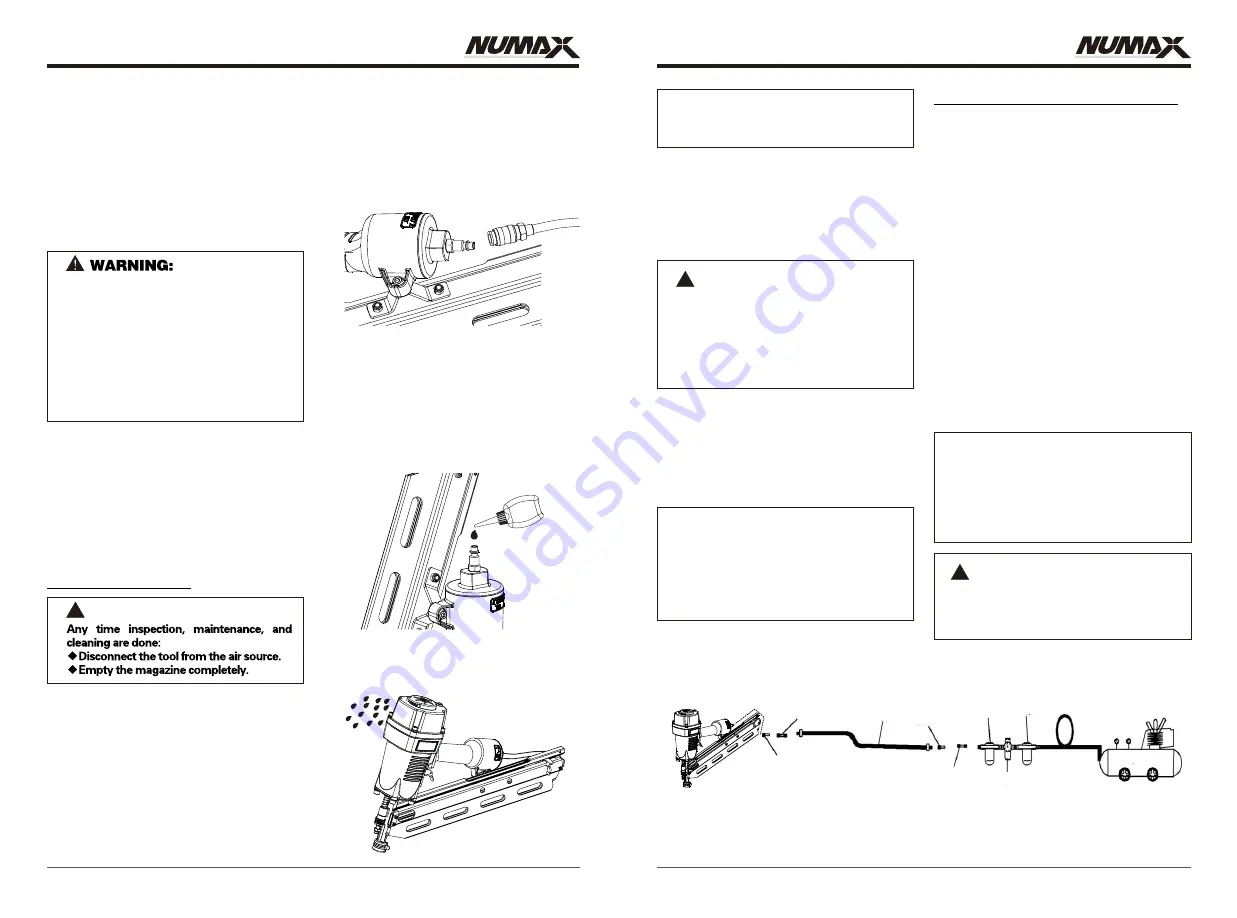
Turn the tool so the air inlet is facing up.
Place 2 - 3 drops of pneumatic fastening
tool oil into air inlet. Do not use detergent
oils, oil additives, or air-tool oils as these
lubricants will cause accelerated wear to
the seals and bumpers in the tool, resulting
in poor tool performance and frequent tool
maintenance.
After adding oil, connect the tool to the air
source, run tool briefly. Wipe off any excess
oil from the cap exhaust.
RECOMMENDED HOOKUP
The air compressor must be able to
maintain a minimum of 70 psi when the tool
is being used. An inadequate air supply can
cause a loss of power and inconsistent
driving.
An oiler can be used to provide oil
circulation through the tool. A filter can be
used to remove liquid and solid impurities
which can rust or gum up internal parts of
the tool.
Always use air supply hoses with a
minimum working pressure rating equal to
or greater than the pressure from the power
source if a regulator fails, or 150 psi,
whichever is greater. Use 3/8 in. air hose for
runs up to 50 ft. and use a 3/8 in. quick
coupler on the air hose.
U s e a p re s s u re re g u l a t o r o n t h e
compressor, with an operating pressure of
0-125 psi. A pressure regulator is required
to control the operating pressure of the tool
between 70 and 115 psi.
The air compressor must be able to
maintain a minimum of 70 psi when the
tool is being used. An inadequate air
supply can cause a loss of power and
inconsistent driving.
CAUTION:
Do not connect with an air compressor
which can potentially exceed 200 psi. As
tool may burst, possibly causing injury.
WARNING:
!
Quick
connector
Quick
Coupler
Air
hose
Quick
connector
Oiler
Regulator
Filter
Compressor
Quick
Coupler
Note:
This actuation mode is recommended when
less precise nail placement is required.
Extreme care should be taken because a nails
will be driver when the work contact element is
pressed against any surface.
Since the tool can be actuated without
removing the finger from the trigger, this is
considered to be a less restrictive mode,
suitable for more experienced users.
Disconnect the tool from the air source to
add
lubricant.
the
LUBRICATION
1.
2.
3.
1.
2.
3.
4.
Frequent, but not excessive, lubrication is
required for best performance. The oil added
through the air line helps to prevent rust and
lubricate the internal parts of the nailer.
This tool will
firing after
or less
stop
7 nails
are left in the magazine. Insert another strip
of nails behind the remaining nails to resume
firing. This helps to prevent wear and extends
the tool life.
ANTI
-
DRY
-
FIRING MECHANISM


