MODEL: SPS08
OPERATION
OPERATING THE SPRAY GUN
• Before operating the gun, make sure all
nuts and bolts are tight.
• Install the regulator onto the air inlet
port of the tool and then install a 1/4"
NPT female connector onto the air inlet
of the regulator. Use Teflon tape on all
threaded connections.
• Start the compressor and set the
regulator to 40-55 PSI.
• The trigger level of this gun has a two
step design. Press the trigger level to
the first step to connect to the air
source, ensuring that air flow the spray
gun. Press the trigger lever to the
second step to connect the paint
material.
CONTROLLING THE PATTERN AND
FLUID FLOW
• Hold the gun 6 to 9 inches from the work
surface.
• Depress the trigger to begin applying
material while moving the gun from side
to side.
• When spraying from left to right, use the
vertical pattern and when spraying from
top to bottom, use the horizontal
pattern.
• Pratice painting on a piece of scrap
material until the coating results are
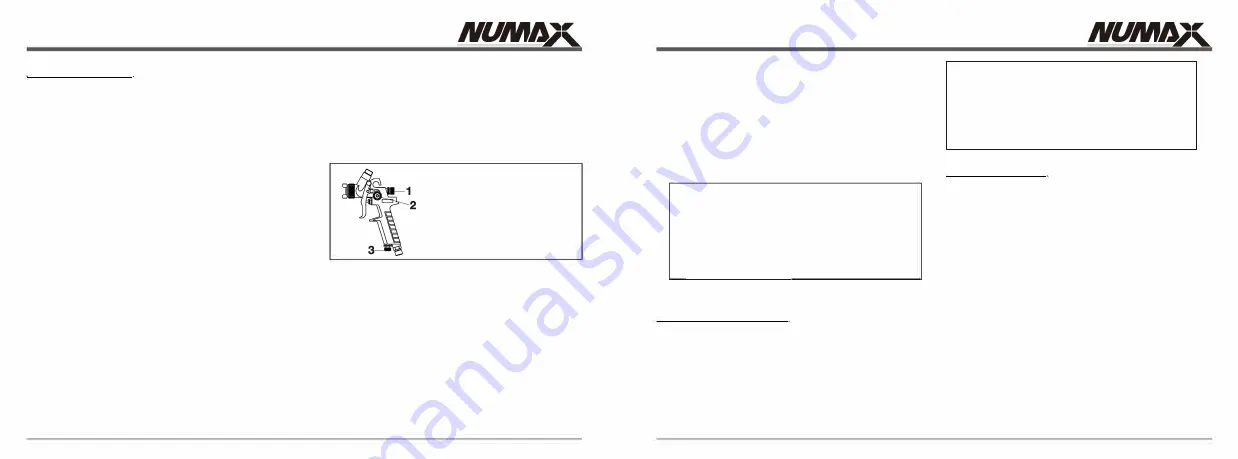
acceptable, adjusting as follows:
1. Fluid control knob
2. Pattern control knob
3. Air control knob
1. Fluid control knob
This knob controls the amount of paint
that is mixed with the air. Reduce the
amount of paint by turning in a clockwise
direction and increase the amount of
paint by turning counterclockwise.
2. Pattern control knob
For a full pattern, turn the knob in a
courterclockwise direction and for a
round pattern, turn the knob clockwise.
06
MODEL: SPS08
3. Air control knob
Increase the air flow by turning the air
control knob clockwise. Reduce the air
flow by turning the air control knob
counterclockwise.
4. Air cap ring
The direction of the fan can be adjusted
by turning the air cap 360 degrees.
�<=Q
�<o-:
1. Air Cap
2. Air Cap Ring
3. Horizontal Fan
4. Vertical Fan
MAINTENANCE
To clean clogged passages. Disassemble
the gun with the tool included and soak all
parts in thinner or approved solvent for 15
to 30 minutes. Longer soaking time might
be required for severely clogged situation.
Clean the parts with a soft wire brush.
A.
WARNING:
Never use metal objects to clean
precisely drilled passages. Damaged
passages will cause improper
spraying.
CLEANING
1. After each use, shut off the air supply
and release the pressure in the paint gun
by pulling the trigger before cleaning to
avoid injury.
2. Drain and clean the cup. To clean and
gun passages, put a small amount of
thinner or approved solvent in the cup.
Attach the cup to the sprayer and spray
the liquid through the gun while shaking
it vigorously. Periodically pull and
release the trigger to help break loose
dried-on material.
3. Wipe the gun and cup exterior with a
solvent soaked rag.
07


