background image

11

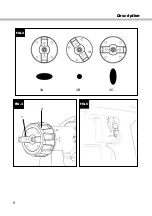
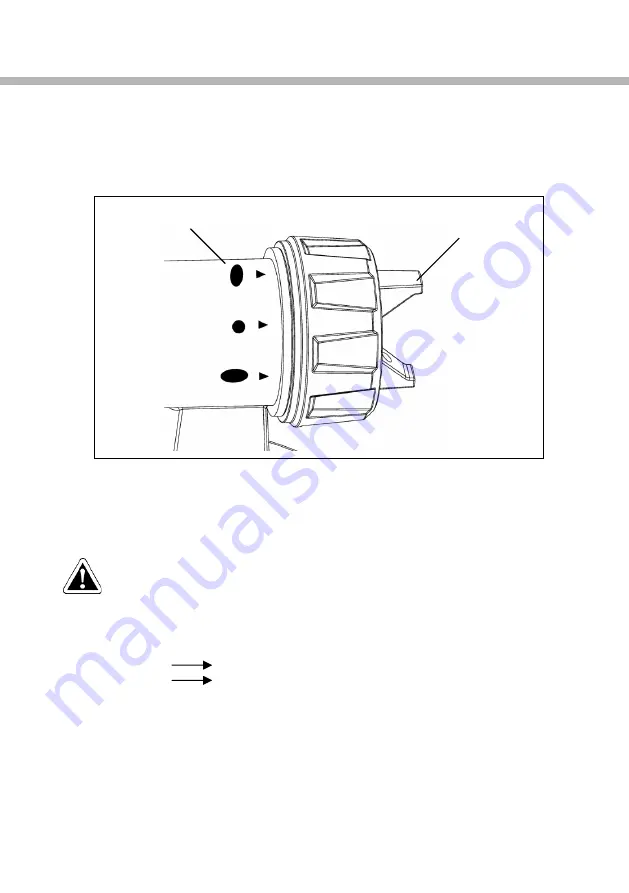
Fig. 3 B = circular jet

Fig. 3 C = vertical fat jet


The spray pattern indication can be found on the front part of the sprayer. With the 

arrowhead towards the boss on the tip. 

Adjusting the desired Spray Setting (Fig. 4)

With the union nut (2) slightly unscrewed, turn the air cap (1) to the desired spray setting 

position. Then tighten the union nut.

WARNING! Danger of injury! Never pull the trigger guard while adjusting 

the air cap.

Adjusting the Material Volume (Fig. 5)

Set the material volume by turning the regulator on the trigger guard of the spray gun.

- turn to downside                lower material volume

+ turn to upside                    higher material volume

Spray Technique

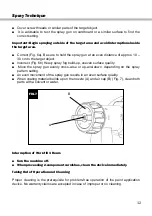
■   The spray result depends heavily on the smoothness and cleanliness of the surface 

to be sprayed. Therefore the surface should be carefully prepared and kept free of 

dust.

■   Cover all surfaces not to be sprayed. 

Boss on the tip  

Spray pattern indicator 

Start-up

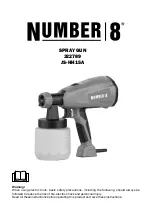
Summary of Contents for 322789

Page 1: ...ng electric tools basic safety precautions including the following should always be followed to reduce the risk of fire electric shock and personnal injury Read all these instructions before operating...

Page 2: ...2 TABLE OF CONTENTS For safe operations 2 Safety Instructions for Spray Guns 4 Description 7 Start up 10 Spray Technique 11 Maintenance 14 Correction of Malfunctions 15 Environmental protection 16...

Page 3: ...rs ranges and refrigerators There is an increased risk of electric shock if your body is earthed or grounded c Do not expose power tools to rain or wet conditions Water entering a power tool will incr...

Page 4: ...ol if the switch does not turn it on and off Any power tool that cannot be controlled with the switch is dangerous and must be repaired c Disconnect the plug from the power source before making any ad...

Page 5: ...I and A III see material tin The device may not be used in workplaces covered by the explosion protection regulations There must be no sources of ignition such as for example open fres smoke of lit ci...

Page 6: ...tive dust mask is not worn 2 Damage to hearing if effective hearing protection is not worn 3 Damages to health resulting from vibration emission if the power tool is being used over longer period of t...

Page 7: ...Warning The vibration emission during actual use of the power tool can differ from the declared total value depending on the ways in which the tool is used There is the need to identify safety measure...

Page 8: ...1 Air Cap 2 Nozzle 3 Union nut 4 Spray gun front part 5 Trigger 6 Release button 7 Spray gun rear part 8 Air filter cover 9 Material volume adjustment 10 Mains lead 11 Container FIG 1 11 1 2 3 4 5 6 7...

Page 9: ...ed spray attachment can be used to spray paints varnishes and glazes that are undiluted or slightly diluted 1 Stir the material up and put the required amount into the paint container Thinning recomme...

Page 10: ...9 FIG 3 FIG 4 3A 2 1 3B 3C FIG 5 Description...

Page 11: ...Turn the suction tube forwards Fig 2 A Spraying work when working on overhead objects Turn the suction tube rearwards Fig 2 B Set the container on a sheet of paper pour in the prepared coating materi...

Page 12: ...Danger of injury Never pull the trigger guard while adjusting the air cap Adjusting the Material Volume Fig 5 Set the material volume by turning the regulator on the trigger guard of the spray gun tur...

Page 13: ...uality Move the spray gun evenly cross wise or up and down depending on the spray pattern setting An even movement of the spray gun results in an even surface quality When coating material builds up o...

Page 14: ...55 C 6 Assemble the gun again 7 Insert the power plug turn on the machine and spray the solvent or water into a container or a cloth 8 Repeat the above procedure until the solvent or water emerging f...

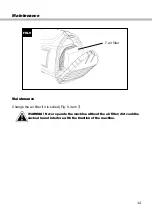
Page 15: ...ir filter Maintenance Change the air filter if it is soiled Fig 9 item 7 WARNING Never operate the machine without the air filter dirt could be sucked in and interfere with the function of the machine...

Page 16: ...t air cap nozzle or needle Tighten Change Clean Atomisation too coarse Viscosity of coating material too high Material volume too large Material volume adjusting screw turned too far to the upside Noz...

Page 17: ...ld be recycled in an environmentally friendly way Do not dispose of the appliance with household waste Support environmental protection by taking the appliance to a local collection point or obtain in...

Reviews: