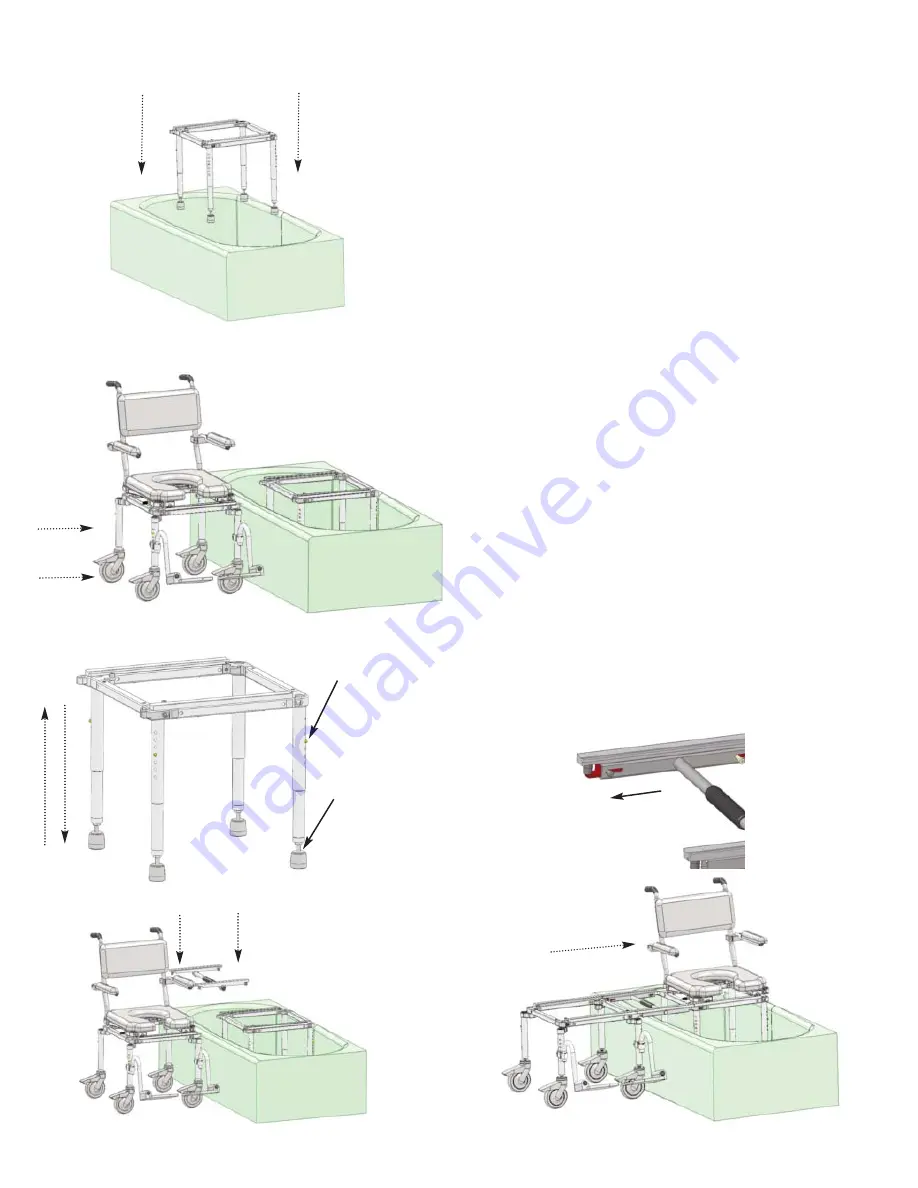
Inner Leg
Adjustment
Crutch Tip
Adjustment
A
Ensure all fasteners (bolts/washers) are securely tightened
and all chair parts have been assembled correctly (Refer back
to Assembly Instructions if needed. Contact Nuprodx, Inc. if
unsure of anything).
B
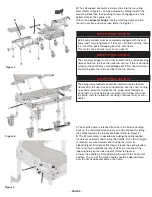
Place the assembled tub section of the slider into the desired
position of the bath tub (Refer to Figure 13).
C
Position the assembled roll-in section of the slider next to the
outside wall of the bath tub (Refer to Figure 14).
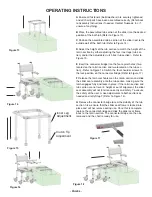
D
Adjust the height of the tub section to match the height of the
roll-in section by either adjusting the four inner legs (tub sec-
tion) and/or the adjustable crutch tips (tub section) - Refer to
Figure 15.
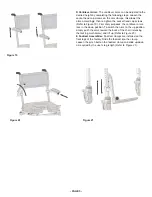
E
Insert the connector bridge into the four eyelet holes (Two
located on the roll-in section and two located on the tub sec-
tion) - Refer to Figure 16. Switch the four shoulder screws to
the lock position on the connector bridge (Refer to Figure 17).
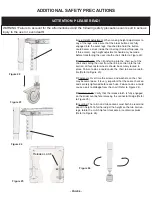
F
Release the latch mechanism on the roll-in section and slide
the slider seat assembly onto the tub section, making sure the
latch engages fully and locks in place. If the roll-in section and
tub section are not level in height or out of alignment, the slider
seat assembly will not function correctly and safely. To ensure
the safety of the user, make adjustments to both sections as
needed and retry Step F (Refer to Figure 18).
G
Remove the connector bridge to test the stability of the tub
section. Also, ensure that the slider seat frame is locked into
place and will not remove during use. Once this is complete,
replace the connector bridge and slide the slider seat frame
back to the roll-in section. The connector bridge can then be
removed and the chair is ready for use.
OPERATING INSTRUCTIONS
Figure 13
Figure 15
Figure 16
Figure 14
Figure 17
- PAGE 4 -
Figure 18


