background image

SERIE NS54000

Page 25

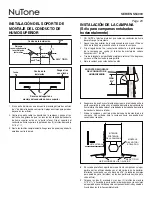
CONDUCTO CIRCULAR 

DE 6" (ENTUBADO 

VERTICAL)

9.  Mida y corte el entubado de acero. Ponga el entubado a un lado.
10.  Conecte el cable de alimentación de la campana al tomacorriente.

CONDUCTO 

DE HUMO 

SUPERIOR

SOPORTE DE MONTAJE DEL  

CONDUCTO DE HUMO SUPERIOR

VISTA FRONTAL

HO0104

11.  Retire el conducto de humo superior del interior del conducto de 

humo inferior. Coloque el soporte del conducto de humo inferior en 

el conducto de humo inferior con dos (2) tornillos para el soporte del 

conducto de humo (N.º 8 x 3/8"). Asegúrese de que el soporte esté 

colocado dentro de las bridas del conducto de humo inferior, con las 

ranuras hacia arriba. Con cuidado, reemplace el conducto de humo 

superior dentro del inferior. Retire el plástico protector que cubre el 

conducto de humo inferior únicamente.

12.  Coloque ambos conductos de humo en el área embutida en la parte 

superior de la campana.

13.  Con cuidado, gire la parte inferior del conjunto del conducto de humo 

y deslice la sección del conducto de metal dentro del conjunto del 

conducto de humo.

14.  Conecte la sección del conducto al conector del conducto y a la 

instalación oculta del conducto. Utilice cinta adhesiva para que todas 

las juntas estén seguras y herméticas.

SOPORTE DE MONTAJE DEL CONDUCTO DE HUMO INFERIOR

CONDUCTO 

DE HUMO
INFERIOR

15.  Deslice el conducto de humo superior hacia arriba hasta que se 

alinee con su soporte de montaje. El soporte debería estar dentro 

del conducto de humo. Asegure el conducto de humo superior en su 

soporte de montaje con dos (2) tornillos de montaje N.º 8 x 3/8".

16.  Retire el plástico protector que cubre el conducto de humo superior y 

la campana.

17.  Monte la placa de vidrio en la parte superior de la base de la campana 

con cuatro (4) tornillos de cabeza plana (M4 x 30  mm) y cuatro 

(4) arandelas decorativas. Atornille desde arriba de la base de la 

campana. No ajuste demasiado estos tornillos.

18. Instale (2) tipo B10, 120 V, 40 W máx. bombillas de los candelabros

incandescentes (incluido).

19.  Vuelva a colocar el filtro de grasas alineando la lengüeta posterior del 

filtro con la ranura en la campana, tire de la lengüeta del pestillo de 

metal y coloque el filtro en su posición y libérelo. Asegúrese de que el 

filtro quede bien conectado después de la instalación.

UBICACIONES DE LOS ORIFICIOS

Ø5/16" TÍPICO

MONTAJE 

DEL MOTOR / 

SOPLADOR

VISTA LATERAL

INTERIOR 

POSTERIOR 

DE LA CAMPANA

7.  En caso de que falte una parte del marco: Con la campana en su lugar, 

perfore por los orificios ubicados en el interior de la parte posterior 

inferior de la campana con una broca de 5/16". Coloque los anclajes 

para pared de yeso (incluidos) en las dos perforaciones (uno para cada 

orificio).

8.  Coloque las dos (2) arandelas y los dos (2) tornillos de montaje 

N.º 8 x 1 ½" a través de la parte posterior de la campana y los anclajes 

para pared de yeso. Verifique que la campana esté centrada y nivelada. 

Ajuste todos los tornillos completamente.

1.  NO QUITE el plástico protector que cubre los conductos de humo 

decorativos por el momento.

2.  Apoye la parte posterior de la campana sobre una mesa. Utilice un 

trozo de cartón para prevenir daños a la mesa o la campana.

3.  Fije el regulador de tiro / conector de conducto a la parte superior de la 

campana con cuatro (4) tornillos de montaje de cabeza troncocónica 

N.º 8 x 3/8".

4.  Tire de la lengüeta del pestillo de metal para retirar el filtro de grasas 

y mueva el filtro hacia abajo para quitarlo.

5.  Rote la campana con cuidado hacia arriba.
6.  Alinee la campana y céntrela arriba del soporte de montaje de la 

campana. Con cuidado, baje la campana hasta que quede bien 

conectada al soporte.

INSTALACIÓN DE LA CAMPANA 
(Sólo para campanas entubadas 
verticalmente)

Summary of Contents for NS54000 Series

Page 1: ...ot be allowed to accumulate on fan or filters 4 Use proper pan size Always use cookware appropriate for the size of the surface element TO REDUCE THE RISK OF INJURY TO PERSON S IN THE EVENT OF A RANGE TOP GREASE FIRE OBSERVE THE FOLLOWING 1 SMOTHER FLAMES with a close fitting lid cookie sheet or metal tray then turn off the burner BE CAREFUL TO PREVENT BURNS IF THE FLAMES DO NOT GO OUT IMMEDIATELY...

Page 2: ...r are not in use Time is displayed in a 12 hour cycle To set time press the push button 1 for 3 seconds The first two digits will flash Use the blower push button 3 to increase and the lighting pushbutton 2 to decrease Press the time delay push button 1 again The last two digits will flash Use the blower push button 3 to increase and the lighting push button 2 to decrease Press the time delay butt...

Page 3: ...ure of cooking impurities Distances over 30 are at the installer and users discretion providing that the ceiling height permits CONTENTS 6 ROUND DUCT ROOF CAP ROUND ELBOW 24 TO 30 ABOVE COOKING SURFACE WALL CAP HOOD DECORATIVE FLUE HOOD 12 3 4 TO CENTER OF HOOD MOUNTING BRACKET HOLES ROUND ELBOW HOOD MOUNTING BRACKET 24 TO 30 ABOVE COOKING SURFACE DECORATIVE FLUE 6 ROUND DUCT ROOF CAP WALL CAP 8 F...

Page 4: ...the dimensions shown 2 After wall surface is finished carefully center and level the hood mounting bracket and secure it to wall framing with 3 8 x 1 1 2 mounting screws Tighten the screws completely Note Do not use drywall anchors NOTES 1 Minimum hood distance above cooktop must not be less than 24 A maximum of 30 above the cooktop is highly recommended for best capture of cooking impurities Dist...

Page 5: ...avoid damaging the table or the hood 3 Attach damper duct connector to top of hood using 4 8 x 3 8 Pan Head mounting screws 4 Remove the grease filter by pulling down the metal latch tab and tilting filter downward to remove 5 Carefully rotate hood upright HOLE LOCATIONS Ø5 16 TYP MOTOR BLOWER ASSEMBLY SIDE VIEW INSIDE BACK OF THE HOOD 6 Make sure there will be adequate clearance between top of ho...

Page 6: ...only 13 Carefully place both flues into the recessed area of hood top LOWER FLUE MOUNTING BRACKET LOWER FLUE 14 Slide the upper flue upward until it is aligned with its upper flue mounting bracket The bracket should be inside the flue Secure the upper flue to the upper flue mounting bracket using 2 8 x 3 8 mounting screws 15 Remove protective plastic film covering the upper flue and the hood 16 Mo...

Page 7: ...ecorative washers Screw from top of hood base Do not overtighten these screws 18 Install 2 type B10 120V 40W max candelabra incandescent bulbs included 19 Reinstall grease filter by aligning rear filter tab with slot in the hood pull down the metal latch tab push filter into position and release Make sure filter is securely engaged after installation HOLE LOCATIONS Ø5 16 TYP MOTOR BLOWER ASSEMBLY ...

Page 8: ...up close to wall mounting location and plug power cord into wall outlet 15 Align the hood and center it above the hood mounting bracket Gently lower the hood until it securely engages the bracket 16 If a framing member is not present With the hood hanging in place drill through both holes located in the inside lower back of hood using a 5 16 drill bit Insert the included drywall anchors into the d...

Page 9: ...n repair or replace without charge any product or part which is found to be defective under normal use and service THIS WARRANTY DOES NOT EXTEND TO FLUORESCENT LAMP STARTERS TUBES HALOGEN AND INCANDESCENT BULBS FUSES FILTERS DUCTS ROOF CAPS WALL CAPS AND OTHER ACCESSORIES FOR DUCTING This war ranty does not cover a normal maintenance and service or b any products or parts which have been subject t...

Page 10: ...s poêles de la taille appropriée Utilisez toujours des ustensiles de cuisine adaptés à la taille de l élément de surface POUR RÉDUIRE LE RISQUE DE BLESSURES PHYSIQUES EN CAS DE FEU DE FRITURE SUR LA TABLE DE CUISSON VEUILLEZ PROCÉDER COMME SUIT 1 ÉTOUFFEZ LES FLAMMES avec un couvercle hermétique une plaque à biscuits ou un plateau en métal puis éteignez le brûleur SOYEZ PRUDENT E AFIN D ÉVITER LES...

Page 11: ...bouton poussoir de la soufflante 3 pour augmenter et le bouton poussoir d éclairage 2 pour réduire Enfoncez à nouveau le bouton poussoir de minuterie temporisation 1 Les deux derniers chiffres clignoteront Utilisez le bouton poussoir de la soufflante 3 pour augmenter et le bouton poussoir d éclairage 2 pour réduire Enfoncez à nouveau le bouton de minuterie temporisation 1 pour confirmer et sortir ...

Page 12: ... des utilisateurs si la hauteur du plafond le permet CONTENU CANALISATION RONDE DE 15 2 cm 6 PO PROTECTION DE TOIT COUDE ROND 61 à 76 cm 24 à 30 PO AU DESSUS DE LA SURFACE DE CUISSON PROTECTION DE PAROI HOTTE CARNEAU DÉCORATIF HOTTE 32 4 cm 12 PO AU CENTRE DES TROUS DE SUPPORT DE MONTAGE DE LA HOTTE COUDE ROND SUPPORT DE MONTAGE DE HOTTE 61 À 76 cm 24 à 30 PO AU DESSUS DE LA SURFACE DE CUISSON CAR...

Page 13: ...rieure à 61 cm 24 po Il est fortement recommandé de placer la hotte à 76 cm 30 po au maximum au dessus de la surface de cuisson pour qu elle capture au mieux les impuretés culinaires Les distances de plus de 76 cm 30 po au dessus de la surface de cuisson sont à la discrétion de l installateur et de l utilisateur pourvu que la hauteur du plafond et la longueur du carneau le permettent 93 cm 36 po b...

Page 14: ...r le dessus de la hotte utilisant 4 vis de montage à tête cylindrique n 8 x 0 9 cm 3 8 po 4 Retirez le filtre à graisse en abaissant la languette de blocage de métal et en penchant le filtre vers le bas pour le retirer 5 Tournez avec soin la hotte pour la mettre à la verticale EMPLACEMENTS DES TROUS Ø 7 9 mm 5 16 PO TYP ASSEMBLAGE DE MOTEUR VENTILATEUR VUE LATÉRALE PARTIE ARRIÈRE INTÉRIEURE DE LA ...

Page 15: ...eau inférieur 13 Placez avec soin les deux carneaux dans l endroit en retrait sur le dessus de la hotte SUPPORT DE MONTAGE DU CARNEAU INFÉRIEUR INFÉRIEUR CARNEAU 14 Glissez le carneau supérieur vers le haut jusqu à ce qu il soit aligné avec son support de montage de carneau supérieur Le support devrait être à l intérieur du carneau Fixez le carneau supérieur au support de montage du carneau supéri...

Page 16: ...es décoratives Vissez depuis le dessus de la base de la hotte Ne resserrez pas trop ces vis 18 Installez 2 types B10 120V 40W max ampoules à incandescence candélabres inclus 19 Réinstallez le filtre à graisse en alignant la languette du filtre arrière avec la fente dans la hotte abaissez la languette de blocage de métal poussez le filtre en position et dégagez Au terme de l installation assurez vo...

Page 17: ... vis de montage à tête cylindrique n 8 x 0 9 cm 3 8 po 14 Tenez la hotte près de l emplacement de montage au mur et branchez le cordon dans la prise 15 Alignez la hotte et centrez la au dessus du support de montage de la hotte Abaissez délicatement la hotte jusqu à ce qu elle s engage bien dans le support 16 S il n y a pas d élément de charpente Avec la hotte suspendue en place percez à travers le...

Page 18: ...PARTICULIER Durantcettepérioded unan Broan NuTonerépareraouremplaceragratuitement àsadiscrétion tout produit ou toute pièce jugés défectueux dans des conditions normales d utilisation CETTE GARANTIE NE S APPLIQUE PAS AUX TUBES FLUORESCENTS ET AUX DÉMARREURS NI AUX AMPOULES HALOGÈNES OU INCANDESCENTES FUSIBLES FILTRES CONDUITS CAPUCHONS DE TOIT CAPUCHONS MURAUX ET AUTRES ACCESSOIRES POUR CONDUITS C...

Page 19: ...impie los ventiladores con frecuencia No se debe dejar acumular grasa en el ventilador ni en el filtro 4 Utilice una cacerola del tamaño adecuado Siempre use utensilios de cocina apropiados para el tamaño del elemento de la superficie PARA REDUCIR EL RIESGO DE LESIONES PERSONALES EN CASO DE UN INCENDIO POR GRASA EN LA COCINA RESPETE LO SIGUIENTE 1 SOFOQUE LAS LLAMAS con una tapa bien ajustada una ...

Page 20: ...tra en un ciclo de 12 horas Para ajustar la hora presione el botón 1 por 3 segundos Parpadearán los primeros dos dígitos Utilice el botón del soplador 3 para subir y el botón de la iluminación 2 para bajar Presione el botón de hora retardo 1 otra vez Los últimos dos dígitos parpadeen Utilice el botón del soplador 3 para subir y el botón de la iluminación 2 para bajar Presione el botón hora retardo...

Page 21: ... la altura del techo lo permita CONTENIDOS CONDUCTO CIRCULAR DE 6 SOMBRERETE PARA EL TECHO CODO CIRCULAR 24 a 30 SOBRE LA SUPERFICIE DE COCCIÓN SOMBRERETE PARA LA PARED CAMPANA CONDUCTO DE HUMO DECORATIVO CAMPANA PERFORACIONES PARA EL SOPORTE DE MONTAJE DE 12 EN EL CENTRO DE LA CAMPANA CODO CIRCULAR SOPORTE DE MONTAJE DE LA CAMPANA 24 a 30 SOBRE LA SUPERFICIE DE COCCIÓN CONDUCTO DE HUMO DECORATIVO...

Page 22: ...ada la superficie de la pared centre y nivele con cuidado el soporte de montaje de la campana y asegúrelo al marco de la pared con tres 3 tornillos de montaje N º 8 x 1 1 2 Ajuste los tornillos completamente Nota No utilice anclajes para paredes de yeso NOTAS 1 La distancia mínima de la campana sobre la cocina no debe ser inferior a 24 Se recomienda enfáticamente un máximo de 30 sobre la cocina pa...

Page 23: ...e tiro conector de conducto a la parte superior de la campana con cuatro 4 tornillos de montaje de cabeza troncocónica N º 8 x 3 8 4 Tire de la lengüeta del pestillo de metal para retirar el filtro de grasas y mueva el filtro hacia abajo para quitarlo 5 Rote la campana con cuidado hacia arriba UBICACIONES DE LOS ORIFICIOS Ø5 16 TÍPICO MONTAJE DEL MOTOR SOPLADOR VISTA LATERAL INTERIOR POSTERIOR DE ...

Page 24: ...te 13 Con cuidado coloque ambos conductos de humo en el área embutida en la parte superior de la campana SOPORTE DE MONTAJE DEL CONDUCTO DE HUMO INFERIOR CONDUCTO DE HUMO INFERIOR 14 Deslice el conducto de humo superior hacia arriba hasta que se alinee con su soporte de montaje El soporte debería estar dentro del conducto de humo Asegure el conducto de humo superior en su soporte de montaje con do...

Page 25: ...tro 4 tornillos de cabeza plana M4 x 30 mm y cuatro 4 arandelas decorativas Atornille desde arriba de la base de la campana No ajuste demasiado estos tornillos 18 Instale 2 tipo B10 120 V 40 W máx bombillas de los candelabros incandescentes incluido 19 Vuelva a colocar el filtro de grasas alineando la lengüeta posterior del filtro con la ranura en la campana tire de la lengüeta del pestillo de met...

Page 26: ...humo superior en su soporte de montaje superior con dos 2 tornillos de montaje N º 8 x 3 8 19 Retire el plástico protector que cubre el conducto de humo superior y la campana 20 Monte la placa de vidrio en la parte superior de la base de la campana con cuatro 4 tornillos de cabeza plana M4 x 30 mm y cuatro 4 arandelas decorativas Atornille desde arriba de la base de la campana No ajuste demasiado ...

Page 27: ... y a su propio criterio Broan NuTone reparará o reemplazará sin costo alguno cualquier producto o pieza que se encuentre defectuosa bajo condiciones normales de servicio y uso LA PRESENTE GARANTÍA NO CUBRE LOS TUBOS FLUORESCENTES NI SUS ARRANCADORES BOMBILLAS DE HALÓGENO E INCANDESCENTES FUSIBLES FILTROS CONDUCTOS TAPONES DE TECHO O PAREDES Y DEMÁS ACCESORIOS PARA CONDUCTOS Esta garantía no cubre ...

Page 28: ...SERIE NS54000 Page 28 99527657C ...

Reviews: