36
Do not use this battery with any other product.
Do not attempt to fit the battery the wrong way round.
Do not short out, or attempt to dismantle the battery.
Do not expose the battery to flames or excessive heat.
Do not immerse in or expose the battery to water.
Do not store or transport the battery with loose metal objects such drill and driver bits.
Batteries are prone to leakage when discharged. To avoid
damage to the product, remove or re-charge the battery when no charge remains. Store the battery in a cool
place when not in use.
After prolonged use the battery may become hot. Before
removing the battery, switch the machine off and allow the
battery to cool down. Do not use the battery if you notice any discoloration or distortion of the battery casing.
CHARGING THE BATTERY
Note - During charging the battery will become warm as it is being charged.
The battery supplied with this power tool contains a test charge only and must be fully charged before use.
First read the safety instructions then follow the charging instructions.
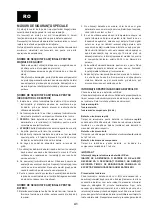
1 Plug the charger into a standard 230V~50Hz mains socket outlet.
2 Do not allow the cable to become knotted or kinked.
3 This charger and battery pack are specifically designed to work together. DO NOT attempt to charge any other
brand of cordless tool or battery pack with this charger.
4 Note the battery has a keyway which allows it to fit into the charger only one way.
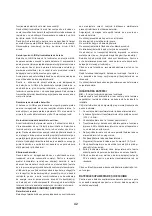
5 Place the battery pack into the charger base.
6 The Red LED indicates that the battery is charging.
The Green LED indicates that the battery is fully charged.
7 If the charger has a “set” button press this once to start the charging process. If the charger does not have
a “set” button charging will start automatically.
The Red LED indicates that the battery is charging.
The Green LED indicates that the battery is fully charged.
8 Time the charge for 1 Hour only.
9 Unplug the charger when not in use and store it in a suitable storage cabinet.
10 Avoid charging your battery in freezing conditions as charging power will not be sufficient.
11 When charging more than one battery pack in succession allow at least 30 minutes for the charger to cool down
before charging the additional battery.
Always remove the battery pack and store it safely when the cordless drill is not in use.
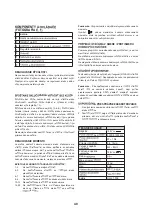
3 COMPONENTS AND CONTROLS (Pic. 1)
1 Keyless chuck
2 Clutch setting ring
3 Rotation direction change converter (forward/reverse)
4 Soft grip
5 On/Off trigger switch
6 LED light
7 2 Speed gearbox
8 LED indicators showing battery capacity
9 Battery
ON/OFF SWITCH WITH A STOP FUNCTION
Press to switch On and release to switch Off. The On/Off trigger switch is equipped with a stop function which stops
the chuck immediately once the On/Off switch is released.
VARIABLE SPEED CONTROL
Simply apply light pressure to the trigger to start the drill on a slow speed. Increasing the pressure will allow a variable
speed increase. Warning!
Always remove the battery before carrying out any adjustments or maintenance.
2 SPEED GEARBOX
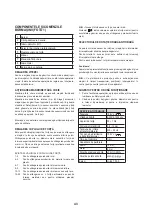
The drill is equipped with a 2 speed gearbox that enables drilling and screwing in at low (mark “1”) and high
(mark “2”) speed. A slide switch, located at the top of the drill (ref. 7 - Fig. 1), enables change of speed. At low speed
the drill operates slower but with higher power and higher torque. At high speed the rotation will be higher but power
and torque will be lower. Warning!
Do not use the tool at low rotations for too long as too much heat accumulates inside the equipment.
LOCKING POSITION
As a safety precaution from accidental engagement, while being carried, pushing the forward/reverse button
(ref. 3 - Fig. 1) into the middle or neutral position will render the drill inoperative.

