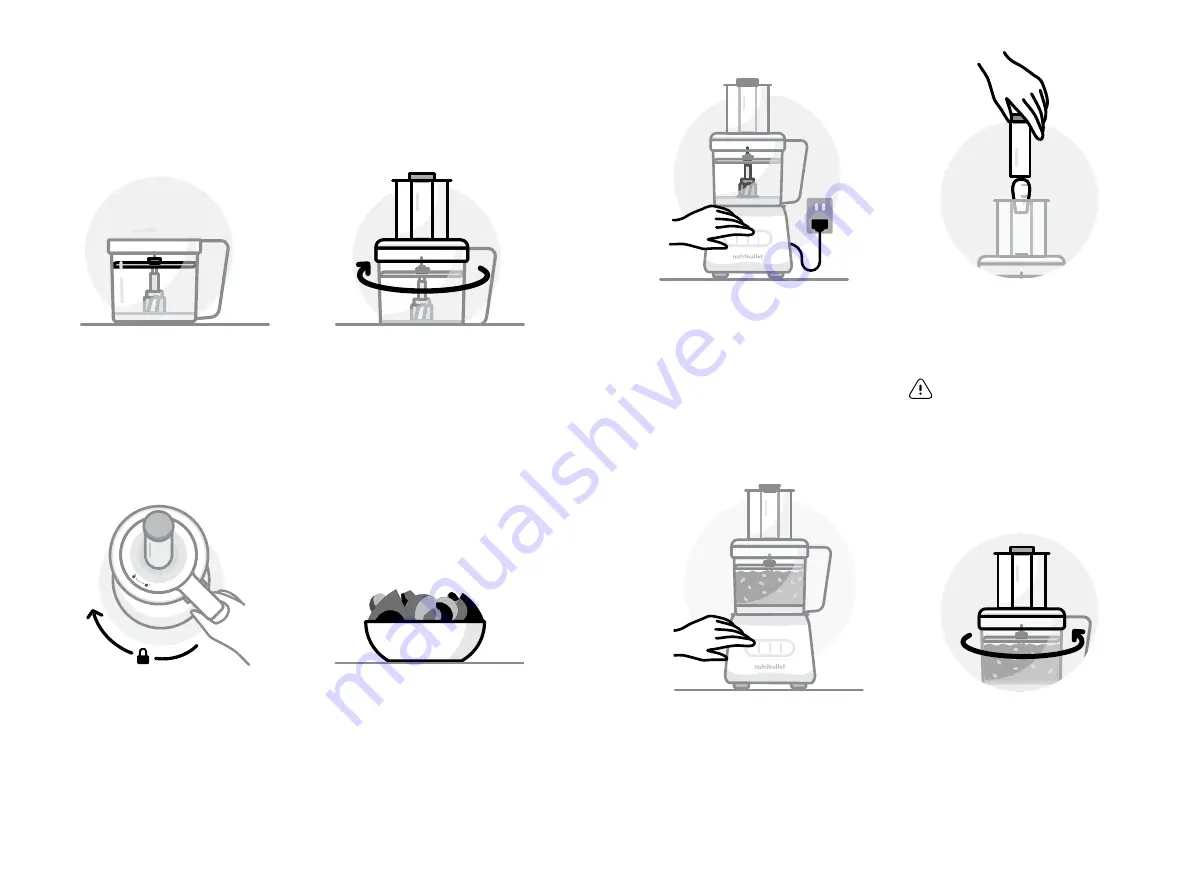
1
Place the
Work Bowl,
with
disc attached, on a clean,
dry, flat surface like a
countertop. Refer to the
assembly instructions on
page 12 for how to properly
attach a disc for use.
2
Place the
Work Bowl Lid
on
top of the
Work Bowl.
Turn
the lid clockwise, lining up
the arrows on the lid and
handle, to lock into place.
NOTE:
The motor will not run
unless the lid is locked in place.
Using a disc attachment.
The disc attachments are for slicing, shredding, or spiralizing your
ingredients. The
Slice/Shred Discs
are reversible and labeled on
either side. Place the side you want to use with its name facing up.
4
Prepare food (cut into
smaller pieces, remove
seeds, etc.) and set aside.
3
Place the
Work Bowl,
with
lid attached, onto the
Motor
Base.
Turn the
Work Bowl
clockwise to lock in place.
You should hear a click when
the bowl is properly locked
in place.
NOTE:
When using the
Spiralizer
Disc
,
cut the produce into pieces
that will easily fit in the chute. We
recommend to cut foods vertically
along the sides creating a 'square'
shape for best spiralizing results.
6
With the motor running,
place food into the
Feed
Chute,
carefully guiding it
down using the
Food Pusher.
7
When you’re done, or when
your processed ingredients
have filled the work bowl,
press the
OFF
button. Wait
until the blade has come to
a complete stop.
8
Remove the
Work Bowl
Lid
from the
Work Bowl
by turning the lid
counterclockwise to unlock.
Carefully remove the lid
and set it aside.
5
Plug in the unit and press
the
HIGH
speed button.
HIGH
PULSE
OFF
LOW
OFF
LOW
HIGH
PULSE
WARNING:
always use the
Food
Pusher
, not fingers or utensils,
to push food down chute.
Do
not insert too much food at one
time. Never force stuck food
down chute.
19
18
Summary of Contents for NBP50100
Page 1: ...User guide FOOD PROCESSOR ...


