21
20
PIPA lite series instructions
PIPA lite series instructions
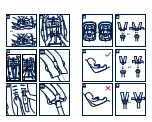
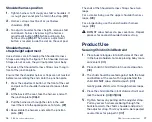
Check to make sure the base is securely installed
by pulling on the both ISOFIX connectors.
5
- After placing the base on the vehicle seat, extend
the load leg to floor. When the load leg indicator
shows green means it is installed correctly, red
means it is installed incorrectly.
(44)
The load leg has multiple positions. When the
load leg indicator shows red this means the load
leg is in the wrong position.
Make sure the load leg is secure by pressing
down on the front of the base.
To shorten the load leg, squeeze the load leg
release button and pull the load leg upwards.
(44)
The completely assembled base is shown as
(45)
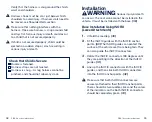
The ISOFIX connectors must be attached and
locked onto the ISOFIX anchor points.
(45)-1
The load leg must be installed correctly with
green indicator.
(45)-2
Check the installation
Base should not move side to side or forward
more than 1” at belt path.
Attaching Child Restraint to Base
1
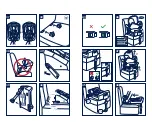
- After child is properly secured in infant carrier,
press child restraint on base and listen for a click.
Pull on child restraint to verify installation.
(46)
DO NOT
allow child restraint to contact the
vehicle interior (side of car or seat in front) when
installed on base.
2
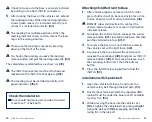
- To release the child restraint, squeeze the carrier
release button
(47)-1
located on the base and then
pull the child restraint up.
(47)-2
3
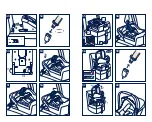
- To remove the base, first push the base toward
the vehicle seat with a light force.
(48)
4
- As you push the base toward the vehicle seat,
squeeze the secondary
(49)-1
and primary ISOFIX
release buttons
(49)-2
. For ease of release, push
the secondary button first, then the primary
button.
5
- Press the ISOFIX releasing button to fold the
ISOFIX.
(50)
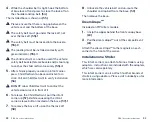
Installation with 3-point-belt
1
- Open the vehicle belt lock-off and route the
vehicle safety belt through the belt path.
(51)
2
- Buckle the vehicle belt. Both the shoulder AND
lap belt must be under the blue lock off and belts
must lay flat.
(52)
3
- While pressing the base into the vehicle seat
(53)-1
, tighten the vehicle belt by pulling
straight
along the belt path
(53)-2
, keeping both belts
laying flat in the lock off.
Summary of Contents for PIPA lite
Page 1: ...Designed around your life...
Page 2: ...AIRBAG 1 2 4 5 7 8 9 10 11 3 1 2 6 1 2 1 3 2 12...
Page 3: ...2 3 4 5 6 15 16 17 18 19 20 21 22 23 13 14 or or or or or 1 2 24 or...
Page 4: ...2 25 3 32 4 33 5 34 6 35 1 36 2 2 2 1 1 1 26 27 28 29 30 31 or or or or or...
Page 5: ...2 1 3 45 6 47 2 1 5 46 43 42 48 2 44 1 5 40 6 41 3 38 4 39 2 37 or...
Page 6: ...3 57 2 1 4 58 4 60 5 59 2 56 3 2 55 1 4 6 54 5 53 1 2 4 52 2 50 1 2 2 3 51 1 49 1 2...
Page 7: ...4 61...
Page 21: ...27 26 PIPA lite PIPA lite 28 28 28 29 29 30 31 34 36 38 43 44 49...
Page 24: ...33 32 PIPA lite PIPA lite ISOFIX 100 13kg 10...
Page 27: ...39 38 PIPA lite PIPA lite 6 7 ISOFIX 8 9 10 11 1 1 2 3 1 2 4 3 1 3 2 1 4 2 3 5...
Page 33: ...51 50 PIPA lite PIPA lite 52 52 52 53 53 54 55 58 60 62 67 68 73...
Page 36: ...57 56 PIPA lite PIPA lite ISOFIX 100 13kg 10...
Page 39: ...63 62 PIPA lite PIPA lite 6 7 ISOFIX 8 9 10 11 1 1 2 3 1 2 4 3 1 3 2 1 4 2 3 5...
Page 41: ...67 66 PIPA lite PIPA lite 1 25 1 25 2 2 26 1 1 31 2 32 3 33 4 34 35 36 5 37...
Page 45: ......

