background image


Ra.Ro. 1.0 – User and maintenance manual


Pag. 44


ROBOT MAINTENANCE 

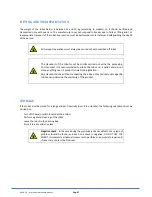
Do not carry out any type 

of maintenance without first having specific written indications from the Assistance 

Service. If the maintenance of the robot is carried out in a manner that does not comply with the instructions 
provided, with non-original spare parts or in any case in such a way as to compromise its integrity or modify its 
characteristics, the manufacturer will be deemed to be relieved of any responsibility concerning personal safety 
and operation. non-compliant of the robot.  

This manual does not elaborate information regarding extraordinary maintenance activities, as these operations 

must always be carried out exclusively by the NuZoo Robotics S.r.l. or at authorized service centers. 


If agreed with the manufacturer it is possible to obtain the AUTOMATIC UPDATING of the robot remotely. This 

procedure allow you to keep the unit always updated from the software point of view and aligned with the latest 
technological advances of the producer, in order to obtain a product as much efficient as possible. 


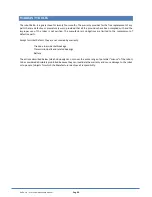
CLEANING 


For a correct cleaning, if necessary, it is advisable to use a cloth dampened with water, exerting a light pressure 

on  the  covers.  To  avoid  damaging  or  compromising  the  operation  of  the  various  components,  especially  the 
electrical parts, cleaning must be carried out taking the necessary precautions. It is absolutely forbidden to direct 
jets of water. Before starting the robot, dry completely with compressed air at low pressure and check that no 
residual moisture has remained on the electrical components. 


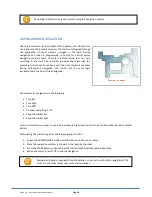
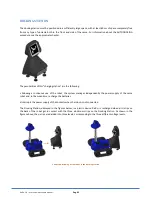
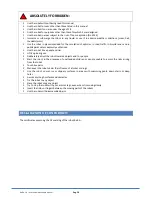
Place the Docking Station in a clean, dry place free from residues of any kind. 
Check that the six connection points make contact with the right aluminum strip, to avoid possible 

damages to the robot. 

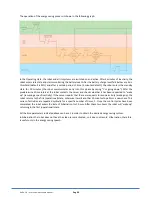
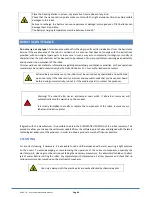
Failure  to  recharge  the  battery  can cause  permanent  damage:  prolonged  use  of flat  batteries  can 

damage them irreparably. 

The battery charging temperature must be between 0 and 40 °. 


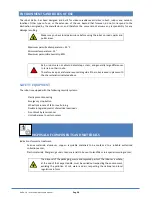
Extraordinary maintenance on the robot must be carried out by specialized and authorized 

personnel only. If the robot emits particular and unusual sounds that you have never heard 
before during normal activity, reboot it. If the problem persists, contact the producer. 


Warning!  The  robot  Ra.Ro.  has  an  anti-tamper  seals  which,  if  altered  or  removed,  will 

automatically void the warranty on the product.  

 
It  is  strictly  forbidden  to  modify  or  replace  the  components  of  the  robot,  remove  covers, 

labels and indication plates 


Use only a damp cloth, the plastic parts are easily attacked by chemical agents 

Summary of Contents for 4W - 3013

Page 1: ...USE AND MANTEINANCE MANUAL MODELS 4W 3013 TK 3013 ...

Page 2: ...8 years The robot Ra Ro IS NOT A TOY Before you start using the robot it is mandatory to read this instruction manual carefully The guarantee of a good performance and the relative safety of the robot and user are strictly dependent on the application of all the instructions contained in this manual ...

Page 3: ...RA 17 4 TAB AUDIO 18 6 SETTINGS 18 VIDEO SYSTEM 20 1 THE NAVIGATION CAMERA 23 2 VIDEO SERVER 23 3 THERMAL CAMERA 24 3D VISION AND EYEWEAR 25 VISUAL MARKERS 25 NAVIGATION 29 NAVIGATION MANUAL 30 SMART DRIVE 33 AUTONOMOUS NAVIGATION 34 AUTODOCKING 36 DOCKING MANUALE 39 FOLLOW ME 39 AUTONOMY and CHARGING 39 DOCKING STATION 43 ROBOT MAINTENANCE 44 LIFTING AND TRANSPORTATION 47 STORAGE 47 ENVIRONMENTS ...

Page 4: ... COMPONENTS AND MATERIALS 48 WARRANTY RULES 49 DECLARATION OF CONFORMITY 50 DECLARATION OF CONFORMITY 51 APPENDIX 1 VISUAL MARKERS 52 APPENDIX 2 TECHNICAL DETAILS 57 APPENDIX 3 ELECTRONIC CHARACTERISTICS 58 CENTRAL UNIT 58 THE FUNDAMENTAL RULES of Ra Ro 59 ...

Page 5: ...and the possibility of integration with the control units of the various supervisory institutions make it a valid robotic mobile operator GENERAL Before start up the robot it is essential that users read understand and follow the instructions below carefully The manufacturer cannot be held liable for damages caused to persons things and or to the robot itself if used in a way that does not comply ...

Page 6: ... of attracting the attention of readers users for the correct and safe use of the robot Residual risks It highlights the presence of hazards that may cause residual risks to which the user must pose attention to avoid any injury or damage materials Pay attention It highlights behavioral norms to be adopted to avoid damage to the robot and or the occurrence of dangerous situations Suggestion An are...

Page 7: ...king and charging area away from direct exposure to different weather conditions sun water snow hail and dust The temperature of use of the robot is between 10 and 45 As for the minimum and maximum temperature during recharging this will be detailed in the specific section Docking DESCRIPTION OF THE ROBOT MODELS AVAILABLE The robot Ra Ro It is available in two different configurations 4 Driving wh...

Page 8: ...in components of the robot are ID NAME DESCRIPTION 1 Sensors The numerous sensors of the latest generation detect environmental data telemetry increase the stability of the robot avoiding the overturning patented system They detect the environment walls crossings obstacles for navigation activities detect movement fires and tampering A stationary robot works by high precision interactive sensors 2...

Page 9: ...tion video and screenshots With the addition of the 3D shooting function it is possible to transmit video footage to specific glasses such as the Oculus Rift allowing a realistic overview DISSEMBLING AND ASSEMBLY The robot is delivered in a special package If it is damaged during transport it is necessary to identify and promptly notify the manufacturer before starting the robot www nuzoo it 1x 1x...

Page 10: ...lockwise as indicated on the connector doing so will automatically arm it During normal use these two switches must be left in the positions indicated above armed red button and main switch active 4 Press and hold the power button for at least 5 seconds It will be noted that during the first few seconds of pressing the button the internal light will increase in intensity progressively and then go ...

Page 11: ...own 2 At the end of the countdown the robot becomes an access point and creates a Wi Fi network called SaferAir with active DHCP Via a PC access the SaferAir network which is open and requires no password 3 Connect to the robot through a BROWSER suggested by typing the address http 192 168 250 1 4 Once connected access the SETTINGS menu and search for available Wi Fi so that the robot can be regis...

Page 12: ...sing To start a new connection with the robot Ra Ro you need to open a browser Suggested Chrome and type the IP address of the robot If the connection is correct a username and password are promptly requested to remotely access the robot in total security username admin password admin are the default credentials as shown in the figure The password is set when the robot is configured and installed ...

Page 13: ...to the robot settings page 1 MOVEMENT In this area it is possible to control and move the robot also differing its movement speed It is possible to interact using a mouse or via the touchscreen The modalities of interaction with this area change according to the type of navigation mode chosen among the three possible way MANUAL SMART DRIVE AUTONOMOUS The side buttons to turn right or left of 90 an...

Page 14: ... for other Wi Fi networks The steps to be performed to network the robot are explained in the NETWORK DEMO MODE section Excellent connectivity Average connectivity Low connectivity Very low connectivity No connectivity ICON DESCRIPTION ICONS SET Battery status This icon indicates the battery status Positioning the mouse pointer above the battery icon the detailed information about the instantaneou...

Page 15: ...ing the band used This part will be further explained in the section VIDEO SYSTEM Quality set for fast network Quality set for medium speed network Quality set for slow network ICON DESCRIPTION ICONS SET Navigation mode set This icon indicates the navigation mode set between MANUAL SMART DRIVE and AUTONOMOUS The differences between the three modes will be detailed in the NAVIGATION section Manual ...

Page 16: ...cons that can appear in the status bar during normal robot operation ICON DESCRIPTION Joypad icon This icon indicates that the interface has recognized the connection of a Joypad which can be used to move the robot If you move the mouse over this icon the image of a joypad will appear in a box through which you can see the functionality of each individual button Sleeping icon This icon indicates t...

Page 17: ...ppear in the status bar is the warning An example of a warning is shown below These types of warning can signal both possible malfunctions of the robot and the occurrence of certain events Each warning consists of a unique code and a sentence that represents it In the table below we summarize the different warnings that may appear CODE WARNING DESCRIPTION 1000 Docking station error Docking station...

Page 18: ...ot work 2006 Pan head cam problems The video server camera s pan engines do not work 2007 Movement by laser scanner Detected movement by laser scanner with stopped robot 2008 High temperature PowerBoard temperature above 50 C 2009 Movement via navcam Detected movement from the navigation camera 2010 WiFi low Low Wi Fi signal 2011 Powerboard problems Initialization problems of some components of th...

Page 19: ... green icon it is also possible to activate and deactivate the laser scanner The three modes will be analyzed later 6 SETTINGS This section accessible only by the administrator user allows you to modify some robot settings It consists of three tabs System Robot and Web In the figure below you find the content of the System card that allows you to search and connect to a Wi Fi network turn up the v...

Page 20: ...ower management and color of the line recognized by the robot This is a very important part so for further information contact the manufacturer The Web tab also contains parameters but these are relate to the video streaming and audio In this section you can create new users too For more information contact the manufacturer ...

Page 21: ...ing them more efficient allows you to integrate these video streams to the remaining remotely managed features Native image Adjusted image Lightning correction Graphics interface Another important feature of Ra Ro is the ability to change dynamically the video streams in real time allowing the robot to adapt itself to the present band in a specific time offering a good user performance in every si...

Page 22: ...ng on the VIDEO icon In contrast the Minimal mode is activated at the time of the initial connection For further information see the CONTROL CLIENT section Depending on the type of camera a warning system is automatically activated to signal blinding or tampering At any time and with any video stream displayed you can instantly capture the screen in JPG format with a simple CLICK on the appropriat...

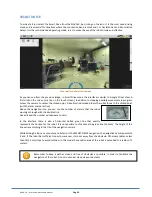
Page 23: ...n related to the direction of the defined path we introduced the use of a compass indicated by a white arrow in the image below The needle moves with the navigation camera so you will need to bring it back to the initial position to re align the camera and the direction of path Now let s have a look at the two cameras on the Ra Ro the navigation camera and the video server camera ...

Page 24: ...get an overview of the robot s surroundings 2 VIDEO SERVER This completely independent video recording system is based on AXIS technology which allows you to capture a video stream expandable to 4 at the same time in Full HD as well as perform video compression and analysis motion detection and alarm recording of all patrols on SD card This system integrates anti tampering and anti blinding soluti...

Page 25: ...data are integrated in the central unit 3 THERMAL CAMERA Among the optional components which can be installed on the Ra Ro there is the thermal camera The use of a thermographic image allows a night vision or in the presence of fog allows to detect the infrared radiation of people or animals immediately detecting them even over long distances In this way heat detection alarms are generated directl...

Page 26: ...rol of an environment from remote locations VISUAL MARKERS The robot Ra Ro enjoys the native functionality of visual MARKER identification These are coded square images in black and white measuring 15x15cm The more than 1 000 codes available allow you to interact with the robot providing a multitude of additional instructions such as interaction with the environment general settings of the robot o...

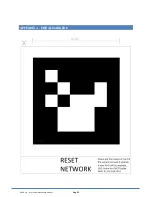
Page 27: ... to tell us its name the SSID of the network which is registered its IP the battery status Look at me The movement of the camera follows exactly what the operator does with the marker Reset Network This marker allow you to register the robot in a new network reset or allow the access to the robot in DEMO MODE Volume By moving this marker up or down the speaker volume will adjust accordingly ...

Page 28: ...e web interface Navigation Docking station These two markers are present on the docking stations and are recognized by the robots for the autodocking functionality The top marker is for the robot in the track version while the bottom one is for the wheeled version Turn Left This marker in autonomous navigation is used to tell the robot to turn left 90 degrees Turn Right This marker in autonomous n...

Page 29: ...eep the Left The robot must keep this marker to the left Very useful at the hallways Keep the Right The robot must keep this marker to the right Very useful at the hallways Goal This marker in autonomous navigation indicates the achievement of the target foreseen or the destination point Turn 180 This marker in autonomous navigation is used to tell the robot to turn 180 on itself ...

Page 30: ...avoid obstacles on the path If instead the laser scanner is disabled you can still count on the help of a 5cm virtual bumper In this mode Ra Ro is able to follow hallways perimeter walls or to easily cross gates doors SMART DRIVE This mode works only through the navigation camera and when used it s similar to Google Street View With the first click on the screen in addition to stop possible moveme...

Page 31: ...th the mouse or Tap for those who use the touch screen the robot will move with the following logic For security problems if at any time the control interface is suddenly closed there will be no connectivity between the robot and the remote operator if the robot is in MANUAL or SMART DRIVE mode it is designed to stop The robot is designed to operate on flat surfaces inclined maximum 20 or with sma...

Page 32: ...rds the top of the screen the robot will begin to move slowly forward Moving it a little further the robot will accelerate forward The further you move the pointer keeping the left button pressed from the point initially clicked the faster the robot will move To move to the right or to the left simply move the pointer always keeping the left button pressed to the right or left in the 3 areas of th...

Page 33: ...all and continue the movement commanded by the operator In case of difficulty or in restricted environments the laser scanner can be deactivated by clicking on the green icon figure below in the NAV tab of the web interface In this case the guide will be totally delegated to the robot user Laser scanner icon With the laser scanner active when an obstacle is in the vicinity of the robot 5 cm RaRo s...

Page 34: ... point with the laser scanner active Above the navigation icon you can see the number of meters that the robot would go through with the double click Once clicked the number will decrease to zero In the interface there is also a horizontal dotted green line that exactly represents the horizon for the robot It is not possible to click above the green line horizon The height of this line varies acco...

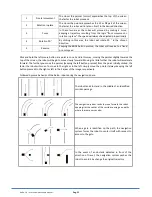
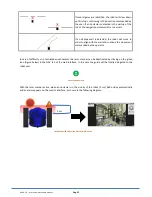
Page 35: ...n The markers for navigation are the following Turn left Turn right Turn 180 Proceed everything is OK Keep the marker left Keep the marker right For more information on how to use them and how to organize the patrol to be carried out by the robot contact NuZoo After placing the markers perform the following steps to start 1 Select the AUTONOMOUS mode from the NAV tab on the control client 2 Place ...

Page 36: ...sing performed by the robot When the line is highlighted green the robot has recognized it For more information about this feature contact the manufacturer USING THE JOYPAD A very simple and intuitive alternative for the movement control of the robot is the use of Joypad Let s look at the steps to follow in the case of a Joypad 1 Insert the Joypad 2 Open the browser and connect to the robot 3 Pres...

Page 37: ...otally automatic way provided that the charging station is positioned in a distance between 1 and 5 meters and a correct orientation as shown in the figure Here are some suggestions for a good behavior of the robot During the telecontrol avoid to voluntarily direct the robot in close contact with objects or people to avoid damaging the robot the controlled function is subject to the common sense o...

Page 38: ...tenance manual Pag 37 When the robot recognizes that there is a suitable position to perform the auto docking operation the software automatically shows the AUTODOCK button on the control client screen as shown in the figure ...

Page 39: ...reen on the control interface If at the end of the procedure of approaches to the docking station the robot does not complete the procedure successfully it will move back and will try again the procedure for a maximum of 3 times The operation will be carried out in complete autonomy Before starting the AUTODOCK procedure make sure that there are no obstacles placed on the floor that could obstruct...

Page 40: ... hold and show the marker the robot will automatically follow the marker When for any reason there is no visual contact between the robot and marker the procedure will be automatically deactivated and the robot will stop AUTONOMY and CHARGING Ra Ro has a red LED figure on the side useful for understanding the state of activity of the robot Ra Ro uses a series of processes specifically developed fo...

Page 41: ...cts the server and checks whether it has been requested to wake up resuming a specific activity If the server reports that there are requests to resume activity waking up the robot returns to the first operational state otherwise it waits another 10 minutes to perform a new check This series of activities are repeated cyclically for a specific number of times 5 Once the control cycles have been co...

Page 42: ...tal devices switched out peripherals TURNED ON 8 hours STANDBY Standby control system devices switched off Operate at small pre defined intervals minutes Fast flashing 5hz 2 days HIBERNATION Control system off devices switched off Back to operation at predefined long intervals hours OFF ON at predefined intervals Up to 3 months POWERDOWN Control system off devices switched off The ignition signal ...

Page 43: ...2 24 V 3 Charger 4 Charge via docking station 5 24 V 6 Ground 7 Charger Ra Ro high capacity rechargeable battery guarantees a good autonomy obviously connected to the use of the robot see the table at page 41 for estimated time Ra Ro is rechargeable in two ways like the image above ...

Page 44: ...inuous use of the robot the system manages independently the power supply of the same robot and in the meantime recharge the batteries Interrupts the power supply of the contacts when the robot is not connected The Docking Station displayed in the figures below is a plastic device Ra Ro is recharged when all six tips on the back of the robot get in contact with the three aluminum strips on the Doc...

Page 45: ...xerting a light pressure on the covers To avoid damaging or compromising the operation of the various components especially the electrical parts cleaning must be carried out taking the necessary precautions It is absolutely forbidden to direct jets of water Before starting the robot dry completely with compressed air at low pressure and check that no residual moisture has remained on the electrica...

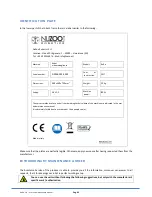
Page 46: ...thods of use and all the remaining technical data of the machine are indicated in the user and maintenance manual It is absolutely forbidden to use the robot like a people carrier Made in Italy Make sure that the plates are perfectly legible Otherwise apply new ones after having requested them from the manufacturer EXTRAORDINARY MAINTENANCE AGREED The Assistance Service of the producer is able to ...

Page 47: ... maximum use of compressed air maximum 2 bar of pressure Never use free flames as a lighting medium when performing maintenance or maintenance work After any maintenance or adjustment work make sure that there are no foreign tools or bodies between the robot moving parts in order to avoid damaging the robot and or injuring the user It is forbidden to remove or tamper with identification plates and...

Page 48: ... bottom Perform a general cleaning of the robot Leave the robot in the packing box Store it in a dry and airy place All transport operations must always be carried out with switched off robot The transport of the robot must be strictly carried out using the packaging For transport it is recommended to place the robot on a pallet and do not store anything over it except its own Docking Station Any ...

Page 49: ...ck by laser scanner Unit unbalance overturn sensor DISPOSAL OF COMPONENTS AND MATERIALS Indications for waste treatment Ferrous materials aluminum copper recyclable materials to be conferred to a suitable authorized collection center Plastic materials fiberglass gaskets tires materials to be sent to landfills or in a special recycling center Make sure you have local permissions before using the ro...

Page 50: ...ied The manufacturer s obligations are limited to the replacement of defective parts Except for initial defects they are not covered by warranty Tires due to accidental breakage Transmission belts and related bearings Battery The actions described below which obviously can not cover the entire range of potential misuse of the robot to be considered absolutely prohibited because they can invalidate...

Page 51: ...expressly authorized Use the robot like a people carrier Lift it up during use Deliberately direct the robot towards objects and or people Start the robot in the presence of unattended children or people unable to assess the risks arising from the robot Touch live parts Maneuver the robot under the influence of alcohol or drugs Use the robot on wet icy or slippery surfaces in areas with swimming p...

Page 52: ...RoHS Directive 2012 19 EU known as WEEE Directive 2001 95 EC known as General Product Safety UNI EN ISO 12100 1 2010 standard General principles of design UNI EN ISO 13849 1 2008 Standard Safety of machinery Parts of safety related control systems CEI EN 60204 standard Electrical equipment of the machinery EN 61000 6 4 2007 A1 2011 standard And it is therefore in compliance with the directives and...

Page 53: ...Ra Ro 1 0 User and maintenance manual Pag 52 APPENDIX 1 VISUAL MARKERS ...

Page 54: ...Ra Ro 1 0 User and maintenance manual Pag 53 ...

Page 55: ...Ra Ro 1 0 User and maintenance manual Pag 54 ...

Page 56: ...Ra Ro 1 0 User and maintenance manual Pag 55 richies ...

Page 57: ...Ra Ro 1 0 User and maintenance manual Pag 56 ...

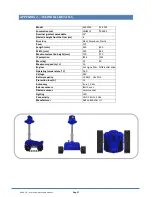
Page 58: ...dth mm 540 665 Maximum elevation height mm 750 770 IP protection IP54 IP54 Mass kg 15 20 Maximum speed m s 1 0 1 Engines 2x Engine 50w Differential drive Operating temperature C 0 40 0 40 Voltage 28V 28V Battery capacity 10 Ah h LiFePO4 10 Ah h Protection fuse A 15 15 Autonomy 4 ore 2 km 4 ore 2 km Balance sensors IMU 9 axes IMU 9 assi Obstacle sensor Laser scanner Laser scanner Lighting LED LED C...

Page 59: ...64bit Base frequency 1 6 Ghz Maximum frequency 2 7 Ghz Core count 2 Hyper Threading technology TDP 15 W RAM SOLID STATE DDR3 4 GB Storage SSD 60GB Wi Fi IEEE 802 11 abgn DualBand Wi Fi 2 4 5 6 GHz Ethernet 10 100 1000 Bluetooth 2 1 2 1 EDR 3 0 4 0 The installed operating system is the Worldwide Robot Operating System ROS standard which allows a total expandability and integration with custom appli...

Page 60: ...aterial in the area Avoid immersion of the robot in water approach to areas where there are open flames or fire and use in hazardous environments explosives paints highly flammable material Do not use the robot in the presence of children or people unable to assess the risks arising from the movement and action of the robot or in the presence of unattended animals The use of the robot is allowed o...

Reviews: