7
Appendix D:
Drying Out Procedure
nVent.com
|
71
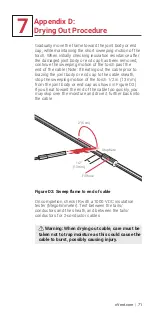
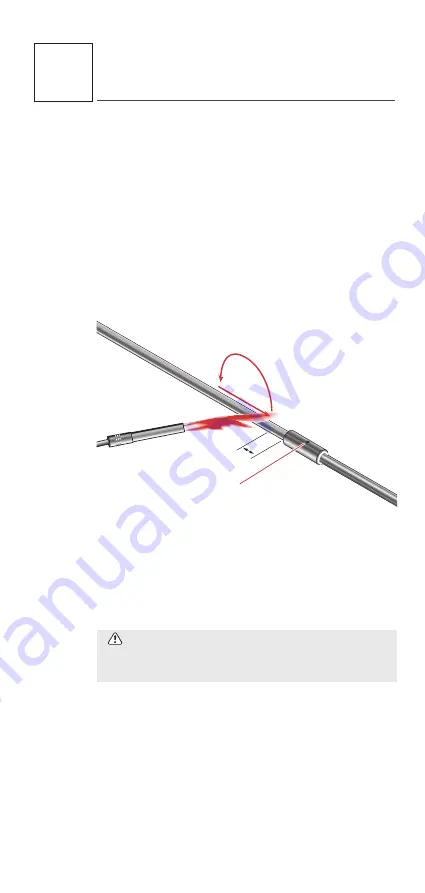
Gradually move the flame toward the joint body or end
cap, while maintaining the short sweeping motion of the
torch. When initially checking insulation resistance after
the damaged joint body or end cap has been removed,
continue the sweeping motion of the torch past the
end of the cable (Note: If heating out the cable prior to
brazing the joint body or end cap to the cable sheath,
stop the sweeping motion of the torch 1/2 in (13 mm)
from the joint body or end cap as shown in Figure D2).
If you heat toward the end of the cable too quickly, you
may skip over the moisture and drive it further back into
the cable.
2" (5 cm)
Stop here
Fill hole
1/2"
(13 mm)
Figure D2: Sweep flame to end of cable
On completion, check IR with a 1000 V DC insulation
tester (Megohmmeter). Test between the tails/
conductors and the sheath, and between the tails/
conductors for 2-conductor cables.
Warning: When drying out cable, care must be
taken not to trap moisture as this could cause the
cable to burst, possibly causing injury.


