104
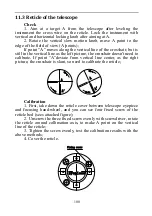
Cross center on the ground
A
C
B
0
5. Repeat step 4, check and calibrate until it meet the
requirements;
6. With the laser plummet, unbolt the laser cover, using 1 # hex
wrench to adjust the three screws, fasten one side and loosen the other
side, and adjust the laser flare to point O;
7. Put the cover back in place.
11.8 Addictive constant (K)
The instrument constant is inspected when it out, and correct it
inside the machine, make K = 0. Instrument constant change rarely,
but we suggest that check it this way for one or two times each year.
The checkout should be done in the standard baseline, or you can take
the following simple method.
Checkout
1. Choose a flat field A to set up and level the instrument , mark
three points A
、
B
、
C in the same line ,their interval is 50m, and set up
the reflection prism accurately;
2. After setting the temperature and atmospheric pressure of the
instrument, measure the horizontal distance of ‗A B‘ and ‗ AC‘
accurately;
3. Place the instrument at point B then centering it accurately to
measure the horizontal distance of BC precisely;
4. Obtain the distance measurement constant of the instrument:
K= AC-(AB+BC);
K should be close to zero, if | K | > 5 mm,it should be send to
standard baseline field for strict checking.You can calibrate it based
on the checking value.
Calibration
If it turns out the instrument constant does not close to 0 but
changing after strict inspection, you need to calibrate it, and set the
instrument additive constant according to the comprehensive constant
K value. Such as: the K has been measured as ‗-5‘ according to the


