background image

STEP 

8 - MARKING THE HOLES FOR THE END WALL BRACKET

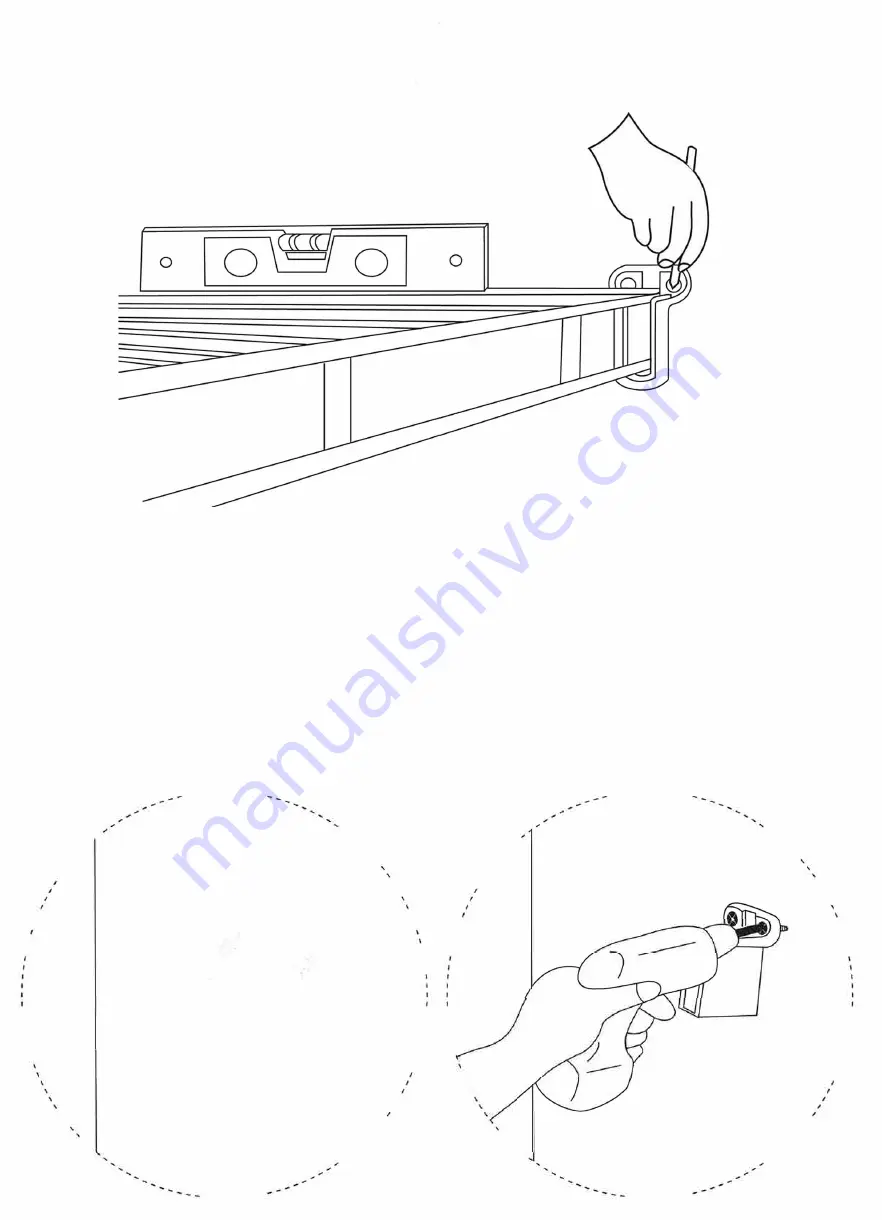
Where the end of a shelf meets a wall, slide an 

End Wall Bracket 

into position and level the shelf. 

Mark the wall through the holes of the 

End Wall  Brackets. 

STEP 9 - DRILLING THE HOLES AND INSERTING THE WALL ANCHORS 

Remove the 

End Wall Bracket 

and drill the holes over the marks. 

Push the 

Wall Anchors 

into the holes as in 

Fig. 4. 

Position the 

End Wall Bracket 

into place and drill into the wall anchors as in 

Fig. 5. 

---------

---------

Fig.4 

Fig.5 

'

' ' 

r#Ji) 

0

0

r# 

\

'

-------

-------

7

Summary of Contents for GENERIC SHELVING

Page 1: ...E SHELF INSTALLATION GUIDE For nzwardrobes ventilated shelving systems For an online installation guide go to nzwardrobes co nz installation Or to speak to one of our friendly staff Phone 0800 nzwardr...

Page 2: ...no matter what your shelving layout is follow these steps for installation 4 Go to nzwardrobes co nz installation for online installation videos recommended 5 The shelves can be cut down using bolt c...

Page 3: ...PLE OF INSTALLED WARDROBE SHELF STEP 1 MARKING THE WALL Measure 1785mm from the floor on the left hand side then measure 60mm in from side wall Make a mark on the wall Do the same on the right hand si...

Page 4: ...STEP 2 DRILLING 4 Drill holes where you have marked the wall STEP 3 Push the Back Wall Clips half way into the holes as in Fig 2...

Page 5: ...Hang the shelves flat against the wall over the Back Wall Clips in the correct position as shown in Fig 3 5 STEP5 DRILLING THE REMAINING HOLES Drill holes between the wire 400mm apart Remove the shel...

Page 6: ...STEP 6 FIXING THE BACK WALL CLIPS Push the Back Wall Clips all the way into the holes and using a Drill drill the screws in to tighten STEP 7 CLIP THE SHELF IN Fit the shelf into the Back Wall Clips 6...

Page 7: ...of the End Wall Brackets STEP 9 DRILLING THE HOLES AND INSERTING THE WALL ANCHORS Remove the End Wall Bracket and drill the holes over the marks Push the Wall Anchors into the holes as in Fig 4 Posit...

Page 8: ...STEP 10 Check shelving is clipped securely into brackets Please Note If required see following page for the Support Bracket Installation 8...

Page 9: ...Anchor into the hole Fix the Support Bracket to the wall with a screw through both the Support Bracket and Wall Anchor o 9 Saddle Clip Fig 2 We recommend finding a wall stud for extra strength Positi...

Reviews: