18
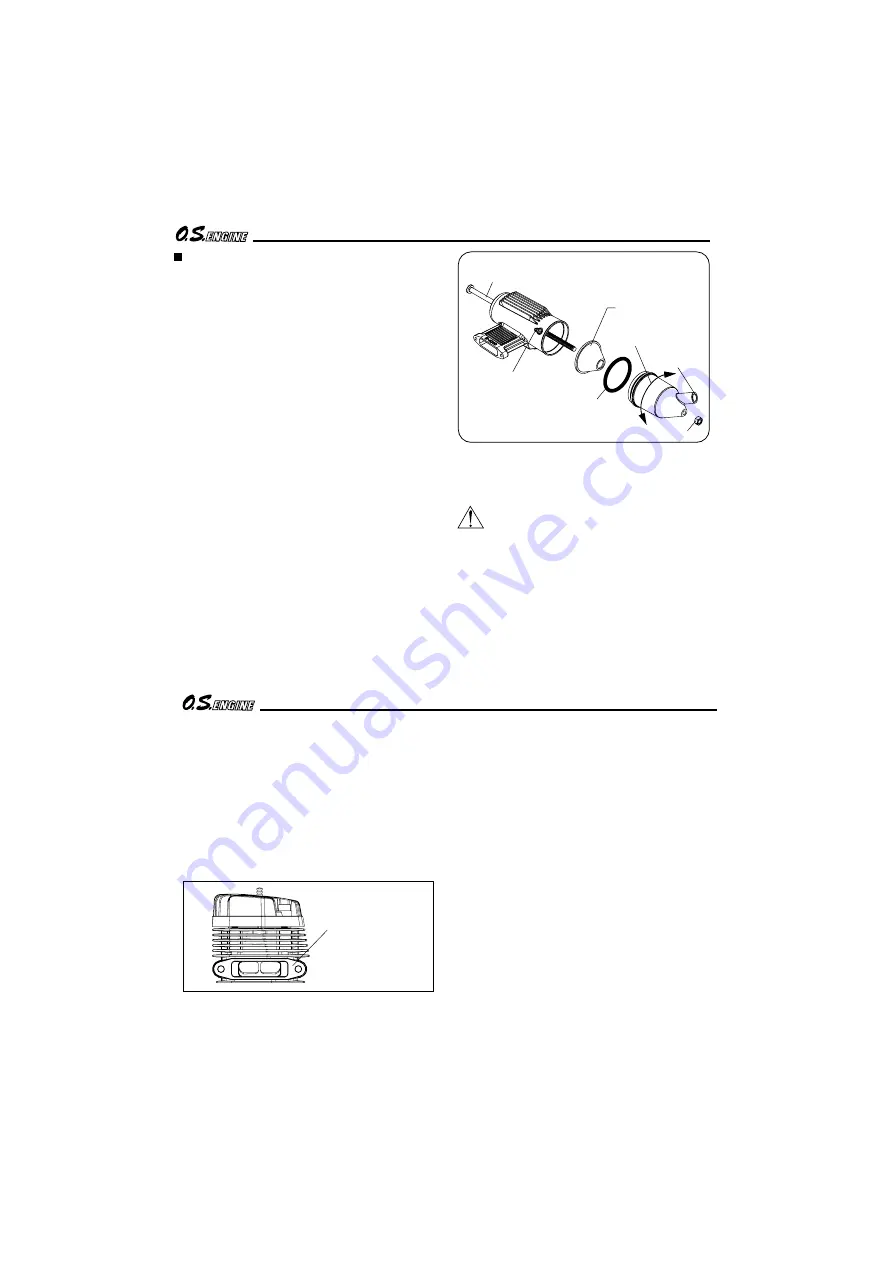
The exhaust outlet of the silencer can be rotated
to any desired position in the following manner:
Loosen the locknut and assembly screw.
Set the exhaust outlet at the required posi-
tion by rotating the rear part of the silencer.
Re-tighten the assembly screw, followed by
the locknut.
INSTALLING SILENCER
Secure the silencer to the engine by means of
two retaining screws supplied after the engine is
securely mounted to a test bench or a model.
It is recommended to seal the fitting face of
engine exhaust and silencer with silicone sealant.
Model engines generate considerable heat.
Do not touch any part of your engine until
it has cooled. Contact with the muffler
(silencer), cylinder head or exhaust header
pipe, in particular, may result in a serious
burn. Keep your hands and face away from
exhaust gas or you will suffer a burn.
Reminder!
1)
2)
3)
Assembly screw
Cone baffle
Turn to requlred position
Exhaust outlet
Locknut
Exhaust pressure nipple
E-4010A Silencer
"O" Ring
19
Note on silicone sealant
Do not over-apply
silicone sealant
When applying silicone sealant to the engine's
exhaust, do not over apply as the excess sealant
may get into the engine's internal parts and
possibly foul the glowplug causing the engine to
quit or experience abnormal engine operation. If
this happens, remove the head, clean out the
sealant, and replace the glowplug.


