Zeta 5W Series Manual - V2.8
© Oak Stoves 2018
16
against a wall, we recommend a minimum clearance of 75mm to prevent restricting airflow.
Building regulations regarding these appliances govern that the hearth must extend at least
300mm out in front of the stove and 250mm to each side. For safety we recommend that you
ensure there is a minimum of 300mm clearance around the entire appliance. This appliance
needs a good amount of air circulation around it, however if you are installing the stove in a
fireplace ensure that there is at least 250mm gap to each side and at least 300mm above the
top of the stove in order to prevent overheating and allow for good heat output.
You may wish to connect the rear Air Wash vent up to an external supply of air, this can be done
provided the connection is secure and doesn’t prevent the Air Wash Control from opening
and closing fully. A rear clearance of 75mm is still recommended in these circumstances. Also
you will need to consider how close your mantelpiece or any other objects directly above the
fireplace are, to prevent damage due to high temperatures.
Flue Connection
The Zeta Series has a top output connection, the type of installation that is best for your home
will depend on the chosen location for the stove. You must ensure that all building and health
and safety regulations that apply to your chosen type of installation are conformed to before
you begin to use the stove.
Your stove will normally be delivered assembled ready for connection.
Connecting The Flue
The flue collar must be sealed with fire cement and all flue connections must be well sealed.
Any horizontal sections of flue must not be longer than 150mm.
With most flue connections your installer should fit a soot door in your chimney to allow
access to sweep it, alternatively this chimney can be swept through the stove
(see Chimney
Sweeping section)
.
On Delivery Of The Stove
Please ensure that the vermiculite bricks, throat plate and baffle plate have not moved in
transit
(see page 19)
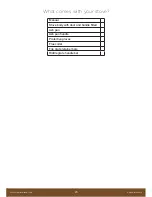
and that the glass window is intact. Also check that you have all the
required parts
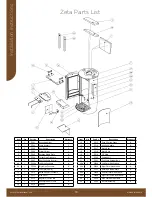
(see back page)
before installation.
After Installation
Upon completion of the installation you should allow time for the fire cement and mortar to
dry out and set properly. Once dry you may begin preparing the fire for its first fire. Ensure
that the throat plate, baffle plate and front grill are in place and that the door and vents close
properly before lighting.
When you’re ready to start the fire, follow the instructions detailed in the Lighting section
relevant to your type of fuel. Once alight, check that the fumes and smoke are being drawn
up through the chimney correctly and that all joints and seals are not emitting fumes.
Your installer should advise on the operation and maintenance of your stove and chimney
and retain this manual for future reference.
Ins
talla
tion Ins
tructions


