background image


VMS


Programming


Holiday Schedules 


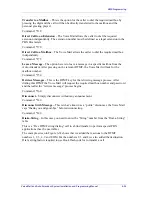
Figure 6-41: Auto Window – Holiday Schedules Tab 

Holiday’s Schedule

 – This list (up to 50) shows the dates that are defined as 

holidays.  If the holiday lasts more than 1 day, each of the holiday days must be 
inserted separately. 

Command: *470 


NOTE 

Pressing the add button adds a new holiday and pressing the remove button deletes the 

selected days. 
The default is empty. 


Voice Mail and Auto Attendant System Installation and Programming Manual 

6-32


Summary of Contents for VoxBox

Page 1: ...VoxBox VoxBox Lite User Guide For Version 7 0 VoxBox s Oak Telecom Ltd 2005 Release 1 00 ...

Page 2: ......

Page 3: ...acking 3 1 3 3 Installing the Unit 3 1 3 3 1 Expanding the System to 4 Ports VoxBox only 3 3 4 DTMF Programming 4 1 4 1 General 4 1 4 2 Entering and Exiting the Programming Mode 4 1 4 3 First Time Programming 4 1 4 3 1 Defining PBX Parameters 4 2 4 3 2 Setting the Time and Date 4 8 4 3 3 Programming the Operational Modes 4 8 4 4 Programming the Unit 4 11 4 4 1 Creating Mailboxes 4 11 4 4 2 Creatin...

Page 4: ...essages 4 28 4 5 7 System Message Setting 4 29 4 5 8 Listening to the Software Version Number 4 29 4 5 9 Resetting the System 4 29 4 5 10 Adjusting Recording Length 4 29 5 Switching to Computer Programming 5 1 5 1 General 5 1 5 2 Connecting the Unit to the Computer 5 1 5 3 System Requirements 5 2 5 4 Installing the VMS 5 2 5 5 Starting VMS 5 3 5 5 1 Communication Setup 5 4 6 VMS Programming 6 1 6 ...

Page 5: ...ttendant Menu 6 21 6 5 1 Script Menu 6 21 6 5 2 Time Date and Weekly Schedules 6 27 6 6 Voice Mail Menu 6 32 6 6 1 List of Mailboxes 6 32 6 6 2 Notification Parameters 6 36 6 6 3 Groups of Mailboxes 6 37 6 7 Line Monitor Menu 6 38 6 7 1 Activate the Line Monitor 6 38 6 8 Statistics Menu 6 39 6 8 1 General 6 39 6 9 Wizard Menu 6 40 6 10 Help Menu 6 41 7 User Operation Instructions 7 1 7 1 General 7...

Page 6: ... an Operation Type 8 3 8 2 3 Selecting a destination 8 4 8 2 4 Defining the Time to Wait for the First DTMF Character 8 4 8 2 5 Defining the Time to Wait Between DTMF Characters 8 4 8 2 6 MATRA PBX Support 8 5 8 3 Sample Programming 8 5 8 3 1 Working with the SIEMENS Hicom 150E Office PBX 8 5 9 Troubleshooting 9 1 9 1 General 9 1 9 2 Troubleshooting Guide 9 1 10 Programming Commands 10 1 11 Progra...

Page 7: ...2 1 15 Appendix 3 Frequently asked questions 3 1 16 Appendix 4 Testing 4 1 17 Appendix 5 Initialisation 5 1 18 Appendix 6 VoxBox returns 6 1 19 Appendix 7 Contacting us 7 1 Voice Mail and Auto Attendant System Installation and Programming Manual v ...

Page 8: ...ure 6 3 Open Window 6 2 Figure 6 4 Save As Window 6 2 Figure 6 5 Print Settings Menu 6 3 Figure 6 6 Print Window 6 3 Figure 6 7 Print Preview Window 6 4 Figure 6 8 Print Setup Window 6 4 Figure 6 9 Options Window Toolbar Configuration Tab 6 5 Figure 6 10 Options Window File Location Tab 6 5 Figure 6 11 Communication Menu 6 6 Figure 6 12 Read Parameters Window 6 6 Figure 6 13 Send Parameters Window...

Page 9: ... Tab 6 25 Figure 6 35 Script Menu Window Script Recording Tab 6 26 Figure 6 36 Script Menu Window Script Status Tab 6 26 Figure 6 37 Time Date Window 6 27 Figure 6 38 Time Date Window 6 28 Figure 6 39 Auto Window Weekly Schedule Tab 6 29 Figure 6 40 Auto Window Auto Breaks Tab 6 30 Figure 6 41 Auto Window Holiday Schedules Tab 6 31 Figure 6 42 Voice Mail Menu 6 32 Figure 6 43 List of Mailboxes Win...

Page 10: ...Table of Contents Figure 6 54 Help Menu 6 41 Figure 6 55 Help Topics Window 6 41 Figure 7 1 Quick Reference Guide 7 7 Voice Mail and Auto Attendant System Installation and Programming Manual viii ...

Page 11: ...ilbox Creation Commands 4 13 Table 4 6 Program Notification for Mailboxes Commands 4 15 Table 4 7 Recording Script Messages Commands 4 16 Table 4 8 Detection Commands 4 24 Table 4 9 Transfer Modes Programming Commands 4 25 Table 8 1 Entering an In Band DTMF Code Using a Telephone 8 2 Table 10 1 DTMF Programming Commands 10 1 Voice Mail and Auto Attendant System Installation and Programming Manual ...

Page 12: ......

Page 13: ...ming and operation of the Auto Attendant and Voice Mail System The information in this manual is valid for the following devices Voice Mail 128 mail boxes VoxBox Voice Mail 32 mail boxes VoxBox Lite Note that the only differences between these units are Feature VoxBox VoxBox Lite Mail boxes 128 32 Storage capacity 10 hours 5 hours Number of ports 2 or 4 2 The term unit in this manual refers to bot...

Page 14: ... Instructions 8 Programming the In Band Protocol 9 Troubleshooting 10 Programming Commands 11 DTMF Programming Forms 12 System Messages 13 Appendix 1 Pre installation 14 Appendix 2 Installation 15 Appendix 3 FAQ 16 Appendix 4 Testing 17 Appendix 5 Initialisation 18 Appendix 6 VoxBox returns 19 Appendix 7 Contacting us Voice Mail and Auto Attendant System Installation and Programming Manual 1 2 ...

Page 15: ...an be integrated with most types of PBXs through the analog ports or through the RS 232 serial port The system administrator can be programmed by the computer using the Voice Mail System Maintenance Software Utility Program VMS or by touch tone telephone The unit installation is quick and easy Just mount it on a wall next to the PBX and connect it to the SLT interfaces and to the main power supply...

Page 16: ...nce Software Utility Program VMS The installer should save the files containing the parameters set in each installation Integration with your PBX The system administrator can integrate the unit with the PBX through In Band DTMF Protocol integration using DTMF strings This type of integration is achieved by setting up the communication parameters on the PBX and the units including answering a call ...

Page 17: ...gration and installation of the unit with the PBX 2 1 2 Automated Attendant Features The unit s automated attendant answers incoming calls and through a series of recorded menus and telephone directories helps the callers reach the required extensions Opening Greeting The unit plays a pre recorded greeting to callers The opening greeting usually includes the organization s name how to reach an ext...

Page 18: ...efined schedule The operator can override the pre defined system schedule and switch manually to day night break or holiday mode using a password Holiday Schedules The unit switches automatically to Holiday mode on dates programmed as holidays During holidays the unit answers calls with the special holiday greeting Fax Detection If the unit detects a fax tone CNG during the opening greeting it aut...

Page 19: ...uage in which the system messages prompts are played Answering on the First Ring To avoid delays the system administrator can set up the unit on each individual port to answer incoming calls on the first ring Script Menus The unit supports up to 39 script menus A script menu is a recorded announcement that can accept a digit entry 0 9 during playback Based on the digit entered the unit can take on...

Page 20: ...ting of the extension called and then they can leave a message Day and Time Stamp The system administrator can program the unit to indicate the start of each message and the day and time it was recorded Message Deletion Mailbox owners can manually delete messages or the system administrator can program the unit to automatically delete all messages after a specified number of days Message Forwardin...

Page 21: ...ding Length The system administrator can select the length of all recorded messages in the unit The selected length will control the following types of messages scripts greetings names and incoming messages Changing this parameter will affect the operation unit Automatic Gain Control AGC When this feature is enabled the unit automatically adjusts the line volume so incoming messages will be record...

Page 22: ...customized Busy No Answer and Do Not Disturb menus in up to three different languages simultaneously Voice Mail features include mailboxes mailbox groups and various types of message notifications for each mailbox The VoxBox comes with two lines and 10 hours recording time You can upgrade the unit by adding a 2 port expansion card to the motherboard to provide four lines The VoxBox Lite comes with...

Page 23: ...ing Figure 2 3 Unit With Cover Removed 2 3 1 Side Panel Figure 2 4 Unit Side Panel No Connector Function 1 Power Supply Connector Connects the unit to the external power supply 2 RS 232 Connector Connects the unit to the PBX or a PC 3 2 RJ 11 Sockets Connects the unit to 2 or 4 PBX extensions VoxBox Connects the unit to 2 PBX extensions VoxBox Lite Voice Mail and Auto Attendant System Installation...

Page 24: ...f Off Holiday Mode Manual Off Off On Off Break Mode Manual On On Off Off Day Mode Auto On Off Off On Night Mode Auto Off On Off On Break Mode Auto On On Off On System Error1 Off Flashing Off Off System Error1 Flashing Flashing Flashing Flashing System Error1 Flashing Flashing Flashing Off Automatic Self Test On On On On 1 Please contact your local dealer Voice Mail and Auto Attendant System Instal...

Page 25: ... hook Impedance 50VDC 40 VAC 25Hz 3000Ω Ring Detect 27 to 100VAC 16 to 60Hz DC Resistance off hook 24 to 66VDC 20 to 100mA 100 to 350Ω Impedance off hook 300 to 3400Hz 500 to 700Ω Imbalance Ratio 300 to 3400Hz 46dB Return Loss 300 to 3400Hz 18dB Current during Break 700µA DTMF Transmission Frequency Tolerance 1 5 Frequency Level High Group 6 to 8 dBm Frequency Level Low Group 8 to 10 dBm Inter dig...

Page 26: ......

Page 27: ...otice any physical damage report it to you local dealer immediately 3 3 Installing the Unit To install the unit 1 Mount the unit on a wall close to the PBX cabinet Use the drill template to place the two screws 2 Remove the side panel cover 3 Connect the RJ 11 connector on one end of the cables to the RJ 11 sockets on the side panel of the unit Connect the other end of the cables to one or two ana...

Page 28: ...e unit turns on 6 If your PBX supports a full authorized RS 232 integration with the unit connect one end of the RS 232 cable to the unit s RS 232 connector and the other end to the RS 232 connector of the PBX 7 Call each unit line from any extension and verify the answer You should hear the default greeting system message no 000 See Chapter 12 8 Replace the side panel cover 9 Program the unit acc...

Page 29: ... by unscrewing the four screws 4 Place the two plastic spacers into the corresponding holes 5 Insert the expansion card into the corresponding J9 J10 connector 6 Connect one end of the 4 wire cable to J5 on the motherboard and the other end to J3 on the expansion card 7 Replace the top panel cover and plug the 9 VDC adapter into the main power supply outlet to turn the unit on 8 Reconnect all the ...

Page 30: ......

Page 31: ...0 5 Dial the System Administrator s password default 1234 to enter the programming mode To exit the programming mode Dial 900 or do not dial any number for a consecutive one minute NOTE If you exit the programming mode by dialing 900 the unit plays the opening menu You can then check the changes that were made to the system 4 3 First Time Programming When programming a unit for the first time foll...

Page 32: ...4 4 4 Make sure you define the mailboxes before building Automated Attendant script menus 4 3 1 Defining PBX Parameters To integrate the unit with your PBX apply the PBX parameters to the unit To obtain your current PBX parameters check your PBX User s Manual or the current PBX setup configuration To configure the unit to detect the in band DTMF protocol sent by your PBX refer to Chapter 7 NOTE Do...

Page 33: ...nds Legal PBX Extensions 320 Y First Ext Last Ext where Y is a group number 0 9 Example 320 0 330 350 320 1 355 375 You can define up to 10 groups of legal extensions If a caller dials an extension by direct dialing code 170 The unit checks if the extension is legal If the extension is not legal The unit does not transfer the call None Resetting a group 320 Y 000 000 the two groups of zeros can be...

Page 34: ...ode for all extensions 350 X Y X 1 All extensions except the operator X 2 Operator extension only Y 0 Non Supervised Y 1 Supervised Mode Y 2 Semi Supervised mode Non supervised Day operator Night operator Fax and Supervisor s extension numbers 360 X YYYY where X 1 Day operator X 2 Night operator X 3 Fax extension X 4 Supervisor extension One mailbox can be defined as Supervisor When storage memory...

Page 35: ... ms X DTMF off 0000 3000 ms X DTMF on 0000 3000 ms YYYY Cadence in milliseconds in steps of 20 milliseconds 100 ms 500 ms 500 ms 240 ms 240 ms 200 ms 60 ms Length of the DTMF cadence sent by the PBX e g a Disconnect code Note This parameter is needed to calculate the time which must be truncated from the end of the message which is terminated via the Disconnect code 372 X where X is the length of ...

Page 36: ...be initiated Enabled DTMF amplitude 379 X where X volume level 1 9 9 Loudest 5 Procedural codes sent to the PBX in order to perform a specific task 380 X CODE 1 X 1 LED1 notification code X 2 LED2 notification code X 3 LED notification off code X 4 Transfer code X 5 Recall from Busy X 6 Recall from No Answer CODE 1 Respective PBX code None None None Flash 1 Ext Flash 1 Flash 1 Delete a specific pr...

Page 37: ...DE 1 DTMF Character Number to Dial Digits 0 9 0 9 Extension 0 Pause 1 indicates a 1 second pause Hook Flash 1 2 Hook Flash 2 3 4 A 5 B 6 C 7 D 8 Voice Mail and Auto Attendant System Installation and Programming Manual 4 7 ...

Page 38: ...e month 01 31 MM month 01 12 YY year 00 99 Example 430 15 03 97 March 15 1997 Note 00 represents Year 2000 The day of the week is automatically calculated by the system based on the entered date Listening to the system time 440 The system announces the date and time 4 3 3 Programming the Operational Modes The unit can operate in Day Night Break or Holiday mode If the unit is in the Auto mode it au...

Page 39: ... 450 D hh mm hh mm where D is the day of the week 1 7 1 First hh mm start of work time in 24 hour format Second hh mm end of work time in 24 hour format Repeat for all days of the week Example 450 1 08 30 1700 means that the unit will play the Day mode opening greeting on Monday from 8 30 until 17 00 It will play the Night mode opening greeting the rest of the time 1 Day 1 is Monday Setting the Br...

Page 40: ...eeting on December 2nd from 8 15 until 23 45 Delete all holidays on a specific date 470 DD MM where DD Day of the month 01 31 MM month 01 12 Delete all holidays on a specific month 470 MM MM month 01 12 Delete all holidays 470 External Notification Active Time 490 hh mm hh mm where hh mm Start time Hour and minutes in 24 hour format hh mm End time Hour and minutes in 24 hour format Example 1 490 0...

Page 41: ...l mailbox can also be created for users who do not have extensions When a caller dials a virtual mailbox number on the Automated Attendant menu the call is immediately transferred to the Do Not Disturb menu and the caller is given the option to leave a message You may use the external notification features for the virtual mailboxes Do not select internal notification because virtual mailboxes do n...

Page 42: ...ault B 1 Skip the date and time stamp Defining whether to play or skip the time and date stamp during message playback for one mailbox 531 Mailbox Number B where B 0 Play the date and time stamp default B 1 Skip the date and time stamp Defining a language for a range of mailboxes 532 First Mailbox Last Mailbox Z where Z 1 2 or 3 language number Defining a language for a mailbox 533 Mailbox Number ...

Page 43: ...he system configuration Notification may be local or remote NOTE Notification is always done on the second line 4 4 3 1 Local Notification For local notification you can select one of the following options None The notification feature is disabled Message Light On 1 The unit signals the PBX that a mailbox has received a message The PBX then turns on the message light of the telephone extension If ...

Page 44: ...mbination of A D 0 9 and Pause when setting the remote notification telephone number After remote notification is enabled the unit will dial the remote phone or pager number and notify the mailbox owner of any new messages After entering the password the mailbox owner can retrieve his messages The duration of remote notification rings is programmed using code 730 The unit stops sending Ring notifi...

Page 45: ...x X where X is defined as above Permitting remote notification for a range of mailboxes 710 First Mailbox Last Mailbox Y where Y 0 remote notification is not permitted Y 1 remote notification is permitted Disable remote notification for all mailboxes 710 Permitting remote notification for one mailbox 711 Mailbox Y Y 0 remote notification is not permitted Y 1 remote notification is permitted Ring N...

Page 46: ...icated by default to specific script messages Script message number 00 to the Day Mode Opening Menu Script message number 10 to the Night Mode Opening Menu Script message number 15 to the Break Time Opening Menu Script message number 20 to the Holiday Mode Opening Menu The rest of the script messages 01 09 11 14 and 16 19 may be used in all modes without limitations Each script message has three p...

Page 47: ... NOTE Do not define the Operator ID digit on script messages The command codes used to build the Automated Attendant Script Menu are presented on the following pages You can program one of the following actions for each script message Play another script message Return to the opening menu Play another script message and change the language Transfer the call to an extension Transfer the call to the...

Page 48: ...ng playback of script message 00 NOTE Make sure to record script message 02 4 4 6 3 Select Opening Script Selects the opening script message Command 112 XX YY Z XX Default script number 00 10 15 or 20 YY Replacement script number 00 20 Z Line number 1 4 4 4 6 4 Transfer to the Main Company Greeting Transfers the caller to the Main company greeting s menu Used mainly by Busy and No Answer script me...

Page 49: ...anguage is the language the unit automatically uses if no other language has been selected To change the default language dial 900 and the administrator password to enter the programming mode then dial Command 118 Z Z 1 is the first language default Z 2 is the second language Z 3 is the third language NOTE The available languages are listed on the bottom panel of the unit 4 4 6 7 Transfer the Call...

Page 50: ... 10 Transferring the Call to a Mailbox Transferring the caller to a specific mailbox number The mailbox must be defined and existing Command 130 XX B Mailbox number Example 130 01 5 152 Transfers the call to mailbox 152 when 5 is dialed during playback of script message 01 4 4 6 11 Disconnecting the Line Disconnects the call at the end of the script message or if the caller dialed the disconnect d...

Page 51: ...to record a personal greeting change his password etc 4 4 6 14 Directing a Call to an Extension Enables the caller to dial an extension directly by programming the first digit of the extension When a caller dials the first digit of an extension during playback of a script message the unit stops the message and waits for the rest of the digits of the extension The number of digits in an extension i...

Page 52: ...180 XX B Example 180 21 3 The unit places the call on hold for 10 seconds before trying to transfer the call again when 3 is dialed during playback of script message 21 4 4 6 17 Blind Transfer to a Busy Extension Transfers a call in blind mode to a busy extension Valid only for script messages 21 22 for the first language 31 32 for the second language and 41 42 for the third language which are res...

Page 53: ...ame 4 4 7 2 Transferring to Directory Listing Transfers the call to the directory listing Command 111 XX B XX Script number Example 111 00 5 Play the directory listing when 5 is dialed during playback of script message 00 4 4 8 Resetting Script Message Programming to Default Resets a complete script message or only one entry This command does not delete the recorded script message Resetting a comp...

Page 54: ...hecking the status of the extension You can configure the unit to detect Answer Busy and Do Not Disturb signals by recognizing the DTMF codes sent by the PBX or analyzing the Call Progress tones If DTMF signals are selected for the supervised mode you must define DTMF codes for the Answer Busy and Do Not Disturb conditions NOTE Do not forget to enter programming mode by dialing 900 and the adminis...

Page 55: ...perator and to the rest of the extensions Table 4 9 Transfer Modes Programming Commands Operation Command Transfer mode for all extensions 350 X Y where X 1 All extensions except the operator X 2 Operator extension only Y 0 Non Supervised Default Y 1 Supervised Y 2 Semi Supervised 4 4 9 1 Detecting a Busy Extension If the unit detects a busy extension it performs a Recall from Busy and by default ...

Page 56: ... the third language 4 4 9 4 Do Not Disturb Using the user menu a mailbox owner can activate the Do Not Disturb mode When a caller dials a Do Not Disturb extension the unit plays system message 121 and does not transfer the call to the extension The System Administrator can replace this message with script message 25 in the first language script message 35 in the second language and script message ...

Page 57: ...e mailbox number The mailbox owner can change the mailbox password 4 5 2 Activate Flash Memory Force Reorganize The Flash memory reorganize option automatically reorganizes and optimizes the data stored in the unit The system administrator can activate the Flash memory Force Reorganize option by calling the unit and during the opening greeting dialing 900 Password 610 NOTE This option cannot be de...

Page 58: ...assword to enter the programming mode then dial 690 Z XXX Z the language number Z 1 is the first language Z 2 is the second language Z 3 is the third language XXX is the message number See Chapter 12 for a list of system messages 4 5 6 Playing All System Messages To listen to all system messages dial 900 and the administrator password to enter the programming mode then dial 691 Z Z the language nu...

Page 59: ... can reset the unit to its factory default settings by dialing 900 and the administrator password to enter the programming mode then dial 654 XXXX Where XXXX the System Administrator s password NOTE If you plan to reconfigure the unit for use with your current PBX and the unit had previously been configured for use with a different PBX type use this command to clear all existing settings and retur...

Page 60: ... length dial 900 and the administrator password to enter the programming mode then dial 790 X X 1 9 minutes This parameter is set to two minutes by default Voice Mail and Auto Attendant System Installation and Programming Manual 4 30 ...

Page 61: ...to the unit We recommend that you save the new configuration in a file Using the VMS you can also Open a configuration file to make changes and then to upload them to the unit Recognize connected unit Open the corresponding default configuration file View unit statistics e g line and memory utilization 5 2 Connecting the Unit to the Computer To enter the programming mode 1 Remove the side panel co...

Page 62: ...M memory 40 MB free hard disk space Microsoft Windows 95 Windows 98 Windows NT SP64 Windows 2000 Pro and Windows XP Internet Explorer 5 5 or higher 5 4 Installing the VMS To install the VMS 1 Exit all open applications 2 Insert the CD with the VMS installation program into the CD drive 3 Use Windows Explorer to locate the setup file 4 Double click the setup file 5 Follow the instructions on the sc...

Page 63: ... continue to work in Off line mode press Cancel Applications will start to download configuration data During transfer process the target device will be recognized automatically The device s name will be shown on the Main screen For to continue to work in offline mode application will offer to select the device for which configuration file will be created Figure 5 3 Product Type Window Voice Mail ...

Page 64: ... be checked initially By default COM Port 1 is used to send data to and receive data from the unit To change this setting 1 Select Communication ComPort COM PORT Selection window opens Figure 5 2 2 Select the relevant COM Port and click OK You can now use the VMS to program the unit Figure 5 5 Communication Menu Voice Mail and Auto Attendant System Installation and Programming Manual 5 4 ...

Page 65: ...unctions Open Save Save As Open Default Print Settings Menu Print Print Preview Print Setup Options and Exit Figure 6 1 File Menu 6 2 1 Open The Open function from the File menu opens the Product Type window Figure 6 2 where you can define the target device and then standard Windows Open screen Figure 6 3 via which you can open an existing configuration file Voice Mail and Auto Attendant System In...

Page 66: ... disk In case the file has not been saved previously the Save As screen will appear 6 2 3 Save As The Save As function from the File menu saves the current open file with the specified name in the specified directory You can save files with the following extensions VUP corresponding to VoxBox VUJ corresponding to VoxBox Lite Voice Mail and Auto Attendant System Installation and Programming Manual ...

Page 67: ... Save As Window 6 2 4 Open Default The Open Default function in the File menu opens the default device s file You must first specify the target device Voice Mail and Auto Attendant System Installation and Programming Manual 6 3 ...

Page 68: ...ng Figure 6 5 Print Settings Menu 6 2 6 Print The Print function in the File menu opens the default Windows Print window Figure 6 6 Print Window 6 2 7 Print Preview The Print Preview function in the File menu Figure 6 7 shows a default Windows preview of the parameters that need to be printed Voice Mail and Auto Attendant System Installation and Programming Manual 6 4 ...

Page 69: ...Print Setup Window 6 2 9 Options The Options function in the File menu consists of two screens The Toolbar Configuration screen and the File Location screen 6 2 9 1 Toolbar Configuration In the Toolbar Configuration screen Figure 6 9 you can select the toolbars and tooltips that will be displayed Voice Mail and Auto Attendant System Installation and Programming Manual 6 5 ...

Page 70: ...ation is the same as where the VMS EXE program is stored Figure 6 10 Options Window File Location Tab 6 2 10 Exit The Exit function in the File menu closes the VMS program If you have made changes to the parameters and not saved the file the program will ask if you want to save the configuration file before exiting the program Voice Mail and Auto Attendant System Installation and Programming Manua...

Page 71: ...rd and ComPort Figure 6 11 Communication Menu 6 3 1 Read Parameters The Read Parameters function in the Communications menu reads the information from the Voice Mail to PC You can edit this information Figure 6 12 Read Parameters Window NOTE When reading parameters from the unit the system will not answer any calls Voice Mail and Auto Attendant System Installation and Programming Manual 6 7 ...

Page 72: ...assword appears Figure 6 13 Send Parameters Window Figure 6 14 Password Window NOTE Before editing and sending parameters in the VMS FIRST perform a read action otherwise you may overwrite the existing information with default information or other incorrect information When sending parameters to the unit the system will not answer any calls Voice Mail and Auto Attendant System Installation and Pro...

Page 73: ...recorded via telephone for the first unit The scripts can then be transferred via the Read Send Recording functions to another unit 6 3 3 1 List of Script Recordings to be Read The List of Script Recordings button shows a screen in which scripts can be selected After selecting Script Recording numbers from the list Figure 6 16 and pressing the Add button you need to define the location where to st...

Page 74: ...ead Window 6 3 4 Send Recording Figure 6 17 Send Recording Window The Send Recording function in the Communications menu sends the script recordings from the VMS into the unit Voice Mail and Auto Attendant System Installation and Programming Manual 6 10 ...

Page 75: ...pt 00 see Figure 6 18 The delete button is used to unselect the chosen script s When a Script Recording needs to be replaced by another Script Recording number e g Script 10 needs to replace the script linked to Script Recording number 4 perform the following steps 1 Select the Script Recording number to be updated 2 Click Add 3 Change the File of Type to All Files 4 Select the Script Recording th...

Page 76: ...in a WAX file Figure 6 19 Backup Window 6 3 6 Restore The Restore function in the Communications menu enables a full restore of the unit The WAX file contains all scripts messages personal greetings and parameters Figure 6 20 Restore Window NOTE You can use a WAX file to transfer the identical contents from one unit to another Voice Mail and Auto Attendant System Installation and Programming Manua...

Page 77: ...nations After a System Init the unit will return to the manufacturers defaults Figure 6 21 System Init Window 6 3 8 Password The Password function in the Communications menu provides the possibility to change the administrator s password The password may be 4 to 8 digits long only The default is 1234 Figure 6 22 Change Password Window Voice Mail and Auto Attendant System Installation and Programmi...

Page 78: ...Selection Window 6 4 Parameters Menu Via the Parameters menu you can execute and configure the functions PBX Parameters System Parameters and In Band DTMF Protocol Figure 6 24 COM Port Selection Window 6 4 1 PBX Parameters The PBX Parameters function in the Parameters menu consists of a number of tabs which will be detailed separately Voice Mail and Auto Attendant System Installation and Programmi...

Page 79: ...fer the call to this extension In order to disable this feature leave the box empty Command 360 Operator ID The digit defined here will route calls to an operator s extension during the auto attendant scripts menus and from users mailboxes Depending on the operation mode the call will be transferred to either the day or night operator extension Command 330 NOTE Make sure that the day and night ope...

Page 80: ...are filtered for the Direct Calling from the Auto Attendant If there are a certain designated extensions that do not want theDirect Call function that extension is left out in the groups of extensions For example Group 0 has the extensions 200 203 and Group 1 has the extensions 205 299 this means that extension 204 cannot be directly contacted from the Auto Attendant scripts and if that extension ...

Page 81: ... party is busy Command 380 Recall from No Answer Code This code is only applicable for supervised mode and it is used to return the caller to the Voice Mail when the caller has been transferred to an extension that is not answered Command 380 Hook Flash Time Here the Hook Flash time of the PBX is defined Command 370 Hook Flash Time 2 This is not a programmable parameter and its only used in cases ...

Page 82: ...e Mail waits to receive DTMF signals from the PBX for busy no answer and DND Command 220 DTMF Codes from PBX The answer busy and DND signals are only programmable when changing the default from CPT to DTMF Answer Signal is the DTMF signal sent from the PBX to the Voice Mail when a call is answered in supervised mode off hook signal Busy Signal is the DTMF signal sent from the PBX to the Voice Mail...

Page 83: ...cting a disconnect situation Command 371 Disconnect Code This defines the DTMF code sent from the PBX to the Voice Mail that instructs the Voice Mail to disconnect the line Command 333 NOTE This code is sent only to VM extensions Disconnect Tone The disconnect on time and off time define the disconnect tone cadence The disconnect tone usually appears when the caller hangs up The Voice Mail will di...

Page 84: ...this parameter will affect on the operation mode of the Voice Mail Default System Language The Voice Mail supports 3 languages simultaneously Here is where system administrator determines which language out of the 3 inserted in the Voice Mail will be the default language for the system messages Command 118 Auto Gain Control When enabled this adjusts the line volume so incoming calls will be record...

Page 85: ...ine the DTMF string that is sent from the PBX to the Voice Mail only if the PBX is In Band DTMF protocol supported and Voice Mail extension is defined as a VM extension There is an option to have up to 40 strings and for each string the operation should be defined Command 200 201 202 Max Time to Wait for DTMF The maximum amount of time the Voice Mail must wait until is receives its first DTMF from...

Page 86: ...g table 6 5 1 Script Menu The Script Menu function in the Auto Attendant menu consists of a number of screens which will be shown separately A number of screens contain example information 6 5 1 1 Script Programming Figure 6 32 Script Menu Window Script Programming Tab In this screen you can define the operation for each DTMF and a view wide array of choices Voice Mail and Auto Attendant System In...

Page 87: ...e destination and to change the language until the end of the session Command 117 Max Delay Between DTMFs The maximum amount of time is defined between each DTMF in the string sent by the PBX to the Voice Mail Command 211 Directory List This is the Dial by name feature After pressing the DTMF for this option the Voice Mail will ask the caller to enter the 1st 3 letters of the first or last name of...

Page 88: ...ges This is the DTMF key for the retrieving message process After dialing this DTMF the Voice Mail will request the required mail box number and password and thereafter the retrieve message process begins Command 160 Disconnect Simply disconnects without any announcement Command 140 Disconnect with Message This is what s known as a polite disconnect the Voice Mail says thank you and good bye befor...

Page 89: ...ings to dial A string can be up to 20 digit including A D 0 9 p for pause and for Hook Flash In the example in Figure 6 33 the string starts with a hook flash pick up the phone a pause and than either a number for an outside line with pause and number or the number directly Voice Mail and Auto Attendant System Installation and Programming Manual 6 25 ...

Page 90: ...gs are defined before a call is answered on the respected line Command 310 The Table Defines which script to be played for each port Script By Port Here you can separate two companies on one Voice Mail and define the opening greeting for each port For each port there are four opening scripts defined according to the day night break and holiday modes Command 112 Voice Mail and Auto Attendant System...

Page 91: ...ript Menu Window Script Recording Tab In this screen you can define the Script Recordings loaded and deleted 6 5 1 5 Script Status Figure 6 36 Script Menu Window Script Status Tab Voice Mail and Auto Attendant System Installation and Programming Manual 6 27 ...

Page 92: ...e Auto Attendant menu provides the options to change the time date and operation mode System Time and Date current date and time by default the Voice Mail takes the time and date from your PC The system time will be shown after the Read parameters from the system otherwise PC time will be shown here Command 420 430 Mode of Operation Defines the unit s mode of operation The mode can be changed by D...

Page 93: ...ekly and holiday schedules must be programmed Should you not do so the Voice Mail will automatically play the opening greeting that was pre programmed by the system clock If a correspond script greeting is not recorded system will be switched to the Manual Day mode automatically The Schedules screen contains two windows Weekly Schedule and Holiday Schedules Voice Mail and Auto Attendant System Ins...

Page 94: ...VMS Programming Weekly Schedule Figure 6 39 Auto Window Weekly Schedule Tab Voice Mail and Auto Attendant System Installation and Programming Manual 6 30 ...

Page 95: ...day from 8 00 to 14 00 the Voice Mail will play script message 00 default day and then from 14 00 to 15 00 script no 15 default break from 15 00 to 18 00 script 00 which is the day script again and then from 18 00 to 08 00 script 10 default night Command 450 460 Voice Mail and Auto Attendant System Installation and Programming Manual 6 31 ...

Page 96: ... that are defined as holidays If the holiday lasts more than 1 day each of the holiday days must be inserted separately Command 470 NOTE Pressing the add button adds a new holiday and pressing the remove button deletes the selected days The default is empty Voice Mail and Auto Attendant System Installation and Programming Manual 6 32 ...

Page 97: ...ure 6 43 List of Mailboxes Window List Tab The above list displays all the mailboxes defined in the Voice Mail and their configuration parameter values You can add edit copy and delete values by clicking on the appropriate button in this screen The description of the values is found in the following screen Supervisor Mailbox define here the supervisor mailbox which is used when the Voice Mail s me...

Page 98: ... virtual Real Mailbox This is a mailbox where there is an extension and a telephone Virtual Mailbox This is a mailbox without an extension It has all the same functions as a real mailbox such as password protected Command 501 or 521 Announcer Enables the Voice Mail to play a personal greeting announcement but does not allow messages to be recorded Command 502 User Language Select the language to b...

Page 99: ...e been heard or the maximum number of notification retries is reached Rings The Voice Mail rings the extension number for a period of time as defined in the ring notification duration and the ring notification retries After the call is answered the unit prompts a menu that allows the user to retrieve messages Command 700 External Notification The system administrator allows remote telephone and pa...

Page 100: ...retrieve a message from your mobile dial your extension and when your personal greeting is played press the defined key and the Voice Mail will then ask for password before playing the messages Maximum Number of Days to Store Messages This parameter defines the number of days that messages are stored in a mailbox After reaching the defined message limit the messages are automatically deleted Voice...

Page 101: ...ssages to LCD station only if the PBX support it DTMF 0 9 A D Message Light Off The signal is used to turn off the message notification on the terminal Some PBXs do not support this code so they turn off the notification LED after the Voice Mail is called Ring Notification Interval This parameter defines how often the mail owner is notified of new messages by ring notification Ring Notification Re...

Page 102: ...xes Figure 6 47 Notification Parameters Window The Groups of Mailboxes function in the Voice Mail menu consists of a number of columns in which groups can be created The example screen above contains a number of groups Group List Up to four mailboxes can be defined The mailboxes that are defined within a group can be addressed simultaneously by dialing the group number In order to add a mailbox to...

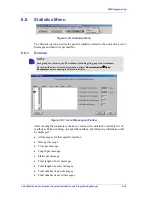
Page 103: ...e Line Monitor menu you can activate the Line Monitor tool The tool shows online all incoming DTMF signals simultaneously from all ports via the RS 232 cable 6 7 1 Activate the Line Monitor To activate the line monitor 1 Connect the RS 232 cable one end to the PC and the other end to the Voice Mail 2 Open the Line Monitor window Figure 6 49 3 Click the start button All DTMF signals are displayed o...

Page 104: ...eters before opening the General Statistics Figure 6 51 List of Messages Window After reading the parameters the above screen will contain the available list of mailboxes When clicking on a specific mailbox the following information will be displayed All messages for that specific mailbox Date per message Time per message Length per message Status per message Total length of new messages Total len...

Page 105: ...d Menu Figure 6 52 Wizard Menu Selecting Wizard Start will activate the Wizard which will to guide you step by step through the integration process Figure 6 53 Wizard Window Voice Mail and Auto Attendant System Installation and Programming Manual 6 41 ...

Page 106: ...igure 6 54 Help Menu The Help Topics function in the Help menu will provide you a list of topics for which help is available Figure 6 55 Help Topics Window Voice Mail and Auto Attendant System Installation and Programming Manual 6 42 ...

Page 107: ...xtension it is possible to dial Mailbox password backup out key DTMF during system requirement to enter the mailbox s password and the call will be forwarded to the Main Company Greeting Then the unit announces the number of messages and plays the users menu Digit Name Description 1 Retrieve Message Listen to Messages 2 Mailbox Parameters Enter Mailbox Parameters Menu 8 Send Message Send a Message...

Page 108: ...main menu 0 Pause Mailbox owners can pause the playback of the mailbox messages for a maximum of 50 seconds 7 4 Mailbox Parameters If the mailbox owner dials 2 while in user s main menu the unit plays the user s Parameters menu Digit Name Description 1 Record Greeting Record a greeting message for the mailbox 2 Record Name Record your name 3 Directory Listing Set directory listing parameters 4 Cha...

Page 109: ...nu To record a greeting message for a mailbox group enter the mailbox group number as the mailbox number The above menu will be played and a message may be recorded or altered 7 4 2 Record Name The mailbox owner can record his personal name by dialing 2 on the user s parameters menu see Paragraph 7 4 The unit then plays the Record Name menu Digit Name Description 1 Play Back Play existing recordin...

Page 110: ... the new password Use digits 0 9 only when entering a password The System Administrator can reset the mailbox password to the default password by using code 570 or using the VMS Digit Name Description 1 Play Back Play the current password 2 Change Change existing password 9 Return to Previous Menu Return to previous menu User s parameters menu 7 4 5 Do Not Disturb DND The mailbox owner can dial 5 ...

Page 111: ...Listen to the current remote telephone number by dialing 6 on the user s parameters menu see Paragraph 7 4 Digit Name Description 1 Change Mode Toggles the external notification state Enable Disable 2 Telephone Number Enter the selected telephone number for external notification Codes1 0 9 Extension Number A D P and Q can be used 3 Play Back Play back the external telephone number 9 Return to Prev...

Page 112: ...ack the pager number 9 Return to Previous Menu Return to previous menu user s parameters menu Codes1 P 1 second pause 1 4 B 6 D 8 Q 4 second pause 2 A 5 C 7 Ext No 0 0 9 0 9 CPD Tone 3 7 4 8 Return to Previous Menu The mailbox owner can dial 9 on the user s parameters menu see Paragraph 7 4 to return to the User s main menu see Paragraph 7 2 7 5 Send Message The mailbox owner can leave a message i...

Page 113: ...s menu Play Back Change Delete Directory Listing DND Change Password Return to Previous menu Play Back Change Return to Previous menu Return to Previous menu Return to Previous menu External Notification Play Back Change Mode Telephone Number Pager Notification Play Back Change Mode Pager Number Retrieve Message Mailbox Parameters Send Message Return to Auto Attendant 8 User s Main Menu User s Par...

Page 114: ......

Page 115: ...der the following conditions The DTMF codes received from the PBX do not exactly match the programmed In Band DTMF codes The specified extension number Target called does not have a valid mailbox The first DTMF character of the In Band DTMF code was received after the specified period of time The following DTMF characters were received outside the specified time frame If an In Band DTMF table is e...

Page 116: ...ample wild card 05 programs the unit to ignore all DTMF characters until it receives a 5 Wild card 0 4 programs the unit to ignore all DTMF characters until it receives a NOTE In the above examples 5 and are also ignored Table 8 1 Entering an In Band DTMF Code Using a Telephone DTMF Character Number to Dial Digits 0 9 0 9 4 A 5 B 6 C 7 D 8 Ignore Length 9 XX where XX is the number of DTMF characte...

Page 117: ...x 03 Play a specific script1 04 Play the busy menu 05 Play the No Answer menu 06 Play the Do Not Disturb menu 07 Disconnect the call 08 Record the conversation 09 Play a specific script and change to 1st language1 10 Play a specific script and change to 2nd language1 11 Play a specific script and change to 3rd language1 12 Play the Directory Listing DBN 13 Transfer to a mailbox1 14 Transfer to an ...

Page 118: ...t a DTMF character within the defined period of time it automatically plays the Automated Attendant s opening greeting To define the timeout until the first DTMF character dial 210 XXXX Where XXXX 0000 9980 ms in steps of 20 ms the default is 3 seconds 8 2 5 Defining the Time to Wait Between DTMF Characters You can define the amount of time the unit must wait between receipts of each DTMF characte...

Page 119: ...d after no answer 7 Source Target 1 Call forward after busy NOTE All source and target extension numbers in the Siemens Hicom 150E Office PBX system have three digits 8 3 1 1 Programming Using a DTMF Telephone To program the unit to detect an In Band DTMF code from the PBX and enable an internal caller to retrieve messages from a mailbox 1 Source 1 Dial 200 00 1 2 2 2 1 200 is the programming code...

Page 120: ...00 is the programming code to define an In Band DTMF code 02 is the event number assigned by you to the In Band DTMF code Each in the above PBX DTMF code is replaced by 905 is a wild card programming the unit to ignore 5 DTMF characters Source 2 2 2indicates the 3 digit target extension number Indicates the end of the In Band DTMF code Dial 201 02 01 201 is the programming code to select an operat...

Page 121: ...ernal notification does not work Solution Make sure you have selected the correct External Access code Make sure you did not add the External Access code to the telephone number because the unit automatically dials the External Access code Make sure External Notification is allowed and enabled The first notification can take up to the amount of time that is defined by Ring Notification Interval Ma...

Page 122: ...e selected COM port was previously used by another device remove the device shut down and restart your computer to release the serial port Symptom A message is sent to a mailbox group that contains five defined mailboxes but only two receive the message Solution The messages were sent to all the mailboxes in the group but only accepted by those mailboxes that did not have the maximum number of mes...

Page 123: ...ched Symptom When I reach a mailbox a menu is played immediately and I am not given a chance to leave a message Solution The mailbox is defined as an announcer mailbox Symptom I have disabled the Automatic Gain Control but the messages are played louder then needed Solution Only messages recorded after the change are affected Initiate a new call after changing the AGCs status Symptom How can I del...

Page 124: ......

Page 125: ... XXXX operator s password Y 0 Day Y 1 Night Y 2 Holiday Y 3 Auto Y 4 Break The following programming codes are to be used after dialing 900 administrator password Script Programming Commands Operation Command Directory listing format 011 X X 0 Last name X 1 First name Record a script message 100 XX Beep Record Play a script message 101 XX Beep Playback Delete a script message 102 XX XX Script No S...

Page 126: ... an extension 120 XX B Extension Dials a programmed DTMF string from the auto attendant script 121 XX B YY YY DTMF string number 00 19 See also command 381 Transfer to an operator 125 XX Transfer to a mailbox 130 XX B Mailbox Transfer to a script message with a change of language 117 XX B YY Z Z 1 2 or 3 language number Set default language 118 Z Z 1 2 or 3 language number Transfer to an extension...

Page 127: ...usy Extension 185 XX B Reset a specific message entry to its default value 190 XX B Reset all message entries to defaults 190 XX Disconnect 140 XX B Z Z 0 no message Z 1 with message In Band DTMF Programming Commands Operation Command Define an In Band DTMF code for an event 200 XX YY YY XX Event number 00 39 YY YY In Band DTMF code Delete all In Band DTMF codes 200 Delete In Band DTMF codes for a...

Page 128: ...TMF code 12 Play the Directory Listing DBN 13 Transfer to a mailbox 14 Transfer to an extension 15 Transfer to the operator A destination must be defined for these tasks Select a destination for an In Band DTMF event 202 XX YYYY XX Event No YYYY Destination Delete the destination for a specific In Band DTMF event 202 XX XX Event No Delete all destinations 202 MATRA PBX Support 204 X where X 0 supp...

Page 129: ...rb condition Delete the DTMF code for all conditions 221 PBX Parameters Operation Command No of digits in extension 300 X Cut off time for continuous call progress tone detection 301 X X cut off time in seconds 0 9 Default 6 sec No of rings before the line is answered 310 line number number of rings Time to wait for No Answer 311 XX PBX legal extensions 320 Y First Ext Last Ext Y group number 0 9 ...

Page 130: ...perator X 2 Operator extension only Y 0 Non Supervised Y 1 Supervised Mode Y 2 Semi Supervised mode Day operator Night operator Fax and Supervisor s extensions 360 X YYYY X 1 Day operator X 2 Night operator X 3 Fax extension X 4 Supervisor extension YYYY Corresponding extension number Delete a specific extension assignment 360 X X 1 Day operator X 2 Night operator X 3 Fax extension X 4 Supervisor ...

Page 131: ...sconnect code 372 X X The length of DTMF cadence in ms 0 9 Default 1 Note Each step represents 100 ms So by setting this parameter to 2 the Voice Mail will cut 200 ms from the end of the recording Busy signal cadence check 375 XXXX Voice and DTMF sensitivity 376 X Y X 1 Voice sensitivity level X 2 DTMF sensitivity level Y Level 0 9 9 Most sensitive Default 5 Note To activate the new selection a ne...

Page 132: ...X 4 Transfer code X 5 Recall from Busy X 6 Recall from No Answer Dial a String from the Auto Attendant to the PBX 381 XX YY YY XX String number 0 19 YY YY DTMF string Answer number of samples 386 X X number of samples 0 9 Default 5 Setting Time and Date Operation Command Change the operational mode 400 X X 0 Day X 3 Auto X 1 Night X 4 Break X 2 Holiday Select time stamp format 410 X Set time and d...

Page 133: ...lidays 470 Delete all holidays on a specific date 470 DD MM DD Day of the month MM month Delete all holidays for a specific month 470 MM MM month External notification active time 490 hh mm hh mm hh mm Start time Hour and minutes in 24 hour format hh mm End time Hour and minutes in 24 hour format Mailbox Configuration Commands Operation Command Create a range of mailboxes 500 First mailbox Last ma...

Page 134: ...ailbox B B 0 Play the time and date B 1 Skip the time and date Play or skip time and date stamp for a mailbox 531 Mailbox number B B 0 Play the time and date B 1 Skip the time and date Define a language for a range of mailboxes 532 First Mailbox Last Mailbox Z where Z 1 2 or 3 language number Define a language for a mailbox 533 Mailbox Number Z where Z 1 2 or 3 language number Add a mailbox to a g...

Page 135: ... 1 2 or 3 language number System message setting 699 X Y X 1 System message 004 X 2 System message 102 X 3 System message 095 Y 0 Play Y 1 Don t play Y 2 Only when X 3 Play the message to mailboxes without a greeting message Change the system administrator s password 600 Old password New password Warning Do not use the or keys Change the operator s password 601 Old password New password Warning Do...

Page 136: ... permitted Disable remote notification for all mailboxes 710 Permit remote notification for one mailbox 711 Mailbox X X 0 not permitted X 1 permitted Ring Notification Interval 720 XX XX is in minutes 1 99 Ring Notification Duration 730 X X 0 short ring X 1 long ring Maximum no of days to store a message in the system 740 XX XX Number of days 00 99 Time to wait after off hook for notification dial...

Page 137: ...lash 2 Pause and Extension Number When entering a code dial 0 for extension 1 for pause 2 for Flash 1 3 for Flash 2 4 for 5 for A 6 for B 7 for C 8 for D 9 for the number of new messages in the mailbox for Voice Mail and Auto Attendant System Installation and Programming Manual 10 13 ...

Page 138: ......

Page 139: ...o Answer 311 _____ Legal PBX extensions Group 1 320 0 ___ ___ Group 2 320 1 ___ ___ Group 3 320 2 ___ ___ Group 4 320 3 ___ ___ Group 5 320 4 ___ ___ Operator ID Code 330 _____ Disconnect Code 333 _____ External Access Code 340 _____ Transfer mode 350 ___ _____ ___ _____ Day Operator s Extension No Night Operator s Extension No Fax Extension No Supervisor Extension No 360 ___ _____ ___ _____ ___ _...

Page 140: ...sage in the system 740 _____ Setting Notification For Mailboxes Local notification for a range of mailboxes 700 _____ _____ ___ Local notification for one mailbox 701 _____ ___ Permitting remote notification for a range of mailboxes 710 _____ _____ ___ Permitting remote notification for one mailbox 711 _____ ___ External notification active time 490 ___ ___ ___ ___ Notification Parameters Ring not...

Page 141: ...________ _____ _____ _____ _____ _______________ _____ _____ _____ _____ _______________ _____ _____ _____ _____ _______________ _____ _____ _____ _____ _______________ _____ _____ _____ _____ _______________ Setting the Working Time See Section 4 3 3 for information on setting the following schedule using codes 450 and 460 Working Hours Break Time Day Start End Start End 1 Monday _____ _____ ____...

Page 142: ...o __________ 0 ________________________ 1 ________________________ 2 ________________________ 3 ________________________ 4 ________________________ 5 ________________________ 6 ________________________ 7 ________________________ 8 ________________________ 9 ________________________ EOM ____________________ 0 ________________________ 1 ________________________ 2 ________________________ 3 _________...

Page 143: ...specific in band DTMF event 202 __ ____ Define the time to wait for the first DTMF character in the In Band DTMF code 210 _______ Define the time to wait between receipt of each DTMF character in the In Band DTMF code 211 ______ Define Transfer Supervision Type 220 __ Define the DTMF code for the Answer Busy and Do Not Disturb conditions 221 __ ____ Voice Mail and Auto Attendant System Installatio...

Page 144: ......

Page 145: ...or To hear all system messages dial 691 language digit 12 2 System Messages No System Message 000 This system has not been programmed Please refer to the installation manual for instructions Thank you 001 Please hang up now 002 Please enter your password 003 Invalid entry Please try again 004 Please hold 005 Message was received on 006 At 007 Zero 008 O clock 009 No Voice Mail and Auto Attendant S...

Page 146: ... Four 027 Eighteen 014 Five 028 Nineteen 015 Six 029 Twenty 016 Seven 030 Thirty 017 Eight 031 Forty 018 Nine 032 Fifty 019 Ten 033 Sixty 020 Eleven 034 Seventy 021 Twelve 035 Eighty 022 Thirteen 036 Ninety 023 Fourteen Voice Mail and Auto Attendant System Installation and Programming Manual 12 2 ...

Page 147: ...h 043 Seventh 054 Eighteenth 044 Eighth 055 Nineteenth 045 Ninth 056 Twentieth 046 Tenth 057 Thirtieth 047 Eleventh 12 5 Months 058 Of January 064 Of July 059 Of February 065 Of August 060 Of March 066 Of September 061 Of April 067 Of October 062 Of May 068 Of November 063 Of June 069 Of December Voice Mail and Auto Attendant System Installation and Programming Manual 12 3 ...

Page 148: ...o delete skipped messages press 8 To save all messages press 9 083 yesterday 084 today 085 Please enter your mailbox number 086 Invalid mailbox Please try again 087 Incorrect password Please try again 088 Please record your greeting after the tone Press the hash key when you have finished 089 Please record your name after the tone Press the hash key when you have finished 090 Calls will be transfe...

Page 149: ...n menu press 9 104 The required extension does not answer To try another extension press 1 followed by the extension number To transfer to the operator press 0 To return to the main menu press 9 105 You have exceeded the maximum message length Your message will be sent 106 Sunday 107 Monday 108 Tuesday 109 Wednesday 110 Thursday 111 Friday 112 Saturday 113 O As Eight O Two for 8 02 114 Pause 115 P...

Page 150: ...Please enter your pager number Press the hash key when you have finished 134 saved messages 135 saved message 136 That mailbox is currently unavailable 137 Storage space is nearing capacity 138 For 139 press 140 To return to the previous list press 7 141 For additional listings press 8 142 To enter another name press 0 To return to the main menu press 9 143 No directory listing is available 144 To...

Page 151: ...nother extension press 1 followed by the extension number To transfer to the operator press 0 To return to the Main Menu press 9 155 This value has not been set 156 To change mailbox settings press 2 To send a message press 8 To return to the main menu press 9 157 To skip this message press 1 To replay press 2 To save press 3 To forward press 4 To delete press 8 To return to the previous menu pres...

Page 152: ......

Page 153: ...Ring box and await answer 4 On answer dial 900 1234 654 1234 to initialise box 5 If the unit is not answering you will need to use the initialization command through the VMS software Turn to page 6 13 NB You will need the Initialisation file This can be downloaded from www oak co uk ONLY THEN SHOULD YOU ATTACH THE PROGRAMMING CABLE AND START PROGRAMMING WITH THE VMS SOFTWARE PROVIDED Voice Mail an...

Page 154: ......

Page 155: ... off and interval between ring notification on page 6 37 8 Record see page 4 16 and program see page 6 21 script menus for the Automated Attendant Make sure you define the mailboxes before building Automated Attendant script menus 9 Send parameters to the VoxBox 10 Dial voicemail number and test system is answering 11 Test internal and external diverts to mailboxes 12 Test message notification 13 ...

Page 156: ......

Page 157: ... secondly ensure the mailbox is included in this range Question This mailbox is unavailable plays when I am trying to leave a message in a mailbox I have previously been able to access this mailbox so why can t I get into it now Answer There is a limit to the amount of messages any mailbox can hold Check with your supplier which version you have and what the message limit is Question Every time I ...

Page 158: ......

Page 159: ...alize the box 3 Connect serial link and read from box set up 2 options on script00 to leave a message and retrieve messages send to box 4 Dial VoxBox and leave a message in an existing mailbox return to the main script and retrieve that message successful If no then re initialize the box 5 Box successfully tested If a problem is experienced at any stage re initialize the box 6 If the problem still...

Page 160: ......

Page 161: ...e Backup and Restore command also available in the VMS software 1 Select System Init from the Communication menu 2 When the System Init window opens click the Browse button 3 Select an initialisation file filename name vox i e V4a109 vox for a version 4 07 VoxBox available from www oak co uk 4 Click the OK button then confirm The process will now begin writing blocks to the VoxBox 5 After approxim...

Page 162: ......

Page 163: ...of Installer Telephone system VoxBox type Version Serial No PLEASE CIRCLE WHAT IS BEING RETURNED POWER SUPPLY LEADS VUP VUJ DISC SIDE PANEL COVER MANUAL SCREWS Reason for return in order to reduce any delays please be specific Date returned Date received by Oak Please print two copies of this form sending one with the unit and keeping the second as a record Voice Mail and Auto Attendant System Ins...

Page 164: ......

Page 165: ...y Park Cabot Lane Poole Dorset BH17 7BX Tel Fax 0870 2000 24 7 0870 2000 24 8 Technical Support E mail Website 0870 2020 24 7 support oak co uk www oak co uk If you require any Technical Support for the VoxBox please visit our website at http www oak co uk call our Customer Service Department on 0870 2020 24 7 or e mail support oak co uk Voice Mail and Auto Attendant System Installation and Progra...

Reviews: