3
1
4
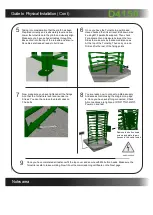
To assemble the turnstile follow the steps below.
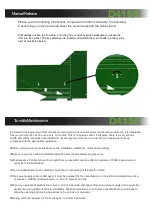
1. Now insert the rubber
mounts in between the
4x rotor bolts and the
head Mechanism.
2. Then place the kidney
washers over and secure
using M16 Nylock Nuts.
2
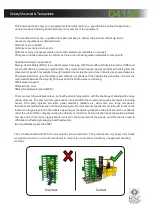
Component Identification and Notes:
You should check that you have received the following in your order as they are referred to throughout this
manual (note this can change per barrier spec i.e. manual components are different from automatic):
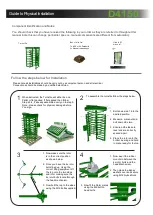
Follow the steps below for Installation.
Guide to Physical Installation
Please note all installations should be carry out by a competent person and all electrical
Connections should be made by a qualified electrician.
When delivered, the Turnstile will either be on a
Pallet or flat packed. If flat packed then follow
Step’s 2-4, if already assembled carry on to step 5.
Note - please check for physical damage before
You sign.
Turnstile
Box of bits C/w
O and M
manual
7 x M12 x 120 Parabolts
2 x Manual release keys
1. Bolt down side 1 into the
desired position.
2. Measure, mark out and
bolt down side two.
3. Ensure both sides are
level and are correctly
spaced apart.
4. Place the rotor onto the
bottom bearing and hold
in place ready for the top.
1. Now make sure the rotor
is in the correct position
as shown below.
2. Once you have the 4x rotor
bolts lined up, Using the
correct lifting equipment lift
the top onto the two sides
and rotor making sure the
4x rotor bolts locate through
the head mechanism.
3. Now bolt the top to the sides
using the M12 bolts supplied.
3. Now fit the Rotor plates
using the M6 button
head bolts.
D4150


