2
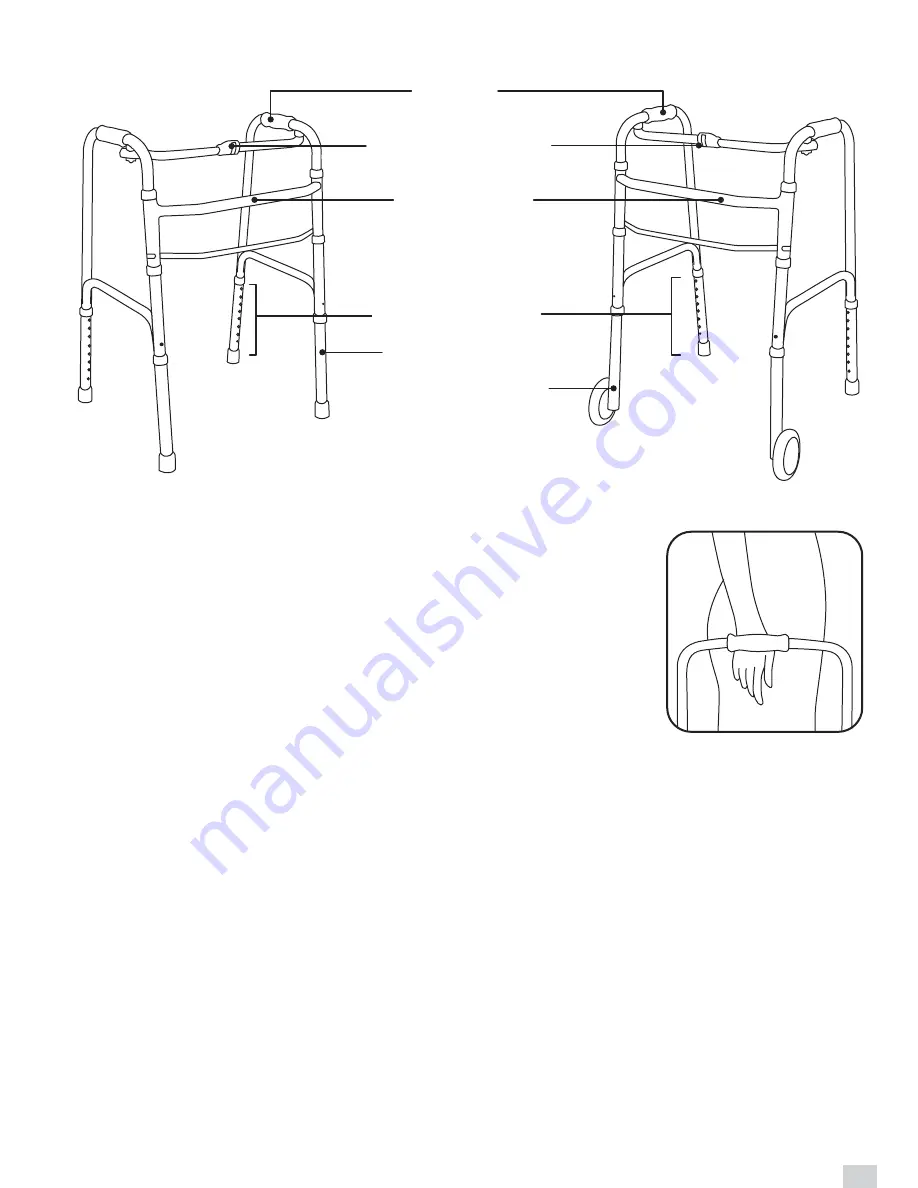
Crossbrace
Leg Extension
Adjustment Holes
Wheeled Extension
Handle
Folding Mechanism
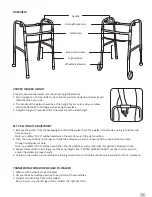
TRANSFERING FROM WHEELCHAIR TO WALKER
1. Make sure the wheels are both locked.
2. Lift your body by pushing down on the armrests of the wheelchair.
3. Transfer one hand at a time to the walker.
Note: If injury is to the left leg or foot, transfer the right hand first.
OVERVIEW
PROPER WALKER HEIGHT
Always make sure the walker is at the proper height before use.
1. Stand upright on a firm and flat surface and let your arm hang down naturally and
comfortably on your side.
2. The handle of the walker should be at the height of your wrist, and your elbow
should be flexed 20 to 30 degree when using the walker.
3. Adjust the legs of the walker till the handles are at the ideal height.
SET UP & HEIGHT ADJUSTMENT
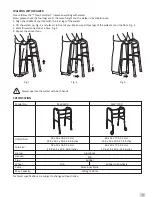
1. Remove the walker from the packaging and unfold the walker. Test if the walker is secured by trying to fold the side
frames inward.
Note: an audible “CLICK” will be heard when the side frame is in the right position.
2. Press the snap buttons on the legs and slide the extension up and/ or down until the snap button protrudes
through an adjustment hole.
Note: an audible “CLICK” will be heard when the snap button securely protrudes through the adjustment hole.
3. Repeat step 2 until the four legs are at the same height. See “PROPER WALKER HEIGHT” section in this manual to
adjust the walker to proper height.
4. To fold up the walker, press and hold the folding mechanism, and fold the side frames inward to the front crossbrace.


