background image

INTRODUCTION 

IF YOU'RE IN A HURRY 

..•• 

Chapter 1: 

A  FEW PRELIMINARIES 

Chapter 2: 

BASIC 

Matrix-1000 

OPERATION 

Chapter 3: 

ABOUT THOSE 

1000 

PATCHES .... 

• 

C

hapter 4: 

ADVANCED 

Matrlx-1000 

OPERATION 

Chapter 5: 

MIDI SUMMARY 

Chapter 

6: 

WARRANTY 

Welcome To The Matrix-1 000 

Matrix-1 000 Quick-Start Procedure 

UNPACKING 

Accessories 

Rack Mounting 

10 

HOOKUP 

1 0  

AC Power 

1 0  

Audio and M IDI Connections 

1 2  

Care and Maintenance 

1 2  

Servicing 

13 

SPECIFICATIONS 

15 

FRONT  PANEL KEYS 

1 5  

Select Key 

1 5  

Bank Lock  Key 

1 6  

Enter, 

and -Keys and Number Keys 

17 

BASIC MODES 

1 7  

Patch 

20 

Channel 

22 

Fine Tune 

23 

Unison.Transpose, MIDI Echo 

27 

PATCH COPY 

29 

SPECIAL MODES 

29 

Units 

32 

Data Dump 

36 

Advanced Extended Functions 

40 

Re-Initialization 

41 

57 

IF YOU  HAVE A PROBLEM 

Matrix-1000 Owner's  Manual 

Summary of Contents for Matrix-1000

Page 1: ...0 NER S MAN UAL scanned at www wolzow com...

Page 2: ...ited Without Express Written Permission Oberheim the Oberheim Logo Matrix 1000 Matrix 6 Matrix SR Matrix 12 Xpander and DPX 1 are trademarks of ECC Development Corporation Oberheim A Division of ECC D...

Page 3: ...may cause interference to radio communications It has been tested and found to comply with the limits for a Class A computing device pursuant to Subpart J of Part 15 of FCC Rules which are designed to...

Page 4: ...re 9 UNPACKING 9 Accessories 9 Rack Mounting 10 HOOKUP 1 0 AC Power 1 0 Audio and MIDI Connections 1 2 Care and Maintenance 1 2 Servicing 13 SPECIFICATIONS 15 FRONT PANEL KEYS 1 5 Select Key 1 5 Bank...

Page 5: ...4 Matrix 1000 Owner s Manual...

Page 6: ...e first 200 patches can be customized via MIDI from a Matrix 6 keyboard a Matrix GR rack mount synthesizer or a computer equipped with a MIDI interface and Matrix 6 6R editing or librarian software Th...

Page 7: ...Front Back Panel 6 Matrix 1000 Owner s Manual 0 0 0 0 II Ill II II II II c w Fl 0 a 0 Oi I r 0 i3 Q 11 0 0 E 0 ED 0 0 0 f oi I 9 i i 9 z...

Page 8: ...IT ON Make all your connections before powering the instrument on When the Matrix 1000 is powered on does the front panel display light up If not check your connections 4 SELECT MODE Press the Select...

Page 9: ...two digits are the location of the patch within that bank 00 through 99 Bank Lock lets you change patches within a bank by typing two digits instead of three Select Patch mode and press Bank Lock A d...

Page 10: ...mounted in a standard 19 inch rack mount cabinet To do this you will need a Phillips Head screwdriver and four mounting bolts with washers The Matrix 1000 uses one standard rack space 1 3 4 inches We...

Page 11: ...0 and the male end into your wall outlet Warning When the voltage is changed the fuse must also be changed for continued protection against fire See the information on the Matrix 1000 case or in the S...

Page 12: ...sing very long MIDI cables maximum total length for the entire rig is about 50 feet The order in which you power on your instruments is important First turn on the Matrix 1000 with its volume control...

Page 13: ...rix 1000 Do not use harsh or abrasive detergents or solvents We do not recommend vinyl treatment products which leave a residue SERVICING If your Matrix 1000 needs servicing do not attempt repairs you...

Page 14: ...wer Switch Rear Panel Monophonic Audio Out Jack MIDI IN OUT and THRU Ports AC Receptacle Power Requirements user selectable North America and Japan 95 120v AC 50 60 Hz 55 watts max Europe 200 230v AC...

Page 15: ...14 Matrix 1000 Owner s Manual...

Page 16: ...e six modes The numeric display changes to correspond to the selected mode Select Pc Vo BANK LOCK Key In Patch mode press the Bank Lock key to turn bank lock on and off Hold down Bank Lock while press...

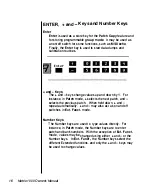
Page 17: ...in Patch mode selects the next patch and selects the previous patch When held down and repeat automatically and may also act as on and off switches in Ext Funct mode Number Keys The Number keys are u...

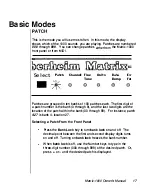
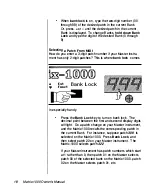
Page 18: ...number is the bank 0 through 9 and the last two digits are the location of the patch within the bank 00 through 99 For instance patch 427 is bank 4 location 27 Selecting a Patch From the Front Panel...

Page 19: ...ially handy Press the Bank Lock key to turn on bank lock The decimal point between the first and second display digits will light Do a patch change on your Master instrument and the Matrix 1000 recall...

Page 20: ...when the Vibrato or Modulation MIDI controller 1 is more than half way on it uses the patch number as a bank number So be careful if you re playing notes with your Vibrato on and you make a Patch cha...

Page 21: ...he and and Number keys iv Select Patch Channel Fine Tune Units Data Dump A number from 1 to 16 indicates the channel on which messages are transmitted and received o n indicates that OMNI mode is acti...

Page 22: ...es not appear while you are playing check both your MIDI Channel selections and your MIDI cable connections The MIDI channel and MIDI Mode OMNI POLY MONO are stored in memory so that you do not have t...

Page 23: ...e Tune is selected the Display reads the current Fine Tune value This value is stored in memory until it is changed Change the value by using the and keys or the Number keys The range of Fine Tune is...

Page 24: ...Channe1 Fine Tune Units Data Dump Ext F l unet In Ext Funet mode the Number keys select the function while the and keys change theo n oro ff status or number value What s impor tant to remember is th...

Page 25: ...e found on some instruments Mono keyboard mode allows you to play only one Voice monophonically Unison plays all six Voices together as a single note This is why the Matrix 1000 sounds richer and loud...

Page 26: ...For example to layer three Matrix 1OOOs Connect the MIDI OUT not THAU of the first Matrix 1000 to the MIDI IN of the second Connect the MIDI OUT of the second to the MIDI IN of the third Set your Mas...

Page 27: ...ough they may not all be used in every patch you may find some interesting effects Hold notes for a long time and let them release for a long time Lots of things are controlled by envelopes Playing st...

Page 28: ...tape at a time With the Matrix 1000 you have immediate access to all 1000 Patch sounds because they are all stored inside the Matrix 1000 But it doesn t stop there In Chapter 4 under the Data Dump mod...

Page 29: ...git is pressed the new patch number is displayed and the copy is complete The old patch at that number is ERASED and replaced with the copied patch If you make a mistake before the third digit is pres...

Page 30: ...cedure is basically the same when more units are added The first Matrix 1000 is considered the Group Master The other Matrix 1OOOs are slaves All operations in the setup procedure are performed on the...

Page 31: ...1000 in a Group to a different patch Select Patch mode and choose a new patch Patch and bank changes on the Group Master are transferred automatically to the rest of the Group Other changes like Fine...

Page 32: ...to use a particular patch as a layer program it to ignore group mode Doing this is very similar to Patch copy In fact it s like copying a patch to itself Press Select until Units is displayed Use Ente...

Page 33: ...PILLOVER OFF Set Matrix 1000 Channel too n Set Matrix 1000 Units to 2 to turn on group mode In fact grol P mode can actually be used between a Matrix 1000 and any other single synthesizer The Matrix 1...

Page 34: ...9 are in perma nent ROM Read Only Memory and cannot be changed Patch backups are unnecessary for ROM sounds but are highly recommended for the RAM sounds elect Patch Channel Fine Tune Units Data o ump...

Page 35: ...e left with bank lock enabled and and bank 1 selected Loading Patches Dumping TO the Matrix 1000 Connect the MIDI OUT from the transmitting device to the MIDI IN of the Matrix 1000 Make sure that MIDI...

Page 36: ...r may transmit patches faster than the Matrix 1000 can receive them during a SEND ALL The result may be that some patches are not successfully transferred These patches can be sent using the Matrix 6...

Page 37: ...une Units Data Dump Ext F 1 unct Advanced Extended Functions Press Display Reads Definition Number Key 3 io n Invert MIDI Volume is ON 4 5 6 7 8 36 Matrix 1000 Owner s Manual or io f P Ed GOO Po n or...

Page 38: ...and the key to turn it off or press Enter to switch between on and off 4 Pedal 1 MIDI Controller Select The Pedal 1 select function is used primarily to provide compatibility with Matrix 6 and GR syn...

Page 39: ...on the Group Master resets this value on all slaves automatically By changing this value after group mode has been turned on you can achieve certain special effects Any instrument with a unit number...

Page 40: ...play Press Enter to toggle display mode When active display shows highest gated voice number or O if no voices are gated This test remains active during all modes until calibration test 1 is re select...

Page 41: ...normal operation by the Matrix 1000 Patch 000 is displayed but the sound heard when notes are received from MIDI is a test tone MIDI is set to Basic Channel 1 Poly Mode OMNI ON Fine Tune is set to O...

Page 42: ...1 xxxx 1 01 1 xxxx 101 1 xxxx 101 1 xxxx 79H OOH 7BH OOH 7CH OOH 7DH OOH 7EH 06H 7FH OOH Chapters MIDI SUMMARY Qescription Note Off Release Velocity 1 127 Note On Velocity 1 1 27 O Note Off Controlle...

Page 43: ...checksum 5 Transmit data OFH 6 Transmit data 1 6 OFH 7 Repeat 3 6 for all data bytes 8 Transmit checksum 07FH 9 Transmit F7H 01 H Single Patch Data FOH 1 OH 06H 01 H nUm Patch data checksum F7H nUm de...

Page 44: ...are transmitted in ascending order using individual Single Patch messages code 01 above This is followed by 50 dummy split patches for compatibility with the Request All function of the Matrix 6 Each...

Page 45: ...et Bank FOH 1OH 06H OAH bank F7H bank bank number to select 0 9 Note On receipt of this message the unit will change banks and enable the bank lock OBH Remote Parameter Edit FOH 1OH 06H OBH path Sourc...

Page 46: ...eceipt this data will be stored into the edit buffer Note Wait at least ten msec after sending a patch to the Matrix 1 000 OEH Store Edit Buffer FOH 1 OH 06H OEH nUm bank ID F7H nUm bank ID patch numb...

Page 47: ...ed by the lower 6 bits of it s ASCII representation Keyboard Mode O Reassign 1 Rotate 2 Unison 3 Reassign w Rob DCO 1 Initial Frequency LSB 1 Semitone DCO 1 Initial Waveshape 0 Sawtooth 31 Triangle DC...

Page 48: ...cy LSB 1 Semitone VCF Initial Resonance VCF Fixed Modulations Bit 0 Lever 1 Bit 1 Vibrato VCF Keyboard Modulation Bit 0 Portamento Bit 1 Keyboard VCF FM Initial Amount VCA 1 Exponential Initial Amount...

Page 49: ...litude Env 1 Trigger Mode Bit o Reset Bit 1 Multi Trigger Bit 2 External Trigger Env 1 Initial Delay Time Env 1 Initial Attack Time Env 1 Initial Decay Time Env 1 Sustain Level Env 1 Initial Release T...

Page 50: ...se Time Env 3 Initial Amplitude Env 3 LFO Trigger Mode See Env 1 LFO Trigger Mode Env 3 Mode See Env 1 Mode Tracking Generator Input Source Code See Table 2 Tracking Point 1 Tracking Point 2 Tracking...

Page 51: ...e see Table 2 1 05 7 Signed MM Bus 0 Amount 1 06 5 MM Bus 0 Destination code see Table 3 1 07 5 Matrix Modulation Bus 1 Source Code see Table 2 1 08 7 Signed MM Bus 1 Amount 1 09 5 MM Bus 1 Destinatio...

Page 52: ...M Bus 5 Destination code see Table 3 Matrix Modulation Bus 6 Source Code see Table 2 MM Bus 6 Amount MM Bus 6 Destination code see Table 3 Matrix Modulation Bus 7 Source Code see Table 2 MM Bus 7 Amou...

Page 53: ...Envelope 3 4 LFO 1 5 LFO 2 6 Vibrato 7 Ramp 1 8 Ramp 2 9 Keyboard 1 0 Portamento 0 Unused Modulation 1 1 Tracking Generator 12 Keyboard Gate 13 Velocity 1 4 Release Velocity 15 Pressure 1 6 Pedal 1 1...

Page 54: ...CF Resonance 1 1 VCA 1 Level 1 2 VCA 2 Level 1 3 Envelope 1 Delay 14 Envelope 1 Attack 15 Envelope 1 Decay 1 6 Envelope 1 Release 1 7 Envelope 1 Amplitude 1 8 Envelope 2 Delay 1 9 Envelope 2 Attack 20...

Page 55: ...Speed Mod Source Code Vibrato Speed Modulation Amount Vibrato Waveform Vibrato Amplitude Vibrato Amp Mod Source Code Vibrato Amp Modulation Amount Master Tune Not Used Not Used MIDI Basic Channel MID...

Page 56: ...EH Chan 06H 01 H F7H chan Device ID 7FH for any device including this one 0 1 5 must match unit s basic channel FOH 7EH Chan 06H 02H mfg fam lo fam hi memb lo memb hi rev 0 rev 1 rev 2 rev 3 F7H Chan...

Page 57: ...mitones Non registered parameters may be used to control any parameter by using the front panel parameter number Matrix modulations must be controlled by use of the System Exclusive message When using...

Page 58: ...at the end in obtaining service for your Oberheim product should it ever be needed OBERHEIM LIMITED CUSTOMER WARRANTY Non Transferable Oberheim a Division of ECC Development Corporation warrants its p...

Page 59: ...art s If the Warranty cannot be verified the entire cost of the repair in parts and labor is the responsibility of the product s owner PRICES AND SPECIFICATIONS ARE SUBJECT TO CHANGE WITHOUT NOTICE WH...

Page 60: ...trict accordance with the procedures written in the Owner s Manual 4 Repairs performed by unauthorized persons 5 Damage caused by fire smoke falling objects water or liquids etc or natural events such...

Page 61: ...ATION OF THE EXPRESS WARRANTY HEREIN ECC Oberheim hereby excludes incidental and consequential damages including but not limited to 1 Loss of time 2 Inconvenience 3 Delay in performance of the Warrant...

Page 62: ...r will need to verify the Warranty If you have returned your Warranty Card the Warranty Verification Sticker affixed to the bottom panel of your unit is sufficient to prove warranty status The Service...

Page 63: ...your local Service Center or Dealer to review and verify the information and facts Based on these facts we will advise or consult with the Service Center or Dealer as appropriate Written correspondenc...

Page 64: ...scanned at www wolzow com...

Reviews: