53
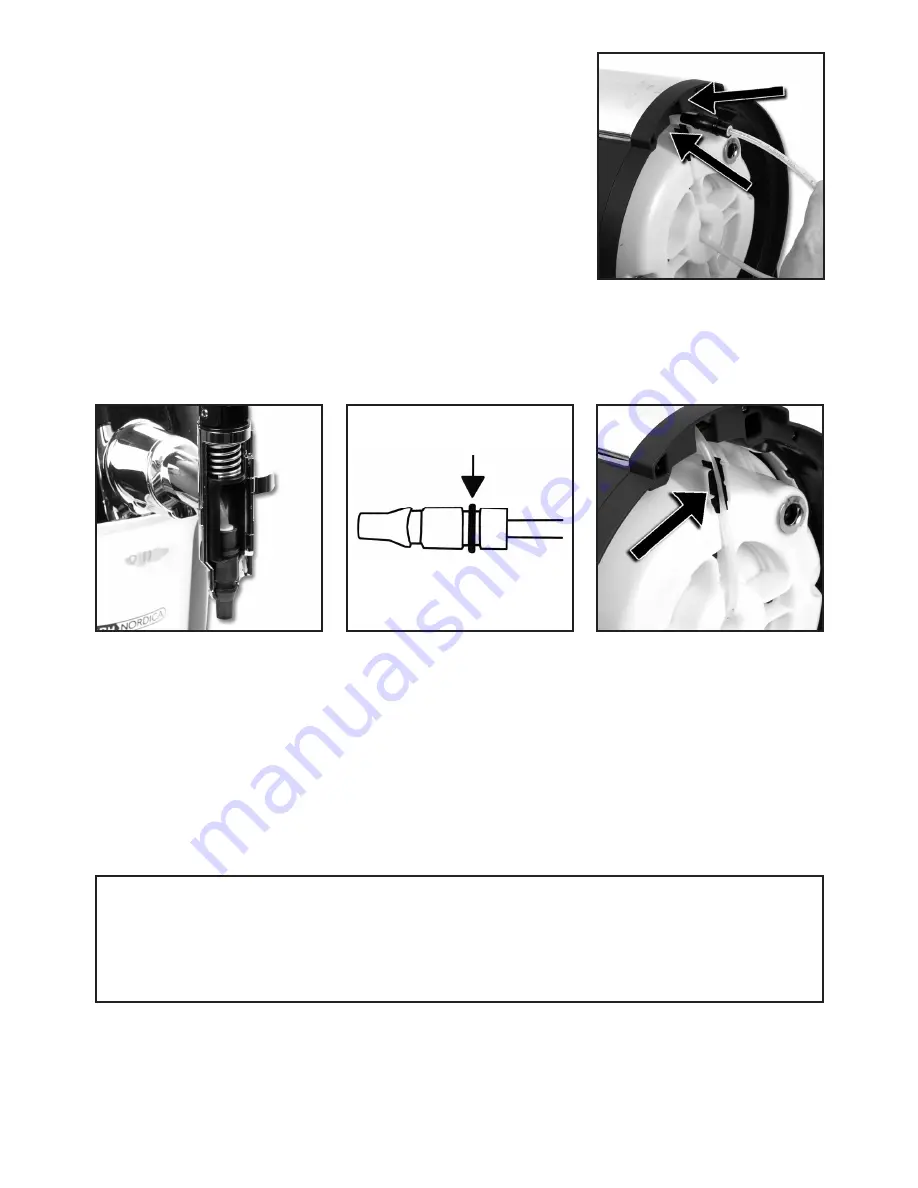
9. The tube is bent outwards slightly to allow for easier
insertion in the tap. Slide the tube through the channel
in the chromium front of the container.
10. Position the valve of the tube at the point of the spout and insert the valve in the groove
of the tap. Close the tap again. Make sure that the tube is not fitted too tightly as this
may cause damage.
Important:
The tube must be placed in the slot in the bottom of the
pressure lid as this activates the switch in the base of the draught beer dispenser (5).
Close the container by tipping it forwards. A click will indicate that the container is closed
properly. The draught beer dispenser is now ready for use.
Insert the plug into a wall socket and turn it on. Turn on the draught beer dispenser by
pressing the On-/off main switch (6) to “1”. The pump now starts to build up pressure inside
the appliance (this will take up to app. 2 minutes with a full keg). When the pressure is built
up, the pump will stop and the draught beer dispenser is now ready for serving.
Make sure the appliance is switched on all the time when a keg is installed.
Important!
When a keg is installed inside the draught beer dispenser, the appliance must
be turned on and the keg installed is therefore under constant pressure. When the release
button is activated, a high-pitch noise followed by a hissing sound will be heard. This is
quite normal and does not indicate that the draught beer dispenser is defective. Do not
turn the pressure lid until this hissing sound stops.


