Assembly
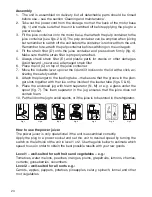
1. The unit is assembled on delivery but all detachable parts should be rinsed
before use – see the section ‘Cleaning and maintenance’.
2. Take out the power cord from the storage room at the back of the motor base
(fig. 1) and make sure that the unit is switched off before applying the plug to a
power socket.
3. Fit the juice container onto the motor base, then attach the pulp container to the
juice container (see figs. 2 & 3). The pulp container can be emptied when juicing
but remember to switch off the unit before the container is removed from the unit.
Remember to re-attach the pulp container before switching on the unit again.
4. Fit the strain filter (D) onto the juice container and press down firmly (fig. 4).
Make sure that the strain filter is properly attached.
5. Always check strain filter (E) and plastic parts for cracks or other damages.
Avoid hazard – never use a damaged strain filter.
6. Place the lid (C) on top of the juice container.
7. Move the lockable lever up over the lid until it locks onto the lid with a click, ac-
tivating the safety switch.
8. Attach the plunger to the feeding tube – make sure that the groove in the plun-
ger slots together with the rise on the inside of the feeder tube (figs. 5 & 6).
9. Place the enclosed jug with foam separator (N, M) or e.g. a glass under the
spout (fig. 7). The foam separator in the jug ensures that the juice does not
contain foam.
10. Put the lid on the jug to avoid squirts, or if the juice is to be stored in the refrigerator.
How to use the power juicer
The power juicer is only operational if the unit is assembled correctly.
Apply the plug to a power socket and set the unit to desired speed by turning the
switch on the left side of the unit to level 1 or 2. Use the guide below to estimate which
speed to use in order to obtain the best possible results with your raw goods.
Level 1 – well-suited for soft fruits and vegetables – e.g.:
Tomatoes, water melons, peaches, oranges, plums, grapefruits, lemons, cherries,
currants, gooseberries, cucumbers.
Level 2 – well-suited for all sorts e.g.:
Carrots, apples, peppers, potatoes, pineapples, celery, spinach, fennel and other
root vegetables.
24
Fig. 1
Fig. 7
Fig. 6
Fig. 5
Fig. 4
Fig. 3
Fig. 2
Summary of Contents for vitamix pro steel 6842
Page 28: ...DK BSB 6842 0608 ...


