Mounting instructions PYROLINE
®
Rapid fire protection duct
EN | 73
Completing mounting
8 2
Tightness test
When all the mounting work has been completed, a visual check of the
duct route must be carried out to check tightness, in order to ensure, in
the case of a cable fire in the interior of the duct, that the fire and smoke
are encapsulated in the duct.
Ensure
• that all the duct lids are attached.
• that all the joints of ducts are covered with connectors and are
screwed on tightly.
• that all the fittings are attached and are screwed on tightly.
• that the duct ends are properly closed with end pieces or a wall con-
nection.
• that the cable outlets are closed tightly.
• that cable outlets, which are closed off with foam seals, are sealed
with the ASX ablation coating.
8 3
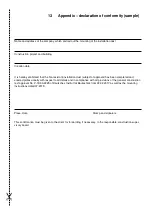
Completing the declaration of conformity
German construction law demands that, after mounting the fire protection
duct system, the installation engineer completes a declaration of conform-
ity and hands it over to the client for documentation purposes. In this way,
they certify that the requirements of the general construction approval
were fulfilled and that the duct system was erected correctly,
You can find a sample declaration of conformity in the appendix.
8 4
Attaching the identification plate
If the fire protection duct system is used as an I duct to encapsulate fire
loads, then identification plates (type KS-K, item no. 7214734) must be
attached. The identification plate must contain the fire resistance class,
the duct type, the approval number and the name of the erection engineer
and the year of the installation.
The identification plates must be attached so that they are
– clearly visible,
– attached beneath the fire protection duct,
– at least in every storey,
– ideally in each construction segment
.
Note!
If the fire protection duct system with a pure white surface is installed,
then, for visual reasons, the identification plate can be attached on the
inside of the duct.

