17
H.264 4/8/16-channel Networkable DVRs
SECTION 3: DVR SETUP
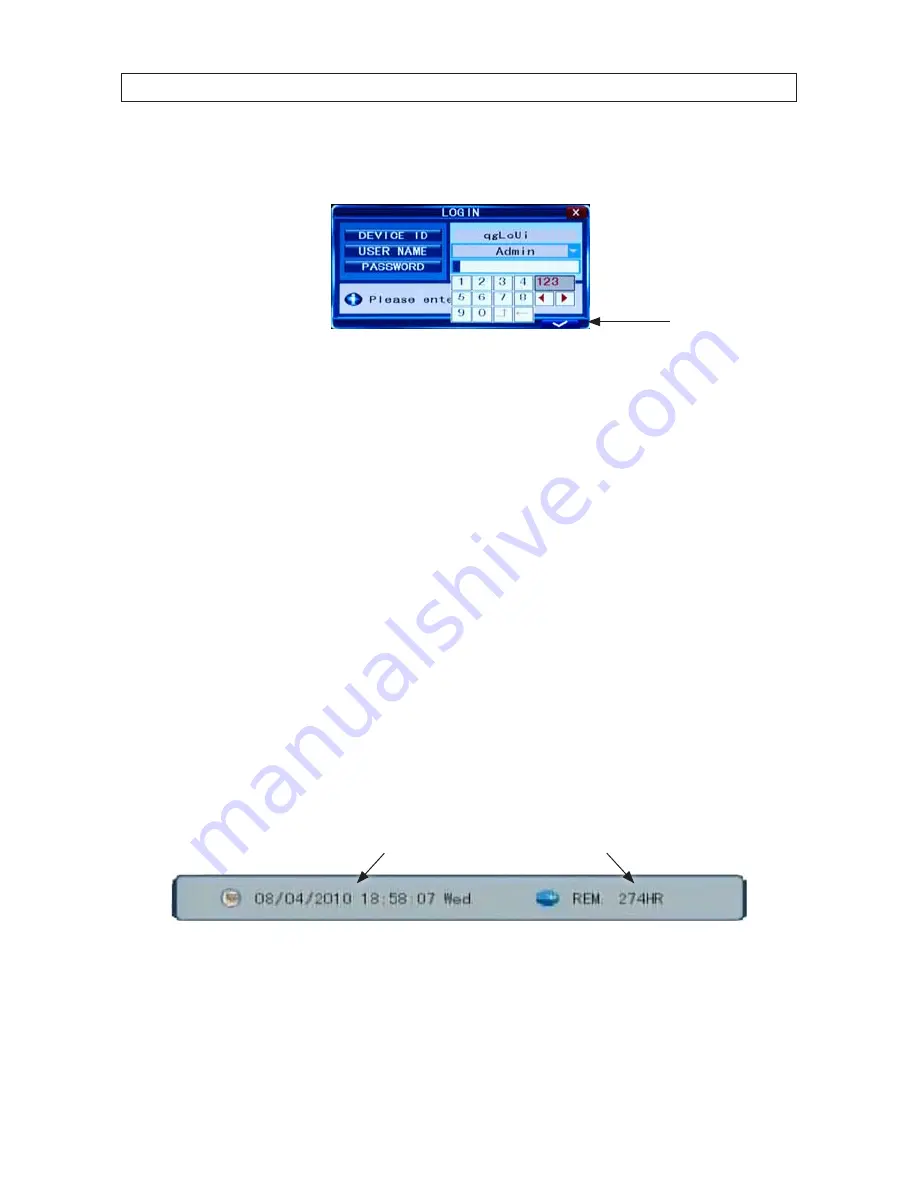
2. Press the
MENU
button on the front panel twice, or right-click the mouse twice anywhere on the screen. An
Input
Password
window will appear.
Confirm entry
3. Click the
q
icons to the right of the User Name field parameter field and select
Admin
. To make configuration changes to the
system, you must login to the
Admin
account.
4. Using the mouse, click the entry field on the PASSWORD line, then click the number buttons that appear to enter the account
password. For example, to enter the default
Admin
password,
888888
, click the “
8
” button six times, then click the confirm
entry icon.
5. Click the
a
(check mark) icon in the lower right corner of the window to confirm your entry and enter the login information.
A tool bar icon strip will appear at the bottom of the screen.
3.2 Configuring the system
Basic system configuration settings include setting the screen language, video system format, system time, creating users,
initializing the hard disk drive (HDD), and setting up automated recording.
1. If the system is not running, power on the DVR and wait until it completes initialization.
2. Right-click anywhere on the desktop, or press the MENU button. A status bar will appear.
3. Compare the DVR system date and time shown on the Status Bar with an accurate clock.
System Date and Time
Remaining HDD Recording TIme
Status Bar
Note
: To see an accurate clock, access a reliable Internet time server, such as
tf.nist.gov


