11
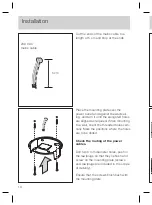
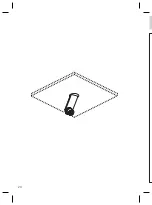
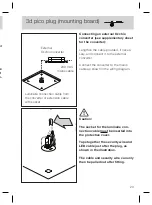
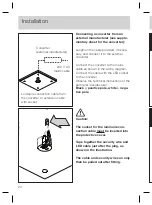
Cut the ends of the mains cable to a
length of 5 cm and strip at the ends.
$
Caution:
Before fitting, disconnect all current-
carrying lines from the mains supply.
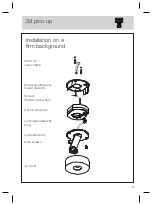
3d pico up
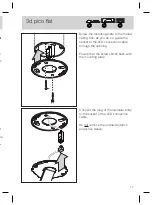
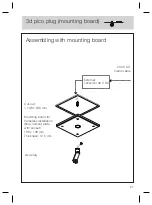
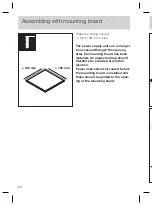
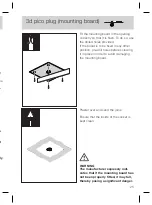
Place the mounting plate over the
power outlet and against the wall/ceil-
ing, and turn it until the elongated holes
are aligned as required. When mounting
to a wall, orient the threaded holes verti-
cally. Mark the positions where the holes
are to be drilled.
Check the routing of the power
cables.
Drill two 6 mm diameter holes, push in
the rawlplugs so that they lie flush and
screw on the mounting plate (screws
and rawlplugs are included in the scope
of delivery).
Ensure that the screws finish flush with
the mounting plate.
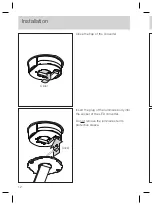
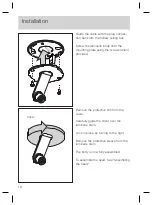
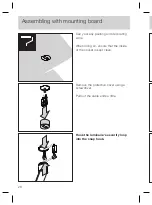
Using a screwdriver, open the flap in the
middle of the converter.
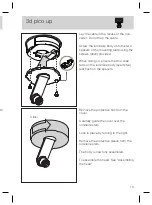
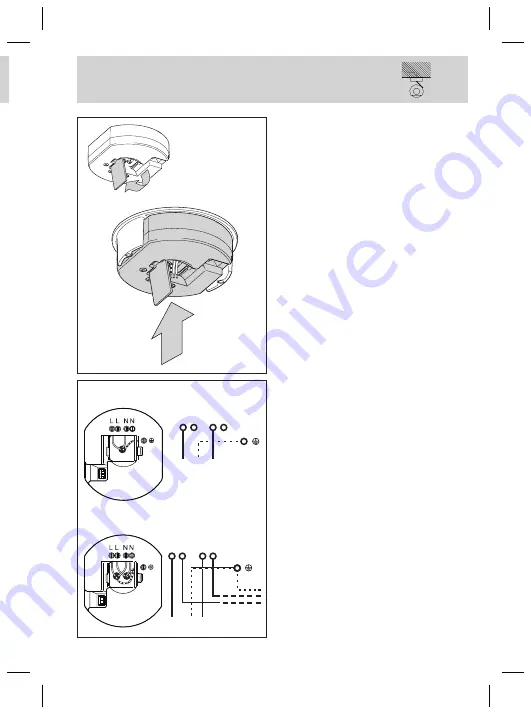
Lock the converter into the mounting
plate so that it is fitted flush.
At the same time, guide the ends of
the mains cable through the converter
opening.
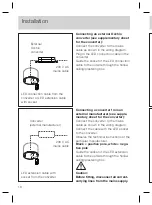
Connect the ends of the mains cable to
the converter terminals in accordance
with the diagram.
Click!
Connected separately
Connected with through-wiring
230 V
230 V
Other
luminaire
L L N N
L L N N
Summary of Contents for 3d body pico
Page 1: ...3d body pico Montageanleitung Mounting instructions up plug track...
Page 2: ......
Page 3: ...3d body pico Montageanleitung up flat plug track De...
Page 4: ...2...
Page 8: ...6 3 f V 3 f V 3 f V f V 3 f V...
Page 10: ...8 2 N...
Page 16: ...14 H...
Page 21: ...19 l t m...
Page 22: ...20...
Page 30: ...28...
Page 38: ...36 E 1 S 3 2 1 0...
Page 44: ...42...
Page 45: ...43 Anhang...
Page 48: ...46...
Page 49: ...3d body pico Mounting instructions up flat plug track En...
Page 50: ...2...
Page 54: ...6 3 f I 3 f E 3 f E f E 3 f I...
Page 56: ...8 2 m...
Page 62: ...14 H c...
Page 67: ...19 ng...
Page 68: ...20...
Page 76: ...28...
Page 84: ...36 E 1 b 3 2 1 0...
Page 90: ...42...
Page 91: ...43 Appendix...
Page 94: ...46...
Page 95: ......

