16
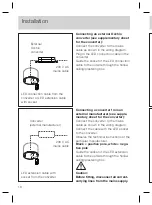
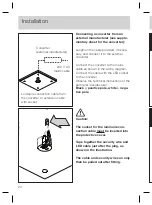
Connecting a converter from an
external manufacturer (see supple-
mentary sheet for the converter):
Connect the converter to the mains
cable as shown in the wiring diagram.
Connect the cable with the LED socket
to the converter.
Observe the technical instructions of the
particular manufacturer.
Black = positive pole, white = nega-
tive pole
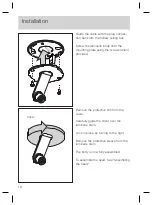
Guide the socket of the LED extension
cable to the outside through the hollow
ceiling/plastering box.
Connecting an external Occhio
converter (see supplementary sheet
for the converter):
Connect the converter to the mains
cable as shown in the wiring diagram.
Plug in the LED connection cable in the
converter.
Guide the socket of the LED connection
cable to the outside through the hollow
ceiling/plastering box.
$
Caution:
Before fitting, disconnect all current-
carrying lines from the mains supply.
External
Occhio
converter
Converter
(external manufacturer)
LED connection cable from the
converter or LED extension cable
with socket
LED extension cable with
socket from the converter
230 V AC
mains cable
230 V AC
mains cable
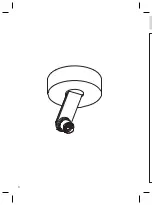
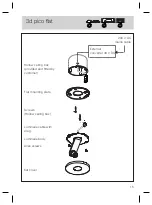
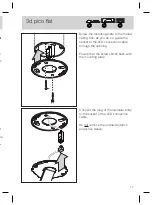
3d pico flat
Installation
Summary of Contents for 3d body pico
Page 1: ...3d body pico Montageanleitung Mounting instructions up plug track...
Page 2: ......
Page 3: ...3d body pico Montageanleitung up flat plug track De...
Page 4: ...2...
Page 8: ...6 3 f V 3 f V 3 f V f V 3 f V...
Page 10: ...8 2 N...
Page 16: ...14 H...
Page 21: ...19 l t m...
Page 22: ...20...
Page 30: ...28...
Page 38: ...36 E 1 S 3 2 1 0...
Page 44: ...42...
Page 45: ...43 Anhang...
Page 48: ...46...
Page 49: ...3d body pico Mounting instructions up flat plug track En...
Page 50: ...2...
Page 54: ...6 3 f I 3 f E 3 f E f E 3 f I...
Page 56: ...8 2 m...
Page 62: ...14 H c...
Page 67: ...19 ng...
Page 68: ...20...
Page 76: ...28...
Page 84: ...36 E 1 b 3 2 1 0...
Page 90: ...42...
Page 91: ...43 Appendix...
Page 94: ...46...
Page 95: ......

