


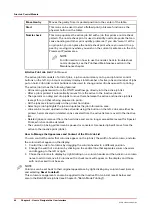


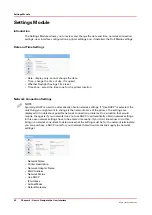


Roll enable
Enables or disables the Roll Media Option print queue (this allows you
check media parameters before the job actually prints). Roll media print
jobs will not print unless this icon is selected.
NOTE
Roll media print jobs do not require user actions to start the print
job once Roll module is initialized (see Roll Media Manager in the
RMO) If this icon is selected, and the job status is not on Hold,
roll media print jobs will start automatically when the printer re-
ceives the job.
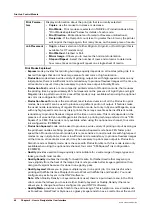
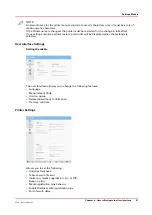
Roll Manager
The Roll Manager allows the operator to load and unload media and to ini-
tialize the Roll module so that the tension on the roll media is set and the
roll is ready to be printed on.
Create Batch
In Batch Mode Operation individual print jobs are sent from the RIP to the
printer, and then combined on the printer to create a batch job for flatbed
printing. There are two types of batch mode jobs: Composite and Collated.
In a Composite batch all images are printed on a single piece of media
without interruption. Composite batch mode can be used to efficiently print
more than three data layers and/or mix print modes for a batch job.
A Collated batch prints a set of individual print jobs on individual pieces of
media, and then repeats the number of copies of the set, as required. The
gantry moves to the park position between each print job, the media is
changed, and media thickness confirmation and pushing the start button is
required to continue printing the next copy.
Refer to Customer Application Bulletin 45 "Batch Mode Operation" on the
DGS website https://dgs.oce.com/ for more details and examples.
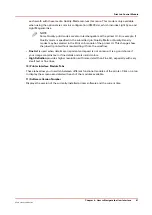
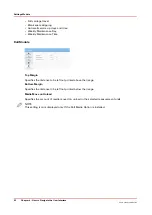
Ink Temperature
Control
This icon controls the ink heater and also displays the ink temperature. The
state of the button reflects the status of the ink heater. The heater times out
after two hours of inactivity (time can be changed up to four hours by a
service technician). If the ink heater is turned off when the timeout period
has expired, the button changes its status to unselected.
The printheads must be at operating temperature (45°C / 113°F) before a
job will start printing.
NOTE
If this button is flashing, it indicates an error. Click on the Ink Sta-
tus button to check the ink system.
UV Curing Lamp
Control
This icon controls the UV curing lamps. The state of the button reflects the
state of the lamps. The UV lamps will timeout after 15 minutes of inactivity
(time can be changed by a service technician). The lamps are extinguished
when the timeout expires, and the button changes its status to unselected.
If the lamps are off before the print starts, the lamps are turned on auto-
matically and the button reflects the state accordingly.
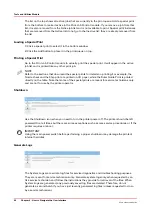
Table vacuum
This icon controls the table vacuum and duplicates the function of the table
vacuum foot switch. The button reflects the actual state of the table vac-
uum. There is an automatic timeout that will turn the table vacuum off. The
actual time is set in the Settings module under Printer.
NOTE
Once turned off, vacuum cannot be turned on again for approxi-
mately 5 seconds.
4
Print Job Control Module
Chapter 4 - How to Navigate the User Interface
43
Océ Arizona 1200 Series
Summary of Contents for arizona 1240 GT
Page 1: ...User guide Oc Arizona 1200 Series Revision 3010121377...
Page 6: ...Contents 6 Oc Arizona 1200 Series...
Page 7: ...Chapter 1 Introduction...
Page 11: ...Chapter 2 Product Compliance...
Page 15: ...Chapter 3 Safety Information...
Page 34: ...Roll Media Safety Awareness 34 Chapter 3 Safety Information Oc Arizona 1200 Series...
Page 35: ...Chapter 4 How to Navigate the User Interface...
Page 56: ...Software Update Module 56 Chapter 4 How to Navigate the User Interface Oc Arizona 1200 Series...
Page 57: ...Chapter 5 How to Operate Your Oc Arizona Printer...
Page 78: ...Media Registration 78 Chapter 5 How to Operate Your Oc Arizona Printer Oc Arizona 1200 Series...
Page 79: ...Chapter 6 Operating the Oc Arizona 1200 XT...
Page 85: ...Chapter 7 Roll Media Option...
Page 109: ...Chapter 8 Static Suppression Option...
Page 113: ...Chapter 9 How to Manage a White Ink Workflow...
Page 157: ...Chapter 10 Ink System Management...
Page 161: ...Chapter 11 Troubleshooting...
Page 163: ...Chapter 12 Printer Maintenance...
Page 207: ...Appendix A Application Information...


