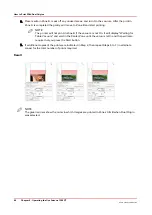


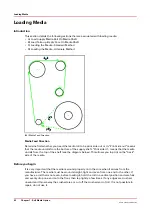


5.
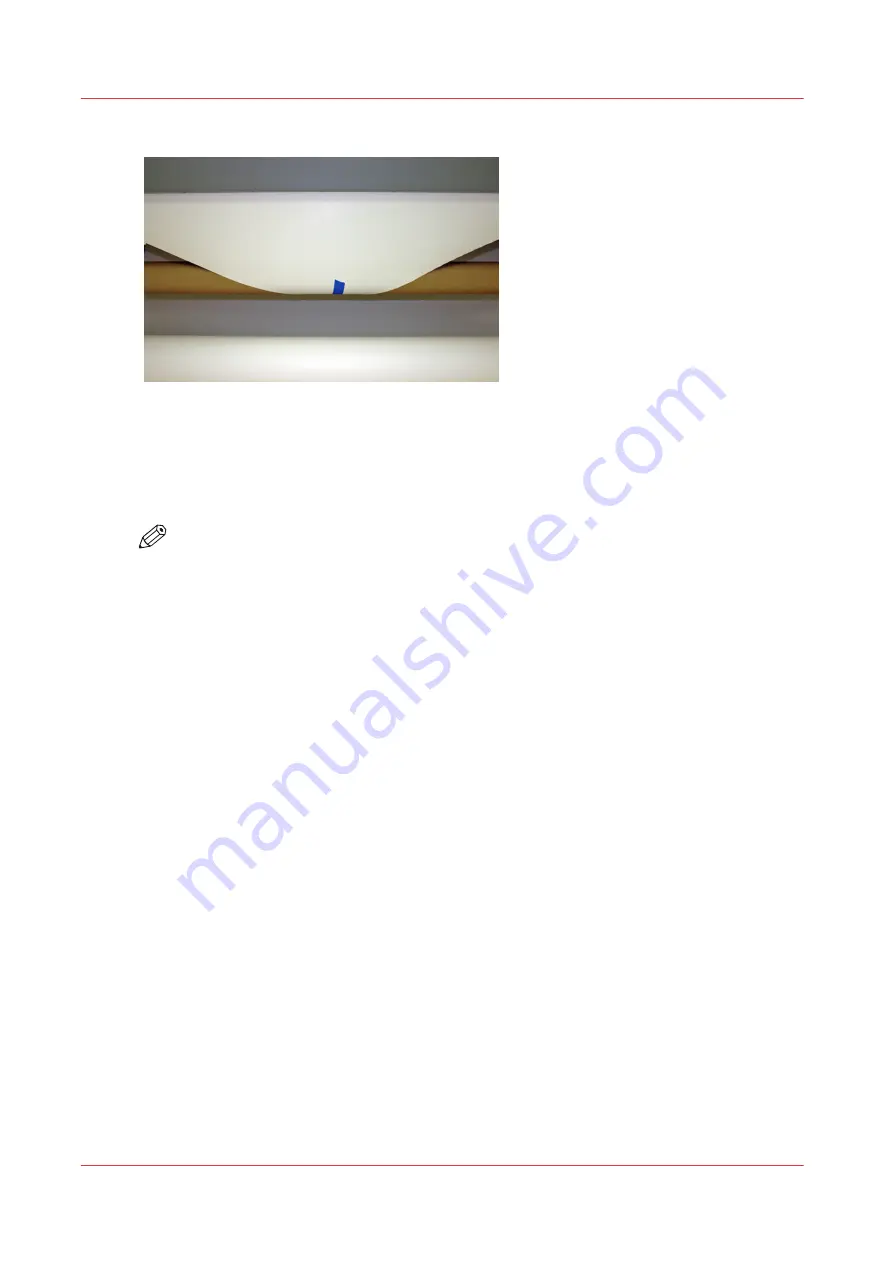
Tape the pointed end of the media to the take-up core as shown below.
[53] Tape media to core
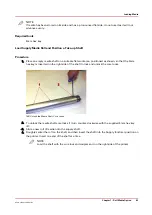
6.
Remove the tape you used to hold the media to the platen.
7.
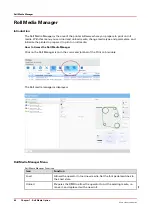
Select the "Initialize" icon from the Roll Media Manager to prepare the RMO for printing.
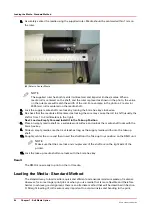
8.
After initialization has completed, advance the media until the cut area is wound onto the core
across the width of the roll and verify with the ruler that the supply and take-up edges are at the
same location.
NOTE
Important:
Use the supplied ruler to check that the edge of the take-up roll is aligned within
1mm of the feed roll.
9.
Start an RMO print job and verify image quality and that there are no wrinkles or banding.
Loading the Media - Alternate Method
98
Chapter 7 - Roll Media Option
Océ Arizona 1200 Series
Summary of Contents for arizona 1240 GT
Page 1: ...User guide Oc Arizona 1200 Series Revision 3010121377...
Page 6: ...Contents 6 Oc Arizona 1200 Series...
Page 7: ...Chapter 1 Introduction...
Page 11: ...Chapter 2 Product Compliance...
Page 15: ...Chapter 3 Safety Information...
Page 34: ...Roll Media Safety Awareness 34 Chapter 3 Safety Information Oc Arizona 1200 Series...
Page 35: ...Chapter 4 How to Navigate the User Interface...
Page 56: ...Software Update Module 56 Chapter 4 How to Navigate the User Interface Oc Arizona 1200 Series...
Page 57: ...Chapter 5 How to Operate Your Oc Arizona Printer...
Page 78: ...Media Registration 78 Chapter 5 How to Operate Your Oc Arizona Printer Oc Arizona 1200 Series...
Page 79: ...Chapter 6 Operating the Oc Arizona 1200 XT...
Page 85: ...Chapter 7 Roll Media Option...
Page 109: ...Chapter 8 Static Suppression Option...
Page 113: ...Chapter 9 How to Manage a White Ink Workflow...
Page 157: ...Chapter 10 Ink System Management...
Page 161: ...Chapter 11 Troubleshooting...
Page 163: ...Chapter 12 Printer Maintenance...
Page 207: ...Appendix A Application Information...


