Chapter 7
‐
How to Manage a White Ink Workflow
105
Océ Arizona 6100 Series
How to Prepare Spot Data in Adobe Illustrator
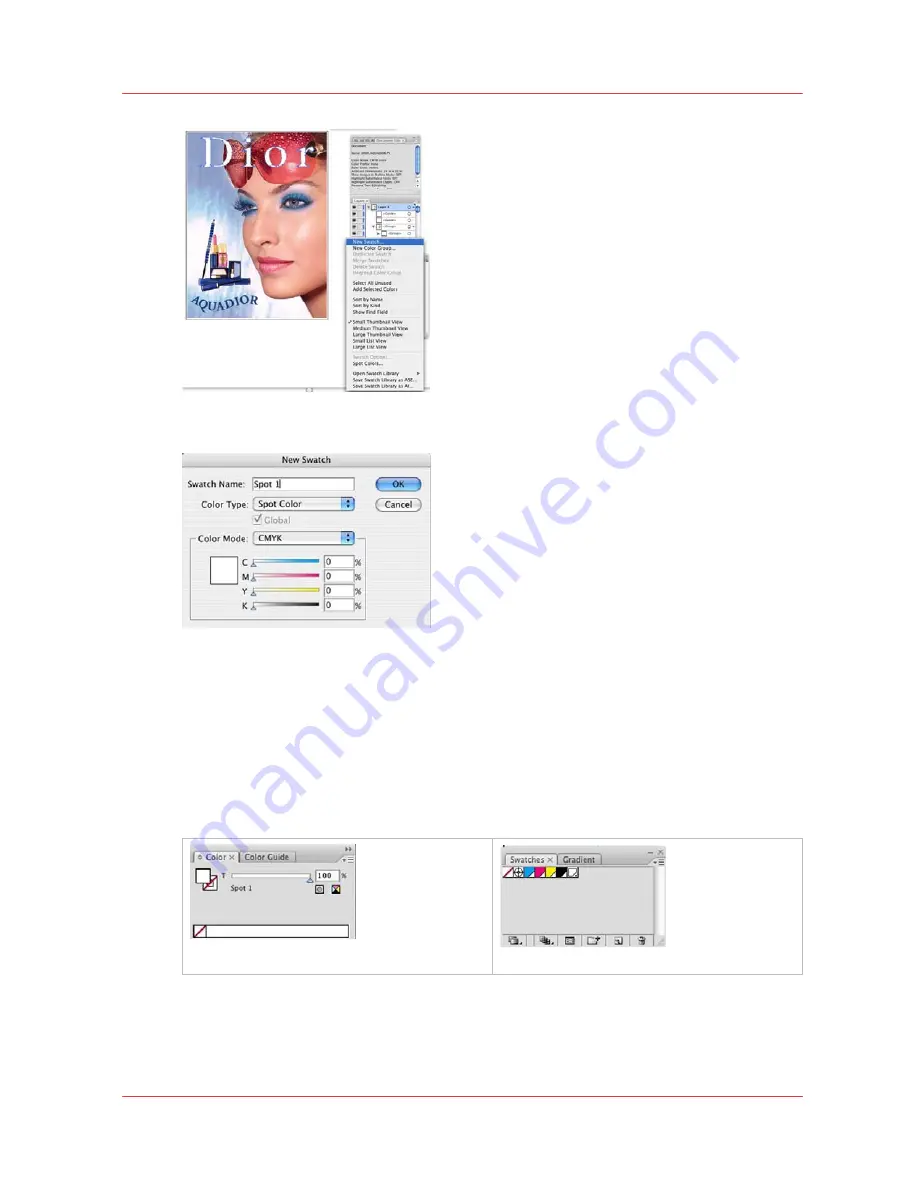
[26] New Swatch
[27] New Swatch Name
•
Name
– Enter the name Spot 1 or Spot 2.
Note: For instructions on how to use a naming convention other than Spot 1 or Spot 2, refer to
the sub-section at the end of this section "Naming Your Spot Data".
•
Color Type
– Use the drop-down menu to select Spot Color.
•
Swatch Color
– Use the sliders to adjust the swatch color. You can make this color any value
that will help you see the design better.
5.
Click OK to save your changes and close the Add Swatch dialog. You should now have a new
Spot color in your swatch palette, which is indicated with a small dot on bottom right side of
swatch.
[28] Color Swatch
[29] Spot Swatch
6.
Use the new swatch for any objects or fills which need to be printed with white ink. Clicking on
new spot color swatch will make this the default fill color for this document. Select element you
would like to be treated with Spot information and choose the fill swatch. See the example below.
Summary of Contents for Arizona 6160 XTS
Page 6: ...Contents 6 Oc Arizona 6100 Series...
Page 7: ...Chapter 1 Introduction...
Page 15: ...Chapter 2 Safety Information...
Page 44: ...44 Chapter 2 Safety Information Oc Arizona 6100 Series Safety Awareness...
Page 45: ...Chapter 3 How to Navigate the User Interface...
Page 67: ...Chapter 4 How to Operate Your Oc Arizona Printer...
Page 79: ...Chapter 5 How to Operate the Vacuum System...
Page 85: ...Chapter 6 How to Print in Batch and Dual Origin Modes...
Page 91: ...Chapter 7 How to Manage a White Ink Workflow...
Page 125: ...Chapter 8 Ink System Management...
Page 135: ...Chapter 9 Error Handling and Troubleshooting...
Page 139: ...Chapter 10 Printer Maintenance...
Page 174: ...174 Chapter 10 Printer Maintenance Oc Arizona 6100 Series How to Bleed an Ink Filter...
Page 175: ...Appendix A Application Information...


