background image

Océ

CS240/CS231

Copy Operations

Summary of Contents for CS231

Page 1: ...Océ CS240 CS231 Copy Operations ...

Page 2: ......

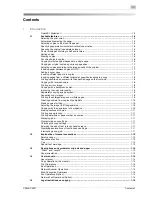
Page 3: ...lor 1 9 Improving the copy color quality 1 9 Separately copying a page spread 1 9 Repeating copy images 1 9 Printing the enlarged image on multiple pages 1 9 Creating booklets from copies of pamphlets 1 10 Making copies for filing 1 10 Adjusting the image to fit the paper size 1 10 Copying with the page layout of a magazine 1 10 Erasing sections of copies 1 11 Printing a sample copy 1 11 Printing ...

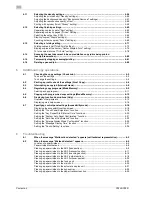
Page 4: ...ty label 2 13 Ozone release 2 14 Acoustic noise for European users only 2 14 For EU member states only 2 14 2 3 Caution notations and labels 2 15 2 4 Space requirements 2 16 2 5 Operation precautions 2 17 Power source 2 17 Operating environment 2 17 Storage of copies 2 17 3 Before making copies 3 1 Part names and their functions 3 3 Options 3 3 Outside of machine 3 6 Inside of machine 3 11 Finishe...

Page 5: ...Specifying the document size Original Size settings 4 18 Copying documents of mixed sizes Mixed Original setting 4 20 Loading folded Z folded documents 4 22 Selecting the document orientation Original Direction settings 4 23 To select an original direction setting 4 24 Selecting the position of the binding margin Binding Position settings 4 25 To select a binding position setting 4 26 Reducing the...

Page 6: ... 11 5 5 Copying with programmed copy settings Mode Memory 5 12 5 6 Displaying function descriptions Help 5 14 Overview of help screens 5 14 Displaying main help screens 5 16 5 7 Specifying control panel settings Accessibility mode 5 18 Displaying the accessibility setting screen 5 18 Setting the Touch Panel Adjustment function 5 18 Setting the Key Repeat Start Interval Time functions 5 20 Setting ...

Page 7: ...XXXX needs to be replaced appears 6 71 6 8 When the message Now remote operating Please do not turn off the power appears 6 72 6 9 Simple troubleshooting 6 73 6 10 Main messages and their remedies 6 76 7 Specifications 7 1 Specifications 7 3 Main unit 7 3 Automatic duplex unit 7 5 Automatic document feeder 7 5 Large capacity unit LU 301 7 6 Finisher FS 517 7 6 Finisher FS 608 7 7 Punch kit PK 512 ...

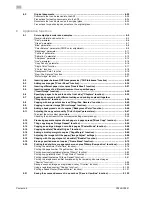
Page 8: ...irror image Mirror Image function 9 42 9 10 Adding a background color to copies Background Color function 9 45 9 11 Adjusting the copy color quality Color Adjust parameters 9 47 To adjust the color adjust parameters 9 48 Checking the print result of the color adjust settings sample copy 9 49 9 12 Producing separate copies of each page in a page spread Book Copy function 9 51 9 13 Tiling copy image...

Page 9: ...eft partition glass 11 3 Control panel 11 4 Document pad 11 4 Paper take up rollers 11 4 Electrostatic charger wire 11 5 Print head 11 5 11 2 Viewing counters Meter count 11 7 Viewing counters 11 7 Viewing the coverage rate 11 8 11 3 When the message It is time for the scheduled inspection of the device appears 11 9 12 Managing jobs 12 1 Overview of job list screen 12 3 Jobs 12 3 Multi job feature...

Page 10: ...side 2 13 42 Centering Duplex 2nd side 13 43 13 8 Finisher adjustment 13 45 2 position staple pitch adjustment 13 45 Center staple position adjustment 13 46 Half fold position 13 48 Tri fold position adjustment 13 50 Punch vertical position adjustment 13 52 Punch horizontal position adjustment 13 54 Punch regist loop size adjustment 13 55 Punch edge sensor adjustment 13 57 13 9 Color registration ...

Page 11: ...rd rules 13 84 Conditions of the password rules 13 84 13 16 Enhanced security settings 13 85 14 Appendix 14 1 Entering text 14 3 Enlarging the keyboard 14 4 To type text 14 5 List of available characters 14 5 14 2 Glossary 14 6 15 Index ...

Page 12: ...Contents 10 CS240 CS231 ...

Page 13: ...1 Introduction ...

Page 14: ......

Page 15: ... 4 The names OpenSSL Toolkit and OpenSSL Project must not be used to endorse or promote products derived from this software without prior written permission For written permission please contact openssl core openssl org 5 Products derived from this software may not be called OpenSSL nor may OpenSSL appear in their names without prior written permission of the OpenSSL Project 6 Redistributions of a...

Page 16: ...ion and or other materials provided with the distribution 3 All advertising materials mentioning features or use of this software must display the following acknowledgement This product includes cryptographic software written by Eric Young eay crypt soft com The word cryptographic can be left out if the rouines from the library being used are not cryptographic related 4 If you include any Windows ...

Page 17: ...zoom ratios By specifying separate horizontal and vertical zoom ratios copies of the original can be resized as desired For details refer to Typing in separate X and Y zoom ratios Individual Zoom settings on page 4 40 Scanning the original in separate batches An original with a large number of pages can be divided and scanned in separate batches Double sided copies can be produced by using the ori...

Page 18: ...opied and stapled together For details refer to Stapling copies Staple settings on page 4 65 Punching holes in copies Holes for filing can be punched in the copies For details refer to Punching holes in copies Punch settings on page 4 69 Copying multiple original pages onto a single page Multiple pages of the original can be printed together on a single page For details refer to Copying multiple d...

Page 19: ...ttings on page 4 55 Inserting paper between copies of OHP In order to prevent OHP from becoming stuck to each other a page interleaf can be inserted between the transparency copies For details refer to Inserting paper between OHP transparencies OHP Interleave function on page 9 22 Adding a cover page Cover pages can be added to copies or copies can be made using different paper for example colored...

Page 20: ...the front side For details refer to Specifying pages to be printed on the front side Chapters function on page 9 33 Copying with reversed colors An original can be copied with the light and dark colored areas of the original image inversed With Color setting Full Color copies are printed with the hues and brightness inversed With Color setting Black or Single Color copies are printed with the hues...

Page 21: ...on page 9 47 Separately copying a page spread A page spread such as in an open book or catalog can be copied onto separate pages For details refer to Producing separate copies of each page in a page spread Book Copy function on page 9 51 Repeating copy images An original image can be repeatedly printed on a single sheet of paper For details refer to Tiling copy images Image Repeat function on page...

Page 22: ...efer to Adding a binding margin to copies Page Margin function on page 9 65 Adjusting the image to fit the paper size When the copy paper is larger than the original copies can be printed so that the original image fills the paper For details refer to Adjusting the image to fit the paper Image Adjust settings on page 9 68 Copying with the page layout of a magazine Copies can be made with the pages...

Page 23: ...er to Managing jobs on page 12 3 Programming copy settings Frequently used copy settings can be programmed and recalled to be used with other copy jobs For details refer to Registering copy programs Mode Memory on page 5 9 Checking the copy settings Screens showing the current copy settings can be displayed From these screens the copy settings can also be changed For details refer to Checking the ...

Page 24: ...ries and to ensure safe use of the machine Sequence of action 1 The number 1 as formatted here indicates the first step of a sequence of actions 2 Subsequent numbers as formatted here indicate subsequent steps of a sequence of actions Text formatted in this style provides additional assistance Text formatted in this style describes the action that will ensure the desired results are achieved Tips ...

Page 25: ...nual the first value always refers to the width of the paper shown as Y in the illustration and the second to the length shown as X Paper orientation Lengthwise w If the width Y of the paper is shorter than the length X the paper has a vertical or portrait orientation indicated by w Crosswise v If the width Y of the paper is longer than the length X the paper has a horizontal or landscape orientat...

Page 26: ...s manual for details on saving data in user boxes retrieving data from user boxes and transferring data Network Scanner Operations This manual contains descriptions on specifying network settings for standard equipment and operating procedures for scanning functions Refer to this user manual for details on using network functions and the Scan to E Mail Scan to FTP and Scan to SMB operations Web Co...

Page 27: ...t agencies Internal revenue stamps canceled or uncanceled Passports Immigration papers Motor vehicle licenses and titles House and property titles and deeds General Identification cards badges or insignias Copyrighted works without permission of the copyright owner In addition it is prohibited under any circumstances to copy domestic or foreign currencies or works of art without permission of the ...

Page 28: ...1 Introduction 1 16 CS240 CS231 ...

Page 29: ...2 Installation and operation precautions ...

Page 30: ......

Page 31: ...er 01E_C 2 Note Some parts of the contents of this section may not correspond with the purchased product Warning and precaution symbols The following indicators are used on the warning labels or in this manual to categorize the level of safety warnings 7 WARNING Ignoring this warnings could cause serious injury or even death Do not ignore this safety advices 7 CAUTION Ignoring this cautions could ...

Page 32: ...ser the laser beam source could cause blindness Warning Symbol Use only the power cord supplied in the package If a power cord is not supplied only use the power cord and plug that is specified in POWER CORD INSTRUCTION Failure to use this cord could result in a fire or electrical shock Use the power cord supplied in the package only for this machine and NEVER use it for any other product Failure ...

Page 33: ...current capacity grounding and may result in fire or shock If proper wall outlet is not available the customer shall ask qualified electrician for the installation Do not use a multiple outlet adapter nor an extension cord in principle Use of an adapter or an extension cord could cause a fire or electrical shock Contact your authorized service representative if an extension cord is required Consul...

Page 34: ...he power plug from the outlet more than one time a year and clean the area between the plug terminals Dust that accumulates between the plug terminals may cause a fire Warning Symbol Connect the power cord to an electrical outlet that is equipped with a grounding ter minal Warning Symbol Do not place a flower vase or other container that contains water or metal clips or oth er small metallic objec...

Page 35: ... mechanical breakdown Do not let any object plug the ventilation holes of this product Heat could accumulate inside the product resulting in a fire or malfunction Do not use flammable sprays liquids or gases near this product as a fire could result Caution Symbol Always use this product in a well ventilated location Operating the product in a poorly ventilated room for an extended period of time c...

Page 36: ...s around the fusing unit etc which are indicated by a Caution HOT caution label Warning Symbol Do not throw the toner cartridge or toner into an open flame The hot toner may scatter and cause burns or other damage Caution Symbol Do not leave a toner unit or drum unit in a place within easy reach of children Licking or ingesting any of these things could injure your health Do not store toner units ...

Page 37: ...ccessive holidays When the optional Fax Kit FK 502 is not installed 7 CAUTION Ignoring this cautions could cause injury or damage to property Do not ignore this safety advices Caution Symbol Unplug the product when you will not use the product for long periods of time ...

Page 38: ... harmful interference in which case the user will be required to correct the interference at his own expense 7 WARNING The design and production of this unit conform to FCC regulations and any changes or modifications must be registered with the FCC and are subject to FCC control Any changes made by the purchaser or user without first contacting the manufacturer will be subject to penalty under FC...

Page 39: ...ion This machine is certified as a Class 1 laser product This means the machine does not produce hazardous laser radiation Internal laser radiation 7 WARNING This product employs a Class 3B laser diode that emits an invisible laser beam The laser diode and the scanning polygon mirror are incorporated in the print head unit The print head unit is NOT A FIELD SERVICE ITEM Therefore the print head un...

Page 40: ...rmance of procedures other than those specified in this manual may result in hazardous radiation exposure This is a semiconductor laser The maximum power of the laser diode is 30 mW and the wavelength is 775 800 nm For Denmark users 7 ADVARSEL Dette er en halvlederlaser Usynlig laserstråling ved åbning når sikkerhedsafbrydere er ude af funktion Undgå udsættelse for stråling Klasse 1 laser produkt ...

Page 41: ...ad Betrakta ej strålen For Norway users 7 ADVARSEL Dette en halvleder laser Dersom apparatet brukes på annen måte enn spesifisert i denne bruksanvisning kan brukeren utsettes for unsynlig laserstråling som overskrider grensen for laser klass 1 Dette en halvleder laser Maksimal effekt till laserdiode er 30 mW og bølgelengde er 775 800 nm Laser safety label A laser safety label is attached to the ou...

Page 42: ...vailler dans un environnement réunissant des conditions de confort santé et de sécurité il est préférable de bien aérer la pièce ou se trouve l appareil Acoustic noise for European users only Maschinenlärminformations Verordnung 3 GPSGV Der höchste Schalldruckpegel beträgt 70 dB A oder weniger gemäß EN ISO 7779 For EU member states only This symbol means Do not dispose of this product together wit...

Page 43: ...precautions 2 2 3 Caution notations and labels Safety precaution notations and labels appear on this machine at the following positions Be very careful that an accident does not occur when operations such as removing paper misfeeds are performed ...

Page 44: ...lar maintenance can easily be performed adhere to the recommended space requirements detailed below 2 Reminder Be sure to allow a clearance of 100 mm 4 in or more at the back of this machine for the ventilation duct Unit mm CS240 CS231 FS 608 LU 301 806 5 958 3 387 391 9 1130 50 1155 494 CS231 FS 519 SD 505 LU 301 Unit mm 555 958 3 387 391 9 1130 50 1155 494 190 6 ...

Page 45: ...ments for correct operation of the machine are as follows Temperature 10 C 50 F to 30 C 86 F with fluctuations of no more than 10 C 18 F within an hour Humidity 15 to 85 with fluctuations of no more than 20 within an hour Storage of copies To store copies follow the recommendation listed below Copies that are to be kept for a long time should be kept where they are not exposed to light in order to...

Page 46: ...2 Installation and operation precautions 2 18 CS240 CS231 ...

Page 47: ...3 Before making copies ...

Page 48: ......

Page 49: ...L 501 Installed to increase the telephone lines available for faxing 5 Large capacity unit LU 301 Can be loaded with up to 3 000 sheets of plain A4 size paper Can be loaded with the following A4 size paper 2 500 sheets of thick paper 1 1 750 sheets of thick paper 1 1 CS240 sheets of thick paper 2 or 1 300 sheets of thick paper 3 Referred to as the LCT throughout the manual 6 Finisher FS 517 Feeds ...

Page 50: ...amp to documents that have been scanned For details refer to the User manual Fax Operations Option 13 Scan accelerator kit SA 501 Creates images at high speed when sending scans 14 Security kit SC 503 Installed to encode the data saved on the hard disk so that the hard disk can be used more safely 15 Local interface kit EK 602 Used for connecting the authentication unit biometric type and the JScr...

Page 51: ... Position Half Fold Center Staple Fold and Tri Fold are available 8 Punch kit PK 512 Installed onto the Finisher FS 517 FS 608 to allow hole punching to be used 9 Punch kit PK 513 Installed onto the Finisher FS 517 FS 608 to allow hole punching to be used 10 Finisher FS 519 Feeds out finished printed pages The Sort setting separating by copy set Group setting separating by pages and Staple setting...

Page 52: ...ts or 10 en velopes 4 Paper empty indicator Flashes in orange when very few pages remain in the paper tray and lights up when the tray is empty 5 Tray 4 Can be loaded with up to 1 000 sheets of plain paper Can be loaded with up to 750 sheets of thick paper 1 500 sheets of thick paper 1 450 sheets of thick paper 2 400 sheets of thick paper 3 or 200 postcards 6 Tray 3 Can be loaded with up to 1 500 ...

Page 53: ...cing the waste toner box and when replacing the imaging unit when cleaning the print head 10 Upper front door Opened when replacing the toner cartridge 11 Output tray Collects printed pages 12 Control panel Used to specify the various machine settings No Part name Description ...

Page 54: ...ease lever Used to open the automatic duplex unit door when clearing pa per misfeeds 19 Upper right side door release lever Used to open the upper right side door 20 Bypass tray door Opened when clearing paper misfeeds 21 Bypass tray door release lever Used to open the bypass tray door when clearing paper mis feeds 22 Lower right side door Opened when clearing paper misfeeds from the paper transpo...

Page 55: ...PORT2 Used for connecting a general subscriber line This jack is used when the optional fax multi line is installed 33 Jack for connecting a telephone TEL PORT1 Used for connecting the cord from a telephone 34 Telephone jack 1 LINE PORT1 Used for connecting a general subscriber line 35 RS 232C port Used for connecting the JScribe IC card reader writer 36 USB port Used for connecting the USB cable ...

Page 56: ...41 Network connector 10Base T 100Base TX 1000Base T Used for connecting the network cable when this machine is used for network printing and network scanning 42 Ozone filter Collects the ozone generated in the machine No Part name Description ...

Page 57: ...s cleaning tool Used to clean the surface of the print head glass for example when replacing the imaging unit 6 Waste toner box Collects used waste toner 7 Imaging unit Creates the print image 8 Charger cleaning tool Used to clean the electrostatic charger wire for example when incorrect copies are produced 9 Imaging unit release lever Used when removing an imaging unit 10 Toner cartridges There a...

Page 58: ...CS231 12 Document scales Position the document so that it is aligned with the scales Also use the scales to measure the loaded document 13 Misfeed clearing dial Turned when clearing paper misfeeds within the ADF No Part name Description ...

Page 59: ...tal transport unit cover Opened when clearing paper misfeeds within the horizontal transport unit 7 Misfeed clearing dial FN3 Turned when clearing paper misfeeds within the finisher 8 Guide lever FN2 Opened when clearing paper misfeeds 9 Stacker unit Removed when clearing paper misfeeds or jammed staples or when replacing the staple cartridge 10 Staple cartridge holder Removed from the stacker uni...

Page 60: ...PK 512 Punch kit PK 513 No Part name Description 14 Punch kit Punches holes for filing printed pages when the punch kit is in stalled onto Finisher FS 517 15 Punch scrap box Removed when emptying punch scraps that have accumulated from using the Punch settings 5 6 18 7 8 19 11 12 13 14 10 9 15 1 2 3 4 ...

Page 61: ...er FN4 Opened when clearing paper misfeeds 6 Guide lever FN1 Opened when clearing paper misfeeds 7 Misfeed clearing dial FN3 Turned when clearing paper misfeeds within the finisher 8 Guide lever FN2 Opened when clearing paper misfeeds 9 Guide lever FN5 Opened when clearing paper misfeeds 10 Guide lever FN9 Opened when clearing paper misfeeds 11 Stacker unit Pulled out when clearing paper misfeeds ...

Page 62: ...e lever FN10 Opened when clearing paper misfeeds 17 Staple cartridge holder Removed from the stacker unit when clearing jammed staples or when replacing the staple cartridge No Part name Description No Part name Description 18 Punch kit Punches holes for filing printed pages when the punch kit is in stalled onto Finisher FS 608 19 Punch scrap box Removed when emptying punch scraps that have accumu...

Page 63: ...7 Guide lever FN1 Raised when clearing paper misfeeds within the finisher 8 Punch scrap box FN3 1 Removed when emptying punch scraps that have accumulated from using the Punch settings 9 Guide lever FN3 Raised when clearing paper misfeeds within the finisher 10 Stapler Moved to the front when clearing jammed staples 11 Staple cartridge holder Removed from the stapler when replacing the staple cart...

Page 64: ...CS240 CS231 Saddle stitcher SD 505 Mailbin kit MT 502 Saddle stitcher SD 505 1 2 No Part name Description 1 Output tray Collects printed pages 2 Misfeed clearing door Opened when clearing paper misfeeds within the saddle stitcher ...

Page 65: ...Mailbin kit MT 502 4 3 5 No Part name Description 3 Mailbins Collects printed pages 4 Misfeed clearing door Opened when clearing paper misfeeds within the mailbin kit 5 Guide lever FN7 Moved when clearing paper misfeeds within the mailbin kit ...

Page 66: ... clearing cover Opened when clearing paper misfeeds 2 Upper door Opened when loading paper 3 Paper empty indicator Flashes in orange when very few pages remain in the paper tray and lights up when the tray is empty 4 Large capacity unit release lever Used to slide the large capacity unit away from the machine ...

Page 67: ...r using the finisher Do not place objects on top of the finisher and below the paper output trays otherwise the machine may be damaged CS240 Do not place your hand below or rest your foot on top of the output trays for finisher FS 519 CS240 231 CS240 CS240 ...

Page 68: ...ss to enter Interrupt mode While the machine is in Interrupt mode the indicator on the Interrupt key lights up in green and the message Now in Interrupt mode appears on the touch panel To cancel Interrupt mode press the Interrupt key again 8 Stop key Pressing the Stop key while copying scanning or printing tem porarily stops the operation 9 Proof Copy key Press to print a single proof copy to be c...

Page 69: ...e the indicator on the Power Save key lights up in green and the touch panel goes off To cancel Power Save mode press the Power Save key again 18 Access key If user authentication or account track settings have been ap plied press this key after entering the user name and password for user authentication or the account name and password for account track in order to use this machine 19 Brightness ...

Page 70: ...ens When the machine is ready to begin making copies after being turned on the Basic screen appears To activate a function or to select a setting lightly touch the desired button in the touch panel Basic screen Quick Copy screen 4 5 8 9 1 7 6 3 2 4 9 1 7 6 3 2 ...

Page 71: ...screen for specifying the settings 3 Icon display area Icons indicating the status of jobs and the machine are dis played 4 Separate Scan button Touch to scan the document in separate batches A document scanned in different batches can be treated as a sin gle copy job 5 Finishing button CS240 Touch to specify settings for collating grouping sta pling or hole punching CS240 Touch to specify setting...

Page 72: ...hine regardless of the current mode Indicates that an error occurred during an image stabilization operation a print op eration or a scan operation Touch this icon to view a screen containing a warning code If the warning screen was closed when a warning occurred touch this button to dis play the warning screen again Appears when there is a message indicating that consumables must be replaced or t...

Page 73: ...lted to the left Adjust the control panel to the angle that allows for easy operation To adjust the angle of the control panel 1 Pull the control panel release lever toward you and then push down on the control panel The control panel stops at the middle position 1 Upper position base position 2 Middle position 3 Lower tilt position 4 Left tilt position Control panel release lever ...

Page 74: ...ol panel The control panel stops at the lower position 3 To tilt the control panel to the left hold the bottom of the control panel and then tilt the panel to the left 4 To return the control panel to the upper position pull the control panel release lever toward you and then pull up on the control panel 2 Reminder When tilting the control panel do not grab the touch panel ...

Page 75: ...e message Warming up Ready to scan appears on the touch panel and the indicator on the Start key lights up in blue indicating that a job can now be queued The default settings are the settings that are selected immediately after the machine is turned on the power switch is set to n and before any setting is specified from the control panel or touch panel and those that are selected when the Reset ...

Page 76: ...queued jobs 7 Check that the document has finished being scanned and then position the next document 8 Specify new copy settings and the desired number of copies and then press the Start key If the Copy Operating Screen parameter in Utility mode was set to Yes touch Next Copy Job to display the Basic screen After the machine has finished warming up the jobs will automatically be printed in the ord...

Page 77: ...urned off Do not turn off the machine with the main power switch or the Power auxiliary power key while it is making copies or printing otherwise a paper misfeed may occur Do not turn off the machine with the main power switch or the Power auxiliary power key while it is scanning or sending or receiving data otherwise all scan data or transmission data will be deleted Do not turn off the machine w...

Page 78: ...m Auto Reset operation As the factory default the Copy mode screen is displayed after 1 minute Detail The mode screen that is displayed when the System Auto Reset operation is performed can be changed from the Utility mode For details refer to System settings on page 13 22 Automatically conserving energy low power mode If no operation is performed for a specified length of time the touch panel goe...

Page 79: ...reparation time than Low Power mode As the factory default the machine enters Sleep mode after 30 minute To recover from Sleep mode 1 Press the Power Save key 2 The machine can receive jobs while it is warming up The touch panel comes on again and after the machine has finished warming up it is ready to begin printing 2 Note The Sleep mode can also be canceled by pressing any key in the control pa...

Page 80: ...Settings mode For details refer to System settings on page 13 22 Automatically turning the machine on off weekly timer The machine can be set to automatically enter Sleep mode according to a usage schedule determined by the administrator so the machine s use can be limited This is the Weekly Timer Follow the procedure described below to use the machine while the Weekly Timer is being used Detail A...

Page 81: ...g of 60 or more cannot be specified 5 Touch OK The message Ready to copy appears on the touch panel 2 Note If the message It is now non business hour Set the Sleep Mode time or It is now non business hour To use the device enter password using the keyboard or keypad and then touch OK appears after the Power auxiliary power key is pressed the Weekly Timer is set Detail During the set time the copy ...

Page 82: ... for the server name 0 If machine authentication or external server authentication has been set a total of 1 000 users and accounts can be registered 1 Touch User Name If a list of user names can be displayed the desired user name can be selected from the list Touch User Name List touch the button for the desired user name to select it and then touch OK Users who have no access to a user name and ...

Page 83: ... appears with the name of the default server Touch Server Name to display the names of the registered servers and then select the desired server For details on specifying settings for an external server authentication refer to Selecting an authentication method on page 13 68 2 Type in the user name and then touch OK 3 Touch Password ...

Page 84: ...Account Track has been set to Synchronize the account track screen does not appear if the users and accounts are synchronized 6 Make copies using the desired copy settings 7 When you are finished printing press the Access key A message appears requesting confirmation to log off 8 Touch Yes and then touch OK The user authentication screen appears Detail For details on specifying user authentication...

Page 85: ...ed by the administrator Controlling each account s use of this machine account track If the account track settings have been specified by the administrator only users of registered accounts can use this machine In addition the number of prints produced with each account can be controlled This is account track 0 When account track settings have been specified only users who enter passwords for spec...

Page 86: ...Before making copies 3 40 CS240 CS231 2 Type in the account name and then touch OK 3 Touch Password 4 Type in the password and then touch OK 5 Touch Login or press the Access key The Basic screen appears ...

Page 87: ...unts can be managed in Administrator Settings mode available from the Utility mode Settings should be specified by the administrator If Account Track Input Method on the General Settings screen of Administrator Settings mode was set to Password Only log on is possible by only entering the password For details refer to User authentication Account track on page 13 28 For details on specifying accoun...

Page 88: ...iometric type authenticates the user by scanning the vein patterns in the finger Detail For details on specifying authentication settings for the authentication unit biometric type and on registering finger vein patterns refer to the User manual provided with the authentication unit biometric type When 1 to many authentication has been specified Place your finger on the authentication unit biometr...

Page 89: ...n has been specified 1 Type in the user name 2 Place your finger on the authentication unit biometric type The basic screen appears 2 Note If the authentication unit biometric type cannot be used it is possible to use this machine by entering a User name and Password ...

Page 90: ...s are not positioned correctly for the loaded paper the paper size will not be correctly detected Be sure to adjust the lateral guides to the size of the loaded paper 3 Load the paper into the tray so that the side of the paper to be printed on the side facing up when the package was unwrapped faces up Load letterhead paper so that the side to be printed on faces down Film Lateral guides mark ...

Page 91: ...special paper is loaded the paper type setting must be specified For details refer to Specifying a setting for special paper on page 8 19 2 Reminder Be careful not to touch the film For details on selecting the size and type of paper loaded in tray 1 and 2 refer to Copy paper on page 8 3 For details on specifying the paper size for tray 1 and 2 refer to Selecting a paper size setting Size setting ...

Page 92: ...t How many sheets of paper and other media can be loaded Do not load so many sheets of plain paper that the top of the stack is higher than the mark 3 Lower the paper take up roller and then close tray 3 2 Reminder For details on selecting the size and type of paper loaded in tray 3 refer to Copy paper on page 8 3 Do not load tray 3 with paper of a size other than that previously specified Be care...

Page 93: ...t How many sheets of paper and other media can be loaded Do not load so many sheets of plain paper that the top of the stack is higher than the mark 3 Lower the paper take up roller and then close tray 4 2 Reminder For details on selecting the size and type of paper loaded in tray 4 refer to Copy paper on page 8 3 Do not load tray 4 with paper of a size other than that previously specified Be care...

Page 94: ...ed paper loaded Flatten the paper before loading it How many sheets of paper and other media can be loaded Do not load so many sheets of plain paper that the top of the stack is higher than the mark 3 Lower the paper take up roller and then close the upper door 2 Reminder For details on selecting the size and type of paper loaded in the LCT refer to Copy paper on page 8 3 2 Note If the machine is ...

Page 95: ...e bypass tray When loading large sized paper pull out the tray extension 2 With the side to be printed on facing down insert the paper as much as possible into the feed slot 3 Slide the lateral guides to fit the size of paper being loaded How is curled paper loaded Flatten the paper before loading it How many sheets of paper and other media can be loaded Do not load so many sheets of plain paper t...

Page 96: ...ls on selecting a setting for non standard size paper refer to Specifying a non standard paper size Custom Size settings on page 8 12 For details on selecting a setting for wide paper refer to Selecting a setting for oversized paper Wide Paper settings on page 8 16 For details on special paper refer to Special paper on page 8 6 5 Touch OK and then touch OK in the next screen that appears The Basic...

Page 97: ... air is removed and make sure that the folds of the flaps are firmly pressed otherwise the envelopes may become wrinkled or a paper misfeed may occur When loading envelopes load them with the flap side up as shown in the illustration If the envelopes are loaded with the flap side down a paper misfeed may occur The flap side of envelopes cannot be printed on A maximum of 10 envelopes can be loaded ...

Page 98: ...bypass tray Be sure to load letterhead paper so that the side to be printed on faces up 2 Note The image will be printed on the surface of the paper facing down when the paper is loaded into the bypass tray Detail For details on specifying the paper size for the bypass tray refer to Selecting a paper size setting Size setting on page 8 10 For details on the paper sizes refer to Copy paper on page ...

Page 99: ...4 Basic copy operations ...

Page 100: ......

Page 101: ...ray has reached its capacity Remove paper from the tray indicated by may appear even if the paper was removed from the output trays For details on multiple jobs refer to Multi job feature on page 12 3 Interrupting a print job resets the loading capacity of the output tray For details on the limitations of the loading capacity for the output trays refer to Specifications on page 7 3 Some settings c...

Page 102: ...g a Zoom setting refer to page 4 35 For details on selecting the document and copy settings refer to page 4 45 For details on selecting the document image quality refer to page 4 52 For details on selecting a copy density setting refer to page 4 55 For details on specifying combined copy settings refer to page 4 49 For details on selecting Finishing settings refer to page 4 60 CS240 For details on...

Page 103: ... C clear key in the keypad and then specify the correct number of copies 5 Press the Start key To stop the copy operation being performed press the Stop key For details refer to page 4 81 The next copy operation can be queued while a copy operation is being performed For details refer to page 4 80 ...

Page 104: ...e setting specified first is given priority A warning message appears Operations where the setting specified last is given priority The procedure for setting the Booklet function after selecting the 2 Position Staple setting is described below 1 Select the 2 Position Staple setting 2 Set the Booklet function The 2 Position Staple setting is automatically canceled and the Booklet function is set To...

Page 105: ... the 2 Position Staple setting after setting the Booklet function is described below 1 Set the Booklet function 2 Select the 2 Position Staple setting The message Cannot be set with Booklet appears and the 2 Position Staple setting cannot be selected The Booklet function remains selected and the 2 Position Staple setting is canceled To select the 2 Position Staple setting cancel the Booklet functi...

Page 106: ...t is not loaded correctly it may not be fed in straight or a document misfeed or damage to the document may occur 0 If the document is loaded in any orientation other than with the top of the document toward the back of the machine be sure to select the document orientation For details on selecting the document orientation refer to Selecting the document orientation Original Direction settings on ...

Page 107: ...ay not be detected 0 Do not place objects weighing more than 2 kg on the original glass In addition do not press down extremely hard on a book spread on the original glass otherwise the original glass may be damaged 0 For thick books or large objects make the copy without closing the ADF if it is installed When a document is being scanned with the ADF open do not look directly at the light that ma...

Page 108: ...arent or translucent documents place a blank sheet of paper of the same size as the document over the document For bound documents spread over two facing pages such as a book or magazine position the top of the document toward the back of this machine and align the document with the mark in the back left corner of the document scales as shown 4 Close the ADF if it is installed Blank sheet of paper...

Page 109: ...pacity of the ADF is 100 sheets of plain paper 80 g m2 or 38 sheets of thick paper 210 g m2 0 The output method used with the Separate Scan setting can be set to Page Print or Batch Print As a default Batch Print is selected 0 For details on the output method used with the Separate Scan setting refer to the description for Separate Scan Output Method in Copier settings on page 13 18 1 Position the...

Page 110: ...3 To change the scanning settings touch Change Setting For details on changing the scanning settings refer to Changing scan settings for each document on page 4 28 The buttons that appear in the screen for changing the settings differ depending on the specified settings Settings for the following can be changed 1 Sided 2 Sided Binding Position Zoom Frame Erase Center Erase Original Size To cancel ...

Page 111: ...Output Method parameter is set to Batch Print touch Print or press the Start key If the Separate Scan Output Method parameter is set to Batch Print the copy settings can be changed To change the copy settings touch Change Setting and then touch OK after changing the settings as desired ...

Page 112: ...ate Scan setting can be set to Page Print or Batch Print As a default Page Print is selected 0 For details on the output method used with the Separate Scan setting refer to Copier settings on page 13 18 1 Lift open the ADF 2 Position the first page or the first side of the document face down onto the original glass For details on positioning the document refer to Placing the document on the origin...

Page 113: ...uch OK For details on specifying the binding position refer to Selecting double sided copies on page 4 47 7 Touch Original Direction select the orientation of the loaded document and then touch OK For details on specifying the document orientation refer to Selecting the document orientation Original Direction settings on page 4 23 8 Touch OK ...

Page 114: ...g settings touch Change Setting For details on changing the scanning settings refer to Changing scan settings for each document on page 4 28 The buttons that appear in the screen for changing the settings differ depending on the specified settings Settings for the following can be changed 1 Sided 2 Sided Binding Position Zoom Frame Erase Center Erase Original Size To cancel changes to the settings...

Page 115: ...Output Method parameter is set to Batch Print touch Print or press the Start key If the Separate Scan Output Method parameter is set to Batch Print the copy settings can be changed To change the copy settings touch Change Setting and then touch OK after changing the settings as desired ...

Page 116: ...can be produced after specifying the document scanning size if the document size cannot be detected automatically or if you wish to specify a certain document size 1 Position the document to be copied For details on positioning the document refer to Feeding the document on page 4 8 2 In the Basic screen touch Original Setting The Original Setting screen appears 3 Touch Original Size The Original S...

Page 117: ...ect the dimension use the keypad to specify the desired value and then touch OK If a value outside the allowable range is specified in the Custom Size screen the message Input Error appears If Input Error appeared or if the value was incorrectly entered press the C clear key and then specify the correct value To cancel changes to the settings touch Cancel Photo Size screen To specify a photo size ...

Page 118: ...y it may not be fed in straight or a document misfeed or damage to the document may occur 1 Slide the adjustable lateral guides of the ADF to fit the size of the largest page The possible combinations of document sizes differ depending on the widest document loaded position of the adjustable lateral guides For details on the mixed document sizes that can be loaded in the ADF refer to Documents tha...

Page 119: ... 4 21 Basic copy operations 4 4 In the Basic screen touch Original Setting The Original Setting screen appears 5 Touch Mixed Original To cancel the Mixed Original setting touch Mixed Original again to deselect it ...

Page 120: ... document are scanned at that size 1 Position the document to be copied Unfold folded documents before loading them into the ADF If the document is copied without being unfolded a paper misfeed may occur For details on loading the document refer to Loading the document into the ADF on page 4 8 2 In the Basic screen touch Original Setting The Original Setting screen appears 3 Touch Z Folded Origina...

Page 121: ...e original glass Icon Description Select this setting for a document load ed with the top toward the back of this machine Select this setting for a document load ed with the top toward the front of this machine Select this setting for a document loaded into the ADF with the top of the document toward the left side of this machine Select this setting for a document placed on the original glass with...

Page 122: ... the document refer to Feeding the document on page 4 8 2 In the Basic screen touch Original Setting The Original Setting screen appears 3 Touch Original Direction The Original Direction screen appears 4 Touch the button for the orientation of the loaded document and then touch OK To cancel the setting and select the default press the Reset key ...

Page 123: ...is loaded with the binding margin at the left Right Select this setting if the document is loaded with the binding margin at the right Top Select this setting if the document that is loaded has a binding margin at the top When the document length is 297 mm or less When the document length is more than 297 mm Auto Select this setting to automatically select the po sition of the binding margin If th...

Page 124: ... 8 When loading a document with a binding margin position the top of the document toward the back of the machine 2 In the Basic screen touch Original Setting The Original Setting screen appears 3 Touch Binding Position The Binding Position screen appears 4 Touch the button for the desired binding margin position and then touch OK To cancel the setting and select the default press the Reset key ...

Page 125: ... a document loaded into the ADF 2 Note For details on cleaning the left partition glass refer to Left partition glass on page 11 3 1 Load the document into the ADF For details on loading the document refer to Loading the document into the ADF on page 4 8 2 In the Basic screen touch Original Setting 3 Touch Despeckle To cancel the Despeckle setting touch Despeckle again to deselect it 2 Note The sc...

Page 126: ...re scanned from the original glass the scan settings can be changed for each document The following procedure describes how to change the settings when the Separate Scan setting is used 1 Position the document to be copied 2 In the Basic screen touch Separate Scan 3 Press the Start key Scanning begins 4 Touch Change Setting A screen appears allowing you to change the settings ...

Page 127: ... OK The buttons that appear in the screen for changing the settings differ depending on the specified settings Settings for the following can be changed 1 Sided 2 Sided Binding Position Zoom Frame Erase Center Erase Original Size To cancel changes to the settings touch Cancel Binding Position screen Zoom screen Frame Erase screen ...

Page 128: ...details on specifying the Frame Erase setting refer to Erasing specified areas of copies Frame Erase function on page 9 73 The Center Erase screen appears only when the Book Scanning function is selected The Original Size screen appears only when the Mixed Original setting is selected 6 Touch OK Center Erase screen Original Size screen ...

Page 129: ...to print the copy in black and white regardless of whether the scanned document is in color or in black and white Single Color Select this setting to print copies in the specified color regardless of whether the scanned document is in color or in blank and white The color used for printing the copy can be set to one of the 21 available Refer to page 9 17 When the Single Color setting is selected t...

Page 130: ...lable Color combinations other than those displayed are not available If the Single Color setting was selected touch the button for the desired color and then touch OK Touch and to display other available colors To use the average brightness method for reproducing gradations in monocolor documents touch Solid If the Solid setting is not selected the relative luminosity method is selected 3 Touch O...

Page 131: ...per on page 8 19 As the factory default Auto is selected The Auto Zoom setting and the Auto Paper setting cannot both be selected at the same time If the Auto Zoom setting was selected the Zoom screen appears In the Zoom screen specify the desired Zoom setting The paper tray are selected in the following order when the Auto Paper setting is selected Tray 1 Tray 2 Tray 3 Tray 4 LCT only when LCT is...

Page 132: ... appropriate zoom ratio is selected based on the size of the loaded document and the specified paper size For details on the Auto Zoom setting refer to Automatically selecting the zoom ratio Auto zoom setting on page 4 35 1 In the Basic screen touch Paper The Paper screen appears 2 Select the paper tray loaded with the desired paper 3 Touch OK The Basic screen appears again ...

Page 133: ...based on the size of the loaded document and the specified paper size 0 If the Auto Zoom setting is selected and an enlargement is to be copied on paper larger than the document load the document with the same orientation as the paper 0 The Auto Zoom setting and the Auto Paper setting cannot both be selected at the same time If the Auto Paper setting was selected the Paper screen appears In the Pa...

Page 134: ...py that is the same size as the document 100 is produced 0 As the factory default Full Size is selected 0 Touch to enlarge the zoom ratio and touch to reduce the zoom ratio in 0 1 increments 1 In the Basic screen touch Zoom The Zoom screen appears 2 Touch Full Size 3 Touch OK The Basic screen appears again ...

Page 135: ...or appears Type a value within the allowable range If the value was incorrectly entered press the C clear key to erase the value and then specify the correct value 0 The entered zoom ratio can be stored For details on storing zoom ratios refer to Storing the desired zoom ratio on page 4 43 1 In the Basic screen touch Zoom The Zoom screen appears 2 Touch XY Zoom 3 Using the keypad type in the desir...

Page 136: ...e original document size and centered in the copy 0 As the factory default Full Size is selected 0 The zoom ratio of the Minimal setting can be changed between 90 0 and 99 9 For details on changing the zoom ratio for the Minimal setting or programming custom zoom ratios refer to Storing the desired zoom ratio on page 4 43 1 In the Basic screen touch Zoom The Zoom screen appears 2 Touch Minimal 3 T...

Page 137: ...ing from common standard document sizes to standard paper sizes are preset 0 As the factory default Full Size is selected 1 In the Basic screen touch Zoom The Zoom screen appears 2 Touch the button for the appropriate zoom ratio beside Enlarge and Reduce depending on the document and paper sizes 3 Touch OK The Basic screen appears again ...

Page 138: ...rection between 25 0 and 400 0 By combining different horizontal and vertical zoom ratios the copy image can be adjusted as shown below 0 If a value outside the allowable range is specified the message Input error appears Type a value within the allowable range If the value was incorrectly entered press the C clear key to erase the value and then specify the correct value 1 In the Basic screen tou...

Page 139: ...om ratio between 25 0 and 400 0 for the X direction 4 Touch Y under Set Individual Zoom and then use the keypad to type in the desired zoom ratio between 25 0 and 400 0 for the Y direction To cancel changes to the settings touch Cancel 5 Touch OK and then touch OK in the next screen that appears The Basic screen appears again ...

Page 140: ...lt Full Size is selected 0 Touch to enlarge the zoom ratio and touch to reduce the zoom ratio in 0 1 increments 0 Stored zoom ratios can be changed to desired zoom ratios For details on storing zoom ratios refer to Storing the desired zoom ratio on page 4 43 1 In the Basic screen touch Zoom The Zoom screen appears 2 Touch the button for the desired zoom ratio under Set Zoom Ratio 3 Touch OK The Ba...

Page 141: ...alue and then specify the correct value 0 To store a Minimal zoom ratio type in the desired zoom ratio between 90 0 and 99 9 0 The default zoom ratios 400 0 200 0 and 50 0 are stored When a new zoom ratio is stored it overwrites the zoom ratio stored with the selected button If a button stored with a zoom ratio is not touched before OK is touched no setting is changed 1 In the Basic screen touch Z...

Page 142: ...ouch the button or Minimal where the new zoom ratio is to be stored To cancel the setting and select the default press the Reset key The specified zoom ratio is stored 6 Touch OK and then touch OK in the next two screens that appear The Basic screen appears again ...

Page 143: ...iginal Copy settings Description 1 Sided 1 Sided Select this setting to produce single sided copies from single sided doc uments 1 Sided 2 Sided Select this setting to produce one double sided copy from two single sided documents 2 Sided 1 Sided Select this setting to produce two single sided copies from one double sided document 2 Sided 2 Sided Select this setting to produce double sided copies f...

Page 144: ... binding margin and the orientation of the loaded document otherwise the copies will not be printed as desired If the binding position for the document is set to Auto the position of the binding margin is automatically selected A binding margin along the long side of the paper is selected if the document length is 297 mm or less If the document length is more than 297 mm a binding margin along the...

Page 145: ...herwise the copies will not be printed as desired If the binding position for the document is set to Auto the position of the binding margin is automatically selected A binding margin along the long side of the paper is selected if the document length is 297 mm or less If the document length is more than 297 mm a binding margin along the short side of the paper is selected If Auto is selected unde...

Page 146: ...ble sided document select the binding positions for the document and the copy and then touch OK 4 Touch Original Direction select the orientation of the loaded document and then touch OK For details on specifying the document orientation refer to Selecting the document orientation Original Direction settings on page 4 23 5 Touch OK The Basic screen appears again ...

Page 147: ...r size The zoom ratio that is selected can be changed manually 2 Note As the factory default Auto Display Zoom Ratio is selected The Auto Zoom for Combine Booklet parameter in Utility mode can be set so that the recommended zoom ratios are not used In that case specify the zoom ratio manually For details refer to Custom display settings on page 13 17 Setting Description 2in1 Select this setting to...

Page 148: ...pecifying the position of the binding margin refer to Selecting the position of the binding margin Binding Position settings on page 4 25 For details on specifying the document orientation refer to Selecting the document orientation Original Direction settings on page 4 23 1 In the Basic screen touch Duplex Combine The Duplex Combine screen appears 2 Select the desired combined copy setting 8in1 S...

Page 149: ...paper arrangement is selected can be viewed in the touch panel However this appears only if the Left Pane Display Default parameter in Utility mode is set to Check Job Settings If 2in1 was selected the pages will be arranged as shown below If 4in1 8in1 was selected the 4in1 8in1 screen appears Touch Vertical or Horizontal to select the page arrangement To cancel the setting touch No Horizontal Ver...

Page 150: ...aining both text and images such as pamphlets or catalogs Photo Photo Paper Select this setting when printing photos from documents onto photo graphic paper Select this setting to produce better reproductions of halftone document images photographs etc that cannot be reproduced with the usual set tings A smooth copy image is produced Printed Photo Select this setting when copying printed documents...

Page 151: ...n page 4 8 2 In the Basic screen touch Quality Density The Quality Density screen appears 3 Touch the button for the quality setting most appropriate for the loaded document For a document that contains only text touch Text For a document that contains both text and photos touch Text Photo to display the Photo Type screen Touch the button for the appropriate setting and then touch OK ...

Page 152: ...ay the Photo Type screen Touch the button for the appropriate setting and then touch OK For a document that contains maps touch Map For a document that contains faint text touch Dot Matrix Original For a document printed with this machine touch Copied Paper The Quality Density screen appears again ...

Page 153: ...he background color of the document can be adjusted to one of nine levels Each time Light or Dark is touched the background density is lightened or dark ened by one level Touch Standard to select the seventh setting from the Light end Touch Auto to automatically adjust the level of the background density according to the document being copied Glossy Select this setting when copying images with a g...

Page 154: ...creen appears 3 Select the desired Density setting Each time Light or Dark is touched the density is lightened or darkened by one level To select the center setting default setting touch Standard To cancel the setting and select the default press the Reset key 4 Touch OK ...

Page 155: ...ound Removal screen appears 3 Select the desired Background Removal setting Each time Light or Dark is touched the density is lightened or darkened by one level To select the third setting from the right default setting touch Standard Touch Auto to automatically adjust the level of the background density according to the document being copied To cancel the setting and select the default press the ...

Page 156: ...Quality Density screen appears 2 Touch Text Enhancement The Text Enhancement screen appears 3 Select the desired text density setting Each time Lighter Text or Darker Text is touched the density is lightened or darkened by one level To select the middle setting of the nine levels 0 touch Standard To cancel the setting and select the default press the Reset key 4 Touch OK ...

Page 157: ...h a glossy finish Glossy setting 1 In the Basic screen touch Quality Density The Quality Density screen appears 2 Touch Glossy To cancel the Glossy setting touch Glossy again to deselect it To cancel the setting and select the default press the Reset key ...

Page 158: ...e Mixed Original setting is selected 2 Note From Administrator Settings mode the machine can be set so that copies are fed out without being shifted when the finisher is installed As a factory default the machine is set to shift the copies that are fed out For details on specifying settings for shifting copies that are fed out when the finisher is installed refer to System settings on page 13 22 C...

Page 159: ...pies The copies can also be bound with staples at the same time Center Staple Fold CS231 Select this setting to fold copies The copies can also be bound with staples at the same time The Center Staple Fold setting can be used if the saddle stitcher is installed on optional finisher FS 519 Output Tray CS231 Select the output tray where the finished copies are to be fed Staple Select one of these se...

Page 160: ... an alternating w and v pattern if the following conditions are met A4 or B5 size paper is used Paper of the same size and type is loaded with the w orientation in one paper tray and with the v orientation in another tray The Auto Paper setting is selected The Auto Paper setting is not selected when the Mixed Original setting is selected 0 If offset sorting is selected while a finisher is installe...

Page 161: ...S231 4 63 Basic copy operations 4 1 In the Basic screen touch Finishing The Finishing screen appears 2 Touch Sort To separate each set of copies touch Yes under Offset 3 Touch OK The Basic screen appears again ...

Page 162: ...nditions are met A4 or B5 size paper is used Paper of the same size and type is loaded with the w orientation in one paper tray and with the v orientation in another tray The Auto Paper setting is selected The Auto Paper setting is not selected when the Mixed Original setting is selected 0 If offset sorting is selected while a finisher is installed printed copies are fed out and stacked on top of ...

Page 163: ...installed 1 In the Basic screen touch Finishing The Finishing screen appears 2 Touch Output Tray 3 Select the output tray where copies are to be fed and then touch OK The Basic screen appears again Stapling copies Staple settings 2 Reminder Copies can be fed out stapled either in the corner or at two places only when the finisher is installed ...

Page 164: ...inisher FS 608 3 There are five Foolscap sizes 220 e 330 mm w 8 1 2 e 13 w 8 1 4 e 13 w 8 1 8 e 13 1 4 w and 8 e 13 w Any one of these sizes can be selected For details contact your technical representative Number of bound pages Examples of the possible number of bound pages are listed below Finisher FS 517 50 sheets of 90 g m2 paper 2 sheets of 200 g m2 paper 48 sheets of 90 g m2 paper Finisher F...

Page 165: ...h None Tray Paper weight Paper size Loading capacity Finishing tray 1 Plain paper 64 g m2 to 90 g m2 A3 w to A5 v When the stack is 32 mm high or contains 200 sheets or 20 sets Thick paper 1 91 g m2 to 120 g m2 Finishing tray 2 Plain paper 64 g m2 to 90 g m2 A3 w to A5 v A4 w or smaller 132 mm high 1 000 sheets or 100 sets B4 w or larger When the stack is 64 5 mm high or contains 500 sheets or 50 ...

Page 166: ... length is 297 mm or less the long side of the paper is stapled If the document length is more than 297 mm the short side of the paper is stapled If Auto is selected for the stapling position load the document with the top toward the back of the machine If the document is loaded in any other orientation the stapling will not be correctly positioned If Auto is selected the stapling position is set ...

Page 167: ...ientation Original Direction settings on page 4 23 2 Note The Punch settings are available only if the punch kit is installed on the optional finisher When Punch kit PK 512 and or Finisher FS 517 FS 608 are installed When Punch kit PK 513 and or Finisher FS 517 FS 608 are installed When Finisher FS 519 is installed CS231 1 In the Basic screen touch Finishing The Finishing screen appears Tray Paper...

Page 168: ...ss the holes are punched along the long side of the paper If the document length is more than 297 mm the holes are punched along the short side of the paper If Auto is selected for the stapling position load the document with the top toward the back of the machine If the document is loaded in any other orientation the stapling will not be correctly positioned If Auto is selected the punched hole p...

Page 169: ...her FS 608 is installed or finisher FS 519 is installed with the saddle stitcher attached Copies can be folded in three only if Finisher FS 608 is installed Setting Description Compatible models CS240 CS231 Half Fold Select this setting to fold copies in half before feeding them out Re fer to page 4 72 FS 608 FS 608 FS 519 Saddle Stitcher Center Staple Fold Select this setting to staple copies at ...

Page 170: ...The Finishing screen appears 2 Touch Fold Bind The Fold Bind screen appears Paper weight Paper size Plain paper 64 g m2 to 90 g m2 A3 w B4 w A4 w 12 1 4 e 18 w 11 e 17 w 8 1 2 e 14 w 8 1 2 e 11 w 8K w Maximum number of folded sheets Paper capacity 3 sheets When folding 3 sheets 25 sets or more with a paper length of 299 mm or less 33 sets or more others ...

Page 171: ...sheets of 90 g m2 paper maximum of 60 pages 1 sheet of 64 to 209 g m2 paper 14 sheets of 64 to 90 g m2 paper maximum of 60 pages Maximum of 13 sheets of 91 to 120 g m2 paper Maximum of 10 sheets of 121 to 150 g m2 paper Maximum of 8 sheets of 151 to 209 g m2 paper Detail In order for copies to be bound at the center or folded in half all of the following conditions must be met The paper width must...

Page 172: ...hing screen appears 2 Touch Center Staple Fold The Center Staple Fold screen appears 3 Touch Yes below Half Fold As the factory default the Booklet function is automatically specified when Half Fold is selected To cancel the Half Fold setting touch No or the button for a different setting ...

Page 173: ...lled 1 In the Basic screen touch Finishing The Finishing screen appears 2 Touch Fold Bind The Fold Bind screen appears 3 Touch Center Staple Fold Paper weight Paper size Maximum number of bound sheets 64 g m2 to 80 g m2 A3 w B4 w A4 w 12 1 4 e 18 w 11 e 17 w 8 1 2 e 14 w 8 1 2 e 11 w 8K w 20 sheets 81 g m2 to 90 g m2 16 sheets ...

Page 174: ... finisher FS 519 CS231 Number of bound pages Examples of the possible number of bound pages are listed below 2 to 15 sheets of 90 g m2 paper maximum of 60 pages 1 sheet of 64 to 209 g m2 paper 14 sheets of 64 to 90 g m2 paper maximum of 60 pages Maximum of 13 sheets of 91 to 120 g m2 paper Maximum of 10 sheets of 121 to 150 g m2 paper Maximum of 8 sheets of 151 to 209 g m2 paper Detail In order fo...

Page 175: ...heet is added with the Cover Sheet function the cover sheet 200 g m2 cannot be sta pled When the Center Staple Fold setting is selected the following factory default settings are auto matically selected 1 Sided 2 Sided Booklet Recommended zoom ratio 70 7 when the Booklet function is selected When the Center Staple Fold setting is selected the following Finishing settings are not availa ble Group O...

Page 176: ...s on the inside or the outside For details on selecting the setting refer to Copier settings on page 13 18 1 In the Basic screen touch Finishing The Finishing screen appears 2 Touch Fold Bind The Fold Bind screen appears Paper weight Paper size Maximum number of tri folded sheets 64 g m2 to 80 g m2 A4 w 8 1 2 e 11 w 16K w 3 sheets 81 g m2 to 90 g m2 1 sheet Number of folded sheets Maximum number o...

Page 177: ... Touch Tri Fold When the Tri Fold setting is selected the following Finishing settings are not available Group Offset Staple Punch To cancel the Tri Fold setting touch No or the button for a different setting 4 Touch OK and then touch OK again ...

Page 178: ...ned 0 To delete a reserved copy job touch Job List in the left panel and then touch Job Details For details refer to Deleting a job on page 12 8 1 When the message Ready to accept another job appears while the current job is being printed a document can be loaded and copy settings can be specified for the next copy job For details on positioning the document refer to Feeding the document on page 4...

Page 179: ...inting operation 0 If a document is being scanned for a job pressing the Stop key stops scanning 0 For details on deleting a temporarily stopped job refer to Deleting a paused job on page 4 82 1 Press the Stop key while a document is being scanned or a job is being printed Scanning printing stops The Stopped Jobs screen appears 2 To continue all stopped jobs press the Start key ...

Page 180: ...ed or printed refer to Temporarily stopping scanning printing on page 4 81 0 Select only one job at a time to be deleted 0 To continue a temporarily stopped job press the Start key 1 Press the Stop key while a document is being scanned or a job is being printed Scanning printing stops The Stopped Jobs screen appears 2 Select the job to be deleted and then touch Delete The selected job is deleted ...

Page 181: ...5 Additional copy operations ...

Page 182: ......

Page 183: ...tions 5 1 Checking the copy settings Check Job From the Check Job Details screens the current copy settings can be checked and changed if desired To check the settings 1 Touch Check Job in the left panel and then touch Check Details The Check Job Settings screen appears ...

Page 184: ...5 Additional copy operations 5 4 CS240 CS231 ...

Page 185: ...ay the next screen touch Forward If the setting for a function has been changed from the default the button for that function appears with a colored box around it To change the settings 1 Touch Check Job in the left panel and then touch Check Details 2 Touch Back or Forward until the button for the function to be changed is displayed 3 Touch the button for the function whose setting is to be chang...

Page 186: ...ue with step 8 To change the copy settings continue with step 6 6 Touch Change Setting in the screen that appeared when the proof copy was printed To stop copying while the proof copy screen is displayed press the Reset key or the C clear key Otherwise select the proof copy job to be stopped from the list of jobs in the left panel and then touch Delete In the screen that appears requesting confirm...

Page 187: ...en specify the desired settings To stop copying while the screen for changing the settings is displayed select the proof copy job to be stopped from the list of jobs in the left panel and then touch Delete In the screen that appears requesting confirmation to delete the copy program touch Yes and then touch OK To cancel changes to the settings in the screen for changing the settings press the Rese...

Page 188: ... job is stopping appears The indicator on the Interrupt key lights up in green and printing of the current job stops What settings are selected when the Interrupt key is pressed When the Interrupt key is pressed all functions and settings are reset to their defaults Why is the Interrupt key not available The Interrupt key cannot be pressed while an original is being scanned 3 Select the desired co...

Page 189: ...rently specified copy settings touch Check Job in the left panel and then touch Job Details For details refer to Checking the copy settings Check Job on page 5 3 2 Press the Mode Memory key The Recall Copy Program screen appears 3 From the copy program buttons that appear in the screen touch the button where you wish to store the copy settings and then touch Register Program There are three Recall...

Page 190: ...y program can be given the same name as a copy program that has already been registered To stop specifying the name of the copy program touch Cancel The Recall Copy Program screen appears again The copy program is registered and a button with the entered copy program name appears Can the copy program name be corrected To change the entered copy program name touch the button whose name is to be cha...

Page 191: ...ration is cancelled Otherwise continue to touch Cancel until the Basic screen is displayed The settings of a copy program cannot be changed If the copy program that was selected has been locked Edit Name and Delete do not appear For details refer to System settings on page 13 22 Deleting a copy program 1 In the Recall Copy Program screen touch the button for the copy program to be deleted If the c...

Page 192: ... the selected copy program are not to be checked continue with step 8 If the copy program to be recalled is not displayed touch and until the desired copy program is displayed 4 Press the Check Program Settings key The copy settings cannot be changed from the Check Job Settings screens The Check Job Settings screen appears There are six Check Job Settings screens The number to the right of the scr...

Page 193: ...registered with the copy settings to be recalled If OK is touched with no copy program selected the Basic screen appears again without a copy program being recalled 8 Touch OK The programmed copy settings are recalled and the Basic screen appears again 9 Press the Start key Copying begins with the recalled copy settings 2 Note To stop recalling a copy program press the Reset key or the Mode Memory...

Page 194: ...cess Mode Memory Enlarge Display Items in the Help Menu screen and other Help screens can be selected by touching the button or by pressing the key in the keypad for the number of the desired item To display the next screen higher in the menu structure touch Close Touch Exit to exit the Help mode and return to the screen that was displayed before the Help key was pressed Item Description Function ...

Page 195: ...e installed Help screen bottom level Example Function Copy Color Function Map screen Example Copy A chart of the available functions and settings are displayed in the function maps Select an item from the chart for the Help screen that you wish to view Item CS240 Item CS231 Description Copy Scan Fax User Box Job List Copy Scan Fax User Box Job List Print Displays the first Help screen for each des...

Page 196: ...ins the selected item touch Close in the Help screen displayed by selecting an item in a Function Map screen To quit the Help mode press the Help key or touch Exit Displaying main help screens As an example the following procedures describe the Help screens that are displayed for copy operations by using Function 1 With the Basic screen displayed press the Help key The Help Menu screen appears 2 T...

Page 197: ...The Copy Help screen appears 4 Touch Open or the desired information or press the key in the keypad for the number to the left of the desired information to display the corresponding Help screen 5 After checking the Help information touch Exit or press the Help key again The Basic screen appears again ...

Page 198: ...ch Close Setting the Touch Panel Adjustment function If the touch panel buttons do not respond correctly the position of buttons in the touch panel may not be correctly aligned with the position of the actual touch sensor and may need to be adjusted 1 Display the Accessibility Setting screen For details on displaying the Accessibility Setting screen refer to Displaying the accessibility setting sc...

Page 199: ...k points If the check points have been touched correctly the indicator on the Start key lights up in blue 4 Press the Start key The touch panel is adjusted and the Accessibility Setting screen appears again 5 Touch Close or press the Accessibility key The Basic screen appears again 2 Note If the touch panel cannot be adjusted contact the technical representative Detail To cancel the touch panel ad...

Page 200: ...the Accessibility Setting screen For details on displaying the Accessibility Setting screen refer to Displaying the accessibility setting screen on page 5 18 2 Touch Key Repeat Start Interval Time or press the 2 key in the keypad The Key Repeat Start Interval Time screen appears 3 Touch and to specify the starting time and the interval for the key repeat feature To extend the time touch To reduce ...

Page 201: ...ge can be displayed allowing you to choose either to continue operating without exiting Enlarge Display mode or to exit Enlarge Display mode and return to the Basic screen In addition it is possible to specify the display time for the message requesting confirmation to exit Enlarge Display mode Yes Enlarge Display mode is not exited No Enlarge Display mode is exited and the Basic screen is display...

Page 202: ...ond or 120 second for the length of time that the message is to be displayed To cancel changes to the settings press the Reset key All changes to the settings are canceled 4 Touch OK The Accessibility Setting screen appears again 5 Touch Close or press the Accessibility key The Basic screen appears again 2 Note The Enlarge Display mode is compatible with basic copy scanning and fax functions With ...

Page 203: ...ayed requesting confirmation to reset the settings in Enlarge Display mode As the factory default No is selected Yes The current settings are not reset No The current settings are reset to the default settings 2 Note For details on the automatic panel reset operation refer to Automatically clearing settings automatic panel reset on page 3 32 1 Display the Accessibility Setting screen For details o...

Page 204: ...e settings are canceled 4 Touch OK The Accessibility Setting screen appears again 5 Touch Close or press the Accessibility key The Basic screen appears again 2 Note The Enlarge Display mode is compatible with basic copy scanning and fax functions With the Enlarge Display mode text and illustrations are displayed at a larger size so that they can be seen more easily If the time setting is the same ...

Page 205: ... Display mode As the factory default OFF is selected Yes The settings that cannot be displayed are cancelled and the Enlarge Display mode is entered No The Enlarge Display mode is not entered 1 Display the Accessibility Setting screen For details on displaying the Accessibility Setting screen refer to Displaying the accessibility setting screen on page 5 18 2 Touch Enlarge Display Mode Confirmatio...

Page 206: ...ility Setting screen appears again 5 Touch Close or press the Accessibility key The Basic screen appears again 2 Note The Enlarge Display mode is compatible with basic copy scanning and fax functions With the Enlarge Display mode text and illustrations are displayed at a larger size so that they can be seen more easily If OFF is selected in the Enlarge Display Mode Confirmation screen the screen i...

Page 207: ...aying the Accessibility Setting screen refer to Displaying the accessibility setting screen on page 5 18 2 Touch Message Display Time or press the 1 key in the keypad The Message Display Time screen appears 3 Select setting for the desired amount of time that messages are displayed Touch 3 seconds or 5 seconds to select how long messages are displayed To cancel changes to the settings press the Re...

Page 208: ... button on the touch panel Invalid Input Sound When incorrectly pressing a key in the control panel or a but ton on the touch panel Basic Sound When switching settings and the default setting is selected Successful Completion Sound Completed Operation Sound When an operation is completed successfully Completed Transmis sion Sound When a communication operation is completed successfully Completed P...

Page 209: ...und setting To produce a sound touch Yes and then touch Low Medium or High To not produce a sound touch No To cancel changes to the settings press the Reset key All changes to the settings are canceled 5 Touch OK The Sound Setting screen appears again 6 Touch Close The Accessibility Setting screen appears again 7 Touch Close or press the Accessibility key The Basic screen appears again ...

Page 210: ...5 Additional copy operations 5 30 CS240 CS231 ...

Page 211: ...6 Troubleshooting ...

Page 212: ......

Page 213: ... the error code appears call technical representative screen The phone number and fax number for the usual technical representative appear in the center of the call technical representative screen Display in Enlarge Display mode If a malfunction occurs the screen shown below appears 2 Reminder Since the machine may be damaged contact the technical representative according to the procedure describe...

Page 214: ...tion code for example C 0001 in the call technical representative screen 2 Turn the machine off by using the Power auxiliary power key and the main power switch 3 Unplug the machine 4 Contact the technical representative and inform them of the malfunction code ...

Page 215: ...lashing o indicates the location of the paper misfeed In addition a lit o indicates areas where paper may have been misfed and that should be checked Example Screen when a paper misfeed occurs in tray 1 Display in Enlarge Display mode If a paper misfeed occurs the screen shown below appears 2 Note The procedure for clearing misfed paper differs depending on where the misfeed occurs Determine the m...

Page 216: ...r misfeed in the ADF turnover section p 6 20 6 Paper misfeed in the fusing area p 6 22 7 Paper misfeed in the main unit p 6 25 8 Paper misfeed in the automatic duplex unit p 6 27 9 Paper misfeed in the bypass tray p 6 29 10 Paper misfeed in the paper transport section p 6 30 11 Paper misfeed in the LCT p 6 38 12 Paper misfeed in tray 1 p 6 32 13 Paper misfeed in tray 2 p 6 33 14 Paper misfeed in t...

Page 217: ...tion above shows the main unit with optional Finisher FS 608 and the LCT installed The illustration above shows optional finisher FS 519 and the mailbin kit installed The illustration above shows optional finisher FS 519 and the saddle stitcher installed ...

Page 218: ...er misfeed in the automatic duplex unit p 6 27 9 Paper misfeed in the bypass tray p 6 29 10 Paper misfeed in the paper transport section p 6 30 11 Paper misfeed in the LCT p 6 38 12 Paper misfeed in tray 1 p 6 32 13 Paper misfeed in tray 2 p 6 33 14 Paper misfeed in tray 3 p 6 34 15 Paper misfeed in the tray 3 4 horizontal transport unit p 6 36 16 Paper misfeed in tray 4 p 6 35 17 Paper misfeed in...

Page 219: ... the ADF feed section Detail For details on the positions of paper misfeeds refer to Paper misfeed indications on page 6 6 1 Remove all document pages remaining in the document feed tray 2 Open the left side cover 3 Raise the document feed tray as far as possible ...

Page 220: ...se the document feed tray before pulling out any misfed pages When pulling out misfed paper be sure to pull it in the feed direction 5 Return the document feed tray to its original position 6 Close the left side cover 7 Load the document into the document feed tray according to the instructions that appear on the screen ...

Page 221: ...he ADF transport section Detail For details on the positions of paper misfeeds refer to Paper misfeed indications on page 6 6 1 Remove all document pages remaining in the document feed tray 2 Open the left side cover 3 Raise the document feed tray as far as possible ...

Page 222: ...240 CS231 4 Slowly remove any misfed document pages Since the document pages may be damaged raise the document feed tray before pulling out any misfed pages When pulling out misfed paper be sure to pull it in the feed direction ...

Page 223: ...h the second side of a double sided document open the transparent guide in the left side cover and then turn misfeed clearing dial 2 in the direction of the arrow to feed out the page 5 Return the document feed tray to its original position Misfeed clearing dial 2 ...

Page 224: ...6 Troubleshooting 6 14 CS240 CS231 6 Close the left side cover 7 Load the document into the document feed tray according to the instructions that appear on the screen ...

Page 225: ...he ADF scanning section Detail For details on the positions of paper misfeeds refer to Paper misfeed indications on page 6 6 1 Remove all document pages remaining in the document feed tray 2 Open the left side cover 3 Raise the document feed tray as far as possible ...

Page 226: ... direction of the arrow to feed out the document page If the edge of the paper is not visible in the document output tray open the guide and pull out the edge of the paper and then turn misfeed clearing dial 1 in the direction of the arrow to feed out the document page Misfeed clearing dial 1 ...

Page 227: ...oubleshooting 6 6 Close the ADF 7 Return the document feed tray to its original position 8 Close the left side cover 9 Load the document into the document feed tray according to the instructions that appear on the screen ...

Page 228: ...s on the positions of paper misfeeds refer to Paper misfeed indications on page 6 6 1 Remove all document pages remaining in the document feed tray 2 Raise the document feed tray as far as possible and then slowly pull out any misfed document pages 3 If the misfed paper could not be removed open the ADF ...

Page 229: ...ction of the arrow to feed out the document page into the document output tray 5 Close the ADF 6 Return the document feed tray to its original position 7 Load the document into the document feed tray according to the instructions that appear on the screen Misfeed clearing dial 1 ...

Page 230: ... 6 6 1 Remove all document pages remaining in the document feed tray 2 Raise the document feed tray as far as possible and then remove all document pages from the document output tray 3 Raise the document output tray as far as possible and then pull out any misfed document pages Raise the document feed tray as far as possible and then raise the document output tray as far as possible ...

Page 231: ...ed open the ADF and then turn misfeed clearing dial 2 in the direction of the arrow to feed out the page 4 Return the document output tray to its original position 5 Return the document feed tray to its original position 6 Load the document into the document feed tray according to the instructions that appear on the screen Misfeed clearing dial 2 ...

Page 232: ...hen open the upper right side door 2 Slowly remove any misfed paper from the fusing unit Pull down any misfed paper from the fusing unit Toner that did not pass through the fusing unit may get on your hands or clothes Be extremely careful when removing the paper If the paper cannot be removed by pulling it down pull it up If the paper is zigzag folded and jammed in the fusing unit open the fusing ...

Page 233: ...than the indicated levers and dials may result in burns If you get burnt immediately cool the skin under cold water and then seek professional medical attention 7 CAUTION Precautions for toner spills Be careful not to spill toner inside the machine or get toner on your clothes or hands If your hands become soiled with toner immediately wash them with soap and water If toner gets in your eyes immed...

Page 234: ...roller in the fusing unit The paper that was removed tore and remains in the fusing unit Decreased image quality may result if the surface of the image transfer belt or image transfer roller is touched Be careful not to touch the surface of the image transfer belt or the image transfer roller Be careful not to touch the film and surface of the paper take up roller with your hands Image transfer be...

Page 235: ... the upper right side door release lever and then open the upper right side door 2 Slowly remove any misfed paper from the main unit Toner that did not pass through the fusing unit may get on your hands or clothes Be extremely careful when removing the paper If the edge of the paper cannot be grabbed turn the misfeed clearing dial to feed out the paper 3 Close the upper right side door ...

Page 236: ...d levers and dials may result in burns If you get burnt immediately cool the skin under cold water and then seek professional medical attention 7 CAUTION Precautions for toner spills Be careful not to spill toner inside the machine or get toner on your clothes or hands If your hands become soiled with toner immediately wash them with soap and water If toner gets in your eyes immediately flush them...

Page 237: ...g unit Decreased image quality may result if the surface of the image transfer belt or image transfer roller is touched Be careful not to touch the surface of the image transfer belt or the image transfer roller Be careful not to touch the film and surface of the paper take up roller with your hands Clearing a paper misfeed in the automatic duplex unit Detail For details on the positions of paper ...

Page 238: ... dial to feed out the paper 3 Close the door of the automatic duplex unit 4 Pull out the tray being used and then remove all paper from the tray 5 Load the paper into the tray again and then close the tray 2 Reminder Be careful not to touch the film and surface of the paper take up roller with your hands ...

Page 239: ...ss tray Detail For details on the positions of paper misfeeds refer to Paper misfeed indications on page 6 6 1 Remove the paper from the bypass tray 2 Open the door of the bypass tray 3 Slowly remove any misfed paper from the bypass tray 4 Close the door of the bypass tray ...

Page 240: ...port section Detail For details on the positions of paper misfeeds refer to Paper misfeed indications on page 6 6 1 Open the door of the bypass tray 2 Open the lower right side door 3 Slowly remove any misfed paper 4 Close the lower right side door and the door of the bypass tray ...

Page 241: ... 6 5 Pull out the tray being used and then remove all paper from the tray 6 Load the paper into the tray again and then close the tray 2 Reminder Be careful not to touch the film and surface of the paper take up roller with your hands ...

Page 242: ...r details on the positions of paper misfeeds refer to Paper misfeed indications on page 6 6 1 Pull out tray 1 2 Remove any misfed paper 3 Remove any paper remaining in the tray 4 Load the paper into the tray again and then close the tray 2 Reminder Be careful not to touch the film ...

Page 243: ...r details on the positions of paper misfeeds refer to Paper misfeed indications on page 6 6 1 Pull out tray 2 2 Remove any misfed paper 3 Remove any paper remaining in the tray 4 Load the paper into the tray again and then close the tray 2 Reminder Be careful not to touch the film ...

Page 244: ...l out tray 3 2 Remove any misfed paper 3 Lift up paper take up roller and then remove any paper remaining in the tray 4 Load the paper into the tray again lower the paper take up roller and then close the tray 2 Reminder When removing misfed paper remove it without lifting the paper take up roller Be careful not to touch the surface of the paper take up roller with your hands ...

Page 245: ...l out tray 4 2 Remove any misfed paper 3 Lift up paper take up roller and then remove any paper remaining in the tray 4 Load the paper into the tray again lower the paper take up roller and then close the tray 2 Reminder When removing misfed paper remove it without lifting the paper take up roller Be careful not to touch the surface of the paper take up roller with your hands ...

Page 246: ...nit Detail For details on the positions of paper misfeeds refer to Paper misfeed indications on page 6 6 1 Pull out tray 4 2 Pull out the tray 3 4 horizontal transport unit 3 Open the cover for the tray 3 4 horizontal transport unit 4 Remove any misfed paper in the tray 3 4 horizontal transport unit ...

Page 247: ...move any paper remaining in the tray 7 Load the paper into the tray again lower the paper take up roller and then close the tray 2 Reminder When removing misfed paper remove it without lifting the paper take up roller Be careful not to touch the surface of the paper take up roller with your hand ...

Page 248: ...ing a paper misfeed in the LCT 1 Slide the LCT away from the machine 2 Slowly remove any misfed paper from the feed slot of the LCT 3 Open the misfeed clearing cover and then slowly pull out any misfed paper 4 Close the misfeed clearing cover ...

Page 249: ...remove any paper remaining in the tray 7 Load the paper into the tray again lower the paper take up roller and then close the tray 2 Reminder When removing misfed paper remove it without lifting the paper take up roller Be careful not to touch the surface of the paper take up roller with your hand ...

Page 250: ...per misfeed CS231 1 Pull up the upper right side door release lever and then open the upper right side door 2 Slowly remove any misfed paper from the main unit If the edge of the paper cannot be grabbed turn the mis feed clearing dial to feed out the paper ...

Page 251: ...CS240 CS231 6 41 Troubleshooting 6 If the edge of the paper is not visible open the door of the bypass tray and then remove the paper 3 Slowly remove all paper from the fusing unit ...

Page 252: ...bleshooting 6 42 CS240 CS231 If the paper is zigzag folded and jammed in the fusing unit open the fusing unit cover and then remove the paper 4 Slowly remove any misfed paper 5 Close the upper right side door ...

Page 253: ...eek professional medical attention 2 Reminder If the paper is misfed as described below contact your technical representative The paper is wrapped around the timing roller The paper is folded or shredded by the timing roller The paper is wrapped around the roller in the fusing unit The paper is folded or shredded by the roller in the fusing unit The paper that was removed tore and remains in the f...

Page 254: ...g in different locations in the finisher where paper misfeeds may occur 1 Open the cover for the horizontal transport unit and then remove any misfed paper in the horizontal transport unit Do not forcefully push or pull the sensor pin in the horizontal transport unit otherwise the horizontal transport unit may be damaged 2 Open the machine s front door 3 Lower guide lever FN2 and then remove any p...

Page 255: ...nnot be removed turn misfeed clearing dial FN3 to feed out the paper 6 Return guide lever FN4 to its original position 7 Lower guide lever FN5 and then remove any paper If the paper cannot be removed turn misfeed clearing dial FN3 to feed out the paper 8 Return guide lever FN5 to its original position ...

Page 256: ...9 Grab handle FN7 and then pull out the stacker unit Slowly pull out the stacker unit as far as possible 10 Remove any misfed paper from the stacker unit If the paper cannot be removed turn misfeed clearing dial FN6 to feed out the paper ...

Page 257: ...47 Troubleshooting 6 11 Return the stacker unit to its original position When returning the stacker unit to its original position grab handle FN7 otherwise your hand or fingers may be pinched 12 Close the front door ...

Page 258: ...per path changes resulting in different locations in the finisher where paper misfeeds may occur 1 Open the cover for the horizontal transport unit and then remove any misfed paper in the horizontal transport unit Do not forcefully push or pull the sensor pin in the horizontal transport unit otherwise the horizontal transport unit may be damaged 2 Open the machine s front door 3 Lower guide lever ...

Page 259: ...any paper If the paper cannot be removed turn misfeed clearing dial FN3 to feed out the paper 6 Return guide lever FN4 to its original position 7 Lower guide lever FN5 and then remove any paper If the paper cannot be removed turn misfeed clearing dial FN3 to feed out the paper 8 Return guide lever FN5 to its original position ...

Page 260: ... pull out the stacker unit Slowly pull out the stacker unit as far as possible 10 Lower guide lever FN9 and then remove any paper 11 Open guide lever FN8 and then remove any paper If the paper cannot be removed turn misfeed clearing dial FN7 to feed out the paper ...

Page 261: ...ove any paper If the paper cannot be removed turn misfeed clearing dial FN7 to feed out the paper 13 Return the stacker unit to its original position When returning the stacker unit to its original position do not grab handle FN6 otherwise your hand or fingers may be pinched ...

Page 262: ...l the finisher release lever 1 to unlock the finisher 2 Grab the finisher at 2 and then slide the finisher away from the main unit To move the finisher away from the main unit be sure to grab it at 2 Do not grab the mailbins or saddle stitcher to move the finisher otherwise they may be damaged 3 Open the front door ...

Page 263: ...ut any paper If the punch kit is installed pull out the hole punch waste container FN3 1 6 Return guide FN3 to its original position If the punch kit is installed insert the hole punch waste container FN3 1 into its original position 7 Turn dial FN4 to feed the paper open the transport unit cover and then pull out any paper FN4 ...

Page 264: ... Return the finisher to its original position When returning the finisher to its original position do not grab the handle on the front door the control panel the mailbins or the saddle stitcher Detail For details on the positions of paper misfeeds refer to Paper misfeed indications on page 6 6 ...

Page 265: ...oting 6 To clear a paper misfeed in the mailbin CS231 1 Open the front door 2 Turn dial FN5 or dial FN6 to feed out the paper 3 While pressing down lever FN7 pull out any paper 4 Pull handle FN8 to open the misfeed clearing door ...

Page 266: ...se the misfeed clearing door 7 Close the front door Detail For details on the positions of paper misfeeds refer to Paper misfeed indications on page 6 6 To clear a paper misfeed in the saddle stitcher CS231 1 Open the front door 2 Turn dial FN5 or dial FN6 to feed out the paper ...

Page 267: ... paper from the finishing tray 4 Open the misfeed clearing door and then pull out any paper 5 Close the misfeed clearing door 6 Close the front door Detail For details on the positions of paper misfeeds refer to Paper misfeed indications on page 6 6 ...

Page 268: ...ssage shown below appears 2 Reminder Be careful when clearing jammed staples since injuries may result Clearing jammed staples in Finisher FS 517 Detail For details on clearing misfed paper in Finisher FS 517 refer to Clearing a paper misfeed in Finisher FS 517 on page 6 44 1 Remove all paper from the finisher CS240 231 CS231 ...

Page 269: ...he front door 3 Grab handle FN7 and then pull out the stacker unit Slowly pull out the stacker unit as far as possible 4 Remove the staple cartridge holder Hold the lever on the staple cartridge holder and then pull the holder down to remove it ...

Page 270: ...r and then pull out one sheet of staples 6 Return the shutter of the staple cartridge holder to its original position 7 Install the staple cartridge holder Check that the staple cartridge holder is securely inserted as far as possible 8 Return the stacker unit to its original position ...

Page 271: ...grab handle FN7 otherwise your hand or fingers may be pinched 9 Close the front door Clearing jammed staples in Finisher FS 608 Detail For details on clearing misfed paper in Finisher FS 608 refer to Clearing a paper misfeed in Finisher FS 608 on page 6 48 1 Remove all paper from the finisher ...

Page 272: ...he front door 3 Grab handle FN6 and then pull out the stacker unit Slowly pull out the stacker unit as far as possible 4 Remove the staple cartridge holder Hold the lever on the staple cartridge holder and then pull the holder down to remove it ...

Page 273: ...r and then pull out one sheet of staples 6 Return the shutter of the staple cartridge holder to its original position 7 Install the staple cartridge holder Check that the staple cartridge holder is securely inserted as far as possible 8 Return the stacker unit to its original position ...

Page 274: ...FN6 otherwise your hand or fingers may be pinched 9 Close the front door Clearing jammed staples in Finisher FS 519 CS231 Detail For details on clearing misfed paper in the finisher refer to To clear a paper misfeed in Finisher FS 519 CS231 on page 6 52 1 Remove all paper from the finisher 2 Open the front door ...

Page 275: ...ge holder and then pull out one sheet of staples 6 Return the shutter of the staple cartridge holder to its original position 7 Insert the staple cartridge holder sliding it along the rails in the compartment Check that the staple cartridge holder is securely inserted as far as possible 8 Close the front door 2 Reminder If stapling still cannot be resumed even after performing the above procedure ...

Page 276: ...9 CS231 on page 6 52 1 Remove all paper from the finisher 2 Open the misfeed clearing door and then remove all paper 3 Close the misfeed clearing door 4 Raise the output tray and then push down the staple cartridge holder to remove it 5 Raise the shutter of the staple cartridge holder and then pull out one sheet of staples 6 Return the shutter of the staple cartridge holder to its original positio...

Page 277: ...CS240 CS231 6 67 Troubleshooting 6 7 Insert the staple cartridge holder and then push it up until it locks into place 8 Return the output tray to its original position ...

Page 278: ... message Replenish paper appears Check which paper tray is indicated in color and then load it with paper Detail For details on loading paper refer to Loading paper into tray 1 and tray 2 on page 3 44 Loading paper into tray 4 on page 3 47 Loading paper into the LCT on page 3 48 and Loading paper into the bypass tray on page 3 49 ...

Page 279: ...while copy operations are being performed the message The job has been deleted due to insufficient memory appears Display in Enlarge Display mode 2 Note If the amount of memory available becomes limited while copy operations are being performed the scanned job is erased Check the number of pages counted for the document and then adjust the number of pages in the document to be scanned ...

Page 280: ...etail When the message appears replace the specified consumables or part according to your maintenance agreement After the message Please replace following unit s appears the message XXXX needs to be replaced appears and the machine stops operating The number of pages that can be printed after the message Please replace following unit s appears and before the message XXXX needs to be replaced appe...

Page 281: ...thin this machine a message similar to the one shown below appears Display in Enlarge Display mode 2 Note When the message appears replace the specified consumables or part according to your maintenance agreement Detail Do not throw away used consumables or parts Instead keep them in their boxes to be collected by your service representative ...

Page 282: ... not turn off the power appears This message appears when the machine is being accessed in Administrator mode of Web Connection 2 Reminder Do not turn off the machine while this message is displayed After access to the machine with Web Connection has ended the Basic screen appears again ...

Page 283: ... that it is pressed closely against the original glass See p 4 9 The printed output is blur ry Is the paper damp Replace the paper with new paper See p 3 44 p 3 46 p 3 47 and p 3 48 Was the document not pressed close enough against the original glass Position the document so that it is pressed closely against the original glass See p 4 9 There are dark specks or spots throughout the print ed outpu...

Page 284: ...ment Otherwise select the Auto Zoom setting to enlarge the copy to the selected paper size See p 4 33 Is the orientation of the document different from the orientation of the paper with a Zoom setting of Full Size 100 0 Select a paper size that is the same size as the document Otherwise select a paper orientation that is the same as that of the document Was the copy reduced to a size smaller than ...

Page 285: ...egrees Is the staple position correctly specified Specify the desired position for stapling See p 4 65 The pages that were fed out were not uniformly loaded and the punched holes or staples are incor rectly positioned Is the paper curled Remove the paper from the paper tray turn it over and then load it again Is there a gap between the lateral guides in the paper tray and the sides of the paper Sl...

Page 286: ... cor rect password are entered Type in your user name and pass word See p 3 39 Your account has reached its maxi mum allowance The limit on the number of pages that can be printed has been reached Contact the administrator of the ma chine The part indicated by is open Ensure that it is properly closed Since a machine door or cover is open or an option is not installed cor rectly the machine is una...

Page 287: ...the main power switch and then contact the technical representative Cannot be accessed due to unau thorized access Please contact your administrator The authentication information has become invalid since the authentica tion attempts have failed the speci fied number of times Contact the administrator of the ma chine The Administrator Password is not valid due to unauthorized access The administra...

Page 288: ...6 Troubleshooting 6 78 CS240 CS231 ...

Page 289: ...7 Specifications ...

Page 290: ......

Page 291: ...tray Copy sizes Tray 1 and tray 2 A3 w to A5 w 12 1 4 e 18 w 12 e 18 w to 8 1 2 e 11 v 8 e 13 w 1 16K v 8K w CS240 Width 139 7 mm to 311 1 mm length 182 mm to 457 2 mm Tray 3 and tray 4 A4 v B5 v A5 v 8 1 2 e 11 v 5 1 2 e 8 1 2 v 16K v A6 cards w Bypass tray CS240 A3 w to B6 w A6 w 12 1 4 e 18 w A6 cards w 12 e 18 w to 5 1 2 e 8 1 2 w v 8 e 13 w 1 16K w v 8K w CS231 A3 w to B6 w A6 w 12 1 4 e 18 w...

Page 292: ... Copy speed Full color 45 ppm single sided 45 sides min double sided CS240 Black 55 ppm single sided 55 sides min double sided With special paper or with the Glossy setting 23 ppm single sided 23 sides min double sided when printing on A4 w paper CS231 Black 45 ppm single sided 45 sides min double sided With special paper or with the Glossy setting 22 ppm single sided 22 sides min double sided whe...

Page 293: ...2 mm Power requirements Supplied from main unit Specifications Document feed methods Standard functions Single sided and double sided documents Mixed Original setting Combination of single sided and double sided documents Document types Single sided Plain paper 35 g m2 to 210 g m2 Double sided or mixed Plain paper 50 g m2 to 128 g m2 Document sizes Single sided double sided documents A3w to B6 w A...

Page 294: ...1 g m2 to 209 g m2 Can only be used as cover sheets Paper sizes Finishing tray 1 A3 w to A5 v w B6 w A6 w 12 1 4 e 18 w 12 e 18 w to 5 1 2 e 8 1 2 v w 8 e 13 w 1 16K v w 8K w width 100 mm to 311 1 mm length 139 mm to 457 2 mm Staple settings A3 w to A5 v 11 e 17 w to 5 1 2 e 8 1 2 v w 8 e 13 w 1 16K v w 8K w Width 182 mm to 311 1 mm length 139 mm to 457 2 mm Finishing tray 2 A3 w to A5 v w B6 w 12...

Page 295: ... 8 1 2 v w 8 e 13 w 1 Width 100 mm to 311 1 mm length 139 mm to 457 2 mm Finishing tray 3 Half Fold A3 w B4 w A4 w 12 1 4 e 18 w 11 e 17 w 8 1 2 e 11 w 8 1 2 e 14 w 8K w width 210 mm to 311 1 mm length 280 mm to 457 2 mm Center Staple and Fold A3 w B4 w A4 w 12 1 4 e 18 w 11 e 17 w 8 1 2 e 14 w 8 1 2 e 11 w 8Kw width 210 mm to 311 1 mm length 280 mm to 457 2 mm Tri fold A4 w 8 1 2 e 11 w 16K w Pap...

Page 296: ...ort Offset Group Offset and Sort and Staple Paper types Finishing tray 1 finishing tray 2 Plain paper 64 to 90 g m2 Thick paper 1 1 2 3 91 to 256 g m2 OHP postcards envelopes label sheets letter heads Punch settings Plain paper 64 to 90 g m2 thick paper 1 1 2 91 g m2 to 209 g m2 Staple settings Plain paper 64 to 90 g m2 thick paper 1 91 to 120 g m2 Cover Mode function Thick paper 1 1 2 91 to 209 g...

Page 297: ...um 200 sheets or 20 sets Staple settings Number of bound pages 2 to 15 sheets Dimensions 445 mm W 203 mm D 478 mm H When the tray is pulled out 576 mm W 281 mm D Weight 7 4 kg Consumables MS 2C cartridge for 2 000 1 Power requirements Supplied from finisher Specifications Number of bins 1 bin Paper capacity Plain paper 64 to 90 g m2 Maximum 200 sheets Thick paper 91 to 256 g m2 postcards envelopes...

Page 298: ...presentative is dispatched to perform inspections and maintenance and to replace parts With this plan a copy charge is applied Fee based plan With this plan a fee is charged each time the customer requests maintenance service or a supply of imaging units toner parts and other related products In addition the minimum period of availability for performance parts required for repairs parts required t...

Page 299: ...8 Copy paper original documents ...

Page 300: ......

Page 301: ...resentative 2 The setting must be changed by the technical representative Paper source Paper width Paper length Bypass tray 1 90 0 mm to 311 1 mm 139 7 mm to 457 2 mm Tray 1 Tray 2 Tray 3 Tray 4 LCT Double sided copies 139 7 mm to 311 1 mm 148 mm to 457 2 mm Paper source Paper size Bypass tray A3 w to B6 w A6 w 12 1 4 e 18 w 12 e 18 w to 5 1 2 e 8 1 2 w v 8 e 13 w 1 16K w v 8K w Tray 1 A3 w to A5 ...

Page 302: ... A4 w 12 1 4 e 18 w 11 e 17 w 8 1 2 e 14 w 8 1 2 e 11 w 8K w Center Staple and Fold A3 w B4 w A4 w 8 1 2 e 14 w 8 1 2 e 11 w 8K w Tri fold A4 w 8 1 2 e 11 w 16K w Finisher FS 519 CS231 Finishing tray 1 2 and optional Output Tray A3 w to B6 w A6 w 12 1 4 18 w Group Sort settings A3 w to A5 v Staple settings A3 w to A5 v Punch settings A3 w A4 v B5 w 3 Optional Output Tray OT 602 CS231 Saddle Stitch...

Page 303: ...changed by the technical representative Paper type Transparencies Postcards Envelopes Label sheets banner paper CS231 Paper source 210 g m2 to 256 g m2 Bypass tray 20 sheets 50 sheets 10 sheets 50 sheets 1 sheet Tray 1 and tray 2 Tray 3 200 sheets Tray 4 200 sheets LCT ...

Page 304: ...er with a weight of 64 g m2 to 90 g m2 A paper tray with this setting is not automatically selected when the Auto Paper setting is specified Transparency Select this setting when OHP transparencies are loaded A paper tray with this setting is not automatically selected when the Auto Paper setting is specified When selecting OHP transparencies select the Black Color setting and then select the pape...

Page 305: ...Paper that has been decorated with foil or embossing Paper of a non standard shape not rectangular Paper that is bound with glue staples or paper clips Paper with labels attached Paper with ribbons hooks buttons etc attached Paper storage Store paper in a cool dark location with little humidity If the paper becomes damp paper misfeeds may occur Paper that has not been loaded should be kept wrapped...

Page 306: ... set to Allow Operating conditions The paper is the same size The paper is positioned in the same orientation The paper is the same type The paper trays are selected when the paper tray is automatically switched Detail For details on the specifying the paper trays that are selected when the paper tray is automatically switched refer to System settings on page 13 22 Order for selecting paper trays ...

Page 307: ...er to Loading paper into the bypass tray on page 3 49 Automatically detecting the paper size Auto Detect setting The size of the paper loaded into tray 1 and the bypass tray can be detected automatically The following procedure describes how to specify the setting for automatically detecting the paper loaded into tray 1 1 In the Basic screen touch Paper The Paper screen appears 2 Touch the button ...

Page 308: ...ng The paper size can be set for the bypass tray so that it can be used with the specified paper size This is useful for example when the size of the paper that is loaded cannot be automatically detected such as with postcards or paper in inch sizes The following procedure describes how to specify the setting for postcards loaded into the bypass tray 1 In the Basic screen touch Paper The Paper scr...

Page 309: ...er other than postcards are loaded change the paper type setting For details on the paper type settings refer to Specifying a setting for special paper on page 8 19 6 Touch OK and then touch OK in the next two screens that appear The Basic screen appears again The paper size for the bypass tray is set 2 Reminder If paper other than the specified paper size is loaded a paper misfeed may occur since...

Page 310: ... Non standard sized paper can be loaded into the bypass tray If wide paper is loaded it will be necessary to enter the paper size 1 In the Basic screen touch Paper The Paper screen appears 2 Select the button for the bypass tray 3 Touch Change Tray Settings 4 Touch Custom Size The Custom Size screen appears ...

Page 311: ... incorrectly entered press the C clear key in the keypad to erase the value and then specify the correct value To cancel changes to the settings touch Cancel Can paper sizes be stored Five non standard paper sizes can be stored To recall a stored paper size touch the corresponding memory key The names memory1 through memory5 can be changed For details on changing the names refer to Storing a non s...

Page 312: ...per sizes can be stored Storing paper sizes that are used often allows the paper size to be quickly selected without having to re enter the setting 1 In the Basic screen touch Paper The Paper screen appears 2 Select the button for the bypass tray 3 Touch Change Tray Settings 4 Touch Custom Size The Custom Size screen appears ...

Page 313: ...k the illustration in the screen for the sides that are considered X and Y If a value outside the allowable range is specified the message Input error appears Type a value within the allowable range If the value was incorrectly entered press the C clear key in the keypad to erase the value and then specify the correct value To cancel changes to the settings touch Cancel 6 Touch the memory button w...

Page 314: ...be loaded into tray 1 or tray 2 or the bypass tray Wide paper is a size larger than the standard size and allows copies of standard sized documents to be printed so that there is no loss at the edges For example if A3 wide paper is used an area up to 311 1 mm e 457 2 mm can be printed allowing the entire area of an A3 size document to be printed If wide paper is loaded it will be necessary to ente...

Page 315: ...onding paper tray 3 Touch Change Tray Settings 4 Touch Wide Paper The Wide Paper screen appears 5 Select the size of the paper to be loaded Touch and until the button for the desired paper size is displayed If tray 1 or 2 is set for wide paper the size cannot be changed 6 To change the size touch Change Size The Change Size screen for oversized paper appears ...

Page 316: ...r sizes If the orientation of the loaded paper does not match the sizes specified for X and Y Input error appears even if the values are within the allowable range In addition do not enter the same size for X and Y If the value was incorrectly entered press the C clear key in the keypad to erase the value and then specify the correct value To cancel changes to the settings touch Cancel 8 Touch OK ...

Page 317: ...creen appears 2 Touch the button for tray 1 To specify a setting for special paper for tray 1 tray 2 or tray 3 or the bypass tray touch the button for the corresponding paper tray If a setting for special paper is selected for a paper tray that tray is not selected automatically with the Auto Paper setting However if the paper cannot be used for double sided printing and the Single Side Only setti...

Page 318: ... paper that can loaded refer to Specifications on page 7 3 If postcards were loaded select Thick 3 5 Touch OK and then touch OK in the next screen that appears The Basic screen appears again 2 Reminder If special paper is loaded into the paper tray be sure to select the corresponding paper type otherwise a paper misfeed may occur Detail For details on loading the paper into tray 3 refer to Loading...

Page 319: ...ot be fed through the automatic duplex unit The paper to be used for printing the second side can be loaded into the bypass tray 1 In the Basic screen touch Paper The Paper screen appears 2 Touch the button for the bypass tray A paper tray set to 2nd Side is not selected when the Auto Paper setting is selected 3 Touch Change Tray Settings 4 Touch Duplex 2nd Side ...

Page 320: ...8 Copy paper original documents 8 22 CS240 CS231 5 Select the type of paper to be loaded 6 Touch OK and then touch OK in the next screen that appears The Basic screen appears again ...

Page 321: ... setting o Possible Not possible Detail 1Indicates the width of the widest document size of the mixed originals width of the adjustable lateral guides of the automatic document feeder 2Indicates document sizes that can be specified together with the maximum document width Single sided documents Double sided documents Document paper type Weight Plain paper 35 g m2 to 210 g m2 Plain paper 50 g m2 to...

Page 322: ... that can be placed on the original glass To copy documents that cannot be loaded into the ADF position them on the original glass Precautions for positioning documents on the original glass Observe the following precautions when placing the document on the original glass If a document of non standard paper size is loaded the Auto Paper setting and Auto Zoom setting cannot be used since the docume...

Page 323: ...9 Application functions ...

Page 324: ......

Page 325: ... Parameter Provides information on the adjustment of the sharpness of text p 9 14 Blue Parameter Provides information on the adjustment of the blue hues p 9 8 Hue Parameter Provides information on the adjustment of the hue p 9 15 Color Balance Parameter Provides information on the adjustment of the density of the colors CMYK p 9 9 Copy Density Parameter Provides information on the adjustment of th...

Page 326: ... the yellow of a grapefruit it is obvious that the yellow of the lemon is brighter But what about when comparing the yellow of a lemon and the red of a bean Obviously the yellow of the lemon is brighter Brightness is this degree of lightness that enables comparison regardless of the hue What makes the difference between the yellow of a lemon and the yellow of a pear By saying that the lemon is a m...

Page 327: ...he outer edge is the hue the vertical axis is the brightness and the horizontal axis from the center is the saturation Assigning colors to the solid object representing the three attributes of color shown in figure 1 produces the color model shown in figure 2 Although the level of saturation differs for each hue and degree of brightness creating a complex color model we can get a better understand...

Page 328: ...9 Application functions 9 6 CS240 CS231 Red parameter This parameter can be used to adjust the degree of red in the image to one of 19 levels For details on the setting procedure refer to page 9 47 ...

Page 329: ...CS240 CS231 9 7 Application functions 9 Green parameter This parameter can be used to adjust the degree of green in the image to one of 19 levels For details on the setting procedure refer to page 9 47 ...

Page 330: ...9 Application functions 9 8 CS240 CS231 Blue parameter This parameter can be used to adjust the degree of blue in the image to one of 19 levels For details on the setting procedure refer to page 9 47 ...

Page 331: ...ack in a full color copy the colors of the original can be reproduced Changing the amount of each color of toner enables the tints in the copy to be finely adjusted Each color can be adjusted to any of 19 levels For details on the setting procedure refer to page 9 47 Adjusting the black tinge Increasing the amount of black Decreasing the amount of black Black ...

Page 332: ...9 Application functions 9 10 CS240 CS231 Y G B R M C ...

Page 333: ...0 CS231 9 11 Application functions 9 Brightness parameter This parameter can be used to finely adjust the brightness of the image to one of 19 levels For details on the setting procedure refer to page 9 47 ...

Page 334: ...tion functions 9 12 CS240 CS231 Contrast parameter This parameter can be used to finely adjust the image to one of 19 levels between soft smooth and crisp For details on the setting procedure refer to page 9 47 ...

Page 335: ...0 CS231 9 13 Application functions 9 Saturation parameter This parameter can be used to finely adjust the vividness of the image to one of 19 levels For details on the setting procedure refer to page 9 47 S ...

Page 336: ...ication functions 9 14 CS240 CS231 Sharpness parameter This parameter can be used to adjust the amount of contours in text and images to one of 7 levels For details on the setting procedure refer to page 9 47 ...

Page 337: ...CS240 CS231 9 15 Application functions 9 Hue parameter This parameter can be used to finely adjust the hue of the image to one of 19 levels For details on the setting procedure refer to page 9 47 ...

Page 338: ...ation functions 9 16 CS240 CS231 Copy Density parameter This parameter can be used to finely adjust the light and shading of the image to one of 19 levels For details on the setting procedure refer to page 9 47 ...

Page 339: ...lows you to copy an original using only one of the 21 colors available For details on the setting procedure refer to page 4 31 Yellow Magenta Cyan Red Green Orange Pumpkin Yellow Green Teal Blue Aquamarine Pink Purple Plum Maroon Copper Red Forest Green Brown Camel Sepia 2 Sepia 1 ...

Page 340: ...ted in black and the color areas of the original printed in one of the six colors available For details on the setting procedure refer to page 4 31 Yellow Magenta Cyan Red Green Blue H A P P Y BIRT H D A Y H A P P Y BIRT H D A Y H A P P Y BIRT H D A Y H A P P Y BIRT H D A Y H A P P Y BIRT H D A Y H A P P Y BIRT H D A Y H A P P Y BIRT H D A Y ...

Page 341: ... you to copy an original using one of the 18 colors available as the color of the background blank areas For details on the setting procedure refer to page 9 45 Yellow Magenta Cyan Red Green Orange Pumpkin Yellow Green Teal Blue Aquamarine Pink Purple Plum Maroon Forest Green Brown Camel ...

Page 342: ...ored areas and the dark colored areas of the image inversed For details on the setting procedure refer to page 9 40 Monotone copy Full color copy and Background Color function Yellow Magenta Cyan Red Green Orange Pumpkin Yellow Green Teal Blue Aquamarine Pink Purple Plum Maroon Copper Red Forest Green Brown Camel Sepia 2 Sepia 1 ...

Page 343: ...CS240 CS231 9 21 Application functions 9 Mirror Image function This function allows you to copy a mirror image of the original For details on the setting procedure refer to page 9 42 ...

Page 344: ...ils on loading OHP transparencies refer to Paper types and paper capacities on page 8 4 and Loading paper into the bypass tray on page 3 49 2 In the Basic screen touch Color and then touch Black Printing on OHP transparencies is possible only in black 3 Load the OHP transparencies into the bypass tray and load the interleaf paper into the desired paper tray Use interleaf paper with the same size a...

Page 345: ...hapter Insert screen appears 6 Touch OHP Interleave The OHP Interleave screen appears 7 Select the paper tray loaded with the interleaf paper To cancel the setting and select the default press the Reset key To cancel the OHP Interleave function touch No 8 Touch OK 9 Specify any other desired copy settings The number of copies is set to 1 and cannot be changed 10 Press the Start key ...

Page 346: ...e paper with the same size for the cover pages and for the main body of the document and load them in the same orientation Setting Description Front Cover Front Copy The first page of the document is copied onto paper for the front cover sheet With double sided copying the second page of the document is copied onto the back of the front cover sheet Front Blank Paper for the front cover sheet is ad...

Page 347: ... to the settings for all Application functions press the Reset key All changes to the settings are canceled The Sheet Cover Chapter Insert screen appears 4 Touch Cover Sheet The Cover Sheet screen appears 5 Select the desired cover page settings To cancel the setting and select the default press the Reset key To cancel the Cover Sheet function touch No The default setting for the paper tray loaded...

Page 348: ... The corresponding Cover Paper screen appears 7 Select the paper tray loaded with the paper for the cover pages 8 Touch OK and then touch OK in the next two screen that appears 9 Specify any other desired copy settings 10 Using the keypad type in the desired number of copies 11 Press the Start key ...

Page 349: ...If Blank is selected the specified paper is inserted before the specified page When page 3 is specified Blank Finishing Description Single sided copies The specified paper is inserted for the 2nd sheet of the copy and the 2nd sheet of the document is copied onto it Double sided copies The back side of the 1st sheet of the copy is left blank the specified paper is inserted for the 2nd sheet of the ...

Page 350: ...e main body of the document into the desired paper trays Use paper with the same size for the insertion sheets and for the main body of the document and load them in the same orientation To cancel changes to the settings for all Application functions press the Reset key All changes to the settings are canceled 3 Touch Application and then touch Sheet Cover Chapter Insert For details on using thick...

Page 351: ...is not possible Delete repeated page numbers If the entered page number is greater than the number of pages in the document paper is not inserted 6 Touch Insert Paper The Insert Paper Settings screen appears 7 Select the paper tray loaded with the paper for the insertion sheets and then touch OK 8 Under Insert Type touch either Copy or Blank If Copy is selected the document is copied with the spec...

Page 352: ...cument of up to 999 pages In double sided documents one double sided page is considered to be two pages one for the front and one for the back 1 Load the document into the ADF For details on positioning the document refer to Feeding the document on page 4 8 For a document that exceeds 100 pages refer to Scanning the document in separate batches Separate Scan setting on page 4 11 2 Touch Applicatio...

Page 353: ...the document scanned from the original glass has more pages than the number of pages specified in the Insert Image screen the extra pages of the insertion document are printed at the end of the document If the document scanned from the original glass has fewer pages than the number of pages specified in the Insert Image screen the missing insertion pages are not printed If the same page number is ...

Page 354: ...original glass For details on positioning the document refer to Feeding the document on page 4 8 10 Press the Start key Scanning begins 11 Touch Finish To insert a multi page document repeat steps 9 and 10 until all pages of the insertion document are scanned in the order that they are to be inserted 12 Press the Start key ...

Page 355: ...side of the paper within a document of up to 999 pages In double sided documents one double sided page is considered to be two pages one for the front and one for the back 2 Note Make sure that the paper loaded for the first page of the chapter and for the copy have the same size and orientation 1 Position the document to be copied For details on positioning the document refer to Feeding the docum...

Page 356: ...touch the button for the page to be removed and then press the C clear key Under Original Copy select 1 Sided 2 Sided If the same page number is entered multiple times copying is not possible Delete repeated page numbers If the specified page number is greater than the number of pages in the document that page number is ignored 5 Under Chapter Paper touch Copy Insert or None If None is selected al...

Page 357: ...pears Touch Chapter Paper select the paper to be used for the first page of the chapter and then touch OK 6 Touch OK and then touch OK in the next screen that appears 7 Specify any other desired copy settings 8 Using the keypad type in the desired number of copies 9 Press the Start key ...

Page 358: ... printed together 2 Note 100 document batches can be set The Group Finishing setting is not available when programming jobs Instead select Sort 1 Position the document to be copied For details on positioning the document refer to Feeding the document on page 4 8 When saving scanned data in a user box some scanned data may be lost if more than 10 000 pages are saved in the box 2 Touch Application a...

Page 359: ...le copy to be checked press the Proof Copy key Scanning begins 5 Touch Fix and then touch OK If the document was loaded on the original glass touch Finish in the screen that appears requesting confirmation that scanning is finished If Retry was selected touch Change Setting to change the copy settings 6 Position the next document and then touch Change Setting ...

Page 360: ...When the memory is full a message appears Select whether to delete the last part of the data and scan it again delete the last part of the data and print or delete all of the document data To cancel changes to the settings touch Cancel Scanning begins After scanning is finished touch Fix and then touch OK Is there more information about the settings Refer to the appropriate section 8 After all doc...

Page 361: ...hod for the entire scanned document Is there more information about the settings Refer to the appropriate section 11 Using the keypad type in the desired number of copies 12 Touch Start or press the Start key If Cancel is touched a message appears requesting confirmation to delete the data To stop printing touch Yes and then touch OK ...

Page 362: ... color has been selected the colors including the selected background color are inversed 1 Position the document to be copied For details on positioning the document refer to Feeding the document on page 4 8 2 Touch Application and then touch Edit Color To cancel changes to the settings for all Application functions press the Reset key All changes to the settings are canceled The Edit Color screen...

Page 363: ...CS240 CS231 9 41 Application functions 9 4 Specify any other desired copy settings 5 Using the keypad type in the desired number of copies 6 Press the Start key ...

Page 364: ...ch dimension is considered the document length refer to Descriptions and symbols for originals and paper on page 1 13 1 Position the document to be copied For details on positioning the document refer to Feeding the document on page 4 8 2 Touch Application and then touch Edit Color To cancel changes to the setti ngs for all Application functions press the Reset key All changes to the settings are ...

Page 365: ... size touch Original Size and then specify the document size from any of the screens If a non standard sized document is loaded the document size cannot be detected Therefore specify the document size in the Custom Size screen and then press the Start key To cancel the Mirror Image function touch No To cancel changes to the settings touch Cancel Original Size screen Custom Size screen ...

Page 366: ...t value To enter a value press the C clear key and then use the keypad to type in the new value What happens when a value outside of the allowable range is specified The message Input error appears If Input error appears or if the value was incorrectly entered press the C clear key in the keypad and then specify the correct value 5 Specify any other desired copy settings To cancel the setting and ...

Page 367: ...of the background colors refer to Background Color function on page 9 19 1 Position the document to be copied For details on positioning the document refer to Feeding the document on page 4 8 2 Touch Application and then touch Edit Color To cancel changes to the settings for all Application functions press the Reset key All changes to the settings are canceled The Edit Color screen appears 3 Touch...

Page 368: ...olor function touch No Can other background colors be displayed Touch or to display a different list of colors 5 Touch OK 6 Specify any other desired copy settings To cancel the setting and select the default press the Reset key 7 Using the keypad type in the desired number of copies 8 Press the Start key ...

Page 369: ... used to adjust the level of blue in the image Hue This parameter can be used to adjust the hue The hue is divided into red blue and yel low By adjusting the hue the image can be made either more reddish or more bluish Copy Density This parameter can be used to adjust the copy density Sharpness This parameter emphasizes the edges of text so that they can be read more easily In addition this parame...

Page 370: ... Touch Application and then touch Edit Color To cancel changes to the settings for all Application functions press the Reset key All changes to the settings are canceled The Edit Color screen appears 2 Touch Color Adjust The Color Adjustment screen appears 3 Touch Brightness From the Color Adjustment screen select the desired parameter The Brightness screen appears ...

Page 371: ...mple copy on page 9 49 2 Note Even though the setting can be specified in 1 3 step increments the setting will appear at the nearest full increment in the Color Adjustment screen Checking the print result of the color adjust settings sample copy You can make a sample copy of your document to see how it will appear with the currently specified color adjustment settings As an example the procedure f...

Page 372: ... Load paper of a size listed under Paper that can be used into the paper tray 3 Place the document within the sample area of the original glass 4 Press the Start key The sample copy is printed 5 Touch Close The screen for the function appears again 2 Note Each sample copy that is printed is counted in the print counter ...

Page 373: ... before the back cover and then all page spreads are scanned in order How are the front and back covers copied Scan the front cover then the back cover and then scan the remainder of the document 2 Load the paper to be used into the desired paper tray Setting Description Book Spread Both pages of the page spread are printed on the same page Separation Separate copies of each page in the page sprea...

Page 374: ...ional Finisher FS 608 is not installed CS231 Booklet Original does not appear if optional Finisher FS 608 or saddle stitcher on Finisher FS 519 is not installed The Book Copy screen appears 5 Touch the button for the desired setting If Separation Front Cover or Front and Back Cover is selected Binding Position appears Select the binding position of the document If desired specify a Book Erase func...

Page 375: ...e of the allowable range is specified The message Input error appears If Input error appears or if the erased width was incorrectly entered press the C clear key in the keypad and then specify the correct value 6 Touch OK and then touch Close 7 In the Basic screen touch Paper and then select the paper tray loaded with the paper 8 Specify any other desired copy settings To cancel the setting and se...

Page 376: ...ve been scanned touch Finish If Front and Back Cover was selected th e back cover is scanned after the front cover and then all page spreads are scanned in order If Front Cover was selected all page spreads are scanned in order after the front cover 12 Press the Start key ...

Page 377: ...e settings for all Application functions press the Reset key All changes to the settings are canceled The Book Copy Repeat screen appears Setting Description With Margin Multiple copies are printed of the entire image within the specified area The area around the image appears as a margin Without Margin Multiple copies of the selected area of the image are printed to fill the paper however a part ...

Page 378: ...onal Finisher FS 608 is not installed The Image Repeat screen appears 5 Under Layout touch With Margin or Without Margin or touch 2 4 8 Repeat To cancel the Image Repeat function touch No Touching 2 4 8 Repeat displays the 2 4 8 Repeat screen where the number of repeats and the interval can be selected ...

Page 379: ...in inches be displayed Touch or to display a different list of sizes Can any size be specified Any size can be specified from the Custom Size screen Touch X or Y to select the dimension and then use the keypad to specify the correct value To enter a value press the C clear key and then use the keypad to type in the new value What happens when a value outside of the allowable range is specified The...

Page 380: ...the paper If settings were specified in the 2 4 8 Repeat screen touch Zoom in the Basic screen and then specify the zoom ratio setting 8 Specify any other desired copy settings To cancel the setting and select the default press the Reset key 9 Using the keypad type in the desired number of copies 10 Press the Start key ...

Page 381: ...size 1 Place the document on the original glass For details on positioning the document refer to Feeding the document on page 4 8 2 Touch Application and then touch Book Copy Repeat To cancel changes to the settings for all Application functions press the Reset key All changes to the settings are canceled The Book Copy Repeat screen appears 3 Touch Poster Mode Booklet Original does not appear if o...

Page 382: ...ize select the finished image size and then touch OK Touch or to display a different list of standard sizes Touching Custom Size displays the Custom Size screen Touch X or Y to select the dimension and then use the keypad to specify the desired value Touch Paper Size select the finished paper size and then touch OK Touch or to display a different list of paper sizes ...

Page 383: ...ument size and then touch OK If the document size cannot be detected automatically or to specify the document size touch Original Size and then specify the document size from any of the screens Touch Photo Size to display the Photo Size screen To cancel changes to the settings touch Cancel Original Size screen Custom Size screen ...

Page 384: ...e correct value To enter a value press the C clear key and then use the keypad to type in the new value What happens when a value outside of the allowable range is specified The message Input error appears If Input error appears or if the value was incorrectly entered press the C clear key in the keypad and then specify the correct value 6 Specify any other desired copy settings The number of copi...

Page 385: ...e used when optional Finisher FS 608 or saddle stitcher on Finisher FS 519 is installed 1 Position the document to be copied Load a booklet with the staples removed The number of sheets that can be stapled together is no more than 20 and differs depending on the paper type For details refer to Selecting a folding setting on page 4 71 No more than 20 sheets can be stapled together with finisher FS ...

Page 386: ...e canceled The Book Copy Repeat screen appears 3 Touch Booklet Original 4 Touch Close 5 Specify any other desired copy settings 6 Using the keypad type in the desired number of copies 7 Press the Start key If the document is placed on the original glass scanning begins For details on scanning a document from the original glass refer to Scanning a multi page document from the original glass on page...

Page 387: ...ut creating a binding margin Detail If the positions of the staples or punched holes are different from the binding position the positions of the staples or punched holes are given priority 1 Position the document to be copied For details on positioning the document refer to Feeding the document on page 4 8 2 Touch Application and then touch Page Margin To cancel changes to the settings for all Ap...

Page 388: ... document length is more than 297 mm a binding position along the short side of the paper is selected 4 Using the keypad specify the binding margin width If None is selected the binding margin width is set to 0 mm When making double sided copies the image orientation can adjusted without creating a binding margin What happens when a value outside of the allowable range is specified The message Inp...

Page 389: ...t 7 If desired touch Original Direction and then select the setting appropriate for the document For details on specifying the document orientation refer to Selecting the document orientation Original Direction settings on page 4 23 8 Touch OK 9 Specify any other desired copy settings 10 Using the keypad type in the desired number of copies 11 Press the Start key ...

Page 390: ...ze or Center Zoom is to be set position the document on the original glass 2 Touch Application and then touch Image Adjust To cancel changes to the settings for all Application functions press the Reset key All changes to the settings are canceled The Image Adjust screen appears Setting Description Full Size The area that contains the entire image is centered and enlarged to the size of the paper ...

Page 391: ...t detected Therefore specify the document size in the Custom Size screen and then press the Start key 4 Check the document size and then touch OK If the document size cannot be detected automatically or to specify the document size touch Original Size and then specify the document size from any of the screens To cancel changes to the settings touch Cancel Original Size screen Custom Size screen ...

Page 392: ...t value To enter a value press the C clear key and then use the keypad to type in the new value What happens when a value outside of the allowable range is specified The message Input error appears If Input error appears or if the value was incorrectly entered press the C clear key in the keypad and then specify the correct value 5 Specify any other desired copy settings To cancel the setting and ...

Page 393: ...ple of 2 document pages is required with a double sided document If there are not enough pages blank pages are automatically added at the end For details on stapling refer to Binding copies at the center Center Staple Fold setting on page 4 75 For a document that exceeds 100 pages refer to Scanning the document in separate batches Separate Scan setting on page 4 11 The width of the binding margin ...

Page 394: ...cape orientation they will be bound at the top regardless of which setting is selected To cancel the setting and select the default press the Reset key To cancel the Booklet function touch No 4 Touch OK 5 Specify any other desired copy settings 6 Using the keypad type in the desired number of copies 7 Press the Start key ...

Page 395: ...he document refer to Feeding the document on page 4 8 2 Touch Application and then touch Frame Erase To cancel changes to the settings for all Application functions press the Reset key All changes to the settings are canceled The Frame Erase screen appears 3 Touch the button for the desired position to be erased To cancel the setting and select the default press the Reset key To cancel the Frame E...

Page 396: ... settings press the C clear key to erase the value and then type in the setting What happens when a value outside of the allowable range is specified The message Input error appears If Input error appears or if the erased width was incorrectly entered press the C clear key in the keypad and then specify the correct value 5 Touch OK 6 Specify any other desired copy settings 7 Using the keypad type ...

Page 397: ...er refer to page 9 101 Function Description Date Time Select a format and print the date or time on the specified pages Page Number Select a format and print page numbers starting with the specified page number Stamp Preset Stamp Print copies with previously stored preset stamps overlapping pages Registered Stamp Print copies with a stamp registered with the Copy Protection Utility overlapping pag...

Page 398: ...g the document on page 4 8 2 Touch Application and then touch Stamp Composition To cancel changes to the settings for all Application functions press the Reset key All changes to the settings are canceled The Stamp Composition screen appears 3 Touch Date Time The Date Time screen appears 4 Touch buttons under Date Format Time Format and Pages to specify the various settings ...

Page 399: ...touch Adjust Position Select the desired direction under Left Right Adjustment or Top Bottom Adjustment use the keypad or touch and to specify the adjustment setting and then touch OK What are the limits on the adjustment amount The print position can be finely adjusted in 0 1 mm increments Can no adjustments be made To make no left right or up down adjustments touch No Adjustment What happens whe...

Page 400: ...n select the color To specify the text size touch Text Size and then select the size 7 Touch OK and then touch Close in the next screen that appears 8 Specify any other desired copy settings To cancel the setting and select the default press the Reset key 9 Using the keypad type in the desired number of copies 10 Press the Start key ...

Page 401: ...er to Feeding the document on page 4 8 2 Touch Application and then touch Stamp Composition To cancel changes to the settings for all Application functions press the Reset key All changes to the settings are canceled The Stamp Composition screen appears 3 Touch Page Number The Page Number screen appears 4 Using the keypad type in the starting page number for printing ...

Page 402: ...opied page To cancel the Page Number function touch No 5 Select a setting under Page Number Type 6 Touch Print Position and then select the printing position To make fine adjustments to the printing position touch Adjust Position Select the desired direction under Left Right Adjustment or Top Bottom Adjustment use the keypad or touch and to specify the adjustment setting and then touch OK What are...

Page 403: ...e numbers are not printed on them If Print on Back Cover Only or Do Not Print Page Number is selected under Cover Sheet page numbers are printed starting with 2 in single sided copies and starting with 3 in double sided copies If Do Not Print is selected inserted pages are only counted but page numbers are not printed on them If Skip the Page s is selected inserted pages are not counted and page n...

Page 404: ...tion the document to be copied Use the Copy Protection Utility to register a registered stamp For details on registering stamps refer to the manual of the Copy Protection Utility For details on positioning the document refer to Feeding the document on page 4 8 2 Touch Application and then touch Stamp Composition To cancel changes to the settings for all Application functions press the Reset key Al...

Page 405: ...s inserted using the Cover Sheet Insert Sheet and Chapters functions 6 Touch Print Position and then select the printing position To make fine adjustments to the printing position touch Adjust Position Select the desired direction under Left Right Adjustment or Top Bottom Adjustment use the keypad or touch and to specify the adjustment setting and then touch OK What are the limits on the adjustmen...

Page 406: ... settings are selected Text Size Std Text Color Black 8 Touch OK and then touch Close in the next screen that appears 9 Specify any other desired copy settings 10 Using the keypad type in the desired number of copies 11 Press the Start key 2 Note Pages printed with the Single Color setting and different settings for the print color and stamp color are included in the 2 Color count of the Total cou...

Page 407: ...ies so that the reader knows that it is a copy The copy protection text is printed on all pages The pages cannot be specified 1 Position the document to be copied For details on positioning the document refer to Feeding the document on page 4 8 2 Touch Application and then touch Stamp Composition To cancel changes to the settings for all Application functions press the Reset key All changes to the...

Page 408: ...ion text formats appear in a column at the center of the screen Up to eight text lines can be combined Multiple registered stamps or preset stamps cannot be selected Touching Date Time displays the Copy Protect Date Time screen Select the desired settings under Date Format and Time Format and then touch OK The copy protection date and time that is printed is the date and time when the document is ...

Page 409: ...touch Detailed Settings and then change the copy protection settings Touch the desired button in the Detailed Settings screen and then change the setting in the screen that appears As the factory default the following settings are selected Text Background Color Black Density Std Copy Protect Pattern Emboss Text Text Size Std Pattern Overwrite Front Overwrite Background Pattern Pattern 1 The settin...

Page 410: ...9 Application functions 9 88 CS240 CS231 Density screen Copy Protect Pattern screen Text Size screen Pattern Overwrite screen ...

Page 411: ...ection text the angle can be changed If desired touch Change Pos Delete in the Position screen and then change the arrangement of the text in the Change Position Delete screen If there are no more than four lines in the selected copy protection text the angle can be changed To change the arrangement order touch Change Position select the copy protection text to be moved and then touch either Up or...

Page 412: ...in the next screen that appears 6 Specify any other desired copy settings To cancel the setting and select the default press the Reset key 7 Using the keypad type in the desired number of copies 8 Press the Start key 2 Note Pages printed with the Single Color setting and different settings for the print color and the color of the copy protection text are included in the 2 Color count of the Total ...

Page 413: ...3 Touch Stamp Repeat The Stamp Repeat screen appears 4 Select the desired type of repeating stamp To cancel the Stamp Repeat function touch No Touch Registered Stamp or Preset Stamp to display a screen containing buttons for the available stamps Touch the button for the desired stamp and then touch OK Use the Copy Protection Utility to register a registered stamp For details on registering stamps ...

Page 414: ...sired stamp and then touch OK To cancel the changes to the settings in each repeating stamp settings screen touch No To print the copy job number touch Job Number To print the serial number of this machine touch Serial Number For details on specifying settings for the serial number contact your technical representative To print the copy distribution number touch Distribution Control Number A distr...

Page 415: ...31 9 93 Application functions 9 As the factory default the following settings are selected Text Color Black Density Std Text Size Std Pattern Overwrite Font Overwrite Color screen Density screen Text Size screen ...

Page 416: ...Delete in the Position screen and then change the arrangement of the text in the Change Position Delete screen If there are no more than four lines in the selected repeating stamp the angle can be changed To change the arrangement order touch Change Position select the repeating stamp text to be moved and then touch either Up or Down Pattern Overwrite screen Position screen Change Position Delete ...

Page 417: ...or the repeating stamp text to be deleted 5 Touch OK and then touch Close 6 Specify any other desired copy settings 7 Using the keypad type in the desired number of copies 8 Press the Start key 2 Note If the document is a single color and Magenta or Cyan was selected as the color for the repeating stamp the copies are included in the 2 Color count of the Total counter The same will occur if the do...

Page 418: ...ges In addition a scanned document can be stored as a registered overlay and recalled and used later 1 Position the document for the overlay 2 Touch Application and then touch Stamp Composition The Stamp Composition screen appears 3 Touch Overlay To cancel the Overlay function touch No The Overlay screen appears 4 Select the desired settings for Pages and Color To print the overlay image only on t...

Page 419: ...cally or to specify the document size touch Original Size and then specify the document size from any of the screens To cancel changes to the settings touch Cancel 6 Touch Close 7 Specify any other desired copy settings 8 Using the keypad type in the desired number of copies 9 Press the Start key Original Size screen Custom Size screen Photo Size screen ...

Page 420: ...ouch New To overwrite the registered overlay with the new image select a registered overlay and then touch Overwrite To delete a registered overlay select a registered overlay and then touch Delete The Image Name Registration screen appears 3 Type in the image name and then touch OK Touch the buttons in the keyboard that appears in the screen to type For details on typing in text refer to Entering...

Page 421: ...5 Specify any other desired copy settings 6 Press the Start key 7 The document is scanned then saved as a registered overlay 2 Note With the Restrict User Access parameter in Administrator mode changes to a registered overlay without administrator permission can be prevented ...

Page 422: ...To cancel the Overlay function touch No The Recall Overlay Image screen appears 2 Touch the button for the registered overlay to be used and then touch OK 3 Touch OK and then touch Close in the next screen that appears 4 Specify any other desired copy settings 5 Using the keypad type in the desired number of copies 6 Press the Start key ...

Page 423: ...ers footers on page 13 63 1 Position the document to be copied For details on positioning the document refer to Feeding the document on page 4 8 2 Touch Application and then touch Stamp Composition 3 Touch Header Footer To cancel changes to the settings for all Application functions press the Reset key All changes to the settings are canceled If no header footer is registered in Administrator mode...

Page 424: ...ded in the 2 Color count of the Total counter If Color is set to 2 Color copies where the second color is different from the stamp text color are included in the Full Color count of the Total counter To check or temporarily change the header footer settings touch Check Change Temporarily 5 Touch OK and then touch Close 6 Specify any other desired copy settings 7 Using the keypad type in the desire...

Page 425: ...nt to be copied 2 Touch Application and then touch Save in User Box 3 Touch User Box A screen for selecting a user box appears 4 Select the user box where the data is to be saved Touch the tab containing the desired user box and then button for the user box To type in a user box number to specify the user box touch Enter User Box No It is not necessary to enter the password when saving data even i...

Page 426: ...ing with the selected letter A user box can be selected from this screen 5 Touch OK 6 Select whether or not a copy will also be printed when the data is saved To print a copy touch Yes beside Save Print 7 Check the name of the document to be saved Touch Document Name 8 The name specified as the default appears beside Document Name For details on typing in text refer to Entering text on page 14 3 9...

Page 427: ... Specify any other desired copy settings 12 Press the Start key If Yes beside Page Print was selected the scanned document is copied and the document data is saved in the specified user box If No beside Page Print was selected the data for the scanned document is saved in the specified user box ...

Page 428: ...9 Application functions 9 106 CS240 CS231 ...

Page 429: ...10 Replacing toner cartridges and staples and emptying punch scrap box ...

Page 430: ......

Page 431: ...ge similar to the one shown below appears Detail When the message appears prepare to replace the toner cartridge according to your maintenance agreement When it is time to replace the toner cartridge an advanced warning message similar to the one shown below appears 2 Note When the message appears replace the toner cartridge according to your maintenance agreement In addition do not replace the to...

Page 432: ...g Replace the toner cartridge If toner other than black is empty printing can continue in black Touch Continue Operation and then select the job to be printed Detail For details on replacing the toner cartridge refer to To replace the toner cartridge on page 10 6 Display in Enlarge Display mode When the toner is about to run out a screen similar to the one shown below appears When it is time to re...

Page 433: ...hrow toner or the toner cartridge into a fire Toner expelled from the fire may cause burns 7 CAUTION Precautions for toner spills Be careful not to spill toner inside the machine or get toner on your clothes or hands If your hands become soiled with toner immediately wash them with soap and water If toner gets in your eyes immediately flush them with water and then seek professional medical attent...

Page 434: ... 1 Open the machine s upper front door Check that a toner cartridge of the same color as the one to be replaced has been prepared 2 Pull out the empty toner cartridge How are used toner cartridges disposed of Do not throw away used toner cartridges Instead keep them in their boxes to be collected by your technical representative 3 Prepare the new toner cartridge Make sure that the toner cartridge ...

Page 435: ... compacted If it has be sure to shake the toner cartridge until the toner is mostly broken up before installing the cartridge 5 Remove the tape from the toner cartridge Remove the tape from the toner cartridge after shaking the cartridge 6 Align the toner cartridge with the slots in the cartridge compartment and then insert the cartridge When inserting the new toner cartridge fully insert it until...

Page 436: ... according to your maintenance agreement Detail The number of copies that can be made from the time that the message Waste toner box needs to be replaced soon appears until the time that the message Waste toner box needs to be replaced Replace it following the instructions appears differs depending on the specified copy settings and the consumables parts When it is time to replace the waste toner ...

Page 437: ...idges and staples and emptying punch scrap box 10 Display in Enlarge Display mode When it is almost time to replace the waste toner box the screen shown below appears When the time to replace the part is reached the following screen appears ...

Page 438: ...replace the waste toner box 1 Open the machine s lower front door 2 Release the securing levers for the waste toner box and then remove the waste toner box 3 Attach the enclosed cap to the waste toner box removed in step 2 4 Place the waste toner box with the cap attached into the plastic bag ...

Page 439: ...may cause burns 7 CAUTION Precautions for toner spills Be careful not to spill toner inside the machine or get toner on your clothes or hands If your hands become soiled with toner immediately wash them with soap and water If toner gets in your eyes immediately flush them with water and then seek professional medical attention 2 Reminder Do not tilt the removed waste toner box otherwise waste tone...

Page 440: ... according to your maintenance agreement When the time to replace the imaging unit is reached an advanced warning message similar to the one shown below appears 2 Note When the message appears replace the imaging unit according to your maintenance agreement If it is time to replace an imaging unit other than the black imaging unit printing can continue in black Touch Continue Operation and then se...

Page 441: ...lace the waste toner box the screen shown below appears When it is time to replace the part the screen shown below appears 2 Reminder Be sure to replace the imaging unit only after the message Please replace following unit s appears In addition do not replace the imaging unit of any color other than the one indicated in the message on the touch panel ...

Page 442: ...ging unit black 1 Open the machine s lower front door Check that an imaging unit of the same color as the one to be replaced has been prepared 2 Release the securing levers for the waste toner box and then remove the waste toner box 3 Release the securing lever for the imaging unit 4 Remove the imaging unit ...

Page 443: ... Leave the imaging unit in the black protective bag until immediately before it is to be installed Do not hold the top part of the imaging unit otherwise the PC drum may be damaged resulting in decreased image quality 6 Peel off the tape and then remove the packing material 7 Remove the imaging unit from the black protective bag 8 Remove the packing material and securing material ...

Page 444: ...ive sheet for the PC drum along the perforation 11 Insert the new imaging unit into the machine Make sure that the imaging unit is the same color as the label on the imaging unit compartment Do not insert the imaging unit into its compartment at an angle Make sure that the imaging unit is fully inserted into its compartment 12 Close the securing lever for the imaging unit ...

Page 445: ...filter when replacing the black imaging unit Make sure that the filter is fully inserted 16 Insert the used imaging unit into the empty black protective bag and box of the new imaging unit How are used imaging units disposed of Do not throw away used imaging units Instead keep them in their boxes to be collected by your technical representative 17 Adjust the gradation levels For details on adjusti...

Page 446: ...iately wash them with soap and water If toner gets in your eyes immediately flush them with water and then seek professional medical attention To replace the imaging unit yellow magenta and cyan 1 Open the machine s lower front door Check that an imaging unit of the same color as the one to be replaced has been prepared 2 Release the securing levers for the waste toner box and then remove the wast...

Page 447: ...aging The imaging unit can easily be damaged by light Leave the imaging unit in the black protective bag until immediately before it is to be installed Do not hold the top part of the imaging unit otherwise the PC drum may be damaged resulting in decreased image quality 6 Remove the packing material 7 Remove the imaging unit from the black protective bag ...

Page 448: ...d then tilt the unit to the right and lightly shake it twice in the direction of the tilt 9 Remove the securing material and tape 10 Tilt the imaging unit to the left and lightly shake it twice in the direction of the tilt and then tilt the unit to the right and lightly shake it twice in the direction of the tilt 11 Tear off the protective sheet for the PC drum along the perforation ...

Page 449: ...Make sure that the imaging unit is the same color as the label on the imaging unit compartment Do not insert the imaging unit into its compartment at an angle Make sure that the imaging unit is fully inserted into its compartment 13 Close the securing lever for the imaging unit 14 Install the waste toner box 15 Close the lower front door ...

Page 450: ...ir boxes to be collected by your technical representative 17 Adjust the gradation levels For details on adjusting the gradation levels refer to Gradation adjustment on page 13 61 7 CAUTION Precautions for toner spills Be careful not to spill toner inside the machine or get toner on your clothes or hands If your hands become soiled with toner immediately wash them with soap and water If toner gets ...

Page 451: ... 4 Replacing the staple cartridge When the staple cartridge is empty the message Replace staple cartridge appears Replace the staple cartridge Display in Enlarge Display mode 2 Reminder Be sure to replace the staple cartridge only after the message appears otherwise the machine may be damaged ...

Page 452: ...lace the staple cartridge in Finisher FS 517 1 Open the front door 2 Grab handle FN7 and then pull out the stacker unit Slowly pull out the stacker unit as far as possible 3 Remove the staple cartridge holder Hold the lever on the staple cartridge holder and then pull the holder down to remove it ...

Page 453: ...ridge holder 5 Load the new staple cartridge into the staple cartridge holder Do not remove the remaining staples otherwise the machine will not be able to staple after the cartridge is replaced 6 Slowly peel off the stopper tape 7 Install the staple cartridge holder Check that the staple cartridge holder is securely inserted as far as possible ...

Page 454: ...s and emptying punch scrap box 10 26 CS240 CS231 8 Return the stacker unit to its original position When returning the stacker unit to its original position grab handle FN7 otherwise your hand or fingers may be pinched 9 Close the front door ...

Page 455: ...lace the staple cartridge in Finisher FS 608 1 Open the front door 2 Grab handle FN6 and then pull out the stacker unit Slowly pull out the stacker unit as far as possible 3 Remove the staple cartridge holder Hold the lever on the staple cartridge holder and then pull the holder down to remove it ...

Page 456: ...lder 5 Load the new staple cartridge into the staple cartridge holder Do not remove the remaining staples otherwise the machine will not be able to staple after the cartridge is replaced 6 Install the staple cartridge holder Check that the staple cartridge holder is securely inserted as far as possible 7 Return the stacker unit to its original position ...

Page 457: ... 29 Replacing toner cartridges and staples and emptying punch scrap box 10 When returning the stacker unit to its original position grab handle FN6 otherwise your hand or fingers may be pinched 8 Close the front door ...

Page 458: ...the staple cartridge holder Pull the staple cartridge holder toward you to remove it Only touch the blue parts of the staple cartridge 3 Remove the empty cartridge from the staple cartridge holder 4 Load the new staple cartridge into the staple cartridge holder Do not remove the remaining staples otherwise the machine will not be able to staple after the cartridge is replaced ...

Page 459: ... making sure the tabs on the holder slide along the rails in the compartment Check that the staple cartridge holder is securely installed 6 Close the front door 2 Reminder Replace the staple cartridge only after the message has appeared If the staple cartridge is replaced before the message appears the machine may be damaged ...

Page 460: ...in saddle stitcher CS231 1 Raise the copy output tray and then push down the staple cartridge holder and remove it 2 Press in the area marked PUSH to unlock the staple cartridge holder 3 Remove the empty staple cartridge from the staple cartridge holder 4 Load the new staple cartridge into the staple cartridge holder PUSH ...

Page 461: ... 6 Insert the staple cartridge holder and then push it up until it locks into place When inserting the staple cartridge holder be sure to insert it so that it faces the correct direction 7 Return the copy output tray to its original position 8 Pull the handle of the misfeed clearing door to open it and then close it ...

Page 462: ...nisher becomes full the message shown below appears if the box can be emptied by the user 2 Note The setting for emptying the punch scrap box should be specified by the technical representative For details contact the technical representative The default setting is Service If a message appears immediately contact the technical representative Screen when a Punch setting is selected ...

Page 463: ...the job being performed is paused To continue the job without canceling the Punch setting empty the punch scrap box To cancel the Punch setting and continue the job touch Cancel Punching When performed by technical representative If the punch scrap box has become full while a job is being performed the job being performed is paused To continue the job touch Cancel Punching However the continued jo...

Page 464: ...10 Replacing toner cartridges and staples and emptying punch scrap box 10 36 CS240 CS231 Display in Enlarge Display mode CS240 CS231 ...

Page 465: ...x 10 To empty the punch scrap box in Finisher FS 517 FS 608 Follow the procedure described below to empty the punch scrap box 1 Open the front door 2 Pull out the punch scrap box 3 Empty the punch scrap box 4 Insert the punch scrap box into its original position 5 Close the front door ...

Page 466: ...31 To empty the punch scrap box in Finisher FS 519 CS231 Follow the procedure described below to empty the punch scrap box 1 Open the front door 2 Pull out the punch scrap box FN3 1 3 Empty the punch scrap box 4 Insert the punch scrap box into its original position 5 Close the front door ...

Page 467: ...11 Care of the machine ...

Page 468: ......

Page 469: ...old detergent 2 Reminder Be sure to turn off the machine set the main power switch to o before cleaning it Never use solvents such as benzene or thinner to clean the housing Original glass Clean the surface of the original glass by wiping it with a soft dry cloth 2 Reminder Never use solvents such as benzene or thinner to clean the original glass Left partition glass Clean the left partition glass...

Page 470: ...rgent glass cleaner benzene or thinner to clean the control panel or touch panel Document pad Clean the document pad by wiping it with a soft cloth dampened with a mild household detergent 2 Reminder Never use solvents such as benzene or thinner to clean the document pad Paper take up rollers Clean the paper take up rollers by wiping them with a soft dry cloth 2 Reminder Never use solvents such as...

Page 471: ...s lower front door 2 Slowly pull out the charger cleaning tool as far as possible Next slowly push in the charger cleaning tool as far as possible Repeat the above operations three times 3 Securely insert the charger cleaning tool and then close the front door Print head If the print head becomes dirty decreased print quality may result If this occurs clean the print head according to the followin...

Page 472: ...11 Care of the machine 11 6 CS240 CS231 3 Insert the cleaning tool into the print head cleaning opening pull it out and then repeat this back and forth movement two or three times ...

Page 473: ...can be printed 1 Press the Utility Counter key 2 Touch Meter Count and then touch Check Details in the left panel The Meter Count screen appears Can the list of counters be printed Touch Print List select the paper size and then press the Start key 3 Touch Close and then touch Close in the next screen that appears The Basic screen appears again 2 Note The list of counters can be displayed even whi...

Page 474: ...used can be viewed in the Coverage Rate screen 1 Press the Utility Counter key 2 Touch Meter Count and then touch Check Details in the left panel The Meter Count screen appears 3 Touch Coverage Rate 4 Touch Close and then touch Close in the next screen that appears The Basic screen appears again ...

Page 475: ...1 3 When the message It is time for the scheduled inspection of the device appears If the message It is time for the scheduled inspection of the device appears contact your technical representative and request a periodic maintenance inspection ...

Page 476: ...11 Care of the machine 11 10 CS240 CS231 ...

Page 477: ...12 Managing jobs ...

Page 478: ......

Page 479: ...the job number does not change until the job is deleted By using the Increase Priority function the selected job can be moved to the front of the queue so that it is printed first Multi job feature While one job is being printed another job can be queued A total of 251 jobs can be queued The number of jobs possible for each operation is listed below The values listed above are for reference and ma...

Page 480: ...listed above can be displayed from any other Job List screen However if a different tab is selected while a setting is being changed that setting is canceled A Current Jobs list and a Job History list can be displayed for each function Current Jobs Lists jobs that are queued and being performed allowing you to check the current status of the machine Job History Lists jobs that have been completed ...

Page 481: ...next job to be printed after the current job is finished can be changed For details refer to In creasing printing priority on page 12 16 The buttons that appear differ depending on the tab or list Current Jobs or Job History that is dis played Release Held Job button displayed on the Current Jobs list of the Print tab Touch to display the list of stored jobs The set tings of a stored job can be ch...

Page 482: ...play other jobs Item Name Description No Job identification number assigned when the job is queued User Name Displays the type source of the job COPY is displayed for copy jobs Status Current Jobs list only Displays the status of the job Document Name Displays the name of the file for print jobs sent from the computer If user authentication settings have been applied the names of documents are not...

Page 483: ...ault the display for the sub display area is that when Job Display Setting is set to List Display For details on specifying the default display for the left panel and the display method for the left panel Job List refer to Custom display settings on page 13 17 ...

Page 484: ... List screen appears 2 In the Print tab display the job to be deleted Jobs on the Job History list cannot be deleted 3 Select the job to be deleted and then touch Delete If the job to be deleted is not displayed touch or until the desired job is displayed If an incorrect job was selected select a different job or touch the button for the selected job again to deselect it A message requesting confi...

Page 485: ...fore Delete was touched appears again and the job is deleted from the Current Jobs list 5 Touch Close or press the Reset key The Basic screen appears again 2 Note If user authentication settings have been applied and the machine is set so that jobs cannot be deleted by other users the job is not deleted A job being performed can also be deleted by selecting the job in the sub display area then tou...

Page 486: ...n can be checked from the Job List screen Print tab Status Receiving PrintWait Printing StopPrint Print Err Job Stored 1 Result Job Complete Deleted Due To Error Deleted by User Reset Modes 2 Error Details 2 User Name Document Name Output Tray hours Job Start Job End Prints Original of Sets Send tab Status Transferring Waiting Dialing Waiting To Redial 1 Result Job Complete Deleted Due To Error De...

Page 487: ...o the screen displayed before Job Details was touched touch Close To return to the Basic screen press the Reset key Detail To delete the job touch Delete in the Detail screen If Detail appears in the Detail screen for a job selected from the Send tab detailed information is available on the multiple destinations that the data was sent to with broadcast transmission To view the information touch De...

Page 488: ...rom the Release Held Job screen For details refer to Printing a stored job on page 12 14 To give priority for output to a job touch Increase Priority in the Current Jobs list For more details refer to Increasing printing priority on page 12 16 Displaying the job history list 1 Touch Job List in the left panel and then touch Job Details The Job List screen appears 2 Touch Job History The Job Histor...

Page 489: ...st of the Print tab touch Release Held Job The Release Held Job screen appears 2 From the job list select the job whose proof copy is to be printed and then touch Proof Copy key If the job to be removed from the Held Jobs list is not displayed touch or until the desired job is displayed If an incorrect job was selected touch the button for the selected job again to deselect it After the single pro...

Page 490: ...ab touch Release Held Job The Release Held Job screen appears 2 Select the job to be removed from the Held Jobs list If the job to be removed from the Held Jobs list is not displayed touch and until the desired job is displayed If an incorrect job was selected select a different job or touch the button for the selected job again to deselect it To continue without changing the specified copy settin...

Page 491: ...more information about the settings Refer to the appropriate section Can a proof copy be printed For details on printing a proof copy refer to Printing a proof copy of a stored job on page 12 13 5 In the Release Held Job screen touch OK or press the Start key The stored job appears in the Current Jobs list and is printed How is the removal of a job from the Held Jobs list stopped Touch Cancel ...

Page 492: ...job has already been interrupted or a job was already given priority printing is interrupted after printing for the current job is finished 1 Display the Job History list of the Print tab For details on displaying the screen refer to Displaying the current jobs list stored jobs and active jobs on page 12 11 2 Touch Increase Priority The Increase Priority screen appears 3 In the job list touch the ...

Page 493: ...13 Utility mode ...

Page 494: ......

Page 495: ... page 13 7 2 Group 3 E mail Settings 2 Create User Box 1 Public Personal User Box Refer to Create user box on page 13 7 2 Bulletin Board User Box 3 Relay User Box 3 Limiting Access to Des tinations 1 Apply Levels Groups to Destinations 2 User Settings 1 System Settings 1 Language Selection Refer to System settings on page 13 15 2 Measurement Unit Set tings 3 Paper Tray Settings 4 Auto Color Level ...

Page 496: ...nt Jobs During Copy Operation Automatic Image Rotation 4 Scan Fax Settings JPEG Compression Level Refer to Scan Fax set tings on page 13 20 Black Compression Level TWAIN Lock Time Default Scan Fax Settings Compact PDF Compres sion Level 5 Printer Settings 1 Basic Settings Refer to Printer settings on page 13 31 2 Paper Setting 3 PCL Settings 4 PS Setting 5 Print Reports 6 Change Password Changes t...

Page 497: ... Destination Refer to One touch User box registration on page 13 28 2 Create User Box 3 One Touch User Box Registration List 4 Maximum Number of User Boxes 4 User Authentica tion Account Track 1 General Settings Refer to User authentica tion Account track on page 13 28 2 Authentication System 3 Account Track Settings 4 Print without Authenti cation 5 Print Counter List 6 External Server Set tings ...

Page 498: ...osition 3 Line Parameter Setting 4 TX RX Settings 5 Function Settings 6 PBX Connection Set tings 7 Report Settings 8 Job Settings List 9 Multi Line Setting 0 Network Fax Setting 9 System Connection Open API Settings Refer to System connec tion on page 13 32 0 Security Settings 1 Administrator Pass word Refer to Security set tings on page 13 32 2 User Box Administrator Setting 3 Administrator Secur...

Page 499: ... installed or when Internet fax functions are available Limiting access to destinations Access level Using the Access Level settings on this machine the security of registered destinations can be managed by permitting prohibiting viewing of the destination information or fax transmissions to the destination Access permission levels can be set to one of six levels between 0 and 5 with the higher nu...

Page 500: ...ers is level 0 Group In addition to users and destinations groups with access permissions can be created and given a name When users and destinations are registered in these groups a destination registered in a group can be accessed by users registered to the same group In addition by applying access permission levels to groups users not registered in a group can be given access permissions accord...

Page 501: ... Touch 8 Limiting Access to Destinations The Limiting Access to Destinations screen appears 4 Touch 1 Create Group A maximum of 20 groups can be registered In the Create Group screen touch the button for a group touch Details and then check the destinations and names of users belonging to that group The Create Group screen appears 5 Touch the button for the desired group and then touch Edit The Ed...

Page 502: ...strator Settings screen For details on displaying the Administrator Settings screen refer to Displaying the administrator settings screen on page 13 35 2 Touch 4 User Authentication Account Track The User Authentication Account Track screen appears 3 Touch 8 Limiting Access to Destinations The Limiting Access to Destinations screen appears 4 Touch 2 Apply Levels Groups to Destinations The Apply Le...

Page 503: ...mission group can be specified for each destination Only one access permission group can be specified for a single destination To specify the destination level touch Apply Level Touch the button for the desired level and then touch OK Touch the button for a group touch Details and then check the destinations and names of users belonging to that group To specify the destination group touch Apply Gr...

Page 504: ...r Box or Personal User Box as the user type and then touch the button for the desired User The Public User Box and Personal User Box settings appear only when access by a public user is permitted If use by a public user is permitted Public appears as the user name As the default level 0 is specified 6 Touch the button for the desired setting Both an access permission level and an access permission...

Page 505: ...ation screen Follow the procedure described below to display the One Touch User Box Registration screen by pressing Utility Counter key 1 Press the Utility Counter key 2 Touch 1 One Touch User Box Registration An item can also be selected by pressing the key in the keypad for the number beside the desired button For 1 One Touch User Box Registration press the 1 key in the keypad ...

Page 506: ... User Box Registration screen appears 2 Note To finish specifying settings in the Utility mode press the Utility Counter key Otherwise exit the Utility mode by touching Close in each screen until the screen for the Copy Fax Scan or Box mode appears ...

Page 507: ...n addition specify the priority of the paper trays when the auto tray switch operation is performed Tray 1 Tray 2 Tray 3 Tray 4 LCT Appears only when the LCT is installed Auto Tray Switch ON OFF Select whether or not a paper tray loaded with paper of the same size is selected automatically when a paper tray that was selected manually becomes empty while printing copies Restrict No Matching Paper i...

Page 508: ...meter Description Default Setting Print Fax Output Settings Specify settings for faxing and printing For details refer to the User manual Fax Op erations Option and the User manual Print Operations Output Tray Setting Select the copy output tray for each type of job copies printouts faxes and reports Copy Tray 1 Print Tray 1 Print Reports Tray 2 Fax Tray 2 Bin Assignment CS231 Select whether or no...

Page 509: ...py mode OFF Shortcut Key 2 Parameter Description Default Tab Specify settings for faxing and scanning For details refer to the User man ual Network Scanner Operations the User manual Fax Operations Op tion and the User manual Network Fax Operations Option Program Default Address Book Index Default Shortcut Key 1 Shortcut Key 2 Default Address Book Parameter Description Default Setting Copy Operati...

Page 510: ...ay Zoom Ratio The following zoom ratios are specified 2in1 Booklet 70 7 4in1 50 0 8in1 35 3 Off The zoom ratio is not selected automatically Auto Display Zoom Ra tio Auto Sort Group Selection Select whether or not the Sort setting is automatically se lected when 2 or more copies are set to be printed in a sin gle job Yes When a document is loaded into the automatic docu ment feeder and the Start k...

Page 511: ...r or not the Auto Zoom setting is automat ically selected when a paper tray is selected except when the Auto Paper setting is selected while a document is placed on the original glass OFF Auto Zoom ADF Select whether or not the Auto Zoom setting is automat ically selected when a paper tray is selected except when the Auto Paper setting is selected while a document is loaded into the ADF ON Specify...

Page 512: ...or scanning For details refer to the User manual Network Scanner Operations Black Compression Level TWAIN Lock Time Default Fax Scan Settings Compact PDF Compression Level Parameter Description Basic Settings Specify settings for printing For details refer to the User manual Print Op erations Paper Settings PCL Settings PS Setting Print Reports The Print function settings can be printed as a repor...

Page 513: ...Touch 2 User Settings An item can also be selected by pressing the key in the keypad for the number beside the desired button For 2 User Settings press the 2 key in the keypad The User Settings screen appears 2 Note To finish specifying settings in the Utility mode press the Utility Counter key Otherwise exit the Utility mode by touching Close in each screen until the screen for the Copy or Box mo...

Page 514: ...m up when Sleep mode is canceled therefore taking more preparation time than Power Save mode Low Power Enter Power Save Mode Specify settings for faxing For details refer to the User man ual Fax Operations Option and the User manual Network Fax Operations Option Normal Parameter Description Default Setting Print Fax Output Set tings Specify settings for faxing and printing For details refer to the...

Page 515: ...achine is turned off with the weekly timer function select whether or not use is limited with a password In addition if Yes is selected specify the password that must be entered No Parameter Description Default Setting Copy Program Lock Settings Select the registered copy programs that are pre vented from being changed or deleted Delete Saved Copy Program Select the registered copy programs to be ...

Page 516: ...31 Adjust the stapling position between 12 8 and 12 7 mm when printing with the Center Staple Fold setting 0 0 mm Half Fold Posi tion 1 CS240 Adjust the folding position between 10 and 10 mm when printing with the Center Staple Fold setting CS231 Adjust the folding position between 12 8 and 12 7 mm when printing with the Center Sta ple Fold setting 0 0 mm Tri Fold Position Adjustment 1 Adjust the ...

Page 517: ...just the paper position where the two sides are separated between 2 0 mm and 2 0 mm during double sided printing 0 0 mm Color Regis tration Ad just Color Registration Adjust Yellow Adjust the color registration if color shifts can be seen in the print result Color Registration Adjust Magenta Color Registration Adjust Cyan Gradation Adjustment Image Stabiliza tion Only When adjusting the gradation ...

Page 518: ...reset operation is per formed Priority Mode Copy System Auto Reset Time 1 minute Auto Reset Select the setting between 1 and 9 minutes or OFF for the desired length of time until the au tomatic panel reset operation is performed for each mode Copy and Scan Fax Copy 1 minute Scan Fax 1 minute Job Reset When Account is changed Select whether or not the settings are reset initial ized when the user h...

Page 519: ...cure Print Docu ments Auto Delete Secure Docu ment Specify settings for using boxes For details refer to the User manual Box Operations 1 day Encrypted PDF Delete Time 1 day Document Hold Setting ON Parameter Description Default Setting Header Footer Settings Program or delete header footer settings Fax TX Settings Select whether or not the stamp settings are canceled when a fax is sent Cancel Des...

Page 520: ...cted if User Authentication is set to OFF The machine can be used without authentication if ON Without Login is touched when logging on as a public user When logging on as an authorized user the Ac cess key must be pressed first to display the authentication screen Account Track Select whether or not account tracking is used to control the machine Account Track Input Method To authenticate using a...

Page 521: ...llow User Registration Register the users of this machine In addition the password printing permissions number of prints allowed and function permissions can be speci fied for each user User Counter The copy print and fax scan use for each user can be checked Parameter Description Account Track Registra tion Register the accounts using this machine In addition the password printing permis sions an...

Page 522: ...ly Levels Groups to Users The access permission level and the group with access permissions can be specified for each user Parameter Description Default setting General Settings Specify the authentication unit used with user authenti cation Bio Authentication Stored Print Job Settings Select whether or not jobs are stored in the Touch Print User Box when authentication unit biometric type is used ...

Page 523: ...Jobs During Copy Operation Select whether or not print data or fax data can be accepted for printing while a copy operation is being performed Accept Print data and fax data can be accepted and printed Receive Only Print data and fax data is printed after the copy operation is finished Accept Tri Fold Print Side Select whether the printed side is on the inside or the outside when the page is folde...

Page 524: ...For details refer to the User manual Box Operations Description Default Setting Specify the range of Administrator mode parameters available to users Level 1 Low Power Mode Settings Auto Magnification Selection Platen Auto Magnifica tion Selection ADF Specify Default Tray when APS Off Select Tray for Insert Sheet Tri fold Print Side Automatic Image Rotation are available to users Level 2 Low Power...

Page 525: ...select the items whose operation restric tions are canceled Users Accounts Operations for user authentication and account track Secure Print Operations for confidential documents User Box Operations for password protected boxes SNMP Operations for SNMP v3 Write user authentica tion Release Time Settings Specify the length of time until prohibited operations are automatically unlocked The time can ...

Page 526: ...f the hard disk where image data is saved after printing or sending can be overwritten and the data can be erased This process prevents disclosure of image data on the hard disk NO Overwrite All Data Select this parameter to overwrite all data on the entire hard disk when returning or disposing of this machine in order to prevent disclosure of the data For details on the settings re fer to the Use...

Page 527: ...ing Utility Counter key 1 Press the Utility Counter key 2 Touch 3 Administrator Settings An item can also be selected by pressing the key in the keypad for the number beside the desired button For 3 Administrator Setting press the 3 key in the keypad 3 Type in the administrator password and then touch OK For details on typing in text refer to Entering text on page 14 3 ...

Page 528: ...lose in each screen until the screen for the Copy Fax Scan or Box mode appears 2 Reminder The default administrator password is 12345678 The administrator of this machine should change the administrator password Be sure to keep the administrator password in a safe place If the administrator password is lost it must be specified by the technical representative For details contact the technical repr...

Page 529: ...aging unit M Imaging unit Y Imaging unit K Fusing unit Transfer roller unit Image transfer belt unit The usage levels are shown as graphs 2 Note The consumables mentioned above are replaceable For replacements contact your technical representative Displaying the check consumable life screen 1 Press the Utility Counter key 2 Touch 4 Check Consumable Life An item can also be selected by pressing the...

Page 530: ...t the list of usage levels touch Print List and then touch Start or press the Start key To finish specifying settings in the Utility mode press the Utility Counter key Otherwise exit the Utility mode by touching Close in each screen until the screen for the Copy Fax Scan or Box mode appears ...

Page 531: ...ed into the electrical outlet even if the machine has been turned off 0 Press the Utility Counter key touch Administrator Settings then System Settings then Weekly Timer Setting and correctly specify the necessary settings 1 Set Weekly Timer ON OFF Settings to ON 2 Specify times for Time Settings 3 Specify dates for Date Settings 4 Specify the desired settings for Select Time for Power Save and Pa...

Page 532: ...uch 7 Expert Adjustment The Expert Adjustment screen appears 4 Touch 2 Printer Adjustment The Printer Adjustment screen appears 5 Touch 1 Leading Edge Adjustment The Leading Edge Adjustment screen appears 6 Touch the button for the paper type to be set 7 Press the Start key Only paper loaded into the bypass tray can be used A test pattern is printed 8 Check that the distance from the starting prin...

Page 533: ...The starting print position is adjusted during manufacturing of the machine Normally the starting print position will not need to be adjusted 0 Only A4 v paper can be used to adjust the bypass tray 1 Display the Administrator Settings screen For details on displaying the Administrator Settings screen refer to Displaying the administrator settings screen on page 13 35 2 Touch 1 System Settings The ...

Page 534: ...fferent paper tray return to step 6 11 Touch OK To cancel the setting and select the default press the Reset key The print position is adjusted Leading edge adjustment Duplex side 2 The starting print position at the leading edge for the second side during automatic double sided copying with each type of paper with respect to the paper feed direction can be adjusted 0 The starting print position i...

Page 535: ...per Check that the distance has been adjusted to 4 2 mm If more adjustment is necessary repeat steps 8 and 9 To adjust the print position for a different paper type return to step 6 11 Touch OK The print position is adjusted Centering Duplex 2nd side The starting print position at the left edge of the paper for the second side during automatic double sided copying for each paper tray can be adjust...

Page 536: ...stance is 3 6 mm or more touch to reduce the adjustment between 0 2 mm and 3 0 mm If the distance is between 2 5 and 3 5 mm continue with step 10 Each time or is touched the value is increased or decreased by one increment 9 Press the Start key The adjusted test pattern is printed 10 Adjust the distance from the starting print position of the test pattern to the edge of the paper Check that the di...

Page 537: ...ings screen appears 3 Touch 7 Expert Adjustment The Expert Adjustment screen appears 4 Touch 3 Finisher Adjustment The Finisher Adjustment screen appears 5 Touch 1 2 Position Staple Pitch Adjustment The Adjust Spacing of 2 Staples screen appears 6 Touch the button for the setting to be adjusted 7 Check the stapling positions in the sample copy Touch or under Adjust Value to adjust the distance bet...

Page 538: ...Center Staple Fold setting refer to Binding copies at the center Center Staple Fold setting on page 4 75 For the procedure on adjusting the center folding position refer to Half fold position on page 13 48 0 Adjust the center folding position before adjusting the center stapling position 0 Before making any adjustments use the Center Staple Fold setting to print a single sample copy Perform the ad...

Page 539: ...the saddle stitcher is installed on optional finisher FS 519 touch buttons for the paper size and for the paper type 7 Compare the width of the left pages of the copy sample with the width of the right pages to check for the center of the paper If the staple position is too far to the left of the center of the paper touch to increase the adjustment Each time or is touched the value is increased or...

Page 540: ...ion when printing with the Half Fold setting can be adjusted for each paper size and for each paper type 2 Note CS240 Half Fold Position does not appear if optional Finisher FS 608 is not installed CS231 Half Fold Position appears only if optional finisher FS 608 is installed or if finisher FS 519 is installed with the saddle stitcher attached The adjustment range differs depending on the finisher...

Page 541: ...djustment The Finisher Adjustment screen appears 5 Touch 3 Half Fold Position The Half Fold Position screen appears 6 Touch the button for the paper size to be adjusted If the paper size to be adjusted is not displayed touch and until the desired paper size is displayed 7 Compare the width of the left pages of the copy sample with the width of the right pages to check for the center of the paper I...

Page 542: ...he folding position is adjusted to the center of the paper If more adjustment is necessary repeat steps 6 through 9 Tri fold position adjustment The folding position when printing with the Tri Fold setting can be adjusted for each paper size 2 Note Tri Fold Position Adjustment appears only if optional finisher FS 608 is installed 0 Before making any adjustments use the Tri Fold setting to print a ...

Page 543: ...d the value is increased or decreased by one increment If the folding position is too far on the left side of the paper touch under Adjust Value to increase the adjustment between 0 1 mm and 12 7 mm 8 Touch OK To cancel the setting and select the default press the Reset key The folding positions are adjusted If no adjustment of the folding positions were necessary in step 7 this completes the proc...

Page 544: ...s on displaying the Administrator Settings screen refer to Displaying the administrator settings screen on page 13 35 2 Touch 1 System Settings The System Settings screen appears 3 Touch 7 Expert Adjustment The Expert Adjustment screen appears 4 Touch 3 Finisher Adjustment The Finisher Adjustment screen appears 5 Touch 5 Punch Vertical Position Adjustment The Punch Vertical Position screen appears...

Page 545: ... touch under Adjust Value to increase the adjustment between 0 1 mm and 5 0 mm 8 Touch OK To cancel the setting and select the default press the Reset key The vertical position of the punched holes is adjusted If no adjustment of the vertical position of the punched holes was necessary in step 7 this completes the procedure 9 Use a Punch setting to print another sample copy ...

Page 546: ...fore making any adjustments use a Punch setting to print a sample copy Perform the adjustment while checking the sample that was created 1 Display the Administrator Settings screen For details on displaying the Administrator Settings screen refer to Displaying the administrator settings screen on page 13 35 2 Touch 1 System Settings The System Settings screen appears 3 Touch 7 Expert Adjustment Th...

Page 547: ...Check that the horizontal position of the punched holes was adjusted If more adjustment is necessary repeat steps 6 through 9 Punch regist loop size adjustment The angle of punched holes when printing with a Punch setting can be adjusted 2 Note For details on the Punch settings refer to Punching holes in copies Punch settings on page 4 69 The adjustment range differs depending on the finisher that...

Page 548: ... If the angle cannot be adjusted by touching or if the paper is wrinkled touch to change the adjustment Each time or is touched the value is increased or decreased by one increment 7 Touch OK To cancel the setting and select the default press the Reset key The angle of the punched holes is adjusted If no adjustment of the angle of the punched holes was necessary in step 6 this completes the proced...

Page 549: ...or FS 608 is installed For details on the Punch settings refer to Punching holes in copies Punch settings on page 4 69 1 Display the Administrator Settings screen For details on displaying the Administrator Settings screen refer to Displaying the administrator settings screen on page 13 35 2 Touch 1 System Settings The System Settings screen appears 3 Touch 7 Expert Adjustment The Expert Adjustmen...

Page 550: ...13 Utility mode 13 58 CS240 CS231 6 Press the Start key Automatic adjustment of the punched hole edge sensor begins Once the adjustment is completed the results screen appears 7 Touch Close ...

Page 551: ...y 1 Display the Administrator Settings screen For details on displaying the Administrator Settings screen refer to Displaying the administrator settings screen on page 13 35 2 Touch 1 System Settings The System Settings screen appears 3 Touch 7 Expert Adjustment The Expert Adjustment screen appears 4 Touch 7 Color Registration Adjust The Color Registration Adjust screen appears 5 Touch 3 Color Reg...

Page 552: ... direction as shown below touch under Y to increase the adjustment between 1 dot and 6 dots If the lines are not shifted from the reference lines continue with step 10 9 Press the Start key The adjustment is applied when the Start key is pressed To cancel the adjustment press the Reset key instead of pressing the Start key The adjusted test pattern is printed 10 Check the print result If there is ...

Page 553: ... with the main power switch wait at least 10 seconds to turn the machine on after turning it off The machine may not operate correctly if it is turned on immediately after being turned off 0 The test pattern is printed on plain paper from a paper tray loaded with one of the following sizes listed in order of priority A3 w 11 e 17 w A4 v or 8 1 2 e 11 v Paper in the bypass tray cannot be selected 1...

Page 554: ...e as the printed test pattern page Why are blank pages placed on top of the test pattern Place 10 sheets of blank paper on top of the test pattern to prevent it from becoming transparent Otherwise the gradation levels may not be correctly adjusted 10 Close the ADF 11 Press the Start key The printed test pattern is scanned When the test pattern is scanned the gradation levels are automatically adju...

Page 555: ...ay the Administrator Settings screen For details on displaying the Administrator Settings screen refer to Displaying the administrator settings screen on page 13 35 2 Touch 1 System Settings The System Settings screen appears 3 Touch Forward and then touch 2 Stamp Settings The Stamp Settings screen appears 4 Touch 1 Header Footer Settings The Header Footer Settings screen appears 5 Touch New The H...

Page 556: ... refer to Entering text on page 14 3 The header foot name is specified 8 Under Header Settings or Footer Settings touch Header Settings and then select the type of header footer to be printed 9 Select the desired setting under Pages and specify the desired settings for Text Color and Text Size 10 Touch OK Detail To print the header footer only on the first page touch Cover Only ...

Page 557: ...ty mode 13 Editing headers footers 1 In the Header Footer Settings screen touch the button of the header footer to be edited 2 Touch Check Edit To delete the header footer touch Delete The Check Edit screen appears 3 Touch OK ...

Page 558: ...able functions copy operations scanning operations fax operations printing document storing operations and transmitted document printing Counters for printing scanning by each user Limits on using color or black printing and on the number of copies that can be set Management of group user boxes and personal user boxes for each owner Management of the level and the group with permissions to access ...

Page 559: ...re to be totaled separately With this setup statistics can be maintained for each employee each user and on each duty of the employee each account In addition totals can be maintained on each employee each user and each duty each account even if the same duty is performed by two different employees To manage the use of this machine in this way specify the following authentication settings User 1 U...

Page 560: ...ve been applied touch Allow ON Without Login allows the machine to be used without authentication when logging on as a public user When logging on as an authorized user the Access key must be pressed first to display the authentication screen 6 Specify a setting for Account Track To cancel account tracking touch OFF To use the account track function touch ON 7 Specify a setting for Account Track I...

Page 561: ... data without changing the settings touch No If the setting for any of the following is changed the data is not cleared Public User Access When of Jobs Reach Maximum or Synchronize User Authentication Account Track To cancel the setting and select the default press the Reset key The authentication method is set Continue by specifying settings for user authentication and account track 2 Reminder Do...

Page 562: ...ended that limitations be placed on the machine functions that can be used For details refer to User registration on page 13 73 If account track settings have been applied while User Authentication is set to External Server Authentication type in the user name and password in the user authentication screen and then type in the account name and password in the account track screen If ON MFP is set ...

Page 563: ...ails on displaying the Administrator Settings screen refer to Displaying the administrator settings screen on page 13 35 2 Touch 4 User Authentication Account Track The User Authentication Account Track screen appears 3 Touch 2 Authentication System The User Authentication Setting screen appears Why is 2 User Authentication Settings not available 2 Authentication System is not available if User Au...

Page 564: ...scanning or faxing a document saved in a box 1 Display the Administrator Settings screen For details on displaying the Administrator Settings screen refer to Displaying the administrator settings screen on page 13 35 2 Touch 4 User Authentication Account Track The User Authentication Account Track screen appears 3 Touch 2 Authentication System The User Authentication Setting screen appears Why is ...

Page 565: ...ess is set to On Without login press the Access key to display the Basic screen User registration The password printing permissions number of prints allowed and function permissions can be specified for each user of this machine In addition if a authentication unit biometric type is installed on this machine the vein patterns of the user s fingers can be registered As an example the following proc...

Page 566: ...o External Server Authentication 9 Type in the password up to 64 characters long and then touch OK For confirmation the Password screen appears again Retype the same password and then touch OK The user password is set 10 Touch E Mail Address The E Mail Address screen appears 11 Type in the e mail address up to 320 characters and then touch OK The e mail address is set If the e mail address exceeds...

Page 567: ... settings to all users At this time do not turn off the machine with the main power switch If color printing is restricted printing is not possible with the Full Color 2 Color or Single Color settings If black printing is restricted printing is not possible with the Black setting If both color and black printing are restricted the message Copying is prohibited appears even if authentication was co...

Page 568: ...metric type 23 Touch Function Permission The Function Permission screen appears 24 Touch the button for the desired setting for each operation To permit the operation to be performed touch Allow To prohibit the operation to be performed touch Restrict Touch All Users to apply the settings in the current screen to all registered users Touch All Users touch OK and then touch OK in the next screen th...

Page 569: ...lor setting the 2 Color setting and the Single Color setting Print This table shows the total number of pages printed with print operations Total Total number of printout pages printed using all Color settings the Black setting the Full Color setting the 2 Color setting and the Single Color setting Large Size Total number of printout pages printed on large sized paper using all Color settings the ...

Page 570: ...ppears 6 Touch the button for the counter to be viewed and then check the counter To clear the counters for the current user touch Clear Counter in the Counter Details screen for the current user A confirmation message appears asking whether the counter should be cleared To clear the counters for the displayed user touch Yes in the confirmation message screen and then touch OK The maximum number a...

Page 571: ...nistrator Settings screen refer to Displaying the administrator settings screen on page 13 35 2 Touch 4 User Authentication Account Track The User Authentication Account Track screen appears 3 Touch 3 Account Track Settings The Account Track Setting screen appears 4 Touch 1 Account Track Registration 5 Touch the button for the desired account and then touch Edit The Edit screen for the account app...

Page 572: ... was set to Password Only the same password cannot be registered more than once The Password screen appears 9 Type in the password up to 8 characters long and then touch Enter A screen for retyping the password appears 10 Retype the password specified in step 9 and then touch OK The user password is set 11 Touch Output Permission The Output Permission screen appears 12 Touch a button under Print o...

Page 573: ...o specify the maximum number of combined color and black prints allowed touch Total Allowance To separately specify the maximum number of color and black prints allowed touch Individual Allowance To specify no maximum for color and black prints touch No Limit 16 Select the parameter to be specified and then use the keypad to type in the maximum number allowed Touch All Accounts to apply the settin...

Page 574: ...olor setting and the Single Color setting Large Size Total number of pages copied on large sized paper using all Color settings the Black setting the Full Color setting the 2 Color setting and the Single Color setting Print This table shows the total number of pages printed with print operations Total Total number of printout pages printed using all Color settings the Black setting the Full Color ...

Page 575: ...on for the counter to be viewed and then check the counter To clear the counters for the current account touch Clear Counter in the Counter Details screen for the current account A confirmation message appears asking whether the counter should be cleared To clear the counters for the displayed account touch Yes in the confirmation message screen and then touch OK The maximum number allowed is not ...

Page 576: ...characters numbers or as the fax transmission password for boxes Limitations on the number of characters Limitations on registering changing 8 alphanumeric characters and symbols A password that consists of a repetition of the same charac ter cannot be registered The same password as one before being changed cannot be registered Limitations on the number of characters Limitations on registering ch...

Page 577: ...ntative The settings that must be specified or are forcibly set cannot be changed after Enhanced Security Settings is set to ON Required settings The following settings must first be specified in order to set Enhanced Security Settings to ON Detail If Account Track is set to ON in the General Settings screen set Account Track Input Method to Account Name Password If Password Only is selected the s...

Page 578: ...the user This machine s counter data cannot be retrieved by Net Care or VISUALCOUNT MASTER An application performing the write operation with SNMP v1 v2c cannot be connected Write users using SNMP v3 must be authenticated 2 Note For details on the limitations placed on the user for box operations refer to the User manual Box Operations For details on the limitations placed on the user for printing...

Page 579: ...14 Appendix ...

Page 580: ......

Page 581: ...how to use the keyboard that appears in the touch panel for typing in the names of registered accounts and custom paper sizes The keypad can also be used to type in numbers Any of the following keyboards may appear Example Password input screen Screen for entering the name of a custom paper size ...

Page 582: ...The keyboard can be displayed larger so that it easier to read 1 While the keyboard is displayed touch Enlarge ON The keyboard is displayed enlarged 2 To cancel the enlarged display and return the keyboard to its normal size touch Enlarge OFF while the keyboard is displayed enlarged 2 Note The keyboard is used in the same way even when it is displayed enlarged ...

Page 583: ...e text box 2 Note To revert to the setting when the keyboard was displayed touch Cancel To clear all entered text press the C clear key Some buttons may not appear depending on the characters being entered Detail To change a character in the entered text touch and to move the cursor to the character to be changed touch Delete and then type in the desired letter or number List of available characte...

Page 584: ...ckground color of the original to one of nine levels Blue Set this parameter to adjust the level of blue in the image for example if you wish to emphasize the blue of water or the sky Brightness Set this parameter to make the image either lighter or darker C Change Tray Settings Touch this button to specify a paper size not loaded in a paper tray or to copy on paper other than normal paper Chapter...

Page 585: ...e and to manage security H Hue Set this parameter to make the image either more reddish or more bluish I Insert Image Set this function to later scan multiple images from the original glass and insert them at the desired locations in an original scanned with the ADF then feed out all copies together Insert Sheet Set this function to insert paper from the specified paper tray into the copies as cha...

Page 586: ...to redden skin tones S Saturation Set this parameter to adjust the degree of vividness of the colors in the image Save in User Box Temporarily saves the job on the hard disk so that it can later be recalled and used again Sharpness Set this parameter to emphasize the edges of text so that they can be read more easily In addition this parameter can be used to adjust the original image Sheet Cover C...

Page 587: ...S240 CS231 14 9 Appendix 14 X XY Zoom Touch this button to use the keypad to specify the zoom ratio for producing an enlarged reduced copy of the loaded original Z Zoom Specify the zoom ratio of the copy ...

Page 588: ...14 Appendix 14 10 CS240 CS231 ...

Page 589: ...15 Index ...

Page 590: ......

Page 591: ...els 2 15 Center staple fold 4 71 4 75 Center staple position 13 46 Centering 13 41 Centering duplex 2nd side 13 43 Chapters 9 33 Check consumable life 13 37 Cleaning 11 3 CMYK color adjustment 9 9 Color adjustments 9 47 Color balance 9 9 Color registration adjust 13 59 Color settings 9 17 9 18 Combined pages 4 49 Conserving energy 3 32 3 33 3 34 Consumables 10 3 10 8 10 12 10 23 Contrast 9 12 Cont...

Page 592: ... 29 Maintenance 11 3 Manual conventions 1 12 Memory 6 69 Message 6 69 6 70 6 71 6 72 6 76 11 9 Message display time 5 27 Meter count 11 7 Minimal 4 38 Mirror image 9 21 9 42 Mixed original 4 20 14 6 Mode check 5 3 Mode memory 5 9 N Neg Pos reverse 9 20 9 40 Negative positive reverse 9 20 Network setting 13 30 Non standard sized paper 8 12 O OHP interleave 9 22 One touch destination User box regist...

Page 593: ...ents 2 16 Special paper 8 6 8 19 Stamp Composition 9 75 Staple 10 23 Staple cartridge 10 23 Staple jam 6 58 Staple settings 4 60 4 65 Status indicator 3 6 Stored jobs 12 13 12 14 Supplying paper 6 68 System auto reset 3 32 System auto reset confirmation 5 21 System connection 13 32 System settings 13 15 13 22 T Temporarily stopping 4 81 Text enhancement 4 55 Text entry 14 3 Toner cartridge 10 3 To...

Page 594: ...15 Index 15 6 CS240 CS231 ...

Reviews: