background image

6

Basic job settings

6-22

Océ CS620/CS650 Pro

4

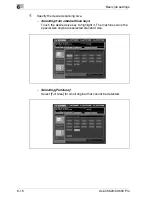
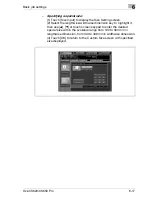
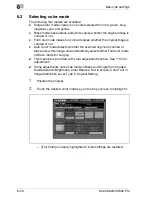
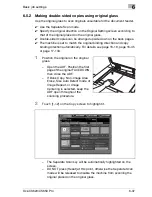
Touch the desired size key to highlight it, then touch [OK].


The Original Setting screen will be restored.

5

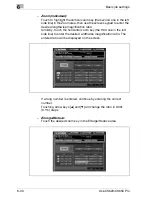
Touch [OK] to return to the Copy screen.

Touch [Default Set] to restore the initial setting, or touch [Cancel] to 
resume the previous setting.

Summary of Contents for CS620 Pro

Page 1: ...Oc CS620 User Manual Oc CS650 Pro...

Page 2: ...B V makes no representation or warranties with respect to the contents hereof and specifically disclaims any implied warranties of merchantability or fitness for any particular purpose Further Oc Tech...

Page 3: ...stic noise For European users only 1 51 1 12 Caution notations and labels 1 52 1 13 Space requirements 1 55 1 14 Operation precautions 1 61 2 Preparation for use 2 1 Machine configuration 2 3 2 2 Turn...

Page 4: ...5 20 5 5 Setting job during warmup 5 22 5 6 To stop scanning printing 5 26 6 Basic job settings 6 1 Original setting 6 3 6 1 1 Selecting binding direction of the original Bind Direction 6 3 6 1 2 Spe...

Page 5: ...7 3 Adjusting density level 7 15 7 4 Changing colors using RGB values 7 23 7 5 Changing colors using HSB values 7 26 7 6 Adjusting sharpness 7 34 7 7 Adjusting contrast 7 36 7 8 Setting image distinct...

Page 6: ...g stamp onto copies Built in Stamp 8 71 8 17 2 Printing distribution number Set Numbering 8 73 8 17 3 Printing page number Page No 8 75 8 17 4 Printing date time Date Time 8 77 8 17 5 Printing waterma...

Page 7: ...52 9 9 Using Finisher FS 607 manually 9 54 9 10 Loading sorting a volume of copies Large capacity stacker LS 501 9 56 9 11 Copy conditions incompatible with output applications 9 58 10 Advanced infor...

Page 8: ...Centering Adjustment 14 6 14 1 3 01 Printer Adjustment 03 FD Mag Adjustment 14 8 14 1 4 01 Printer Adjustment 04 CD Mag Adjustment 14 11 14 1 5 02 Scanner Adjustment 01 Restart Timing Adjustment 14 1...

Page 9: ...06 Saddle Stitcher Adj 05 Tri Fold Position Adj 14 70 14 7 6 06 Saddle Stitcher Adj 06 Fold Paper Width Adj 14 73 14 7 7 06 Saddle Stitcher Adj 07 Trimming Adjustment 14 75 14 7 8 06 Saddle Stitcher A...

Page 10: ...strator setting outlines 17 3 17 2 01 System Setting 17 7 17 3 02 Administrator Register 17 78 17 4 03 Scanner Send Address 17 80 17 5 04 User Auth Account Track 17 98 17 6 05 Network Setting 17 128 1...

Page 11: ...s saved in audit log 22 17 23 Troubleshooting 23 1 If Please Call Service C message is displayed 23 3 23 2 Clearing mishandled paper 23 6 23 3 If MACHINE tab blinks in orange 23 9 23 4 If Memory Full...

Page 12: ...Contents 10 Oc CS620 CS650 Pro 26 1 How to input characters 26 3 26 2 Index 26 5...

Page 13: ...1 Introduction Safety information...

Page 14: ......

Page 15: ...rent from views of the actual equipment ACKNOWLEDGEMENTS Microsoft MS Windows and MS DOS are registered trademarks or trademarks of Microsoft Corporation in the United States and or other countries IB...

Page 16: ...of this manual may be used or duplicated without permission Manufacturer and Sales Company will have no liability for any influences caused by using the printing system and this user manual The inform...

Page 17: ...been established to encourage the widespread and voluntary use of energy efficient technologies that reduce energy consumption and prevent pollution As an ENERGY STAR Partner we have determined that...

Page 18: ...the OS please contact directly to TimeSys Corporation or their sales representative http www timesys com About License Granted to Each Software Component The GPL LGPL or OpenSSL license is granted to...

Page 19: ...d that you know you can do these things To protect your rights we need to make restrictions that forbid anyone to deny you these rights or to ask you to surrender the rights These restrictions transla...

Page 20: ...s source code as you receive it in any medium provided that you conspicuously and appropriately publish on each copy an appropriate copyright notice and disclaimer of warranty keep intact all the noti...

Page 21: ...based on the Program on a volume of a storage or distribution medium does not bring the other work under the scope of this License 3 You may copy and distribute the Program or a work based on it unde...

Page 22: ...ve works These actions are prohibited by law if you do not accept this License Therefore by modifying or distributing the Program or any work based on the Program you indicate your acceptance of this...

Page 23: ...cit geographical distribution limitation excluding those countries so that distribution is permitted only in or among countries not thus excluded In such case this License incorporates the limitation...

Page 24: ...U SHOULD THE PROGRAM PROVE DEFECTIVE YOU ASSUME THE COST OF ALL NECESSARY SERVICING REPAIR OR CORRECTION 12 IN NO EVENT UNLESS REQUIRED BY APPLICABLE LAW OR AGREED TO IN WRITING WILL ANY COPYRIGHT HOL...

Page 25: ...anations below When we speak of free software we are referring to freedom of use not price Our General Public Licenses are designed to make sure that you have the freedom to distribute copies of free...

Page 26: ...the entire combination fits its criteria of freedom The Lesser General Public License permits more lax criteria for linking other code with the library We call this license the Lesser General Public...

Page 27: ...modifications and or translated straightforwardly into another language Hereinafter translation is included without limitation in the term modification Source code for a work means the preferred form...

Page 28: ...ined independent of the application Therefore Subsection 2d requires that any application supplied function or table used by this function must be optional if the application does not supply it the sq...

Page 29: ...n a medium customarily used for software interchange If distribution of object code is made by offering access to copy from a designated place then offering equivalent access to copy the source code f...

Page 30: ...his License You must supply a copy of this License If the work during execution displays copyright notices you must include the copyright notice for the Library among them as well as a reference direc...

Page 31: ...company the operating system Such a contradiction means you cannot use both them and the Library together in an executable that you distribute 7 You may place library facilities that are a work based...

Page 32: ...m the conditions of this License If you cannot distribute so as to satisfy simultaneously your obligations under this License and any other pertinent obligations then as a consequence you may not dist...

Page 33: ...he Free Software Foundation If the Library does not specify a license version number you may choose any version ever published by the Free Software Foundation 14 If you wish to incorporate parts of th...

Page 34: ...LIABLE TO YOU FOR DAMAGES INCLUDING ANY GENERAL SPECIAL INCIDENTAL OR CONSEQUENTIAL DAMAGES ARISING OUT OF THE USE OR INABILITY TO USE THE LIBRARY INCLUDING BUT NOT LIMITED TO LOSS OF DATA OR DATA BEI...

Page 35: ...r the terms of the GNU Lesser General Public License as published by the Free Software Foundation either version 2 1 of the License or at your option any later version This library is distributed in t...

Page 36: ...cludes software developed by the OpenSSL Project for use in the OpenSSL Toolkit http www openssl org 4 The names OpenSSL Toolkit and OpenSSL Project must not be used to endorse or promote products der...

Page 37: ...his package is used in a product Eric Young should be given attribution as the author of the parts of the library used This can be in the form of a textual message at program startup or in documentati...

Page 38: ...DAMAGES INCLUDING BUT NOT LIMITED TO PROCUREMENT OF SUBSTITUTE GOODS OR SERVICES LOSS OF USE DATA OR PROFITS OR BUSINESS INTERRUPTION HOWEVER CAUSED AND ON ANY THEORY OF LIABILITY WHETHER IN CONTRACT...

Page 39: ...open book or book size sheet separately onto two letter sheets in 1 1 mode or separately onto each side of one letter sheet in 1 2 mode You can use the Book Copy mode with the Front or Front Back cove...

Page 40: ...t on the pages of another document For example you may want to incorporate a page heading graphic design or logo into the pages of your document Image repeat Selects the horizontal image area across t...

Page 41: ...by job number as needed All compatible original glass functions can be programmed into Mode Memory directly after they are selected Multi page enlargement Makes an enlarged copy of an original by div...

Page 42: ...with SD 501 saddle stitcher installed Fold Staple Trimming Folding Multi Half Fold Multi Tri Fold Page margin Creates or removes a binding margin at the top bottom right and left edges shift amount fr...

Page 43: ...s the desired simplex mode 1 1 or 2 1 or duplex mode 1 2 or 2 2 Stamp Prints watermark regular stamp date time page number and numbering onto the output copies to enhance the presentation and usefulne...

Page 44: ...1 Introduction Safety information 1 32 Oc CS620 CS650 Pro Zoom Selects fixed ratios four reduction four enlargement and three user set ratios Zoom ratios can be selected from 25 400 in 0 1 increments...

Page 45: ...ings in order to prevent injuries and to ensure safe use of the machine 7 CAUTION Failure to observe instructions highlighted in this manner may result in slight injuries or property damage Observe al...

Page 46: ...e use of the machine 2 Reminder Text highlighted in this manner contains information that should be reminded Detail Text highlighted in this manner contains references for more detailed information Sp...

Page 47: ...General Identification cards badges or insignias Copyrighted works without permission of the copyright owner In addition it is prohibited under any circumstances to copy domestic or foreign currencies...

Page 48: ...usehold waste Please refer to the information of your local community or contact our dealers regarding the proper handling of end of life electric and electronic equipment Recycling of this product wi...

Page 49: ...d preventing equipment problems Please keep this manual in a handy place near the machine Make sure you observe all of the precautions appear in each section of this manual 2 Note Some parts of the co...

Page 50: ...l line indicates a pro hibited course of action This symbol warns against dis mantling the device A black circle indicates an im perative course of action This symbol indicates you must unplug the dev...

Page 51: ...in a fire or electrical shock Use the power cord supplied in the package only for this ma chine and NEVER use it for any other product Failure to ob serve this precaution could result in a fire or el...

Page 52: ...uct connecting to inadequate power supply voltage current capacity grounding and may result in fire or shock If proper wall outlet is not available the customer shall ask qualified electrician for the...

Page 53: ...plug and plug in the power cord with a wet hand as an electrical shock could result Plug the power cord all the way into the power outlet Failure to do this could result in a fire or electrical shock...

Page 54: ...iately turn OFF the pow er switch unplug the power cord from the power outlet and then call your authorized service representative Caution Symbol After installing this product mount it on a secure bas...

Page 55: ...re your health Ventilate the room at regular intervals Warning Symbol Do not keep using this product if this product becomes inor dinately hot or emits smoke or unusual odor or noise Imme diately turn...

Page 56: ...mper ature which may cause burns When checking the inside of the unit for malfunctions such as a paper misfeed do not touch the locations around the fus ing unit etc which are indicated by a Caution H...

Page 57: ...afety advices Caution Symbol Whenever moving this product be sure to disconnect the power cord and other cables Failure to do this could damage the cord or cable resulting in a fire electrical shock o...

Page 58: ...nable protection against harmful interference when the equipment is operated in a commercial environment This equipment generates uses and can radiate radio frequency energy and if not installed and u...

Page 59: ...not subject to Class B regulations 7 WARNING Interference with radio communications This is a Class A product In a domestic environment this product may cause radio interference in which case the use...

Page 60: ...r ling ved bning n r sikkerhedsafbrydere er ude af funktion Undg uds ttelse for sr ling Klasse 1 laser produkt der opfylder IEC 60825 1 sikkerheds kravene Dansk Dette er en halvlederlaser Laserdiodens...

Page 61: ...n turvallisuusluokan 1 ylitt v lle n kym tt m lle lasers teilylle T m on puolijohdelaser Laserdiodin sunrin teho on 15 mW ja aallonpituus on 775 800 nm 7 VARNING Det h r r en halvledarlaser Om apparat...

Page 62: ...1 Introduction Safety information 1 50 Oc CS620 CS650 Pro...

Page 63: ...igable est d gag e pendant le fonctionnement de l appareil quand celui ci est utilis normalement Cependant une odeur d sagr able peut tre ressentie dans les pi ces dont l a ration est insuffisante et...

Page 64: ...rations such as removing paper misfeeds are performed The fixing unit is very hot To avoid getting burned DO NOT TOUCH DO NOT put your hand between the main body and developing fixing unit otherwise y...

Page 65: ...Introduction Safety information 1 Oc CS620 CS650 Pro 1 53 DO NOT throw the toner recovery box into a fire If it is thrown into a fire the toner may ignite and cause a dangerous situation WARNING...

Page 66: ...r notation is damaged please contact your service representative To avoid any unexpected injury DO NOT put your hand into the holes 3 places on the bottom plate of the LU CAUTION To avoid injury DO NO...

Page 67: ...erformed adhere to the recommended space requirements detailed below To whole machine may weigh approx 930 kg at maximum depending on the combination of options Be sure to choose a level and solid flo...

Page 68: ...ntroduction Safety information 1 56 Oc CS620 CS650 Pro 1021 1619 899 950 293 1619 899 2142 1021 950 293 766 2142 unit mm unit mm main body DF 609 PF 601 side view main body DF 609 PF 601 SD 501 side v...

Page 69: ...c CS620 CS650 Pro 1 57 175 760 544 254 947 2997 1179 100 117 100 1619 1021 393 205 175 760 400 947 2866 1231 100 100 1619 1021 393 205 267 117 unit mm unit mm main body DF 609 PF 601 RU 504 FS 503 mai...

Page 70: ...mation 1 58 Oc CS620 CS650 Pro 175 760 1170 947 3252 46 4 100 100 1619 1021 393 205 175 760 785 947 2867 1179 100 100 1619 1021 393 205 unit mm unit mm main body DF 609 PF 601 RU 503 SD 501 main body...

Page 71: ...n 1 Oc CS620 CS650 Pro 1 59 1619 175 760 400 544 947 3397 1021 393 1231 100 100 205 254 117 unit mm main body DF 609 PF 601 RU 504 FD 501 FS 503 main body DF 609 LU 202 FS 607 PI 502 main body DF 609...

Page 72: ...1 Introduction Safety information 1 60 Oc CS620 CS650 Pro 2 Reminder Be sure to allow a clearance of 200 mm or more at the back of this machine for the ventilation duct...

Page 73: ...fluctuations as possible Operating environment The environmental requirements for correct operation of the machine are as follows Operating temperature 10 C 50 F to 30 C 86 F Humidity 10 to 80 Storag...

Page 74: ...1 Introduction Safety information 1 62 Oc CS620 CS650 Pro...

Page 75: ...2 Preparation for use...

Page 76: ......

Page 77: ...Preparation for use 2 Oc CS620 CS650 Pro 2 3 2 Preparation for use 2 1 Machine configuration External 1 2 3 4 5 6 7 8 9 10 11 12 13 14...

Page 78: ...pace for documents both before and after copying 7 Toner access door Opens to replenish the black toner and color toner 8 Toner recovery box door Opens to replace the filled toner recovery box with ne...

Page 79: ...unit follow the instruction on the screen to be displayed when paper misfeed occurs 2 Conveyance fixing unit lever Can be turned leftward to withdraw the conveyance fixing unit for removal of mishand...

Page 80: ...2 Preparation for use 2 6 Oc CS620 CS650 Pro Paper feeder unit PF 601 Oc CS650 Pro 1 2 3 4 5 6 7 8 7 9 10 6 11...

Page 81: ...ndled paper 4 Paper feed roller Feeds one sheet of paper at a time into the main body 5 Auxiliary paper guide Pulled out to load A5 w B6 w or A6 w paper A5 v and A6 w are acceptable in tray 5 only 6 P...

Page 82: ...2 Preparation for use 2 8 Oc CS620 CS650 Pro Finisher FS 503 Oc CS650 Pro 1 2 3 6 5 4 8 7 9 10...

Page 83: ...ward to remove mishandled paper 5 Secondary Sub tray convey ance lever right Opens upward to remove mishandled paper 6 Secondary Sub tray convey ance lever left Opens leftward to remove mishandled pap...

Page 84: ...2 Preparation for use 2 10 Oc CS620 CS650 Pro Large capacity stacker LS 501 Oc CS650 Pro 1 4 5 6 7 8 2 3 9 10 12 13 15 16 17 14 11...

Page 85: ...to remove mishandled paper 8 Secondary Sub tray convey ance cover handle Opens to remove mishandled paper 9 Stacker conveyance knob Can be turned clockwise to feed mishandled paper to the stacker 10...

Page 86: ...2 Preparation for use 2 12 Oc CS620 CS650 Pro Folding unit FD 501 Oc CS650 Pro 1 2 3 4 5 6 7 8 12 1 2 3 4 5 6 7 9 10 8 9 11...

Page 87: ...handled paper 2 Post inserter conveyance le ver behind the inlet lever Opens leftward to remove mishandled paper 3 Waste basket Holds waste paper punched out 4 Upper Lower conveyance le ver Opens righ...

Page 88: ...2 Preparation for use 2 14 Oc CS620 CS650 Pro Saddle stitcher SD 501 Oc CS650 Pro 1 2 3 4 5 6 7 8 1 2 3 4 5 6 7 8 9 10 11 12 13...

Page 89: ...cover lever of Folding unit Opens the upper cover to remove paper misfed inside the Folding unit 2 Secondary Sub tray convey ance lever middle Opens downward to remove mishandled paper 3 Folding unit...

Page 90: ...2 Preparation for use 2 16 Oc CS620 CS650 Pro Finisher FS 607 Oc CS620 3 2 4 1 1 2 3 4 5 6 7 8 9 3 11 10...

Page 91: ...o remove mishandled paper 2 Paper inserter conveyance lever Opens leftward to remove mishandled paper 3 Punch kit PK 512 option Punches file holes in the output copies 4 Entrance lever Opens downward...

Page 92: ...ations 2 Upper unit release lever Can be moved to slide the upper unit of paper inserter for removal of mishandled paper 3 Upper tray guide plates Hold cover sheets to fix the position 4 Upper tray Ho...

Page 93: ...mishandled paper 4 Paper loading button Pressed to lower the bottom plate to allow loading paper 5 Paper feed roller Conveys copy paper to the main body 6 Tray paper guides Hold copy paper to fix the...

Page 94: ...reparation for use 2 20 Oc CS620 CS650 Pro Standard optional equipment Oc CS650 Pro FD 501 LS 501 IC 408 SD 501 LS 501 SD 501 LS 501 RU 503 IC 303 HD 506 DF 609 OC 506 PF 601 main body key counter FD...

Page 95: ...Preparation for use 2 Oc CS620 CS650 Pro 2 21 Oc CS650 Pro LS 501 FD 503 IC 408 FS 503 FD 501 FS 503 RU 504 IC 303 HT 504 DF 609 OC 506 PF 601 main body key counter HD 506...

Page 96: ...22 Oc CS620 CS650 Pro Oc CS620 FS 607 HD 506 PK 512 PI 502 HT 503 DF 609 OC 506 LU 202 key counter PK 513 main body IC 408 IC 303 HD 506 DF 609 OC 506 key counter main body IC 408 IC 303 HT 504 PF 60...

Page 97: ...t in red 2 Turn on the sub power switch The sub power switch is located at the front of the main body When the sub power switch is turned on the Power LED will turn green 3 The Wake up screen and Mach...

Page 98: ...ll be displayed Detail Administrator may have changed the screen to be displayed after the machine power is on so that a user should enter the user name and password to operate the machine See page 2...

Page 99: ...switch The sub power switch is located at the front of the main body The touch panel and all the LEDs on the control panel will go out except for the Power LED The Power LED will turn red from green...

Page 100: ...machine provides two types of default settings Full auto and Initial This selection can be made also in the Utility mode Full auto is initially selected Detail For selecting the timespan for the auto...

Page 101: ...Power Save has been activated the machine will become available for operaions If Weekly Timer has been activated the Machine Status screen will appear with the message Timer interrupt mode Enter pass...

Page 102: ...LEDs except Start LED on the control panel turned off The Start LED will turn red while the Power LED keeps green 2 Note If the Auto shut off function activates at the same time the power will be tur...

Page 103: ...to Low Power after a specified period initially 90 minutes of copier inactivity with the Power Save LED lit and all other LEDs on the control panel and touch panel turned off The Power LED keeps green...

Page 104: ...ss any key or touch screen to exit 2 Power Save will be activated The Power Save LED will be lit and the LCD screen will be turned off 2 Reminder Be sure to press Power Save for one second or longer o...

Page 105: ...d 0 You cannot specify the copy time shorter than 5 minutes entering 0 for hour and a number smaller than 5 for minute will set the minute at 5 Also a number larger than 60 is unavailable for minute 1...

Page 106: ...py time 3 hour s minute s 4 Set the minute for the interrupt use then press Start Enter a 2 digit minute ex 07 for 7 minutes using the control panel keypad 00 59 then press Start Input desired copy ti...

Page 107: ...user password section name and or section password specified by the administrator are verified Copy quantity limit for each section can also be set When the machine is turned on one of the following u...

Page 108: ...ction name max 8 characters and or 8 digit section password 2 Touch OK Check that the screen message changes to Ready for copy 3 Start machine operation Normal copying printing scanning job is availab...

Page 109: ...3 Paper and original information...

Page 110: ......

Page 111: ...he following equipment is provided for conveying delivering copies ADU Automatic Duplex Unit built in to the main body Finisher FS 503 built in Staple Unit Folding unit FD 501 Post inserter attached t...

Page 112: ...Fold 50 to 130 g m2 Double Parallel Gate Fold 50 to 91 g m2 Post Inserter attached to Folding Unit FD 501 50 to 300 g m2 Large Capacity Stacker LS 501 Stacker 50 to 244 g m2 Secondary sub tray 50 to 3...

Page 113: ...nly of the weight specified for the tray otherwise copy quality may be deteriorated or machine trouble may occur Detail The paper weight setting for trays 1 to 5 is described on page 13 10 The paper w...

Page 114: ...5 e 11 w v 1 500 sheets 80 g m2 SRA3 w SRA4 w v A3 w B4 w F4 w 8K w 13 e 19 w 12 e 18 w 11 e 17 w 8 5 e 14 w Primary main tray Staple Max 100 sheets 80 g m2 per set 2 9 sheets stapled 150 sets 10 20...

Page 115: ...to 161 g m2 5 sheets or 4 sheets 1 200 g m2 Fold Staple Saddle stitcher tray capacity 2 to 10 sheet folded set 50 sets 11 to 20 sheet folded set 30 sets 21 to 40 sheet folded set 20 sets 41 to 50 she...

Page 116: ...6 pages 25 sets for A4 w 8 5 e 11 w Fold Staple 20 sets for 5 sheet folded booklet 100 sheets 400 pages 15 sets for A4 w 8 5 e 11 w Fold Staple 5 sets for 20 sheet folded booklet 100 sheets 400 pages...

Page 117: ...v A3 w B4 w A4 w v B5 w v A5 w 12 e 18 w 11 e 17 w 8 5 e 14 w 8 5 e 11 v Custom Size Max 330 2 mm e 487 7 mm to Min 100 mm e 148 mm Tab Paper A4 v 8 5 e 11 v Tray 4 to 5 Paper Feeder Unit trays Standa...

Page 118: ...Staple Standard Size SRA3 w SRA4 w v A3 w B4 w F4 w A4 w v B5 v A5 v 8K w 16K v 12 e 18 w 11 e 17 w 8 5 e 14 w 8 5 e 11 w v 5 5 e 8 5 v Custom Size Max 324 mm e 460 mm to Min 210 mm e 139 mm Tab Paper...

Page 119: ...x 331 mm e 483 mm to Min 210 mm e 148 mm Secondary sub tray Standard Size SRA3 w SRA4 w v A3 w B4 w F4 w A4 w v B5 w v A5 w v B6 w A6 w 8K w 16K w v 13 e 19 w 12 e 18 w 11 e 17 w 8 5 e 14 w 8 5 e 11 w...

Page 120: ...Size Max 324 mm e 460 mm to Min 210 mm e 139 mm Tab Paper A4 v 8 5 e 11 v Booklet tray Standard Size SRA3 w SRA4 w A3 w B4 w A4 w 12 e 18 w 11 e 17 w 8 5 e 14 w 8 5 e 11 w SRA3 w is unavailable for Fo...

Page 121: ...at 01 System Setting 03 Feed Tray Setting of user setting Select the paper tays to be selected automatically by 02 Feed Tray Auto Selection if Auto paper select is functioned Tray Priority is availabl...

Page 122: ...e machine trouble may occur Wrinlked folded curled or torn original Highly translucent or transparent original such as overhead transparencies or trace paper Coated original such as carbon backed pape...

Page 123: ...73 F4 Foolscap includes the following 4 types 8 25 e 13 w 8 5 e 13 5 w 8 5 e 13 w and 8 e 13 w and 8 5 e 14 w one of which can be selected See page 17 73 Machine administrator can specify the smallest...

Page 124: ...xed by the administrator For details see page 17 73 Normal mode Item Description Detectable original size A3 w B4 w A4 v B5 w v 11 e 17 w 8 5 e 14 w 8 5 e 11 w v 5 5 e 8 5 w v Original weight Single s...

Page 125: ...by the ADF guide width A3 w B4 w A4 w v B5 v and A5 v mixed B4 w A4 w B5 w v and A5 v mixed A4 w B5 v and A5 v mixed Original weight Single sided original 35 g m2 to 210 g m2 Double sided original 50...

Page 126: ...B5 w v 11 e 17 w 8 5 e 14 w 8 5 e 11 w v 5 5 e 8 5 w v Original weight Single sided original 35 g m2 to 210 g m2 Double sided original 50 g m2 to 210 g m2 Use the Thick original mode to copy original...

Page 127: ...4 Supplies handling...

Page 128: ......

Page 129: ...ng paper A paper indicator is shown on each tray key of the Machine Status screen and of the Copy screen to indicate the paper level of the tray Five levels are provided main body tray 1 to 3 paper fe...

Page 130: ...ks on the tray key Follow the procedure below to supply the empty tray with copy paper 2 Reminder Paper setting for each tray can be made from the Machine Status screen or from the Copy screen using t...

Page 131: ...ed 2 Open the paper feed roller To load the same size as loaded before proceed to step 4 If changing the paper size proceed to the next step 3 Adjust the position of the side guide plate Pull up the l...

Page 132: ...e it to the left 5 Place paper on the tray Load paper aligning it to the right side of the tray then align the rear stopper to the paper Do not load more than 500 sheets 80 g m2 or above the limit ind...

Page 133: ...so that the machine can detect the correct paper size Be sure to press down the rear stopper when moving it to the right and also be sure to hold at the lower part when moving it to the left Do not m...

Page 134: ...void machine trouble do not use coated paper as follows Heat sensitive paper silver coated or carbon backed paper OHP transparencies ink jet printer paper 1 Open the bypass tray located on the right s...

Page 135: ...another page See page 4 14 1 Withdraw the tray to be supplied with paper To load the same size as loaded before proceed to step 4 2 Loosen the paper guide knobs Turn the four paper guide knobs counte...

Page 136: ...er is seated properly close the paper feed roller 7 Push in the tray until it locks into place The indicator on the Machine Status screen or Copy screen will change to 2 Reminder Do not load above the...

Page 137: ...de Do not load A5 v A6 w size paper into the upper tray tray 4 for the tray cannot detect those paper sizes 0 Be sure that the machine is powered ON before withdrawing the tray 0 Only one tray can be...

Page 138: ...o the paper guide lock release lever to lock it again Turn the paper guide knobs two for each clockwise to fix the guides 5 Load the A5 w B6 w or A6 w paper into tray 5 Load paper so that the left sid...

Page 139: ...to be seated under the paper holding lover at the air nozzle Be sure that the side paper guides and front edge guide are securely aligned to the paper otherwise the machine cannot detect the correct p...

Page 140: ...tray 2 Turn the bottom plate lock release knob counterclockwise to loosen it slide it to the rear side then turn it clockwise to fix it in position 3 Return the tray to its original position then wit...

Page 141: ...Do not press the guides to the sheet strongly otherwise paper mishandle may be caused 5 Fix paper guides position Turn the paper guide knobs two for each clockwise to fix the guides Check the two scal...

Page 142: ...locks into place The indicator on the Machine Status screen or Copy screen will change 2 Reminder Do not load above the limit level and carefully load the paper to be seated under the paper holding l...

Page 143: ...Open the tray top door The tray bottom plate will go up To load the same size as loaded before proceed to step 3 If changing the paper size proceed to the next step 2 Adjust the position of the tray...

Page 144: ...two for each clockwise to fix the guides Move the position of the rear stopper to the appropriate positions according to the size indication on the size indication on the bottom plate Turn the two rea...

Page 145: ...d 4 until the bottom plate will not go down any more 6 Close the tray top door 2 Reminder Do not load above the limit indicated on the tray paper guides Be sure that the rear stopper is correctly posi...

Page 146: ...See page 6 48 for the details of Paper Setting 0 Example 1 3 Tabbed sheets loaded in position for one finished set Example 2 9 Tabbed sheets loaded in position for 3 finished sets 1 Withdraw the tray...

Page 147: ...side guide plate to move the side guide plates and also move the rear edge guide to the edge of the paper 5 Push in the tray until it locks into place 2 Reminder Do not load above the limit level on...

Page 148: ...on the right side of the machine 2 Specify the paper type as tabbed sheets for the bypass tray See page 6 48 for specifying the paper type of the bypass tray 3 Place tabbed sheets on the tray Place pa...

Page 149: ...3 Move the side guide plates to the edge of the paper Set paper aligning it to the paper feed roller side of the tray Press the release lever of the front side guide plate to move the side guide plat...

Page 150: ...ading button to lower the tray bottom plate 4 Move the tray paper guides and rear stopper to the edge of the paper Set paper aligning it to the paper feed roller side of the tray Move the side guide p...

Page 151: ...eady to copy Please add toner will be displayed on the touch panel When toner supply from the toner supply device also becomes low the message will change to No Toner Please add toner will appear The...

Page 152: ...ion for storing and handling the toner bottle If too much of toner is inhaled or toner gets in your eyes your health may be affected Keep the toner bottle away from children Be careful not to spill to...

Page 153: ...CS650 Pro 4 27 To exchange the toner bottle 1 Open the toner access door 2 Unlock and open the toner bottle cover of the empty toner bottle 3 Partially withdraw the toner bottle then turn it to set t...

Page 154: ...straightforward to remove the bottle 5 Loosen toner in the new toner bottle Tap both top and bottom of the new toner bottle on a solid surface five times each then shake the bottle at least five times...

Page 155: ...the two hollow parts of the toner bottle with the salients on the bottle entrance fully insert the new toner bottle until it locks in place 8 Close and lock the toner bottle cover then close the toner...

Page 156: ...box message will be displayed on the touch screen and also the Toner Recovery Box indicator on the Machine Status screen will light Follow the procedure below to exchange the toner recovery box 7 WARN...

Page 157: ...overy box 1 Open the toner recovery box door on the rear right side of the machine 2 Withdraw the toner recovery box 3 Cover the used toner inlet of toner recovery box with a sticker Remove the sticke...

Page 158: ...Oc CS620 CS650 Pro 4 Set the new toner recovery box then close the toner recover box door 2 Reminder Be sure to completely cover the used toner inlet with the sticker otherwise the used toner may leak...

Page 159: ...staple cartridge of the finisher FS 503 becomes empty the Staple Cartridge Supply indicator lights in red in the option status area of the Machine Status screen Follow the procedure below to replenish...

Page 160: ...t the staple roll into the staple cartridge Open the staple cartridge cover then set the staple roll into the cartridge Close the cover then remove the lock tape pulling it in horizontal direction 5 S...

Page 161: ...CS650 Pro 4 35 6 Return the stapler unit to its original position 7 Close the finisher door 2 Reminder Do not pull the lock tape upward otherwise the tape may rip and remain inside the cartridge so th...

Page 162: ...red in the option status area of the Machine Status screen If printing job is in progress a message will be displayed on the Copy screen Follow the procedure below to replace the staple cartridge 1 Op...

Page 163: ...pplies handling 4 Oc CS620 CS650 Pro 4 37 3 Set the new cartridge Check that the top side of the staple cartridge is up otherwise it cannot be inserted 4 Close the left side door of the saddle stitche...

Page 164: ...ge of the Finisher FS 607 becomes empty the Staple Cartridge Supply indicator lights in red in the option status area of the Machine Status Screen Follow the procedure below to replenish staples 1 Ope...

Page 165: ...the empty staple case from the staple cartridge 5 Insert the new staple case into the staple cartridge Firmly insert the staple case into the staple cartridge while aligning the arrow sides of both c...

Page 166: ...CS620 CS650 Pro 6 Set the staple cartridge Insert the cartridge while sliding it along the stapler rail then push down and in to secure it in place 7 Return the stacker unit to its original position 8...

Page 167: ...607 Oc CS620 When the waste basket of Punch kit PK 512 installed in Finisher FS 607 be comes full the Punch Waste Basket indicator lights in red in the option status area of the Machine Status Screen...

Page 168: ...4 Supplies handling 4 42 Oc CS620 CS650 Pro 3 Empty the waste basket 4 Return the waste basket to its origi nal position then close the Finisher door securely...

Page 169: ...1 Oc CS650 Pro When the waste basket of folding unit FD 501 becomes full the Punch Waste Basket indicator lights in red in the option status area of the Machine Status screen Follow the procedure belo...

Page 170: ...4 Supplies handling 4 44 Oc CS620 CS650 Pro 2 Empty the waste basket 3 Return the waste basket to its original position then close the folding unit door securely...

Page 171: ...ste basket of the saddle stitcher SD 501 becomes full the Trim Waste indicator lights in red in the option status area of the Machine Status screen If printing job is in progress a message will be dis...

Page 172: ...e waste basket cannot be withdrawn while machine operation is in progress Be sure to confirm that the machine has stopped its operation before withdrawing the waste basket 2 Open the top cover of the...

Page 173: ...Supplies handling 4 Oc CS620 CS650 Pro 4 47 2 Reminder Be sure to return the waste basket to its original position otherwise the trimming function cannot be performed...

Page 174: ...elow to take out paper from the stacker 2 Note The paper stopper is provided to secure the paper in position when moving the carriage To remove finished sets 1 Press the Paper removal button The stack...

Page 175: ...le Be sure to withdraw the carriage straightforward and do not change the direction forcibly while driving it 4 Remove the sheets from the carriage The stacker unit can be removed from the carriage 5...

Page 176: ...ker unit for the purpose of removing mishandled paper or checking output sheets be sure to remove all the sheets from the carriage If the carriage is returned with any sheets left on the stacker unit...

Page 177: ...he paper stopper form the carriage 2 Mount the paper stopper on the paper holder Pull the tow projections of paper stopper to the holder then raise the another side as illustrated 3 Hold the paper usi...

Page 178: ...paper stopper from the paper holder Pull up and turn the paper stopper as illustrated Remove the stopper from the paper holder 6 Return the paper stopper to its original position Return the paper stop...

Page 179: ...5 Before making copies...

Page 180: ......

Page 181: ...Before making copies 5 Oc CS620 CS650 Pro 5 3 5 Before making copies 5 1 Control panel and basic screens 5 1 1 Control panel 1 2 3 4 5 6 7 8 9 10 11 12 13 14 15 16 17 18 19...

Page 182: ...tings have been applied 10 Mode Check key Displays the Mode Check screen to view the copy set tings currently made 11 Utility Counter key Displays the Utility screen or various counters 12 Mode Memory...

Page 183: ...s 5 Oc CS620 CS650 Pro 5 5 7 CAUTION The touch panel is covered with glass Do not drop heavy objects on the glass or put excess weight or pressure on it otherwise the glass may break or scratched and...

Page 184: ...5 6 Oc CS620 CS650 Pro 5 1 2 Copy screen The Copy screen is used to select the desired copy conditions when setting a new copy job and also reserve jobs 1 2 3 4 5 6 7 8 9 10 11 12 13 14 15 16 17 18 1...

Page 185: ...ify the image quality of the originals in cluding copy density color adjustment etc 13 Paper Setting key Touched to use different paper type from that indicated on the tray key 14 Tray keys Display sp...

Page 186: ...5 8 Oc CS620 CS650 Pro 5 1 3 Machine Status screen The Machine Status screen displays when copying operation becomes available after warmup or when any copying job has been completed 1 2 3 4 2 5 6 7 8...

Page 187: ...in different color 7 Job list Displays the current status of the jobs to be operated on the machine 8 Controller key Touched to set the controller Controller setting is not available for the machine w...

Page 188: ...basic copy How to make a basic copy 0 The following procedure is basic and not always applicable to the operation of selected copy conditions When using a specific function be sure to follow the proc...

Page 189: ...y conditions as desired The following settings are available on the Copy screen Original Setting see page 6 3 Separate Scan see page 6 23 Color mode see page 6 26 Zoom see page 6 26 Application see pa...

Page 190: ...ty from the control panel keypad For details on entering print quantity see page 5 20 Entered quantity will be displayed on the touch panel 5 Press Start on the control panel When the machine starts s...

Page 191: ...Before making copies 5 Oc CS620 CS650 Pro 5 13 The reserve job setting is available from this popup menu Touch Yes or Close to return to the Copy screen See page 6 63 for details...

Page 192: ...tail The screen to be displayed after machine power is turned on can be selected either from the Machine Status screen initially selected or the Copy screen The popup menu will vary depending on this...

Page 193: ...sure the ADF is closed fully Once closed do not open the document feeder otherwise the selected copy conditions may be altered automatically 0 Do not load more than 100 sheets of the original or over...

Page 194: ...5 Before making copies 5 16 Oc CS620 CS650 Pro 3 Adjust paper guides 2 Reminder Once closed do not open the document feeder otherwise the selected copy conditions may be altered automatically...

Page 195: ...and depth as shown in the illustration 2 Position the original FACE UP with page one UP in the ADF The direction of the original should conform to the original direction icon displayed on the Copy sc...

Page 196: ...the original in order 2 Position the original FACE UP with page one UP in the ADF The direction of the original should conform to the original direction icon displayed on the Copy screen Up to 100 she...

Page 197: ...d not be positioned correctly especially when using duplex mode Staple Half Fold or Booklet Pagination See page 6 3 for details 0 When Book Copy Auto mode in Repeat or Image Centering is selected the...

Page 198: ...nitially set to copy the original set in amounts determined by the print quantity setting then output sorted sets 0 Print quantity can be entered in any instance of the procedure unless the control pa...

Page 199: ...he procedure below to change the print quantity that has been already entered 1 Press C clear quantity The quantity displayed on the touch panel will return to 1 2 Enter the correct quantity from the...

Page 200: ...e the machine is warming up after power is turned on you can select copy conditions and start scanning so that the machine may start printing immediately the machine engine is ready Service can set th...

Page 201: ...opy screen to check that the message Ready to set reserve job is displayed in the message area A few seconds after the Wake up screen appears on the touch panel the Machine Status screen with four typ...

Page 202: ...5 20 4 Position the original FACE UP in the ADF or FACE DOWN on the original glass For details on positioning the original see page 5 15 5 Press Start When scanning the original for the job is started...

Page 203: ...tail The screen to be displayed after machine power is turned on can be selected either from the Machine Status screen initially selected or the Copy screen The popup menu will vary depending on this...

Page 204: ...or details 1 Press Stop on the control panel while the current job is in progress With the popup menu displayed right after pressing Start for scanning the original of reserve job the current job cann...

Page 205: ...ng copies 5 Oc CS620 CS650 Pro 5 27 Both scanning and printing are in progress Touch Stop Job to cancel the job or touch Continue to complete the job 2 Reminder Touching Stop Job will delete all the s...

Page 206: ...making copies 5 28 Oc CS620 CS650 Pro Scanning a job in separate scan mode Touch Stop Job to cancel the job or touch Continue to complete the job 2 Reminder Touching Stop Job will delete all the scan...

Page 207: ...e making copies 5 Oc CS620 CS650 Pro 5 29 Batch printing is in progress Touch Stop Job to cancel the job or touch Continue to complete the job 2 Reminder Touching Stop Job will delete all the scanned...

Page 208: ...g copies 5 30 Oc CS620 CS650 Pro Scanning and printing the job using program job Touch Stop Job to cancel the job or touch Continue to complete the job 2 Reminder Touching Stop Job will delete all the...

Page 209: ...canning the reserve job while printing The following popup menu will be displayed 2 Touch No to restore the Machine Status screen If machine has been set to display the Copy screen as the initial scre...

Page 210: ...Scan to stop scanning the reserve job and continue printing Touch Print to stop printing and continue the scanning job Touch Scan Print to cancel both scanning and printing jobs Touch Continue to com...

Page 211: ...6 Basic job settings...

Page 212: ......

Page 213: ...e copied sets will be exactly the same in page arrangement as the originals Use this function to obtain the single or double sided copies having the same edge as page top from double sided originals p...

Page 214: ...inal with the binding direction of copies in Output Application setting automatically For details see p 16 18 p 16 45 or p 17 134 1 Position the original 2 Touch Original Setting on the Copy screen Th...

Page 215: ...al glass Key Description Select for the original positioned with the top toward the rear of the machine Initially selected as factory default Select for the original positioned with the top toward the...

Page 216: ...ing on the Copy screen The Original Setting screen will be displayed 3 Touch the desired original direction key to highlight it 4 Touch OK to complete the setting and return to the Copy screen Touch D...

Page 217: ...f the original This setting is effective when making copies in Full Color Single Color or Black mode Detail The screen type can be selected automatically to match with the Text Photo or Photo mode whe...

Page 218: ...Select to reproduce a half tone photo image The copy will closely rep resent the half tones of the original image Select for copying the original composed of text only In this mode the edges of copie...

Page 219: ...ype Use this function to improve the image quality by specifying the printed original type Key Description Select for normal original Select for photo printed original Select for copied original Selec...

Page 220: ...reen The Original Setting screen will be displayed 3 Touch the desired mode key to highlight it Select the desired mode for each of Image and Type 4 Touch OK to complete the setting and return to the...

Page 221: ...y the mixed size original set scanned from the ADF with Auto Paper Select or Auto Zoom activated Function Description Auto Paper Select Makes a copy of the same size as the original set Auto Zoom Copi...

Page 222: ...can the original from the original glass Separate Scan mode is required For details see Separate Scan mode on page 6 23 0 With Mixed specified Auto Paper Select will function automatically To copy ont...

Page 223: ...nal in the ADF 0 This mode requires more scanning time to detect the original size 1 Position the original Normal originals can be set together with the Z folded original 2 Touch Original Setting on t...

Page 224: ...ll the other functions 1 Position the original in the ADF 2 Touch Original Setting on the Copy screen The Original Setting screen will be displayed 3 Touch Thin or Thick to highlight it For the origin...

Page 225: ...tion also allows you to specify register the desired special size in 1 mm increments and to recall the registered size when needed 0 Use Full Area on the Custom Size menu for small original that canno...

Page 226: ...the desired scanning size Selecting from standard size keys Touch the desired size key to highlight it The machine scans the special size original as selected standard size Selecting Full Area Select...

Page 227: ...en 2 Select the lengthwise widthwise dimension key to highlight it then use or touch screen keypad to enter the desired special size within the available range from 100 to 303 mm in lengthwise dimensi...

Page 228: ...303 mm in lengthwise dimension from 140 to 438 mm in widthwise dimension 3 Touch Size Registration to display the Size Registration screen 4 Touch the desired number key to highlight it using Next an...

Page 229: ...e screen with specified size displayed Recalling a special size 1 Touch Size Input to display the Size Setting screen 2 Touch Size Recall to display the Size Recall screen 3 Touch the desired number k...

Page 230: ...gs 6 20 Oc CS620 CS650 Pro 5 Touch OK The Original Setting screen will be restored 6 Touch OK to return to the Copy screen Touch Default Set to restore the initial setting or touch Cancel to resume th...

Page 231: ...lable tabbed copy paper sizes are A4 v or 8 5 e 11 v 0 When loading tabbed copy paper in a tray specify the paper type as Tab Paper for that tray in Paper Setting See page 6 48 for details 0 Tab exten...

Page 232: ...ro 4 Touch the desired size key to highlight it then touch OK The Original Setting screen will be restored 5 Touch OK to return to the Copy screen Touch Default Set to restore the initial setting or t...

Page 233: ...r of the original available in the ADF does not change in this mode Do not load more than 100 original sheets or above the limit mark otherwise paper misfeed or damage to the original may be caused 0...

Page 234: ...ed automatically due to some copy selection 4 Press Start on the control panel The machine starts scanning the original 5 Replace the original then press Start Memory indicator under the message area...

Page 235: ...25 7 Enter the desired print quantity then press Start All the data in memory will be output Detail To delete the scanned data without printing or to suspend the printing job press Stop See To stop s...

Page 236: ...or mode detects whether the scanned original is colored or black and white image and automatically selects either Full Color mode or Black mode for copying 0 This machine is provided with color adjust...

Page 237: ...50 Pro 6 27 Touching Single Color will display the Single Color screen Select the desired color key then touch OK 3 Select additional copy conditions as desired 4 Enter the desired print quantity then...

Page 238: ...mage 1 Press Reset on the control panel If the machine is equipped with the ADF close it securely before pressing Reset The initial setting will be restored Check that e 1 0 is highlighted to indicate...

Page 239: ...000 provided on the screen Set Zoom Select one from the three ratios previously programmed Detail The Enlarge Reduce and Set Zoom ratio setting is described on page 16 22 and page 16 39 1 Touch Zoom...

Page 240: ...ngthwise magnification ratio Similarly touch the horizontal zoom key the third one in the left side line to enter the desired widthwise magnification ratio The entered ratio will be displayed on the s...

Page 241: ...Basic job settings 6 Oc CS620 CS650 Pro 6 31 Preset Zoom Touch the desired preset zoom key in the Preset Zoom area 3 Touch OK to return to the Copy screen Touch Cancel to resume the previous setting...

Page 242: ...o the scanned original size Detail For details of Paper Setting see page 6 43 0 Auto Zoom is incompatible with Auto Paper Select while Rotation is available 0 Auto Zoom will not function if the tray o...

Page 243: ...ies from the original scanned from the document feeder or from the original glass and also to make single sided copies from double sided originals 6 5 1 Making double sided copies using ADF Follow the...

Page 244: ...down on the back pages 0 The normal double sided copies having the same edge as page top can be made from double sided originals printed upside down on the back pages 0 The machine is set to match the...

Page 245: ...Touch to highlight the original direction key according to the direction of the original loaded in the ADF 3 To make normal double sided copies having the same edge as page top from double sided orig...

Page 246: ...li on the Copy screen to display the Output Application screen 2 Touch the desired binding direction key to highlight it To make double sided copies arranged upside down on the back pages select Top 3...

Page 247: ...n and copy binding direction automatically For details see page 16 18 page 16 45 or page 17 134 1 Position the original on the original glass Open the ADF Position the first page of the original FACE...

Page 248: ...ch Original Setting on the Copy screen to display the Original Setting screen 2 Touch to highlight the original direction key according to the direction of the original placed on the original glass 3...

Page 249: ...opies arranged upside down on the back pages select Top 3 Touch OK to return to the Copy screen For details on specifying binding direction of double sided copies see Setting binding direction for dup...

Page 250: ...scanned touch Separate Scan to exit the Separate Scan mode 8 Press Start to print All the data in memory will be output Detail To delete the scanned data without printing or to suspend the printing j...

Page 251: ...sided originals 0 Specify the original direction on the Original Setting screen according to that of the original loaded in the ADF 0 The normal single sided copies having the same edge as page top ca...

Page 252: ...the Original Setting screen 2 Touch to highlight the original direction key according to the direction of the original loaded in the ADF 3 To make normal single sided copies having the same edge as p...

Page 253: ...paper specifications can be set on each tray in the User Setting Those specifications can also be registered as desired Using Paper Setting on the Copy screen the selection for each can be altered te...

Page 254: ...ails The original sizes to be detected from the ADF or original glass can be changed For details see page 17 73 The machine manager can designate the tray or paper condition incompatible with Auto Pap...

Page 255: ...will be selected automatically Or a message will be prompt you that the appropriate size cannot be found in any tray In this case load the paper of the size referred in the message 2 Reminder Auto Pa...

Page 256: ...copy paper feeding direction Detail The machine can be set to change the timing to operate this function For details see page 16 45 or page 17 134 The copier is initially set to activate the Rotation...

Page 257: ...v w 1 Touch Rotation Off on the Copy screen to highlight it When Rotation is released the Rotation icon on the Copy screen will disappear to indicate that this function is cancelled 2 Touch to desele...

Page 258: ...rmal to Coated GL it may take a certain period of time before copying operation becomes available due to the fixing temperature adjustment 1 On the Copy screen check the tray setting for each tray Eac...

Page 259: ...cifications of the tray either by selecting the one previously registered or by programing a new setting To recall a setting 1 Touch Recall 2 Use Next or Previous to scroll the list to the desired Pap...

Page 260: ...ob settings 6 50 Oc CS620 CS650 Pro To program a new setting 1 Touch Change In this case the paper name cannot be changed 2 Touch Paper Type then select the desired paper type Touch OK to complete the...

Page 261: ...1 The trays 4 and 5 exclusively allow the selection of four types of coated paper 3 Touch Weight Touch the desired paper weight key to highlight it Use Unit Change to select the desired unit of the pa...

Page 262: ...Front or Back to select the printed side select the adjustment item vertical zoom horizontal zoom vertical shift horizontal shift or registration loop and then touch to specify the value to be positiv...

Page 263: ...ch Speed Setting Select the desired speed key then touch OK This setting is unavailable if paper weight is specified as 106 135 g m2 6 Make a selection for Hole Punch Touch Punched if the paper has pu...

Page 264: ...ored Paper Touch Non White when using colored paper or touch White for white paper 8 Touch OK to return to the Paper Setting screen with the new specifications displayed The paper specifications made...

Page 265: ...hree options Standard Custom Tab Paper To set the desired standard size 1 Touch Size Setting then touch Standard to highlight it The tray can be set to detect some specific standard sizes if desired T...

Page 266: ...dimension 182 487 mm in widthwise dimension 3 Similarly touch the trimming width key to highlight it then enter the desired amount With the Trimming mode selected the machine will output printed sets...

Page 267: ...40 mm 4 Touch Lead Edge Rear Edge or Center to specify the desired image position 5 Touch Size Registration to display the Size Registration screen 6 Touch the desired number key to highlight it using...

Page 268: ...ed number key to highlight it using Next and Previous as needed 4 Touch OK to restore the Size Setting screen with recalled size displayed 5 Touch OK to complete the setting and return to the Paper Se...

Page 269: ...uch Size Setting then touch Tab Paper 2 Touch the desired tabbed paper size key to highlight it 3 Touch OK to complete the setting 7 Touch Close on the Paper Setting screen The Copy screen will be res...

Page 270: ...y the Copy screen 3 Press Start on the control panel to output a chart Touch Return to restore the Chart Adjustment screen 4 Enter the adjustment data of the front side With Front selected Use a scale...

Page 271: ...nit may reduce the unevenness Follow the procedure below to adjust the fixing pressure of the fixing unit 1 Open the front door of the main body 2 Turn the fixing conveyance unit lever leftward to wit...

Page 272: ...conveyance unit to its original position then close the front door of the main body 6 Operate the copying printing job The fixing pressure adjustment knob should not be moved unless the copy print re...

Page 273: ...e while printing the current job 1 Display the Copy screen with the message Ready to set reserve job displayed in the message area When scanning job is started The following popup menu will be display...

Page 274: ...display the Copy screen with the message Ready to set reserve Job 2 Select copy conditions for the reserve job as desired position original s then press Start Repeat steps 1 and 2 Up to 100 reserve jo...

Page 275: ...Basic job settings 6 Oc CS620 CS650 Pro 6 65 6 8 Copy conditions incompatible with basic job settings...

Page 276: ...6 Basic job settings 6 66 Oc CS620 CS650 Pro...

Page 277: ...Basic job settings 6 Oc CS620 CS650 Pro 6 67...

Page 278: ...6 Basic job settings 6 68 Oc CS620 CS650 Pro...

Page 279: ...Using IP scanner Automatic exposure is unavailable 6 Image Distinction Level Color Text only is grayed out or released automatically 8 1 2 or 2 2 mode is selected automatically 9 After making proof co...

Page 280: ...6 Basic job settings 6 70 Oc CS620 CS650 Pro...

Page 281: ...7 Color adjustment...

Page 282: ......

Page 283: ...le rays The wavelengths of visible rays can be separated into the rainbow colors violet indigo blue green yellow orange and red from the shortest wavelength in order When all the wavelengths of the vi...

Page 284: ...ry colors of light are called additive color mixture and the more colors are added the brighter it will be Mixing red R green G and blue B colored lights various colors can be created The three primar...

Page 285: ...dark etc and the purity vivid dull etc of the color The color perception reddish bluish etc is defined as hue H The strength or purity of the color is defined as saturation S and the lightness or dark...

Page 286: ...y mixing four pigments the three primary colors cyan C magenta M yellow Y and black K To enhance the copy quality this machine allows you to modify colors by means of the three attributes of color bas...

Page 287: ...Pro 7 7 Adjust the hue saturation and brightness The hue adjustment leads the color of the image to another color adjacent in the color circle of red R yellow Y green G cyan C blue B and magenta M Or...

Page 288: ...7 Color adjustment 7 8 Oc CS620 CS650 Pro Change the hue by varying the image s red R green G and blue B individually or mutually Original Red Green Blue...

Page 289: ...Color adjustment 7 Oc CS620 CS650 Pro 7 9 Change the hue by varying the image s cyan C magenta M yellow Y and black K individually or mutually Original Cyan Magenta Yellow Black...

Page 290: ...so provides two methods Line screen and Dot screen The Line screen uses many halftone lines like scanning lines of a television while Dot screen uses small dots to reproduce the image The screen metho...

Page 291: ...r printer may add colors in large or bold characters to reproduce the text in the same way as the photo While scanning such originals this machine detects and determines the photo portion and text are...

Page 292: ...n to the color adjustment and image reproduction methods this machine allows you to apply the following filters to improve the copy image quality Sharpen the outline of the image Sharpness Increase th...

Page 293: ...e color adjustment is performed by varying the level of pigments in RGB model or CMYK model or by modifying the hue saturation and brightness of the image To reproduce the copy image select one of the...

Page 294: ...ve been made use and to scroll Use this shortcut to directly jump to the setting screen or Quality Adjustment Screen for the function without subsequent screen if any setting change is desired 2 Note...

Page 295: ...al image while scanning and automatically selects the appropriate density for the copy Detail The density to be selected automatically using Automatic exposure can be adjusted on the machine For detai...

Page 296: ...r adjustment 7 16 Oc CS620 CS650 Pro 1 Position the original 2 Touch Quality Adjust on the Copy screen The Quality Adjustment screen will be displayed 3 Touch Copy Density to display the Copy Density...

Page 297: ...h OK The Quality Adjustment screen will be restored Do you want to resume the previous setting Touch Cancel Do you want to restore the initial setting Touch Default Set Do you want to check the adjust...

Page 298: ...ro To adjust background Adjust the background whiteness when copying newspaper or recycled paper original 1 Position the original 2 Touch Quality Adjust on the Copy screen The Quality Adjustment scree...

Page 299: ...to 4 to make the background lighter or from 1 to 4 to make it darker Touch Standard to select the middle density level 5 Touch OK The Quality Adjustment screen will be restored Do you want to resume t...

Page 300: ...uch Close on the Quality Adjustment screen The Copy screen will be restored with the Adj Back key displayed and highlighted under the Quality Adjust key Use this key to directly jump to the Adjust Bac...

Page 301: ...prevent Adjust the density level of the back side lighter when copying dark originals 1 Position the original 2 Touch Quality Adjust on the Copy screen The Quality Adjustment screen will be displayed...

Page 302: ...Do you want to resume the previous setting Touch Cancel Do you want to restore the initial setting Touch Default Set Do you want to check the adjustment result Touch Adj Proof Copy to print a sample c...

Page 303: ...adjustment will operate to the reproducibility of each color of colored original giving effect to the strength of black or single color on a printed image Detail To reproduce the yellow part of the or...

Page 304: ...h the desired color key The Red Green or Blue Adjustment screen will be displayed 4 Adjust the color value Touch the desired level key from 1 to 4 to make the color weaker or from 1 to 4 to make it st...

Page 305: ...he initial setting Touch Default Set Do you want to check the adjustment result Touch Adj Proof Copy to print a sample copy 6 Touch Close on the Quality Adjustment screen The Copy screen will be resto...

Page 306: ...HSB values Change the color of the copy image by making adjustments to Hue Saturation and Brightness To adjust hue 1 Position the original 2 Touch Quality Adjust on the Copy screen The Quality Adjust...

Page 307: ...e in the color circle Or touch a key from 1 to 4 to make yellow closer to green and green closer to cyan Adjustment goes clockwise in the color circle Touch Standard to select the middle level 5 To ad...

Page 308: ...to restore the initial setting Touch Default Set Do you want to check the adjustment result Touch Adj Proof Copy to print a sample copy 7 Touch Close on the Quality Adjustment screen The Copy screen w...

Page 309: ...t 7 Oc CS620 CS650 Pro 7 29 To adjust saturation 1 Position the original 2 Touch Quality Adjust on the Copy screen The Quality Adjustment screen will be displayed 3 Touch Saturation to display the Sat...

Page 310: ...make the colors calm or from 1 to 4 to make them vivid Touch Standard to select the middle level 5 To adjust the saturation by setting fine adjustment in each color of RGB touch RGB Adjustment to dis...

Page 311: ...restore the initial setting Touch Default Set Do you want to check the adjustment result Touch Adj Proof Copy to print a sample copy 7 Touch Close on the Quality Adjustment screen The Copy screen wil...

Page 312: ...ent 7 32 Oc CS620 CS650 Pro To adjust brightness 1 Position the original 2 Touch Quality Adjust on the Copy screen The Quality Adjustment screen will be displayed 3 Touch Brightness to display the Bri...

Page 313: ...en will be restored Do you want to resume the previous setting Touch Cancel Do you want to restore the initial setting Touch Default Set Do you want to check the adjustment result Touch Adj Proof Copy...

Page 314: ...ing sharpness Use this function to sharpen the outline of copy image To adjust sharpness 1 Position the original 2 Touch Quality Adjust on the Copy screen The Quality Adjustment screen will be display...

Page 315: ...reen will be restored Do you want to resume the previous setting Touch Cancel Do you want to restore the initial setting Touch Default Set Do you want to check the adjustment result Touch Adj Proof Co...

Page 316: ...ting contrast Use this function to increase the contrast of copy image To adjust contrast 1 Position the original 2 Touch Quality Adjust on the Copy screen The Quality Adjustment screen will be displa...

Page 317: ...creen will be restored Do you want to resume the previous setting Touch Cancel Do you want to restore the initial setting Touch Default Set Do you want to check the adjustment result Touch Adj Proof C...

Page 318: ...r this adjustment two items are provided Text Photo proportion adjustment and Black Color text proportion adjustment Text Photo changes the ratio of detecting the text area of the original Color Text...

Page 319: ...vel key from 1 to 4 to increase the proportion of photo or from 1 to 4 to increase the proportion of text Touch Standard to select the middle level 5 Make an adjustment to Color Text Touch the desired...

Page 320: ...e the initial setting Touch Default Set Do you want to check the adjustment result Touch Adj Proof Copy to print a sample copy 7 Touch Close on the Quality Adjustment screen The Copy screen will be re...

Page 321: ...en Line 1 Line screen Line 2 Line screen The print result may not be satisfactory depending on the original type In this case try another screen type Detail Dot 2 and Line 2 also provide the lower lin...

Page 322: ...7 42 Oc CS620 CS650 Pro To select reproducing method 1 Position the original 2 Touch Quality Adjust on the Copy screen The Quality Adjustment screen will be displayed 3 Touch Screen to display the Scr...

Page 323: ...d should be selected automatically 5 Touch OK The Quality Adjustment screen will be restored Do you want to resume the previous setting Touch Cancel Do you want to restore the initial setting Touch De...

Page 324: ...This adjustment can be made in each density area shadow mid tone or highlight of the individual color or in the whole density area of each color The adjustment value ranges from 10 to 10 To adjust col...

Page 325: ...m 10 to 10 Select smaller number to make the color lighter or larger number to make it darker The adjustment can be made for each density area 6 Touch OK The Quality Adjustment screen will be restored...

Page 326: ...o 7 11 Selecting glossy Use this function to increase shine on the copy image To specify glossy 1 Position the original 2 Touch Quality Adjust on the Copy screen The Quality Adjustment screen will be...

Page 327: ...ality Adjustment screen The Copy screen will be restored with the Glossy key displayed and highlighted under the Quality Adjust key Do you want to restore the initial setting Touch Default Set Detail...

Page 328: ...7 Color adjustment 7 48 Oc CS620 CS650 Pro 7 12 Copy conditions incompatible with color adjustment...

Page 329: ...Color adjustment 7 Oc CS620 CS650 Pro 7 49...

Page 330: ...mn will be released A Condition in the top row is selected automatically Unreleasable B Condition in the top row is selected automatically Releasable C Not specified D Condition in the far left column...

Page 331: ...8 Application functions...

Page 332: ......

Page 333: ...1 To use application function Follow the procedure below to display the Application screen and select the desired copying features To display application screen 1 Touch COPY tab on the Machine Status...

Page 334: ...sed in combination however if one function on the menu is incompatible with another it will appear dimmed Do you want to restore the previous setting Touch Cancel Do you want to cancel all the selecte...

Page 335: ...n for the function without subsequent screen if any setting change is desired Detail You may find a Bookmark key on some subsequent screens Touch this key to highlight it if desired so that the screen...

Page 336: ...Function Description Front Cover Print The first page of the original will be printed onto the front cover When making double sided copies the second page of the original will be printed onto the bac...

Page 337: ...ex copied onto copy paper while the 6th and 7th pages of the single sided original are duplex copied onto the insertion which will be the 4th sheet of copied set 2 2 The 5th and 6th pages of double si...

Page 338: ...lex copied With page 6 specified a blank insertion will be added as the 4th sheet of copied set after the 5th and 6th pages of single sided original are duplex copied 2 2 A blank insertion will be add...

Page 339: ...st front cover and the last back cover 1 Position the original 2 Load paper into the tray Load regular sheets insertion sheets and covers into any tray When using the Post inserter load covers or inse...

Page 340: ...desired tray key to select the cover sheet tray source Select the desired front back cover mode Touch None if no cover is desired Print to insert a copied front back cover or touch Blank to insert a b...

Page 341: ...opied insertion or touch Blank to insert a blank insertion 7 Enter the page number Use the control panel keypad to enter the page number of insertion location Touch Set after each entry to move to the...

Page 342: ...t random will be sorted automatically What if the same page number is entered twice The second entry will be ignored on the screen 8 Specify the post inserter setting if desired Touch Paper inserter o...

Page 343: ...Close to return to the Application screen To release the Insert Sheet function with the current setting remained touch Function Off 10 Touch OK on the Application screen The Copy screen will be restor...

Page 344: ...le pages Simplex Duplex Description 1 2 A blank page is automatically added before the 2nd and 5th pages of the original so that they will be printed on the front side of double sided copies 1 2 Print...

Page 345: ...or details 0 Max title pages 30 sheets from 1 999 0 The chapter page can be copied on the sheet from another tray source Print Insertion 0 Use Stamp together with this function to print chapter number...

Page 346: ...int Insertion on the Chapters screen to enable the Insertion Tray key Use this key to change the currently selected paper tray displayed on the screen What if an entered page number is larger than the...

Page 347: ...yed under the Application key Use this key to jump to the subsequent screen to make any setting change 7 Enter the desired print quantity from the control panel keypad then press Start 2 Note Touch Bo...

Page 348: ...specified original binding margin Setting item Description 2 in 1 Select this setting to print two original images onto one sheet Left binding Right binding 4 in 1 Select this setting to print four or...

Page 349: ...order left binding Horizontal order right binding Vertical order left binding Vertical order right binding Setting item Description 1 1 2 2 3 3 4 4 5 5 6 6 7 7 8 8 1 1 2 2 3 3 4 4 5 5 6 6 7 7 8 8 4 4...

Page 350: ...utomatically selected Normally the fixed size of Tray 1 will be selected Available to be changed manually 1 Position the original 2 Touch Application on the Copy screen 3 Touch Combine Originals on th...

Page 351: ...the Application screen The Copy screen will be restored with highlighted Combine Originals key displayed under the Application key Use this key to jump to the subsequent screen to make any setting cha...

Page 352: ...re scanned into memory and automatically arranged in booklet format in correct order If the machine is equipped with saddle stitcher SD 501 option folded stapled and or trimmed booklets can be made Se...

Page 353: ...erwise blank pages are automatically inserted to the last 0 Trays for copy paper and front back covers should have the same paper size loaded 0 Auto Zoom is automatically selected Select the desired p...

Page 354: ...Reduce Shift mode as follows Touch Page Margin on the Application screen Select Reduce Shift and Double Sided then specify the desired shift amount For details see page 8 66 Touch OK to complete the...

Page 355: ...x Duplex Description 1 1 The first scanned image will be inserted after page 2 of the original and the second scanned image will be inserted after page 5 1 2 The first scanned image will be printed on...

Page 356: ...original sheets can be set If the original count exceeds 100 divide them into blocks not exceeding 100 sheets and load them from the block with the first page 2 Touch Application on the Copy screen 3...

Page 357: ...sequence even if original page numbers are entered out of sequence What if the same page number is entered twice or more The images will be inserted at specified location by the entered count 5 If des...

Page 358: ...nditions as desired 9 Press Start on the control panel The machine starts scanning the original loaded in the ADF 10 Place the original of image insertion on the original glass Open the ADF position t...

Page 359: ...nal pages will be output in correct order Using Booklet Pagination in combination original images are automatically arranged in booklet format in correct order to make a multiple page signature bookle...

Page 360: ...ccording to pagination then the back cover page The original should be scanned from the front cover back cover then page spread originals in page order Mode key Description Front Back Back Back Front...

Page 361: ...and left pages separately Mode key Description Left Bind Page spread originals will be scanned from the left page to the right page and will be output in page order Right Bind Page spread originals w...

Page 362: ...glass to scan position the first page facedown with the ADF kept open Using the ADF arrange the original in page order and then load it with the first page faceup Up to 100 original sheets can be set...

Page 363: ...n then select the desired mode For details see page 8 22 Touch OK to complete the setting and return to the Book Copy screen 6 Touch OK to complete the setting To restore the previous setting touch Ca...

Page 364: ...9 Press Start on the control panel Scanned image will be stored into memory Repeat this procedure to complete scanning all originals When scanning from the original glass Non Image Area Erase and Ima...

Page 365: ...nary Separate Scan mode the combined features selected for the job are applied to all originals to be scanned Using Program Job you may scan multiple sets of originals and apply different settings on...

Page 366: ...nal 2 Touch Application on the Copy screen 3 Touch Program Job on the Application screen The incompatible function keys will be dimmed to show inactivity 4 Touch OK on the Application screen The Copy...

Page 367: ...displayed to ask you whether or not to store the scanned image data as a JOB for printing in specified copy conditions 7 Touch Decision to store the current JOB images To delete the scanned images tou...

Page 368: ...en then select the desired output mode The setting made at this time will be applied to all subsequent JOBs 11 Enter the desired print quantity from the control panel keypad Entered quantity will be t...

Page 369: ...or select the desired paper size on the Copy screen If Auto Paper Select is used the largest paper size will be selected automatically 0 The output size can be selected standard size or determined wh...

Page 370: ...the desired tray key to highlight it If Auto Paper Select is selected initial setting the largest paper size loaded in a tray will be selected automatically 3 Touch Application on the Copy screen 4 T...

Page 371: ...the setting To restore the previous setting touch Cancel To release the Multi Page Enlargement function with the current setting remained touch Function Off 7 Touch OK on the Application screen The C...

Page 372: ...then make a copy eliminating the exposed glass area outside the borders of the original 0 Scan the original from original glass Be sure to keep the ADF open 0 Original size should be larger than 3 e...

Page 373: ...cation is selected automatically Available copy modes are 1 1 and 1 2 Selecting 1 2 will select Separate Scan automatically 5 Enter the desired print quantity from the control panel keypad then press...

Page 374: ...gative image and vice versa in the selected color mode Single Color Makes a reversed image in the selected single color Black Reverses the image from black on white to white on black and vice versa Fu...

Page 375: ...will be dimmed to show inactivity 4 Touch OK on the Application screen The Copy screen will be restored with highlighted NegPos Reverse key displayed under the Application key This key can also be use...

Page 376: ...y specify the scanning area of the original glass then let the machine to print the scanned image repeatedly on one sheet of copy paper Size Auto Detect mode will automatically detect the original siz...

Page 377: ...Position original on the original glass When selecting Size Manual Input place the original facedown on the original glass so that the original image should fit within the area measured by vertical h...

Page 378: ...Manual to highlight it then use to specify the desired horizontal vertical width If the touch panel keypad is desired touch Input With Keypad to display the Image Size Input screen Touch Horizontal o...

Page 379: ...creen The Copy screen will be restored with highlighted Image Repeat key displayed under the Application key Use this key to jump to the subsequent screen to make any setting change Auto Zoom and Auto...

Page 380: ...original glass In this case consult your service representative about an appropriate place for installation You may find the Bookmark key at the lower left corner of the Image Size Input screen Touch...

Page 381: ...8 51 8 12 2 Specifying repeat times Repeat Repeat mode will scan the image area specified by the selected paper size and mode 2 Repeat 4 Repeat or 8 Repeat then arrange the image by specified times in...

Page 382: ...e selected paper size equally divided according to the selected mode 1 Position the original Both ADF and original glass are available The scanning area varies according to the selected paper size ori...

Page 383: ...be restored with highlighted Image Repeat key displayed under the Application key Use this key to jump to the subsequent screen to make any setting change Auto Zoom and Auto Paper Select are released...

Page 384: ...ss black copy marks may be produced along borders and center line and also around punch holes Use this function to eliminate them from the copies and lower the toner consumption at the same time Mode...

Page 385: ...nation 0 The Frame erase amount can be specified both collectively for all four sides and individually for each side 1 Position the original Both ADF and original glass are available When lowering the...

Page 386: ...ghlight it Use Frame erase and Center erase in combination if desired 5 Specify the erasure amount for the selected mode To specify the erase amount for Erase All Sides Confirm that all the frame eras...

Page 387: ...the desired erase amount To specify the erase amount for Center Erase Confirm that the center erase amount in the illustration is highlighted If not touch Center on the right side of the screen to hig...

Page 388: ...een will be restored with highlighted Frame Fold key displayed under the Application key Use this key to jump to the subsequent screen to make any setting change 8 Enter the desired print quantity fro...

Page 389: ...ass are available 2 Touch Application on the Copy screen 3 Touch Image Centering on the Application screen The incompatible function keys will be dimmed to show inactivity Non Image Area Erase will be...

Page 390: ...Paper Select are released and e1 0 magnification is selected automatically Available copy modes are 1 1 and 1 2 Selecting 1 2 will select Separate Scan automatically 5 Enter the desired print quantit...

Page 391: ...and back sides when making double sided copies in order to correct the image dislocation Page Space function is available only when Booklet Pagination or 2 Repeat mode of Image Repeat has been alread...

Page 392: ...S620 CS650 Pro 0 Available shift direction Top Bottom Right Left 0 Shift amount 0 to 250 mm in 1 mm increments 1 Position the original 2 Touch Application on the Copy screen 3 Touch Page Margin on the...

Page 393: ...djusted with image position Touch Front Back or Double Sided to highlight it Making single sided copies only the front side setting will be effective To have the same shift amount on both sides of dou...

Page 394: ...nistrator setting For details see page 16 45 or page 17 134 7 Repeat the steps 5 and 6 if setting the shift amount for front and back sides individually 8 Touch OK to complete the setting To restore t...

Page 395: ...n is available only when Booklet Pagination or 2 Repeat mode of Image Repeat has been already selected Use this function to make the desired amount of blank space between the two images on a page Book...

Page 396: ...prevent image loss when creating a binding margin To create a binding margin without reducing the original image see Adjusting position of copy image Page Margin Shift on page 8 61 Left binding margin...

Page 397: ...ically selected and cannot released Reduction ratio will depend on the specified shift amount 0 Shift amount 0 to 250 mm in 1 mm increments 1 Position the original 2 Touch Application on the Copy scre...

Page 398: ...d shift direction key to highlight it then use and or touch panel keypad to enter the desired shift amount Setting the shift amount in 0 1 mm increments is also available in the Utility mode 7 Repeat...

Page 399: ...ut copies the desired type of built in stamp numbering for multiple sets page number for multiple pages date time watermark and watermark numbering The following six modes are provided for the Stamp f...

Page 400: ...s see page 8 83 Fine adjustment for printed position Start number setting for Set Numbering mode Start number setting for Page No mode Character size type setting for Page No and Date Time modes Cover...

Page 401: ...red letter type selected from preset stamps onto the specified position of copies 0 To use this function the optional HDD HD 506 is required to be installed in the machine 1 Position the original 2 To...

Page 402: ...t Cover Only or All Pages For selecting the stamp color see page 8 88 6 Touch OK twice to complete the setting To restore the previous setting touch Cancel To release the Stamp Image Overlay function...

Page 403: ...7 2 Printing distribution number Set Numbering Print a distribution number onto the specified position of copies 1 Position the original 2 Touch Application on the Copy screen 3 Touch Stamp Image Over...

Page 404: ...To specify the start number touch Start Number See page 8 84 for details For selecting the stamp color see page 8 88 6 Touch OK twice to complete the setting To restore the previous setting touch Can...

Page 405: ...0 Pro 8 75 8 17 3 Printing page number Page No Print a page number onto the specified position of copies 1 Position the original 2 Touch Application on the Copy screen 3 Touch Stamp Image Overlay on t...

Page 406: ...color see page 8 88 Touch Change Character to select the character size and type See page 8 86 for details To specify the start number touch Start Number See page 8 85 for details 6 Touch OK twice to...

Page 407: ...Pro 8 77 8 17 4 Printing date time Date Time Print date and time onto the specified position of copies 1 Position the original 2 Touch Application on the Copy screen 3 Touch Stamp Image Overlay on th...

Page 408: ...86 for details Touch Print Page to select Cover Only or All Pages For selecting the stamp color see page 8 88 6 Touch OK twice to complete the setting To restore the previous setting touch Cancel To r...

Page 409: ...d letter type selected from preset watermarks in the center of printed page background 0 To use this function the optional HDD HD 506 is required to be installed in the machine 1 Position the original...

Page 410: ...See page 8 83 for details 6 Touch OK twice to complete the setting To restore the previous setting touch Cancel To release the Stamp Image Overlay function with the current setting remained touch Fun...

Page 411: ...umber as watermark Set Numbering Print a distribution number in the specified form repeatedly over the scanned image 1 Position the original 2 Touch Application on the Copy screen 3 Touch Stamp Image...

Page 412: ...one of the four text density keys to highlight it 6 Touch OK twice to complete the setting To restore the previous setting touch Cancel To release the Stamp Image Overlay function with the current se...

Page 413: ...nt on printing position of Built in Stamp Set Numbering Page No and Date Time The adjustment range is 0 to 50 mm in lengthwise direction Top or Bottom and in widthwise direction Right or left 1 Touch...

Page 414: ...hing Start Number on the Set Numbering screen will display the following screen to allow you to specify the start number 1 Use and or touch panel keypad to enter the desired start number Up to four di...

Page 415: ...ed on this screen 1 Touch Start Number under Page No to highlight it then use and or touch panel keypad to enter the desired start number Up to four digits can be specified 2 Touch Start Page under Pa...

Page 416: ...e Use this function to specify the character size and type for Page No and Date Time 1 Touch one of the four keys under Character Size to highlight it 2 Touch either Gothic or Ming under Font to highl...

Page 417: ...and insertions if Print Blank Insert Paper mode of Insert Sheet has already been selected 1 Touch one of the three keys under Cover to highlight it 2 Select one of the keys under Print Insert if Prin...

Page 418: ...0 Pro Selecting color Use this function to select the desired color in Built in Stamp Set Numbering Page No and Date Time 1 Touch one of the seven color keys to highlight it 2 Touch OK to complete the...

Page 419: ...ge onto each page copied in the job 1 Position the overlaying original Position a sheet of original faceup in the ADF or facedown on the original glass 2 Touch Application on the Copy screen 3 Touch S...

Page 420: ...ect are released and e1 0 magnification is selected automatically The Separate Scan key on the Copy screen also appears highlighted to show that the Separate Scan mode is automatically selected 7 Sele...

Page 421: ...es in HDD then recall the desired image from the HDD to overlay onto each page copied in the job To use this function the optional HDD HD 506 is required to be installed in the machine Follow the step...

Page 422: ...ng original facedown on the original glass 2 Touch Application on the Copy screen 3 Touch Stamp Image Overlay on the Application screen 4 Touch Program Overlay The Image Store Recall screen will be di...

Page 423: ...eypad to enter the desired name up to 8 characters The date when making this entry will be stored automatically 7 Touch OK The Copy screen to store the overlaying image will be displayed Select copy c...

Page 424: ...e previous setting touch Cancel To release the Stamp Image Overlay function with the current setting remained touch Function Off 11 Touch OK on the Application screen The Copy screen will be restored...

Page 425: ...ns 8 Oc CS620 CS650 Pro 8 95 14 Touch Separate Scan to exit the Separate Scan mode 15 Enter the desired print quantity from the control panel keypad then press Start The machine will start printing wh...

Page 426: ...If both OK and Cancel keys are displayed the image with the entered name applied can be overwritten Touch Cancel to overwrite the existing image data To store the new data with a new name touch OK If...

Page 427: ...Application functions 8 Oc CS620 CS650 Pro 8 97 8 20 Copy conditions incompatible with application functions...

Page 428: ...8 Application functions 8 98 Oc CS620 CS650 Pro...

Page 429: ...Application functions 8 Oc CS620 CS650 Pro 8 99...

Page 430: ...8 Application functions 8 100 Oc CS620 CS650 Pro...

Page 431: ...Condition in the top row is selected automatically Releasable C Not specified D Condition in the far left column does not function ignored E Not grayed out but unavailable 1 Separate Scan mode is sele...

Page 432: ...below 15 Compatible if Booklet Pagination is selected in combination 16 Back cover cannot be attached 19 Only 2 in 1 and 2 Repeat modes are available 20 Only 2 in 1 mode is available Available combina...

Page 433: ...9 Output applications...

Page 434: ......

Page 435: ...section describes how to select an output tray 1 Position the original 2 Touch Output Appli on the Copy screen The Output Application screen will be displayed Output tray positions are indicated as sq...

Page 436: ...the desired tray position key to highlight it Machine with large capacity stacker LS 501 1 unit or with large capacity stacker LS 501 folding unit FD 501 In addition to the tray position keys a Pile S...

Page 437: ...tting is initially specified as Prohibit 5 Touch OK on the Output Tray Selection screen The Output Application screen will be restored with the selected tray mark highlighted 6 Touch OK on the Output...

Page 438: ...an output tray Open the tray stand when fully withdrawn 2 Reminder Never return the saddle stitcher tray to its original position with the tray stand opened Be careful not to exceed the finisher tray...

Page 439: ...duplex copies printed upside down on back pages from side bound simplex duplex originals front and back pages have the same side up Detail To make side bound duplex copies front and back pages have th...

Page 440: ...ective only when duplex mode is selected 0 Resetting the machine will restore the right left binding mode 1 Position the original 2 Touch Output Appli on the Copy screen The Output Application screen...

Page 441: ...t by sorted sets Collate Collate mode outputs multiple copies of the original set having each sorted set offset by 30 mm upon exit Uncollate Uncollate mode groups together multiple copies of each orig...

Page 442: ...utput is available Uncollate Uncollate mode groups together multiple copies of each original No offset output is available Combined with the output modes above you can also choose to output face up or...

Page 443: ...ail You can change the initial output mode in the Utility setting For details see page 16 39 For detailed specifications see Paper tray exit tray capacity on page 3 6 and Finisher FS 503 on page 25 7...

Page 444: ...to 1 as needed 4 Touch OK on the Output Application screen The specified output mode icon will be displayed on the Copy screen 2 Reminder The primary main tray gradually goes down while printed materi...

Page 445: ...ple Detail For detailed specifications see Paper tray exit tray capacity on page 3 6 and Finisher FS 503 on page 25 7 1 Position the original 2 Touch Staple on the Copy screen Stapled sheets will be d...

Page 446: ...ed stapling position key to select it 6 Touch OK To restore the previous setting touch Cancel To release the Staple function with the current stapling position setting remained touch Function Off The...

Page 447: ...nted materials are output DO NOT allow any object to interfere with the operation of the tray on the left side of the finisher as any interference may cause damage to the finisher Be careful not to ex...

Page 448: ...tray and select the desired output mode by following the procedure below Detail For detailed specifications see Paper tray exit tray capacity on page 3 6 and Finisher FS 503 on page 25 7 1 Position th...

Page 449: ...Uncollate to highlight it Select output face Face Down Face Up and output order 1 to N N to 1 as needed 5 Touch OK on the Output Application screen The specified output mode icon will be displayed on...

Page 450: ...oles in printed sheets for filing purposes Specify the desired punch position left right top according to the original set direction Folding Six folding types are available Z Fold Tri Fold in Tri Fold...

Page 451: ...pacity on page 3 6 and Folding unit FD 501 on page 25 8 1 Position the original 2 Touch Punch on the Copy screen Punched sheets will be delivered to the primary main tray The Output Application icon s...

Page 452: ...t it 6 Touch OK To restore the previous setting touch Cancel To release the Punch function with the current number of punch holes and punch position setting remained touch Function Off The Output Appl...

Page 453: ...Output applications 9 Oc CS620 CS650 Pro 9 21 2 Reminder Be careful not to exceed the finisher tray capacity when selecting the print quantity otherwise unexpected trouble may be caused...

Page 454: ...cations see Paper tray exit tray capacity on page 3 6 and Folding unit FD 501 on page 25 8 0 Folding types Z Fold Tri Fold in Tri Fold out Double Parallel Gate Fold Half Fold 0 Sheets placed on the po...

Page 455: ...re the previous setting touch Cancel To release the Fold function with the current folding type setting remained touch Function Off The Output Application screen will be restored 6 Touch OK on the Out...

Page 456: ...insertion chapter sheets Use this function to create a staple bound book with covers and title pages attached You can also use the Cover With Blank Sheet mode of Booklet Pagination in combination wit...

Page 457: ...agination to attach a cover sheet 2 Reminder Do not load more than 500 sheets 80 g m2 for each of the upper and lower trays Do not load above the limit line indicated on the guide plate Be careful not...

Page 458: ...t in the upper lower tray of the post inserter Three paper rollers are attached to the upper lower tray respectively To lock the roller both sides prevent paper from skewing Push the both roller lock...

Page 459: ...hine installed with saddle stitcher SD 501 can create a multiple page signature booklet folded and stapled at two positions saddle stitched in the center Use Trimming mode to trim the edge that opens...

Page 460: ...the original 2 Touch Output Appli on the Copy screen The Output Application screen will be displayed 3 Touch Fold Staple The screen to specify the Trimming mode will be displayed 4 Touch Trimming or N...

Page 461: ...be displayed on the Copy screen Booklet Pagination in Application is selected automatically 7 Withdraw the saddle stitcher tray Open the tray stand when fully withdrawn 2 Note The folded and stapled a...

Page 462: ...cified on the screen 0 Using Multi Half Fold mode the finished sets will be delivered to the saddle stitcher tray 0 Using Multi Tri Fold mode the finished sets will be delivered to the multi folding m...

Page 463: ...d sheets Touch Trimming or Non Trimming to select it If Multi Tri Fold is selected the Multi Tri Fold screen will be displayed to specify the print side Touch Outside Print or Inside Print to select i...

Page 464: ...draw the saddle stitcher tray Open the tray stand when fully withdrawn 2 Note The double folded sets will be delivered into the saddle stitcher tray If the tray is not fully withdrawn the machine will...

Page 465: ...ually Detail For detailed specifications see Paper tray exit tray capacity on page 3 6 and Folding unit FD 501 on page 25 8 Multi Feed 1 Stapling 2 Holes Punch Fold Staple Z Fold Tri Fold in Half Fold...

Page 466: ...amp in order to turn the function OFF 0 Manual Fold Staple mode is unavailable at present 1 Place paper in the upper tray of the post inserter 1 or 2 stapling Place paper face up Punching Place paper...

Page 467: ...the operation press the Start Stop button again If multi feeding is detected and the machine stops even if single sheet is fed press the Multi Feed Detection button to turn on the lamp below 2 Reminde...

Page 468: ...3 copied sets from 4 original sheets Mode Description Non sort Non sort mode simply means that the offset stacker finisher modes are not se lected Copies will be stacked upon exit without being offset...

Page 469: ...n and output front to back or back to front Example Make 3 copied sets Mode Description Collate Collate mode outputs multiple copies of the original set No offset output is avail able Uncollate Uncoll...

Page 470: ...ange the initial output mode in the Utility setting For details refer to 02 Initial Setting on page 16 39 For detailed specifications see Paper tray exit tray capacity on page 3 6 and Finisher FS 607...

Page 471: ...to 1 as needed 4 Touch OK on the Output Application Screen The specified output mode icon will be displayed on the Copy Screen 2 Reminder The primary main tray gradually goes down while printed materi...

Page 472: ...ple Detail For detailed specifications see Paper tray exit tray capacity on page 3 6 and Finisher FS 607 on page 25 9 1 Position the original 2 Touch Staple on the Copy Screen Stapled sheets will be d...

Page 473: ...ed stapling position key to select it 6 Touch OK To restore the previous setting touch Cancel To release the Staple function with the current stapling position setting remained touch Function Off The...

Page 474: ...nted materials are output DO NOT allow any object to interfere with the operation of the tray on the left side of the finisher as any interference may cause damage to the finisher Be careful not to ex...

Page 475: ...tray and select the desired output mode by following the procedure below Detail For detailed specifications see Paper tray exit tray capacity on page 3 6 and Finisher FS 607 on page 25 9 1 Position th...

Page 476: ...Uncollate to highlight it Select output face Face Down Face Up and output order 1 to N N to 1 as needed 5 Touch OK on the Output Application Screen The specified output mode icon will be displayed on...

Page 477: ...ecifications of copy paper to be used see Section 3 0 Max number of sheets 21 lb paper in each mode Multi Half Fold 3 sheets Fold Staple 20 sheets 19 sheets when using thick cover paper 0 Folding mode...

Page 478: ...The Output Application Screen will be displayed 3 Touch Fold Staple or Multi Half Fold to highlight it 4 Touch OK on the Output Application Screen The specified output mode icon will be displayed on t...

Page 479: ...Max 3 sheets 0 Paper size A4 w or 8 5 e11 w 0 Paper weight 61 to 80 g m2 0 Printed side Selectable inside or outside 0 Output tray Folding mode tray 0 The output order will be set to 1 to N automatic...

Page 480: ...ide Print or Inside Print as desired 5 Touch OK To restore the previous setting touch Cancel To release the function with current setting remained touch Function Off The Output Application Screen will...

Page 481: ...der Do not punch special paper type such as labels tracing paper etc Otherwise machine trouble may occur Be sure that the side guide plates of the paper tray are securely aligned to the paper otherwis...

Page 482: ...ain tray The Output Application icon shows the number of punch holes and punch position currently selected If you want to change the number of punch holes and punch position proceed to the following s...

Page 483: ...current number of punch holes and punch position setting remained touch Function Off The Output Application Screen will be restored 7 Touch OK on the Output Application Screen The specified output mod...

Page 484: ...he paper inserter will be attached as a front cover and or back cover or insertion sheet to output copies and also using Staple mode a covered and stapled book can be made Or using Cover with Blank Sh...

Page 485: ...k each 0 Use ADF 0 The cover paper size should be the same as copy paper size 0 Cover paper loaded in the paper inserter cannot be copied 1 Load cover paper into the upper and lower trays of the paper...

Page 486: ...t of paper into the lower tray Upper tray cannot be used Available finishing modes according to the optional configuration are described below Finisher FS 607 Paper inserter PI 502 Staple 1 staple 2 s...

Page 487: ...Align the guide plate with the paper 2 Press Staple mode selection button and Punch button to select the desired mode To select Staple 1 staple 2 staples Fold Staple or Multi Tri Fold press Staple mo...

Page 488: ...by 20 mm upon exit Uncollate Uncollate mode groups together multiple copies of each original and offsets the sets upon exit Combined with the output modes above you can also choose to output face up...

Page 489: ...ct the desired one See page 9 3 for details 3 Select the desired output mode For Non sort output cancel both Collate and Uncollate For Collate output touch Collate to highlight it For Uncollate output...

Page 490: ...9 Output applications 9 58 Oc CS620 CS650 Pro 9 11 Copy conditions incompatible with output applications...

Page 491: ...Output applications 9 Oc CS620 CS650 Pro 9 59...

Page 492: ...9 Output applications 9 60 Oc CS620 CS650 Pro...

Page 493: ...Output applications 9 Oc CS620 CS650 Pro 9 61...

Page 494: ...ll be released A Condition in the top row is selected automaticaly Unreleasable B Condition in the top row is selected automaticaly Releasable C Not specified D Condition in the far left column does n...

Page 495: ...10 Advanced information...

Page 496: ......

Page 497: ...ple copies This is a convenient and cost effective way of viewing the results of the copying selections 0 Proof copy is available when using ADF or when using Separate Scan mode for more than 100 shee...

Page 498: ...to the next step To release any application function from the Check screen proceed to step 5 If a sample copy is needed proceed to step 6 If settings are OK proceed to step 7 4 Change the settings fr...

Page 499: ...en selecting the application function key will jump to that screen See page 8 3 for details Do not press Stop or Reset to change the setting or all the settings will restore the initial condition If m...

Page 500: ...en will be resumed Press Stop to suspend the proof copying In this case the scanned image data will not be deleted from memory If any setting change is required press Mode Check and return to step 3 I...

Page 501: ...can mode for more than 100 sheets of original or originals to be scanned from original glass 1 Position the original then select the desired copy conditions on the Copy screen Or use Separate Scan mod...

Page 502: ...rmation 10 8 Oc CS620 CS650 Pro 4 Change the settings or print quantity as required then press Start If the desired selection cannot be changed press Reset to delete all the data in memory and restart...

Page 503: ...pt mode cannot be selected with the following copier conditions Machine is not operating printing or scanning job Program Overlay is in use The Call for Service message displays or a paper misfeed occ...

Page 504: ...o 3 Position the original then press Start to start the interrupt copying 4 When interrupt copying is completed press Interrupt again The Interrupt LED turns out and the settings of the previous job w...

Page 505: ...dure below to store the copy job setting 0 Available settings Basic setting Original Setting Special Image Application Output Application Print quantity 0 Stored job is given a job number 01 30 and al...

Page 506: ...tion from step 2 5 Touch the desired job key then touch OK The job keys numbered from 01 to 18 are displayed on the screen Touching Next will display the keys from 19 to 30 A blank keys without a lock...

Page 507: ...o move the cursor and use Shift to enter upper case letters or symbols Touch OK to complete the setting and return to the Mode Memory screen Check that the job name has been correctly entered 7 Touch...

Page 508: ...s displayed pressing Mode Memory will be ignored 1 Position the original 2 Touch Copy tab to display the Copy screen then press Mode Memory on the control panel The Mode Memory screen will be displaye...

Page 509: ...Pro 10 15 4 Touch Job Check The Job Recall Check screen displays to enable you to review the settings 5 Review the settings then touch OK The settings of the selected job will be recalled on the resto...

Page 510: ...as the previous job settings Non completed job or reserve job settings cannot be recalled even if the setting operations have been made last 0 The previous job settings can be recalled even after the...

Page 511: ...tings The Mode Check screen will be displayed Check the settings of the previous job on the screen Recalled settings can be altered from this screen See page 10 3 for details 5 Touch OK The settings o...

Page 512: ...function and operation of the keys on Copy screen 02 Scan provides information on function and operation of the keys on Scanner screen 03 Job List provides information on function and operation of th...

Page 513: ...Advanced information 10 Oc CS620 CS650 Pro 10 19 To display Help screen Press Help on the control panel...

Page 514: ...andicapped users who have difficulty in touching keys with accuracy Detail For details on how to set the desired response time see page 16 32 0 Response time can be selected from Normal 0 5 second 1 s...

Page 515: ...emote Panel functions Touch panel screens can be displayed on the web browser and operated using a mouse Control panel keys can be displayed on the web browser and operated using a mouse Passwords can...

Page 516: ...re or application software is necessary Microsoft Internet Explorer 6 02 or higher Netscape Navigator 7 1 or higher FireFox 1 0 or higher 0 JavaScript must be active 0 The popup menu such as paper mis...

Page 517: ...Advanced information 10 Oc CS620 CS650 Pro 10 23 3 Using a mouse and keyboard perform job operation...

Page 518: ...10 Advanced information 10 24 Oc CS620 CS650 Pro...

Page 519: ...11 Job management...

Page 520: ......

Page 521: ...The letters on the key turn red if any suspended job remains The jobs referred here include printer jobs and scanner jobs Follow the procedure below to display the Job List screen 1 Touch JOB LIST ta...

Page 522: ...ode Copy or Printer Status Printing or Reserved current status of the job Sheets max 4 digit page count Sets max 4 digit set count Pages To Go max 4 digit pages to be output Sheets e Sets Pages To Go...

Page 523: ...Job management 11 Oc CS620 CS650 Pro 11 5 2 Reminder This will not function if printing operation has already been started for the selected job...

Page 524: ...Touch to highlight the desired reserve job key then touch Suspend Printing operation for the selected job will be suspended and kept stored in memory In this case the letters Suspended on the key at...

Page 525: ...s max 4 digit page count Sets max 4 digit set count Result Complete or Cancel Time time when output operation was executed Follow the procedure below to check the settings of output jobs 1 Touch JOB L...

Page 526: ...address to which the data was transmitted Result Complete or Cancel Time time when data transmission was executed Follow the procedure below to check the settings of transmitted jobs 1 Touch JOB LIST...

Page 527: ...ed the job Cause Memory Full Cancel etc cause for which the job was not completed Follow the procedure below to check the settings of incomplete jobs 1 Touch JOB LIST tab on the Copy screen then touch...

Page 528: ...nt Sets max 4 digit set count Pages To Go max 4 digit pages to be output Sheets e Sets Pages To Go Minute s time required for completing each job minute Follow the procedure below to check the setting...

Page 529: ...heck the printing order touch Reserved Job to display the reserved job list To release all suspended jobs Touch All Release then touch Yes on the popup menu All the data of suspended jobs will be clea...

Page 530: ...11 Job management 11 12 Oc CS620 CS650 Pro...

Page 531: ...12 Screen setting outlines...

Page 532: ......

Page 533: ...CS650 Pro 12 3 12 Screen setting outlines 12 1 Machine status screen setting outlines The Paper Setting Both Sides Adj Adjustment and Controller keys are located at the bottom of the Machine Status sc...

Page 534: ...ing paper settings or using predefined settings This operation is equivalent to touching Paper Setting on the Copy screen Please refer to page 9 44 for more information 2 After completing the Paper Se...

Page 535: ...yed 1 Specify the Vertical zoom Horizontal zoom Up Down shift amount and Right Left shift amount for both front and back pages For the details see page 6 48 2 After completing the Adjustment mode sett...

Page 536: ...650 Pro Adjustment key The adjustment mode menu screen is displayed 1 Adjust the settings of Image Control and Output options For the details see page 14 3 2 After completing the Adjustment mode setti...

Page 537: ...ey The controller setting menu screen is displayed 1 Specify the settings concerning the optional Print Controller For the details please see the contents of the user manuals for the optional controll...

Page 538: ...ing items one in which a user can set and the other in which a machine administrator is required to enter a password Detail The machine administrator setting can be established by general users in the...

Page 539: ...outlines 12 Oc CS620 CS650 Pro 12 9 Close and Exit on the utility screen Touch Close to return to the previous screen Touch Exit to return to the screen displayed before pressing Utility Counter on th...

Page 540: ...12 Screen setting outlines 12 10 Oc CS620 CS650 Pro...

Page 541: ...13 Paper setting...

Page 542: ......

Page 543: ...Sides Adjustment Process Adjustment Speed Setting Hole Punch Color Paper and Air Assist Paper conditions as mentioned above are supposed to be predefined and can be edited and even deleted at any time...

Page 544: ...between paper type and weight Both sides adj Specify the Vertical zoom Horizontal zoom Up Down shift amount Right Left shift amount and Registration Loop for both front and back pag es Vertical zoom F...

Page 545: ...size information can be registered together with other paper information Link Size Information Tab paper in sizes A4 v 8 5 e 11 w cannot be registered from Paper Setting in the User Setting Speed set...

Page 546: ...generally used for offset printing The High Quality paper has a high degree of whiteness and used for various purposes Specify High Quality to a tray to which the High Quality paper is loaded Plain Th...

Page 547: ...to eight types as shown in the following table Plain Color Specific High Quality Coated GL Coated ML Coated GO Coated MO Plain Gloss Plain Gloss Plain Plain Gloss Plain Disable Disable Disable Disable...

Page 548: ...own specified in Process Adj Copy rate will be 45 cpm or 32 cpm on A4 paper in simplex mode Normally the Process Adj setting is available by service only Copy speed becomes faster due to the speed set...

Page 549: ...0 5 66 5 100 0 26 6 37 0 55 4 45 7 61 5 67 6 104 7 27 9 38 8 58 0 47 8 64 4 70 8 108 0 28 8 40 0 59 8 49 3 66 4 73 1 110 0 29 3 40 7 60 9 50 2 67 7 74 4 120 0 32 0 44 4 66 5 54 8 73 8 81 2 127 9 34 1...

Page 550: ...paper type weight Follow the procedure below to register paper type weight in the User Setting 1 Press Utility Counter on the control panel The Utility menu screen will be displayed 2 Touch 02 User S...

Page 551: ...Setting The Paper Setting Menu screen will be displayed 4 Touch the key to be registered To modify the a paper setting which is already registered touch to select the corresponding name for the settin...

Page 552: ...ch Add Edit The Input Condition screen will be displayed 6 Select the paper type Touch Paper Type to display the Paper Type screen Select the desired paper type and the touch OK to complete the settin...

Page 553: ...name as the paper type specified is displayed on the screen To alter it enter the new paper type name For details on entering texts in the field see 26 Appendix 8 Select the paper weight Touch Weight...

Page 554: ...e Front and Back Page Adjustment screen Enter the adjustment value as follows Touch Front or Back on the Front and Back Page Adjustment screen to select the printed side Select the adjustment item ver...

Page 555: ...e adjustment touch OK 11 Adjust the copying speed Touch Speed Setting to display the Speed Setting screen Copy speed changes with paper type and paper weight The Speed Setting key is available only wh...

Page 556: ...mplete the setting To specify the custom size recall the custom size registered from Copy screen or Machine Status screen Touch Custom on the link size information to display the Size Recall Screen Se...

Page 557: ...etting 17 Touch Close on the Paper Setting screen Touch Exit to return to the Copy screen Detail Chart adjustment is available from the Paper Setting on the Copy screen or Machine Status screen only P...

Page 558: ...e paper setting Follow the procedure below to delete the paper setting previously registered 1 Press Utility Counter on the control panel The Utility menu screen will be displayed 2 Touch 02 User Sett...

Page 559: ...Paper setting 13 Oc CS620 CS650 Pro 13 19 3 Touch 01 Paper Setting The Paper Setting screen will be displayed 4 Touch the key to be deleted...

Page 560: ...will be displayed to confirm that the selected register will be deleted 6 Touch Yes to delete or No Return to the Input Condition screen To delete multiple paper types repeat steps 4 and 6 7 Touch Clo...

Page 561: ...14 Machine adjustment...

Page 562: ......

Page 563: ...1 Restart Timing Adjustment Perform this adjustment to control the restart timing 2 Reminder Perform this adjustment after completing FD Mag Adjustment To specify Restart Timing Adjustment 1 Touch Adj...

Page 564: ...reen will be displayed 4 Select A3 w 11 e 17 w paper then press START The sample pattern No 16 will be output 5 Measure the resultant restart timing 6 If the desired result cannot be obtained touch th...

Page 565: ...down arrow keys and touch it 8 Use the touch panel keypad to enter the desired adjustment value then touch SET Available range 60 to 60 1 step 0 1 mm 9 Repeat the adjustment steps from 3 to 8 until th...

Page 566: ...ing to the direction of paper feed To specify Centering Adjustment 1 Touch Adjustment on the Machine Status screen The Adjustment Menu screen will be displayed 2 Touch 01 Machine Adjustment 01 Printer...

Page 567: ...both sides 6 If the desired result cannot be obtained touch the ADJUSTMENT tab The Centering Adjustment screen will be restored 7 Display the required item using up down arrow keys and touch it 8 Use...

Page 568: ...s the baseline for the Both Sides Adjustment function in the Paper Setting Specified value in that adjustment will be an offset estimated from this baseline To specify FD Mag Adjustment 1 Touch Adjust...

Page 569: ...screen will be displayed 5 Select A3 w 11 e 17 w paper then press START The sample pattern No 16 will be output 6 Measure the resultant magnification to the direction of paper feed 7 If the desired r...

Page 570: ...d item key 9 Use the touch panel keypad to enter the desired adjustment value then touch SET Available range 100 to 100 1 step 0 01 10 Repeat the adjustment steps from 3 to 9 until the desired result...

Page 571: ...gnification perpendicular to the direction of paper feed To specify CD Mag Adjustment 1 Touch Adjustment on the Machine Status screen The Adjustment Menu screen will be displayed 2 Touch 01 Machine Ad...

Page 572: ...6 will be output 6 Measure the resultant magnification perpendicular to the direction of paper feed 7 If the desired result cannot be obtained touch the ADJUSTMENT tab The CD Mag Adjustment screen wil...

Page 573: ...Machine adjustment 14 Oc CS620 CS650 Pro 14 13 10 Repeat the adjustment steps from 3 to 9 until the desired result is obtained 11 Touch Return to restore the Adjustment Menu screen...

Page 574: ...the original with the original glass To specify Restart Timing Adjustment 1 Touch Adjustment on the Machine Status screen The Adjustment Menu screen will be displayed 2 Touch 01 Machine Adjustment 02...

Page 575: ...ring the original and the output 6 If the desired result cannot be obtained touch the ADJUSTMENT tab The Scanner Restart Timing Adjustment screen will be restored 7 Use the touch panel keypad to enter...

Page 576: ...f paper feed in scanning the original with original glass To specify Centering Adjustment 1 Touch Adjustment on the Machine Status screen The Adjustment Menu screen will be displayed 2 Touch 01 Machin...

Page 577: ...y comparing the original and the output 6 If the desired result cannot be obtained touch the ADJUSTMENT tab The Scanner Centering Adjustment screen will be restored 7 Touch the required item key 8 Use...

Page 578: ...gnification to the direction of paper feed in scanning the original with original glass To specify FD Mag Adjustment 1 Touch Adjustment on the Machine Status screen The Adjustment Menu screen will be...

Page 579: ...n No 16 will be output 5 Check the magnification in the direction of paper feed by comparing the output and the original 6 If the desired result cannot be obtained touch the ADJUSTMENT tab The Scanner...

Page 580: ...14 Machine adjustment 14 20 Oc CS620 CS650 Pro 8 Repeat the adjustment steps from 3 to 9 until the desired result is obtained 9 Touch Return to restore the Adjustment Menu screen...

Page 581: ...n a copying or printing job To specify Image Quality Stability 1 Touch Adjustment on the Machine Status screen The Adjustment Menu screen will be displayed 2 Touch 02 Image Quality Stability The Image...

Page 582: ...er Refresh Mode and the Belt Refresh Mode To specify Execute Adjust Operation 1 Touch Adjustment on the Machine Status screen The Adjustment Menu screen will be displayed 2 Touch 03 Execute Adjust Ope...

Page 583: ...nted sheets and of staples processed by the Staple finisher FS 503 The paper width adjustment is supposed to be completed before this adjustment To specify Staple Center Position 1 Touch Adjustment on...

Page 584: ...ol panel A sample copy will be output 5 If the desired result cannot be obtained touch ADJUSTMENT tab The Staple Center Position screen will be restored 6 Use the touch panel keypad to enter the desir...

Page 585: ...er to the direction of paper feed and check misalignment a of the stapling center position 8 If the test desired result cannot be obtained touch ADJUSTMENT tab Repeat the adjustment steps from 3 to 7...

Page 586: ...d neatly processed by the Staple finisher FS 503 To specify Paper Width Staple 1 Touch Adjustment on the Machine Status screen The Adjustment Menu screen will be displayed 2 Touch 04 Finisher Adjustme...

Page 587: ...gth side is 239mm or longer the Staple unit can not be withdrawn Remove output paper from the paper exit side withdraw the staple unit and then reset the output paper in the unit 6 Check misalignment...

Page 588: ...r the desired adjustment value then touch SET Available range 20 wide to 20 narrow 1 step 0 1 mm 10 Remove the output paper and close the finisher door 11 If the test desired result cannot be obtained...

Page 589: ...is misaligned in the Staple finisher FS 503 To specify Paper Width Straight 1 Touch Adjustment on the Machine Status screen The Adjustment Menu screen will be displayed 2 Touch 04 Finisher Adjustment...

Page 590: ...th side is 239mm or longer the Staple unit can not be withdrawn Remove output paper from the paper exit side withdraw the staple unit and then reset the output paper in the unit 6 Check whether any mi...

Page 591: ...r the desired adjustment value then touch SET Available range 20 wide to 20 narrow 1 step 0 1 mm 10 Remove the output paper and close the finisher door 11 If the test desired result cannot be obtained...

Page 592: ...ment for the specific paper size if punch holes processed by the folding unit FD 501 dislocate largely To specify Paper Width Adjustment 1 Touch Adjustment on the Machine Status screen The Adjustment...

Page 593: ...specify the set number to 10 then press Start on the control panel A sample pattern will be output 5 Check the diameter of penetrated holes when output sheets are piled up 6 If the desired result cann...

Page 594: ...ailable range 20 wide to 20 narrow 1 step 0 1 mm 9 Repeat the adjustment steps from 3 to 8 until the desired result is obtained 10 Touch Return to restore the Adjustment Menu screen 2 Note If the sett...

Page 595: ...Punch holes can be adjusted separately for 2 hole punch and 4 hole punch To specify Hole Punch Vertical Pos 1 Touch Adjustment on the Machine Status screen The Adjustment Menu screen will be displaye...

Page 596: ...to be adjusted on a tray specify Punch then press Start on the control panel A sample pattern No 16 will be output 6 Check the distance a from the edge of the feeding sheet to the center position of...

Page 597: ...ouch panel keypad to enter the desired adjustment value then touch SET Available range 40 wide to 40 narrow 1 step 0 1 mm 10 Repeat the adjustment steps from 4 to 9 until the desired result is obtaine...

Page 598: ...essed by the folding unit FD 501 To specify Half Fold Position Adj 1 Touch Adjustment on the Machine Status screen The Adjustment Menu screen will be displayed 2 Touch 04 Finisher Adjustment 03 Multi...

Page 599: ...tab The Half Fold Position Adjustment screen will be restored 7 Display the required size key using up down arrow keys and touch it 8 Use the touch panel keypad to enter the desired adjustment value t...

Page 600: ...line of Single Fold is calculated from the edge of the sheet while that of Double Fold is calculated from the position of the first fold line therefore a distance b in step 5 will be altered by changi...

Page 601: ...of paper to be adjusted on a tray specify Letter Fold in then press Start on the control panel A sample pattern No 16 will be output 5 Check a distance a and distance b on the output sheet 6 If the d...

Page 602: ...tep 0 1 mm The distance a in step 5 will increase when the value is entered and decrease when the value is entered 10 Touch Single Fold then repeat step 9 The distance b in step 5 will increase when t...

Page 603: ...the sheet while that of Double Fold is calculated from the position of the first fold line therefore a distance b in step 5 will be altered by changing the position of either Single Fold or Double Fol...

Page 604: ...of paper to be adjusted on a tray specify Tri Fold out then press Start on the control panel A sample pattern No 16 will be output 5 Check a distance a and distance b on the output sheet 6 If the des...

Page 605: ...1 step 0 1 mm The distance a in step 5 will increase when the value is entered and decrease when the value is entered 10 Touch Double Fold repeat step 9 The distance b in step 5 will increase when the...

Page 606: ...of Single Fold is calculated from the edge of the sheet while that of Double Fold is calculated from the position of the first fold line therefore a distance b in step 5 will be altered by changing t...

Page 607: ...paper to be adjusted on a tray specify Double Parallel then press Start on the control panel A sample pattern No 16 will be output 5 Check a distance a and distance b on the output sheet 6 If the des...

Page 608: ...1 step 0 1 mm The distance a in step 5 will decrease when the value is entered and increase when the value is entered 10 Touch Double Fold repeat step 9 The distance b in step 5 will decrease when the...

Page 609: ...line of Single Fold is calculated from the edge of the sheet while that of Double Fold is calculated from the position of the first fold line therefore a distance b in step 5 will be altered by changi...

Page 610: ...d size of paper to be adjusted on a tray specify Z Fold then press Start on the control panel A sample pattern No 16 will be output 5 Check a distance a and distance b on the output sheet 6 If the des...

Page 611: ...1 step 0 1 mm The distance a in step 5 will increase when the value is entered and decrease when the value is entered 10 Touch Double Fold repeat step 9 The distance b in step 5 will increase when the...

Page 612: ...m the edge of the sheet while that of Double Fold is calculated from the position of the first fold line and that of Triple Fold is calculated from the position of the second fold line therefore a dis...

Page 613: ...f paper to be adjusted on a tray specify Gate then press Start on the control panel A sample pattern No 16 will be output 5 Check a distance a distance b and distance c on the output sheet 6 If the de...

Page 614: ...n the value is entered 10 Touch Double Fold and Triple Fold to set in the same manner respectively Repeat step 9 In Double Fold the distance b in step 5 will increase when the value is entered and dec...

Page 615: ...s are not aligned in a perpendicular position to the direction of paper feed processed by the large capacity Stacker LS 501 To specify Paper Width Adjustment 1 Touch Adjustment on the Machine Status s...

Page 616: ...16 will be output 5 If output sheets are misaligned touch ADJUSTMENT tab The Paper Width Adjustment screen will be restored 6 Use the touch panel keypad to enter the desired adjustment value then touc...

Page 617: ...n of paper feed processed by the large capacity stacker LS 501 To specify Length Adjustment 1 Touch Adjustment on the Machine Status screen The Adjustment Menu screen will be displayed 2 Touch 04 Fini...

Page 618: ...put sheets are misaligned touch ADJUSTMENT tab The Paper Length Adjustment screen will be restored 6 Use the touch panel keypad to enter the desired adjustment value then touch SET Available range 20...

Page 619: ...and of staples processed by the saddle stitcher SD 501 The 06 Fold Paper Width Adj and 04 Half Fold Position Adj are supposed to be completed before this adjustment To specify Staple Center Adj 1 Tou...

Page 620: ...ayed 4 Select the Fold Staple mode then press Start on the control panel A sample copy will be output 5 Check misalignment a of the folded line and stapling position 6 If the test desired result canno...

Page 621: ...ouch panel keypad to enter the desired adjustment value then touch SET Available range 50 forward to 50 backward 1 step 0 1 mm 8 Repeat the adjustment steps from 3 to 7 until the desired result is obt...

Page 622: ...processed by the saddle stitcher SD 501 To specify Staple Paper Width Adj 1 Touch Adjustment on the Machine Status screen The Adjustment Menu screen will be displayed 2 Touch 04 Finisher Adjustment 0...

Page 623: ...curving b in which a sample set is curved if the paper width setting is smaller than the actual width has occurred 6 If the desired result cannot be obtained touch ADJUSTMENT tab The Staple Paper Wid...

Page 624: ...n is put on the paper width setting according to the actual paper width Using paper size of which actual width is less than 222 mm such as A4 w the staple pitch will be set to 91 mm automatically even...

Page 625: ...sed by the saddle stitcher SD 501 To specify Staple Pitch Adjustment 1 Touch Adjustment on the Machine Status screen The Adjustment Menu screen will be displayed 2 Touch 04 Finisher Adjustment 06 Sadd...

Page 626: ...tch a of the sample sheet 6 If the desired result cannot be obtained touch ADJUSTMENT tab The Staple Pitch Adjustment screen will be restored 7 Display the required size key using up down arrow keys a...

Page 627: ...Machine adjustment 14 Oc CS620 CS650 Pro 14 67 10 If adjustment in any other paper size is required repeat steps from 3 to 9 11 Touch Return to restore the Adjustment Menu screen...

Page 628: ...cessed by the saddle stitcher SD 501 To specify Half Fold Position Adj 1 Touch Adjustment on the Machine Status screen The Adjustment Menu screen will be displayed 2 Touch 04 Finisher Adjustment 06 Sa...

Page 629: ...STMENT tab The Half Fold Position Adjustment screen will be restored 7 Display the required size key using up down arrow keys and touch it 8 Use the touch panel keypad to enter the desired adjustment...

Page 630: ...The baseline of Single Fold is calculated from the edge of the sheet while that of Double Fold is calculated from the position of the first fold line therefore a distance b in step 5 will be altered...

Page 631: ...size of paper to be adjusted on a tray specify Tri Fold then press Start on the control panel A sample pattern No 16 will be output 5 Check a distance a and distance b on the output sheet 6 If the des...

Page 632: ...distance a in step 5 will increase when the value is entered and decrease when the value is entered 10 Touch Single Fold repeat step 9 The distance b in step 5 will increase when the value is entered...

Page 633: ...d paper processed by the saddle stitcher SD 501 To specify Fold Paper Width Adj 1 Touch Adjustment on the Machine Status screen The Adjustment Menu screen will be displayed 2 Touch 04 Finisher Adjustm...

Page 634: ...The Fold Paper Width Adjustment screen will be restored 7 Display the required size key using up down arrow keys and touch it 8 Use the touch panel keypad to enter the desired adjustment value then to...

Page 635: ...the trimmed width To specify Trimming Adjustment 1 Touch Adjustment on the Machine Status screen The Adjustment Menu screen will be displayed 2 Touch 04 Finisher Adjustment 06 Saddle Stitcher Adj and...

Page 636: ...it 8 Use the touch panel keypad to enter the desired adjustment value then touch SET Available range 400 wide to 400 narrow 1 step 0 1 mm 9 Repeat the adjustment steps from 3 to 8 until the desired re...

Page 637: ...receiver Move Pitch Force the receiver to be moved if trimming operations are beginning to fail Execute Compulsive Movement 08 Trimming Receiver Adj key is not display normally If the adjustment is pr...

Page 638: ...300 times 4 Select the move pitch Touch to choose between 1 0 mm 1 5 mm and 2 0 mm 5 Touch Execute Compulsive Movement to force the receiver to be moved This operation takes effect immediately and to...

Page 639: ...urs in options it can be prevented by selecting the curl reform direction for the paper fed into the Relay Unit To specify Curl Reform Direction 1 Touch Adjustment on the Machine Status screen The Adj...

Page 640: ...14 Machine adjustment 14 80 Oc CS620 CS650 Pro 3 Touch to select Upper or Lower Touch Off if you do not use the function 4 Touch Return to restore the Adjustment Menu screen...

Page 641: ...ions in widthwise direction of paper using Fold Staple mode operated by the Finisher FS 607 1 Touch Adjustment on the Machine Status Screen The Adjustment Menu Screen will be displayed 2 Touch 04 Fini...

Page 642: ...put sheets 6 If the desired result cannot be obtained touch ADJUSTMENT tab The Fold Staple Stopper Adjustment Screen will be restored 7 Display the required size key using up down arrow keys and touch...

Page 643: ...Machine adjustment 14 Oc CS620 CS650 Pro 14 83 10 If adjustment in any other paper size is required repeat steps from 3 to 9 11 Touch Return to restore the Adjustment Menu Screen...

Page 644: ...ouble folding position processed by the Finishher FS 607 1 Touch Adjustment on the Machine Status Screen The Adjustment Menu Screen will be displayed 2 Touch 04 Finisher Adjustment and 02 Half Fold St...

Page 645: ...er Adjustment Screen will be restored 7 Display the required size key using up down arrow keys and touch it 8 Touch 5 to specify the value to be positive or negative Use the touch panel keypad to ente...

Page 646: ...sition of punch holes operated by the Punch Kit PK 512 513 1 Touch Adjustment on the Machine Status Screen The Adjustment Menu Screen will be displayed 2 Touch 04 Finisher Adjustment 03 Punch Adjustme...

Page 647: ...STMENT tab The Vertical Position Adjustment Screen will be restored 7 Display the required size key using up down arrow keys and touch it 8 Touch 5 to specify the value to be positive or negative Use...

Page 648: ...eeding direction operated by the Punch Kit PK 512 513 1 Touch Adjustment on the Machine Status Screen The Adjustment Menu Screen will be displayed 2 Touch 04 Finisher Adjustment 03 Punch Adjustment an...

Page 649: ...m the edge of the output sheet to the center of the punch hole 7 If the desired result cannot be obtained touch ADJUSTMENT tab The Horizontal Position Adjustment Screen will be restored 8 Touch 5 to s...

Page 650: ...14 Machine adjustment 14 90 Oc CS620 CS650 Pro 10 If adjustment in any other tray is required repeat steps from 3 to 9 11 Touch Return to restore the Adjustment Menu Screen...

Page 651: ...ion made by the Punch Kit PK 512 513 in duplex copying or cover sheet feeding using the paper inserter 1 Touch Adjustment on the Machine Status Screen The Adjustment Menu Screen will be displayed 2 To...

Page 652: ...heck whether or not the punch position is skew on the output sheet 7 If the desired result cannot be obtained touch ADJUSTMENT tab The Registration Adjustment Screen will be restored 8 Touch 5 to spec...

Page 653: ...Machine adjustment 14 Oc CS620 CS650 Pro 14 93 10 If adjustment in any other size is required repeat steps from 3 to 9 11 Touch Return to restore the Adjustment Menu Screen...

Page 654: ...oint of punching operation 1 Touch Adjustment on the Machine Status Screen The Adjustment Menu Screen will be displayed 2 Touch 04 Finisher Adjustment 03 Punch Adjustment and then 04 Paper Edged Detec...

Page 655: ...ree folding positions processed by the Finisher FS 607 1 Touch Adjustment on the Machine Status Screen The Adjustment Menu Screen will be displayed 2 Touch 04 Finisher Adjustment and then 04 Tri Fold...

Page 656: ...touch ADJUSTMENT tab The Tri Fold Adjustment Screen will be restored 7 Touch the required size key 8 Touch 5 to specify the value to be positive or negative Use the touch panel keypad to enter the des...

Page 657: ...Machine adjustment 14 Oc CS620 CS650 Pro 14 97 10 If adjustment in any other size is required repeat steps 3 to 9 11 Touch Return to restore the Adjustment Menu Screen...

Page 658: ...taple and Fold Staple modes 1 Touch Adjustment on the Machine Status Screen The Adjustment Menu Screen will be displayed 2 Touch 04 Finisher Adjustment and then 05 2 Pos Staple Pitch Adj The 2 Positio...

Page 659: ...MENT tab The 2 Position Staple Pitch Adjustment Screen will be restored 8 Touch 5 to specify the value to be positive or negative Use the touch panel keypad to enter the desired adjustment value then...

Page 660: ...502 1 Touch Adjustment on the Machine Status Screen The Adjustment Menu Screen will be displayed 2 Touch 04 Finisher Adjustment and then 06 Paper Inserter Tray Size Adj The PI 1 Tray Size Adjustment...

Page 661: ...Machine adjustment 14 Oc CS620 CS650 Pro 14 101 5 Load the A4 w or 8 5 e 11 w on the Lower tray of the Paper Inserter and then touch Start 6 Touch Return to restore the Adjustment Menu Screen...

Page 662: ...t Quality Limit Screen is displayed 3 Touch the desired key to be specified the quantity limit 4 Use the touch panel keypad to enter the desired adjustment value then touch SET The following adjustmen...

Page 663: ...15 Utility screen outlines...

Page 664: ......

Page 665: ...enu 01 Scan Send Ad dress 1 01 Address Edit E Mail HDD FTP SMB Group 02 E Mail Title Setting 03 E Mail Text Setting 02 User Set ting 01 System Setting 01 Language Setting 02 Unit Set ting 03 Feed Tray...

Page 666: ...e sponse Time 11 Short Cut Key Setting 01 Applica tion 02 Quality Adjust Copy 03 Quality Adjust Scanner 04 Quality Adjust Area Set 12 Service Port Device 02 Initial Setting 01 Copy Ini tial Setting 02...

Page 667: ...03 Machine Admin Set ting 01 System Setting 01 Power Save Setting 3 02 Time and Date Setting 4 03 Weekly Timer Setting 01 Weekly Timer On Off Set 02 Timer Setting 03 Timer Action On Off Set 04 Lunch H...

Page 668: ...ase Operation Setting 03 ADF Frame Erase 03 Printer Adjustement 8 01 Restart Timing Ad justemt 02 Center ing Adjuste ment 03 FD Mag Adjustment 04 CD Mag Adjusment Erase 05 Lead Edge Earse Adjustment 0...

Page 669: ...01 Paper Width Adjust ment 02 Hole Punch Verti cal Pos 03 Multi Folder Fold Adj 01 Half Fold Position Adj 02 Tri Fold in Pos Adj 03 Tri Fold out Pos Adj 04 Double Parallel Pos Adj 05 Z Fold Position...

Page 670: ...ustment SD 501 9 06 Saddle Stitcher Adj 01 Staple Center Adj 02 Staple Paper Width Adj 03 Staple Pitch Adjust ment 04 Half Fold Position Adj 05 Tri Fold Position Adj 06 Fold Pa per Width Adj 07 Trimmi...

Page 671: ...rtical Position Adj 02 Horizon tal Position Adj 03 Registra tion Adjust ment 4 Paper Edge Detect Sensor Adj 04 Tri Fold Adjustment 05 2 Pos Staple Pitch Adj 06 Paper In serter Tray Size Adj 07 Output...

Page 672: ...set Adj 02 Printer Gamma Off set Auto Adj 03 Printer Gamma Sen sor Adj 04 Image Quality Sta bility 05 Custom Screen 08 Execute Adjust Oper ation 06 List Count 07 Size Set ting 01 Orig Glass Size Dete...

Page 673: ...E Mail Ti tle Setting 03 E Mail Text Setting 04 User Auth Ac count Track 01 Authenti cation Method 02 User Au thentication Set 03 Account Track 04 Without Authentication 05 Network Setting 01 Machine...

Page 674: ...cting 02User Setting 03 Common Setting allows for the same operation as selecting 03 Machine Admin Setting 06 Common Setting 6 Selecting 02User Setting 04 Copy Setting allows for the same operation as...

Page 675: ...the optional equipment installed in the machine 10 The adjustment operation by selecting 03 Machine Admin Setting 01 System Setting 05 Expert Adjustment 05 Scanner Adjustment are exactly the same as t...

Page 676: ...detec tion when ATS functions ATS APS Switch Trays 1 to 3 Off Tray Priority Tray 3 Tray 1 Tray2 Bypass Tray Priority Tray 3 Tray 1 Tray2 03 ATS Permit Setting Set ATS on or off on off off 04 Auto Pape...

Page 677: ...et Bind Direction Change user Yes ADF original direction Not reset Reset button function Full auto Mode memory auto call Off Finisher Mode by Full auto Collate Initial by Key Counter Insert Off Status...

Page 678: ...ring Page Margin Stamp Image Overlay 02 Quality Adjust Copy Select short cut keys to be displayed under Image Quality on the Copy screen Up to 3 keys can be se lected Copy Density Adjust Background B...

Page 679: ...dication area of the touch panel 3 seconds 5 seconds 3 seconds Job Offset Mode Set the machine to offset the copies printouts of different jobs On Off Off Continuation print Set the machine to output...

Page 680: ...cted paper size On Off On ADF AMS Set the machine to automatically select an appropriate ratio for copying when detecting the original size placed on the ADF On Off On Non Image Area Erase of orig Spe...

Page 681: ...y4 Tray5 APS Tray Scan prohibit pull out tray Set to stop scanning when pulling out the tray On Off On 05 Scan Setting File Form Default E Mail Select the default file form when transmitting in E Mail...

Page 682: ...mission 02 Screen Initial setting Select the screen to be displayed when selecting Text Photo or Photo for image quality Full color Text Photo Line 1 Line 2 Dot 1 Dot 2 Com pression Full color Photo L...

Page 683: ...s in hours and minutes 03 Timer Action On Off Set Set the On Off condition of the machine for a given month 04 Lunch Hour Off Setting Set the machine to turn off and then on during the lunch break 05...

Page 684: ...amount of frame erase when copying in ADF mode None Image Area Erase Erase Outside of Original On APS AMS Only Ex cept Orig Glass 1 1 Erase Operating Setting Auto Dark Dark Normal Light Light ADF Fra...

Page 685: ...50 to 50 1 step 0 1mm Gate Fold Position Adj 50 to 50 1 step 0 1mm 05 Stacker Adjustment Paper Width Adjustment 20 to 20 1 step 0 1mm Paper Length Adjustment 20 to 20 1 step 0 1mm 06 Saddle Stitcher A...

Page 686: ...egistration Adjustment 20 to 20 1 step 0 8mm Paper Edge Detect Sensor Adj 04 Tri Fold Adjustment Adjust the three folding positions using Multi Tri Fold mode 128 to 127 1 step 0 1mm 05 2 Position Stap...

Page 687: ...ced in the post inserter 01 Orig Glass Size Detect Specify the size of the originals which needs to be de tectable on the original glass Full size AB Inch Only A series Only A series 02 ADF Original S...

Page 688: ...il Title Setting Register up to 5 templates which can optionally be used as a title when transmitting scanned data 03 E Mail Text Setting Register up to 5 templates which can optionally be used as bod...

Page 689: ...er Change add or delete accounts being tracked Section No Section Name Password Name Output Permission Color Black and their Upper Limit Set Useable Function Copy Scanner Printer 02 Account Counter Vi...

Page 690: ...y when storing to HDD is not completed with memory overflow Off On Off 07 Copy Setting Fold Staple auto select Set the machine to automatically select the Booklet mode when Stapling Folding mode is se...

Page 691: ...seconds 60 seconds 90 seconds Off Bookmark function Specify whether to delete the set bookmarks or not or se lect to disable the bookmark function Off Release Every Job Not release Release Every Job O...

Page 692: ...ard Low Compress Standard 09 System Connection 01 Administrator Touch Start when calling CSRC Start Start 10 Security Setting 01 Administrator Password Change the machine administrator password which...

Page 693: ...16 User setting...

Page 694: ......

Page 695: ...ter is pressed The User Setting Menu screen is the screen which is displayed by touching User Setting on the Utility Counter screen The Machine Administrator Menu screen is the screen which is display...

Page 696: ...4 Oc CS620 CS650 Pro How to display User Setting Menu screen 1 Press the Utility Counter on the control panel The Utility menu screen will be displayed 2 Touch User Setting The User Setting Menu scree...

Page 697: ...0 CS650 Pro 16 5 How to use Close layer keys and Exit Touch Close to return to the previous screen Touch the desired layer key on the left side area of the screen to jump to that screen Touch Exit to...

Page 698: ...guage Setting Select the language used in the touch panel The initial setting is English 1 Follow the procedure on page 16 3 to display the User Setting Menu screen 2 Touch 01 System Setting and then...

Page 699: ...6 Oc CS620 CS650 Pro 16 7 4 Touch OK to complete the setting To cancel the change touch Cancel In either case the System Setting Menu screen will be restored 5 If further changes are required touch th...

Page 700: ...Follow the procedure on page 16 3 to display the User Setting Menu screen 2 Touch 01 System Setting 02 Unit Setting in sequence 3 Select the desired unit key to highlight it 4 Touch OK to complete th...

Page 701: ...opying is in progress automatic tray switching detects the same copy paper size loaded in another tray to allow copying to continue without interruption Auto Tray Switching ATS Select the tray size se...

Page 702: ...cted even when ATS functions 4 The selected tray will be displayed under Tray Priority as the tray key Touch to highlight the desired tray key under Tray Priority then change its priority by using the...

Page 703: ...User Setting Menu screen 2 Touch 01 System Setting 03 Feed Tray Setting and then 03 ATS Permit Setting 3 Touch On when ATS is used and Off when ATS is not used 4 Touch OK to complete the setting To c...

Page 704: ...e that is not specified with this function is designated to the tray that is automatically selected by ATS the machine indicates the paper type unmatched 1 Follow the procedure on page 16 3 to display...

Page 705: ...b Paper and Color Paper You may choose more than one key for each item Switch the displayed unit for weight by touching Unit Change 4 Touch OK to complete the setting To cancel the change touch Cancel...

Page 706: ...d the fun heater function for each tray 1 Follow the procedure on page 16 3 to display the User Setting Menu screen 2 Touch 01 System Setting 03 Feed Tray Setting and then 05 Dehumidification Fan 3 To...

Page 707: ...Oc CS620 CS650 Pro 16 15 4 Touch OK to complete the setting To cancel the change touch Cancel In either case the Feed Tray Setting Menu screen will be restored 5 If further changes are required touch...

Page 708: ...o the initial screen without selecting any key on the touch panel or the control panel Use this setting mode to specify the period of time to be elapsed before Auto Reset is activated 1 Follow the pro...

Page 709: ...6 Oc CS620 CS650 Pro 16 17 4 Touch OK to complete the setting To cancel the change touch Cancel In either case the Reset Setting Menu screen will be restored 5 If further changes are required touch th...

Page 710: ...ode can be changed to Finisher Mode by Full auto as required Mode memory auto call Specify the subsequent operation when selecting Initial for the Reset button function Select OFF to reset to the init...

Page 711: ...hen 02 Mode Reset Setting 3 Touch the desired key to each item on the left side of the screen There are two setting screens Touch Next and Previous to switch between the screens 4 Touch OK to complete...

Page 712: ...turned on Machine The Machine Status screen will be displayed Job List The Job List screen will be displayed Copy Copy screen will be displayed 1 Follow the procedure on page 16 3 to display the User...

Page 713: ...6 Oc CS620 CS650 Pro 16 21 4 Touch OK to complete the setting To cancel the change touch Cancel In either case the System Setting Menu screen will be restored 5 If further changes are required touch t...

Page 714: ...Zoom2 is 2 000 and Preset Zoom3 is 0 500 1 Follow the procedure on page 16 3 to display the User Setting Menu screen 2 Touch 01 System Setting and then 06 Preset Zoom Setting 3 Touch the desired prese...

Page 715: ...6 Oc CS620 CS650 Pro 16 23 4 Touch OK to complete the setting To cancel the change touch Cancel In either case the System Setting Menu screen will be restored 5 If further changes are required touch t...

Page 716: ...and select the interval of time that must elapse before Auto Low Power and Auto Shut Off Auto Low Power 5 min 10 min 15 min 30 min 60 min 90 min 120 min 240 min Auto Shut Off 30 min 60 min 90 min 120...

Page 717: ...arrow keys and in each area to select a specific waiting period before activating Auto Low Power 5 Select the interval of time that must elapse before turning to Auto Shut Off automatically The initia...

Page 718: ...iod of time as Auto Shut Off is selected for Auto Low Power Auto Shut Off will function instead of Auto Low Power 2 Note If the period of time selected for Auto Shut Off is shorter than that of for Au...

Page 719: ...16 3 to display the User Setting Menu screen 2 Touch 01 System Setting and then 08 Time and Date Setting 3 Adjust the time The time indicated by the machine is displayed in the upper line and ordered...

Page 720: ...function follow the procedure below Touch Diff time setting to display the Difference in Time Setting screen Touch to display when the local time is earlier than the Universal time or when the local t...

Page 721: ...key sound as touching the screen and also select the buzzer volume 02 Buzzer for Job Stop Set Select the duration of the buzzer sound when the machine stops due to no paper and mishandled paper 1 Foll...

Page 722: ...as desired Touch Small or Big to regulate the buzzer volume of the touch keys Touch Off to highlight it The buzzer will go off 4 Touch OK to complete the setting To cancel the change touch Cancel In e...

Page 723: ...16 31 6 Select the desired time to highlight it 7 Touch OK to complete the setting To cancel the change touch Cancel In either case the Buzzer Setting Menu screen will be restored 8 If further changes...

Page 724: ...the procedure on page 16 3 to display the User Setting Menu screen 2 Touch 01 System Setting and then 10 Key Response Time 3 Select the desired time to highlight it 4 Touch OK to complete the setting...

Page 725: ...en and under Quality Adjust on the Scan Settings screen of the Scanner screen for easy access to the desired setting screens Short Cut Display under Quality Adjust on the Copy screen can also be chang...

Page 726: ...ouch appropriate keys to select up to 3 short cuts for Application 4 Touch OK to complete the setting The Short Cut Key Setting Menu screen will be restored 5 To set short cut keys to be displayed und...

Page 727: ...rt cut keys to be displayed under Quality Adjust on the Scan Settings screen of the Scanner screen touch 03 Quality Adjust Scanner to display the Short cut Key Setting screen Quality Touch appropriate...

Page 728: ...n to Density Setting Display touch 04 Quality Adjust Area Set to display the Short cut Key Setting screen Quality Select either Short Cut Display or Density Setting Display 10 Touch OK to complete the...

Page 729: ...device or not and select the keyboard type if the service port device is used 1 Follow the procedure on page 16 3 to display the User Setting Menu screen 2 Touch 01 System Setting and then 12 Service...

Page 730: ...o complete the setting To cancel the change touch Cancel In either case the System Setting Menu screen will be restored 5 If further changes are required touch the desired key 2 Note When using the se...

Page 731: ...pecify the copy conditions set here to be used as the initial setting when the Reset function is used select User Setting 01 System Setting 04 Reset Setting 02 Mode Reset Setting and then select Initi...

Page 732: ...Appli Simplex Duplex Paper Setting and Rotation On Off Follow the same procedure as setting it on the Copy screen Touch ADF to select the ADF mode as the initial setting 4 Touch OK to complete the set...

Page 733: ...d To specify the scanning conditions set here to be used as the initial setting when the Reset function is used select User Setting 01 System Setting 04 Reset Setting 02 Mode Reset Setting and then se...

Page 734: ...ust Scan Size Resolution and Default Server Follow the same procedure as setting it on the Copy screen Touch ADF to select the ADF mode as the initial setting 4 Touch OK to complete the setting To can...

Page 735: ...rve jobs in succession Copy on Copy off Printer on Printer off STOP Key Function Specify whether to pause or abort a job when Stop is pressed on the control pan el Job Temp Stop Job Stop Function Side...

Page 736: ...g 3 Touch the desired key to each item on the left side of the screen There are two setting screens Touch Next and Previous to switch between the screens 4 Touch OK to complete the setting To cancel t...

Page 737: ...propriate ratio for copying when detect ing the original size placed on the ADF On Off Non Image Area Erase of orig Specify the conditions to be applied to Non Image Area Erase of orig Yes APS AMS Ex...

Page 738: ...ion of the originals and printed sets each other On Off Choose Default Tray when APS Off Select the tray to be automatically selected when APS is released APS Tray Tray1 Tray2 Tray 3 Tray4 Tray5 Scan...

Page 739: ...3 Touch the desired key to each item on the left side of the screen There are five setting screens Touch Next and Previous to switch between the screens 4 Touch OK to complete the setting To cancel t...

Page 740: ...efault FTP Select the default file form when transmit ting to FTP Packaged TIFF Divid ed TIFF Packaged PDF JPEG File Form Default SMB Select the default file form when transmit ting in SMB Packaged TI...

Page 741: ...3 Touch the desired key to each item on the left side of the screen There are three setting screens Touch Next and Previous to switch between the screens 4 Touch OK to complete the setting To cancel t...

Page 742: ...Outline Enhance Feature Description Available options 01 Gray Text Outline En hance Select to enable gray text outline enhance ment for printing Strong Nor mal Weak 02 Thin Line Enhance ment Specify...

Page 743: ...51 3 Select the desired key to highlight it 4 Touch OK to complete the setting To cancel the change touch Cancel In either case the Printer Setting Menu screen will be restored 5 Touch 06 Printer Sett...

Page 744: ...6 Select the desired key to highlight it 7 Touch OK to complete the setting To cancel the change touch Cancel In either case the Printer Setting Menu screen will be restored 8 Touch 06 Printer Settin...

Page 745: ...6 53 9 Select the desired key to highlight it 10 Touch OK to complete the setting To cancel the change touch Cancel In either case the Printer Setting Menu screen will be restored 11 Touch 06 Printer...

Page 746: ...Pro 12 Select the desired key to highlight it 13 Touch OK to complete the setting To cancel the change touch Cancel In either case the Printer Setting Menu screen will be restored 14 If further change...

Page 747: ...than Line 1 when selecting Text Photo or Photo for image quality Line 2 Permission Prohibition Dot 1 Permission Prohibition Dot 2 Permission Prohibition 1 Follow the procedure on page 16 3 to display...

Page 748: ...56 Oc CS620 CS650 Pro 4 Touch OK to complete the setting To cancel the change touch Cancel In either case the Image Quality Setting Menu screen will be restored 5 If further changes are required touc...

Page 749: ...color Photo Line 1 Line 2 Dot 1 Dot 2 Compression Black Text Photo Line 1 Line 2 Dot 1 Dot 2 Compression Black Photo Line 1 Line 2 Dot 1 Dot 2 Compression Single Color Text Photo Line 1 Line 2 Dot 1...

Page 750: ...t There are six setting screens Touch Next and Previous to switch between the screens 4 Touch OK to complete the setting To cancel the change touch Cancel In either case the Image Quality Setting Menu...

Page 751: ...oto 3 Map 3 Photo 3 Text 3 1 Follow the procedure on page 16 3 to display the User Setting Menu screen 2 Touch 07 Image Quality Setting and then 03 Original Density shift 3 Display the required item u...

Page 752: ...60 Oc CS620 CS650 Pro 5 Touch OK to complete the setting To cancel the change touch Cancel In either case the Image Quality Setting Menu screen will be restored 6 If further changes are required touc...

Page 753: ...tified as monochrome or a monochrome original is identified as colored with this function 1 Follow the procedure on page 16 3 to display the User Setting Menu screen 2 Touch 07 Image Quality Setting a...

Page 754: ...is read as colored use the keypad to enter a lower value and then touch SET Available range 5 to 5 5 Repeat the adjustment steps from 3 to 4 until the desired result is obtained 6 Touch OK to complet...

Page 755: ...sword which the user has registered for user authentication The changed password is reflected to the user authentication setting description 1 Follow the procedure on page 16 3 to display the User Set...

Page 756: ...the change touch Cancel In either case the User Setting Menu screen will be restored 6 If further changes are required touch the desired key 2 Note Be sure to make the user authentication before acces...

Page 757: ...17 Machine administrator setting...

Page 758: ......

Page 759: ...the Touch Screen Adjustment screen when it is misaligned with the screen 17 1 Machine administrator setting outlines The top menu referred to as Utility Counter screen appears right after Utility Cou...

Page 760: ...trator setting 17 4 Oc CS620 CS650 Pro How to access the Machine Administrator Setting screen 1 Press the Utility Counter on the control panel The Utility menu screen will be displayed 2 Touch 03 Mach...

Page 761: ...trator setting 17 Oc CS620 CS650 Pro 17 5 If the Password Input screen is displayed enter the eight digit machine administrator password then touch OK The Machine Administrator Setting Menu screen wil...

Page 762: ...17 6 Oc CS620 CS650 Pro How to use Close layer keys and Exit Touch Close to return to the previous screen Touch the desired layer key on the left side area of the screen to jump to that screen Touch...

Page 763: ...e manually and select the interval of time that must elapse before Auto Low Power and Auto Shut Off Auto Low Power 5 min 10 min 15 min 30 min 60 min 90 min 120 min 240 min Auto Shut Off 30 min 60 min...

Page 764: ...ng 17 8 Oc CS620 CS650 Pro Power Save Setting screen will be displayed Detail The following operation is equivalent to selecting User Setting 01 System Setting 07 Power Save Setting Please refer to pa...

Page 765: ...e summer time is off 1 Follow the procedure on page 17 4 to display the Machine Administrator Setting Menu screen 2 Touch 01 System Setting and then 02 Time and Date Setting Time and Date Setting scre...

Page 766: ...is inserted into the socket the Weekly Timer is not operational when the power plug is disconnected while the data such as the On Off time settings are stored The power switch is turned on The curren...

Page 767: ...er On will enable the Weekly Timer The machine which is set to Weekly Timer On should have main and sub power supplies sustained Touching Weekly Timer Off will disable the Weekly Timer Power supply ca...

Page 768: ...e specified here Timer Action On Off Set see page 17 15 still needs to be specified in order to activate the timer meaning that for example setting On Off times for holidays here will not turn on the...

Page 769: ...than one can be selected at a time Enter the On time and Off time using the touch panel keypad and then touch Set after each entry Touch OK to restore the Weekly Timer On Off Time Setting screen 4 Ent...

Page 770: ...s to be specified in order to activate the timer meaning that for example setting On Off times for holidays here will not turn on the machine on those holidays Enter a two digit On hour ex 8 a m is 08...

Page 771: ...the On Off condition for specific days individually or collectively for all Mondays through Sundays of the given month 2 Note The default setting is collective On for mondays through saturdays and Off...

Page 772: ...hanged If any change is made in the collective setting area the Timer Action Change Confirmation popup screen will be displayed The settings specified collective to days of the weeks will supersede se...

Page 773: ...ing 17 Oc CS620 CS650 Pro 17 17 5 Touch OK to complete the setting To cancel the change touch Cancel In either case the Weekly Timer Setting Menu screen will be restored 6 If further changes are requi...

Page 774: ...is function is designated to the tray that is automatically selected by ATS the machine indicates the paper type unmatched 2 Note The Lunch Hour Off Setting does not apply to the time during which the...

Page 775: ...sing the touch panel keypad and touch OK then enter Restart time and touch Set Touch Function Invalid to deactivate the Lunch Hour Off function 4 Touch OK to complete the setting To cancel the change...

Page 776: ...mer Interrupt function 1 Follow the procedure on page 17 4 to display the Machine Administrator Setting Menu screen 2 Touch 01 System Setting 03 Weekly Timer Setting and then 05 Timer Interrupt Passwo...

Page 777: ...nges are required touch the desired key 2 Note When the password setting is 0000 Timer Interrupt can be used simply by pressing Power Save on the control panel then on In this case you will be asked t...

Page 778: ...delete a mode memory that has been programmed The settings of a locked mode memory cannot be changed 1 Follow the procedure on page 17 4 to display the Machine Administrator Setting Menu screen 2 Touc...

Page 779: ...ntered will not lock the key and will not display the lock mark 5 Delete a mode memory Touch the Mode memory number you want to delete Use the arrow keys to scroll to the desired Job number if require...

Page 780: ...ttings Change Send Address Permit prohibit to enter send address manually on the Scanner screen Change User Lens Mode Permit prohibit to alter already programmed magnification ratio Change Program Ima...

Page 781: ...7 25 3 Touch to highlight Permission or Prohibition for each item 4 Touch OK to complete the setting To cancel the change touch Cancel In either case the Reset Setting Menu screen will be restored 5 I...

Page 782: ...it to transmit scanned data to the following device E Mail HDD FTP SMB QUEUE Manual Input 1 Follow the procedure on page 17 4 to display the Machine Administrator Setting Menu screen 2 Touch 01 System...

Page 783: ...17 Oc CS620 CS650 Pro 17 27 4 Touch OK to complete the setting To cancel the change touch Cancel In either case the Operation Prohibit Setting Menu screen will be restored 5 If further changes are re...

Page 784: ...on the Copy screen 1 Follow the procedure on page 17 4 to display the Machine Administrator Setting Menu screen 2 Touch 01 System Setting 05 Expert Adjustment and then 01 AES Level Adjustment 3 Touch...

Page 785: ...Machine administrator setting 17 Oc CS620 CS650 Pro 17 29 5 If further changes are required touch the desired key...

Page 786: ...side area of the original On APS AMS Only Set the machine to delete the outside area of the original only when APS or AMS is activated Except Orig Glass 1 1 Set the machine to delete the outside area...

Page 787: ...reen 2 Touch 01 System Setting 05 Expert Adjustment and then 02 Erase Adjustment The Erase Adjustment Menu screen will be displayed 3 Touch 01 Non Image Area Erase Touch the desired key to highlight i...

Page 788: ...e original glass for either mode Touch any key from five exposure levels to manually select the density level 6 Touch OK to complete the setting To cancel the change touch Cancel In either case the Er...

Page 789: ...tting 17 Oc CS620 CS650 Pro 17 33 8 Touch OK to complete the setting To cancel the change touch Cancel In either case the Expert Adjustment Menu screen will be restored 9 If further changes are requir...

Page 790: ...uivalent to selecting Adjustment 01 Machine Adjustment 01 Printer Adjustment 01 Restart Timing Adjustment on the Machine Status screen 2 Reminder Perform this adjustment after completing FD Mag Adjust...

Page 791: ...Machine administrator setting 17 Oc CS620 CS650 Pro 17 35 The Restart Timing Adjustment screen will be displayed Detail Please refer to page 14 6 for the details on the subsequent operations...

Page 792: ...paper feed This operation is equivalent to selecting Adjustment 01 Machine Adjustment 01 Printer Adjustment 02 Centering Adjustment on the Machine Status screen 1 Follow the procedure on page 17 4 to...

Page 793: ...Machine administrator setting 17 Oc CS620 CS650 Pro 17 37 Detail Please refer to page 14 6 for the details on the subsequent operations...

Page 794: ...aper feed This operation is equivalent to selecting Adjustment 01 Machine Adjustment 01 Printer Adjustment 03 FD Mag Adjustment on the Machine Status screen 1 Follow the procedure on page 17 4 to disp...

Page 795: ...Machine administrator setting 17 Oc CS620 CS650 Pro 17 39 Detail Please refer to page 14 22 for the details on the subsequent operations...

Page 796: ...on of paper feed This operation is equivalent to selecting Adjustment 01 Machine Adjustment 01 Printer Adjustment 04 CD Mag Adjustment on the Machine Status screen 1 Follow the procedure on page 17 4...

Page 797: ...Machine administrator setting 17 Oc CS620 CS650 Pro 17 41 Detail Please refer to page 14 11 for the details on the subsequent operations...

Page 798: ...of image erase from the edge of the sheet 1 Follow the procedure on page 17 4 to display the Machine Administrator Setting Menu screen 2 Touch 01 System Setting 05 Expert Adjustment 03 Printer Adjustm...

Page 799: ...ILITY tab The Lead Edge Erase Adjustment screen will be restored 7 Touch to specify the value to be positive or negative Use the touch panel keypad to enter the desired adjustment value then touch SET...

Page 800: ...loop based on a paper feed unit a bypass tray and ADU 1 Follow the procedure on page 17 4 to display the Machine Administrator Setting Menu screen 2 Touch 01 System Setting 05 Expert Adjustment 03 Pri...

Page 801: ...ent screen will be restored 7 Display the required item using up down arrow keys and touch it 8 Touch to specify the value to be positive or negative Use the touch panel keypad to enter the desired ad...

Page 802: ...ster based on paper feed tray a bypass tray and ADU 1 Follow the procedure on page 17 4 to display the Machine Administrator Setting Menu screen 2 Touch 01 System Setting 05 Expert Adjustment 03 Print...

Page 803: ...istration Adjustment screen will be restored 7 Touch the required item key 8 Touch to specify the value to be positive or negative Use the touch panel keypad to enter the desired adjustment value then...

Page 804: ...finisher This operation is equivalent to selecting Adjustment 04 Finisher Adjustment on the Machine Status screen 1 Follow the procedure on page 17 4 to display the Machine Administrator Setting Menu...

Page 805: ...Machine administrator setting 17 Oc CS620 CS650 Pro 17 49 Detail Please refer to page 14 23 for the details on the subsequent operations...

Page 806: ...This operation is equivalent to selecting Adjustment 01 Machine Adjustment 02 Scanner Adjustment on the Machine Status screen 1 Follow the procedure on page 17 4 to display the Machine Administrator S...

Page 807: ...Machine administrator setting 17 Oc CS620 CS650 Pro 17 51 Detail Please refer to page 14 14 for the details on the subsequent operations...

Page 808: ...stcard 1 Follow the procedure on page 17 4 to display the Machine Administrator Setting Menu screen 2 Touch 01 System Setting 05 Expert Adjustment 06 Process Adjustment and then 01Front Back Density 3...

Page 809: ...Machine administrator setting 17 Oc CS620 CS650 Pro 17 53 5 Touch Return to restore the Process Adjustment Menu screen 6 If further changes are required touch the desired key...

Page 810: ...procedure on page 17 4 to display the Machine Administrator Setting Menu screen 2 Touch 01 System Setting 05 Expert Adjustment 06 Process Adjustment and then 02 Toner Density Sensor 3 Touch Start to d...

Page 811: ...Follow the procedure on page 17 4 to display the Machine Administrator Setting Menu screen 2 Touch 01 System Setting 05 Expert Adjustment 06 Process Adjustment and then 03 Toner Quality Exposure 3 To...

Page 812: ...at the adjustment steps from 3 to 4 until the desired result is obtained 6 Touch OK to complete the setting To cancel the change touch Cancel In either case the Process Adjustment Menu screen will be...

Page 813: ...ally adjust the CMYK values separately for Line 1 Line 2 Dot 1 Dot 2 CONTONE and ED 1 Follow the procedure on page 17 4 to display the Machine Administrator Setting Menu screen 2 Touch 01 System Setti...

Page 814: ...ill be restored 5 Touch Next or Previous to display the relevant screen on which you want to make adjustments 6 Touch to highlight Y M C or K as required and enter values using the screen keypad then...

Page 815: ...ot 2 CONTONE and ED 2 Note Be sure to out put the chart in Printer Gamma Offset Adj in order to check the printed position of the chart both before and after operating Printer Gamma Offset Auto Adj 1...

Page 816: ...reen will be displayed 4 Select A4 v 8 5 e 11 v paper then press START on the control panel The test chart will be output The Printer Gamma Offset Automatic Adjustment screen will be restored 5 Touch...

Page 817: ...ror code Error 1 2 or 10 is displayed check that the test chart is placed properly If any other error code is displayed please contact your service representative 8 If you want to make readjustments p...

Page 818: ...gamma sensor Adjust Line 1 Line 2 Dot 1 Dot 2 CONTONE and ED 1 Follow the procedure on page 17 4 to display the Machine Administrator Setting Menu screen 2 Touch 01 System Setting 05 Expert Adjustment...

Page 819: ...ginal glass Place the test chart face down on the original glass with green arrow pointing at the left side as shown below and put about 10 sheets of blank copy paper on top of the chart Close the ADF...

Page 820: ...st or not 9 Repeat the adjustment steps from 3 to 8 until the desired result is obtained Touching Adj data reset will display the Reset Confirmation popup menu Touch YES to reset the adjustment value...

Page 821: ...s whose priority is set to image quality stability The selection of Speed or Stability here is equivalent to selecting Adjustment 02 Image Quality Stability on the Machine Status screen 1 Follow the p...

Page 822: ...ment operations can be set to the jobs whose priority is set to Stability 5 Touch OK to complete the setting To cancel the change touch Cancel In either case the Quality Adjustment Menu screen will be...

Page 823: ...creen type has been changed gamma automatic adjustment will be performed after returning to the user mode After completing gamma automatic adjustment please perform printer gamma offset adjustment aga...

Page 824: ...setting To cancel the change touch Cancel To cancel the change touch Cancel 5 If screen type was changed touch Exit on the Quality Adjustment screen to display the Copy screen The gamma automatic adju...

Page 825: ...esh Mode This operation is equivalent to selecting Adjustment 03 Execute Adjust Operation on the Machine Status screen 1 Follow the procedure on page 17 4 to display the Machine Administrator Setting...

Page 826: ...setting 17 70 Oc CS620 CS650 Pro 4 Touch OK to complete the operation To cancel the change touch Cancel In either case the Expert Adjustment Menu screen will be restored 5 If further changes are requi...

Page 827: ...ode memory User management list Home position settings selected by user Use management list Information controlled by user authentication or division authentication Font pattern list Font patterns use...

Page 828: ...to display the Copy screen Press Start on the control panel to start printing the selected list To suspend printing press Stop Touch UTILITY tab to return to the List Print screen 5 Touch Return to r...

Page 829: ...the minimum original size to be detected on the original glass K Size Specify whether to use the K size for instance 8K and 16K ADF Orig Glass Priority Identify the standard sizes to be detected on th...

Page 830: ...Pro The Size Setting Menu screen will be displayed 3 Touch 01 Orig Glass Size Detect Touch the desired key to highlight it 4 Touch OK to complete the setting To cancel the change touch Cancel In eith...

Page 831: ...uch OK to complete the setting To cancel the change touch Cancel In either case the Size Setting Menu screen will be restored 7 Touch 03 Orig Glass Minimum Detect Touch the desired size key to highlig...

Page 832: ...OK to complete the setting To cancel the change touch Cancel In either case the Size Setting Menu screen will be restored 11 Touch 05 ADF Orig Glass Priority Touch the desired size key to highlight it...

Page 833: ...3 Touch 06 PI Size Priority Touch the desired size key to highlight it 14 Touch OK to complete the setting To cancel the change touch Cancel In either case the Size Setting Menu screen will be restore...

Page 834: ...er the machine administrator name and the extension number which are displayed on the left side of the Utility Counter screen 1 Follow the procedure on page 17 4 to display the Machine Administrator S...

Page 835: ...el keypad The five digit numbers including a hyphen can be entered When the extension number is below five digits enter hyphens to make it five If the hyphen is entered as the first number it is displ...

Page 836: ...ting scanned data 01 Address Edit Add change or delete the destination of the scanned image The following four addresses can be registered E Mail mail address HDD box No FTP FTP server address SMB The...

Page 837: ...d the E Mail destination address Touch E Mail and touch Add to display the Input Destination Address screen Touch Address and display the screen for input Repeat this operation for Register Name and S...

Page 838: ...arrow keys and to display the Register Name to be changed and touch to highlight it Touch Change to display the Input Destination Address screen Select the changing item from Address Register name and...

Page 839: ...Register Name to be deleted and touch to highlight it Touch Delete The Delete Confirmation popup screen will be displayed Touch Yes To suspend deleting touch No Touch OK to restore the Register Edit D...

Page 840: ...Off Touch OK to restore the Register Edit Destination Address screen To change the HDD destination address Touch HDD Touch the search key Other Common or the arrow keys and to display the Register Nam...

Page 841: ...screen To delete the HDD destination address Touch HDD Touch the search key Other Common or the arrow keys and to display the Register Name to be deleted and touch to highlight it Touch Delete The Del...

Page 842: ...Destination Address screen Touch Register Name and display the screen for input Repeat this operation for Search Character Host Address File Path Login Name and Password Touch Anonymous to log in as...

Page 843: ...Name to be changed and touch to highlight it Touch Change to display the Input Destination Address screen Select the changing item from Register Name Search Character Host Address File Path Login Nam...

Page 844: ...FTP Touch the search key Other Common or the arrow keys and to display the Register Name to be deleted and touch to highlight it Touch Delete The Delete Confirmation popup screen will be displayed To...

Page 845: ...ation address Touch SMB and touch Add to display the Input Destination Address screen Touch Register Name and display the screen for input Repeat this operation for Search Character Host Address File...

Page 846: ...splay the Register Name to be changed and touch to highlight it Touch Change to display the Input Destination Address screen Select the changing item from Register Name Search Character Host Address F...

Page 847: ...o display the Register Name to be deleted and touch to highlight it Touch Delete The Delete Confirmation popup screen will be displayed Touch Yes To suspend deleting touch No Touch OK to restore the R...

Page 848: ...arrow keys and to display the Register Name to be changed and touch to highlight it More than one can be selected at a time Repeat this operation for HDD FTP and SMB Multiple selection of HDD FTP or...

Page 849: ...Name to be changed and touch to highlight it Touch Change to display the Destination List screen Touch E Mail HDD FTP or SMB to select the item to modify and make appropriated changes on the relevant...

Page 850: ...roup Touch Group Touch the arrow keys and to display the Register Name to be deleted and touch to highlight it Touch Delete The Delete Confirmation popup screen will be displayed Touch Yes To suspend...

Page 851: ...a by e mail 1 Follow the procedure on page 17 4 to display the Machine Administrator Setting Menu screen 2 Touch 01 Scanner Send Address and then 02 E Mail Title Setting The E Mail Title Setting scree...

Page 852: ...setting 17 96 Oc CS620 CS650 Pro 4 Touch OK to complete the setting To cancel the change touch Cancel In either case the Scan Send Address Menu screen will be restored 5 If further changes are requir...

Page 853: ...anner Send Address and then 03 E Mail Text Setting 3 Input the E Mail text Touch an appropriate key by selecting from 1 to 5 to display the screen to input appropriate body text and then touch OK 4 To...

Page 854: ...s set to Connected Section Authentication is not required to enter User Distribute Number Enter the number of user authentication The total number of authentication to be distributed is 1 000 for both...

Page 855: ...d then 01 Authentication Method The Authentication Method Setting screen will be displayed 3 Select the desired key on the right side of User Authentication Public User Account Track Account Track Aut...

Page 856: ...then select the desired key on the right side of Upper Limit Achieve Movement 6 Touch OK to complete the setting To cancel the change touch Cancel In either case the User Auth Account Track Menu scre...

Page 857: ...user names section names registered in the unit will be displayed so you can set a user name section name simply by selecting from the list Also the functions available and output quantity to authenti...

Page 858: ...y to specify the copy functions which you want to make available to the user after authentication Selecting Individual in the Management System enables the upper limit to be separately specified for c...

Page 859: ...ng 17 Oc CS620 CS650 Pro 17 103 5 Touch OK to complete the setting To cancel the change touch Cancel In either case the User Authentication Setting screen will be restored 6 If further changes are req...

Page 860: ...d limit value to each number etc The registered user setting is listed on the screen Select the user setting from the list and change or delete the setting 1 Follow the procedure on page 17 4 to displ...

Page 861: ...Change Registered User screen Touch User Name to display the input screen Enter the user name and touch OK You may enter 64 letters for the user name For the details on entering texts in the input sc...

Page 862: ...it Set to display the Upper Limit Setting screen Touch an appropriate key to specify the copy functions which you want to make available to the user after authentication Selecting Individual in the Ma...

Page 863: ...to display the input screen Enter the user name and touch OK You may enter eight letters for the section name For the details on entering texts in the input screen see 26 Appendix Touch Password to d...

Page 864: ...the Management System enables the upper limit to be separately specified for color output and black output Touch Upper to display the keypad which can be used to enter the upper limit Touch Copy Scann...

Page 865: ...CS620 CS650 Pro 17 109 To delete user settings Touch Next or Previous to display the user name to be deleted and touch to highlight it Touch Delete to display the Delete Confirmation popup menu Touch...

Page 866: ...per Limit Set to display the Upper Limit Setting screen Touch an appropriate key to specify the copy functions which you want to make available to all users after authentication Selecting Individual i...

Page 867: ...Machine administrator setting 17 Oc CS620 CS650 Pro 17 111 4 Touch Return to restore the Machine Administrator Setting Menu screen 5 If further changes are required touch the desired key...

Page 868: ...opying scanning and printing for authenticated users and public users or reset these counters collectively 1 Follow the procedure on page 17 4 to display the Machine Administrator Setting Menu screen...

Page 869: ...ame to reset the counter and touch to highlight it Touch Public to reset the counter of the public user The Counter List screen will be displayed Touch Delete to display the Delete Confirmation popup...

Page 870: ...user counter uniformly Touch Clear Package to display the All Reset Counter Confirmation popup menu Touch Yes to reset or touch No to cancel 4 Touch Return to restore the User Authentication Setting...

Page 871: ...alue to each number The registered section management setting is listed on the screen Select the section management setting from the list and change or delete the setting 1 Follow the procedure on pag...

Page 872: ...letters for the section name For the details on entering texts in the input screen see How to input characters on page 26 3 Touch Password to display the input screen Enter the password and touch OK Y...

Page 873: ...ate key to specify the copy functions which you want to make available to the account after authentication Selecting Individual in the Management System enables the upper limit to be separately specif...

Page 874: ...nter the section name and touch OK You may enter eight letters for the section name For the details on entering texts in the input screen see How to input characters on page 26 3 Touch Password to dis...

Page 875: ...the Upper Limit Setting screen Touch an appropriate key to specify the copy functions which you want to make available to the account after authentication Selecting Individual in the Management System...

Page 876: ...S620 CS650 Pro To delete registered section settings Touch Next or Previous to display the section name to be deleted and touch to highlight it Touch Delete to display the Delete Confirmation popup me...

Page 877: ...per Limit Set to display the Upper Limit Setting screen Touch an appropriate key to specify the copy functions which you want to make available to all users after authentication Selecting Individual i...

Page 878: ...17 Machine administrator setting 17 122 Oc CS620 CS650 Pro 4 Touch Return to restore the Machine Administrator Setting Menu screen 5 If further changes are required touch the desired key...

Page 879: ...ing scanning and printing for authenticated accounts and public users or reset these counters collectively 1 Follow the procedure on page 17 4 to display the Machine Administrator Setting Menu screen...

Page 880: ...to reset the counter To reset counter individually Touch Delete to display the Delete Confirmation popup menu Touch Yes to delete or touch No to cancel Touch Yes to display the screen to select the co...

Page 881: ...Pro 17 125 Touch Clear Package to display the All Reset Counter Confirmation popup menu Touch Yes to reset or touch No to cancel 4 Touch Return to restore the Account Track Setting Menu screen 5 If fu...

Page 882: ...e without user authentication or account track 1 Follow the procedure on page 17 4 to display the Machine Administrator Setting Menu screen 2 Touch 04 User Auth Account Track and then 04 Without Authe...

Page 883: ...17 Oc CS620 CS650 Pro 17 127 4 Touch OK to complete the setting To cancel the change touch Cancel In either case the User Auth Account Track Setting screen will be restored 5 If further changes are r...

Page 884: ...e NIC Setting Control the NIC settings such as the IP address and line speed of the machine 1 Follow the procedure on page 17 4 to display the Machine Administrator Setting Menu screen 2 Touch 05 Netw...

Page 885: ...inue in this manner IP Address Enter the IP address of the machine Subnet Mask Enter the subnet mask Gateway Address Enter the gateway address Line Speed Setting Specify the line speed of the network...

Page 886: ...7 4 to display the Machine Administrator Setting Menu screen 2 Touch 05 Network Setting and then 02 E Mail Initial Setting The E Mail Initial Setting screen will be displayed 3 Specify the following i...

Page 887: ...tting 17 Oc CS620 CS650 Pro 17 131 4 Touch OK to complete the setting To cancel the change touch Cancel In either case the Network Setting Menu screen will be restored 5 If further changes are require...

Page 888: ...ontinuation print Set the machine to output multiple reserve jobs in succession Copy on Copy off Printer on Printer off STOP Key Function Specify whether to pause or abort a job when Stop is pressed o...

Page 889: ...re on page 17 4 to display the Machine Administrator Setting Menu screen 2 Touch 06 Common Setting The Common Setting screen will be displayed Detail The following operation is equivalent to selecting...

Page 890: ...Off ADF AMS Set the machine to automatically select an appropriate ratio for copying when detect ing the original size placed on the ADF On Off Non Image Area Erase of orig Specify the conditions to...

Page 891: ...g di rection of the originals and printed sets each other On Off Choose Default Tray when APS Off Select the tray to be automatically selected when APS is released APS Tray Tray1 Tray2 Tray 3 Tray4 Tr...

Page 892: ...edure on page 17 4 to display the Machine Administrator Setting Menu screen 2 Touch 07 Copy Setting The Copy Setting screen will be displayed Detail The following operation is equivalent to selecting...

Page 893: ...Packaged TIFF Divid ed TIFF Packaged PDF JPEG File Form Default FTP Select the default file form when transmit ting to FTP Packaged TIFF Divid ed TIFF Packaged PDF JPEG File Form Default SMB Select t...

Page 894: ...edure on page 17 4 to display the Machine Administrator Setting Menu screen 2 Touch 08 Scan Setting The Scan Setting screen will be displayed Detail The following operation is equivalent to selecting...

Page 895: ...or maintenance Your service representative is monitoring the machine status as needed basis The monitored information will be useful for maintenance 1 Follow the procedure on page 17 4 to display the...

Page 896: ...17 Machine administrator setting 17 140 Oc CS620 CS650 Pro 4 Touch Return to restore the System Connection Menu screen 5 If further changes are required touch the desired key...

Page 897: ...01 Administrator Password Set the new machine administrator password 1 Follow the procedure on page 17 4 to display the Machine Administrator Setting Menu screen 2 Touch 10 Security Setting and then...

Page 898: ...42 Oc CS620 CS650 Pro 3 Enter the new password 4 Touch OK to complete the setting To cancel the change touch Cancel In either case the Security Setting Menu screen will be restored 5 If further change...

Page 899: ...e Security Strengthen mode is set to On 1 Follow the procedure on page 17 4 to display the Machine Administrator Setting Menu screen 2 Touch 10 Security Setting and then 02 Change HDD Lock Password Th...

Page 900: ...Input screen Enter the new password and touch OK Touch Check Input to enter the same new password then touch OK 5 Touch OK to complete the setting To cancel the change touch Cancel In either case the...

Page 901: ...isplay the Machine Administrator Setting Menu screen 2 Touch 10 Security Setting and then 01 Administrator Password The Overwrite screen will be displayed 3 Touch Yes or No 4 Touch OK to complete the...

Page 902: ...your service representative to set a CE password and a machine administrator password to your machine 1 Follow the procedure on page 17 4 to display the Machine Administrator Setting Menu screen 2 To...

Page 903: ...ight side of the screen to display the Confirmation popup screen 5 Touch Yes to complete the setting The machine power will be turned off then on Touch No to cancel the setting Touch Cancel at the low...

Page 904: ...17 Machine administrator setting 17 148 Oc CS620 CS650 Pro...

Page 905: ...18 Touch Screen adjustment...

Page 906: ......

Page 907: ...trol panel keypad with the Utility menu screen displayed Service can set the machine to forbid users to access this function from the menu and to display the Touch Screen Adjustment screen only when p...

Page 908: ...econd line If the coordinates fall out of the range of the standard value repeat the adjustment procedure or contact your service representative 5 Touch each Check Button at the upper left and lower r...

Page 909: ...19 Web Utilities setting...

Page 910: ......

Page 911: ...onal printer controller Setting Data Import Export Transmit the setting data from the machine to a PC export using the web browser then return the data to the machine import Prerequisites Browser Inte...

Page 912: ...ser 1 Turn on the power to the PC connected with the machine over a network 2 Activate the web browser then select Open from the File menu 3 Enter the URL http IP address or host name of the machine t...

Page 913: ...k Data Change or delete the account track data password section name or limit value or reset the counters 2 Reminder The volume track setting is available only when the machine is under the following...

Page 914: ...x and an 8 digit administrator in the password text box then click on OK The Machine Manager Setting menu will be displayed 4 Click on Volume Track setting The Volume Track Setting menu will be displa...

Page 915: ...ters Password Up to 8 characters Name Up to 20 characters Upper Limit Setting Color Up to 99999999 Black Up to 99999999 Only effect Individual Management Management System Total Management Individual...

Page 916: ...he registered content will be displayed in the window The new account track data will be transmitted to the machine immediately so that is valid for the user operations 8 Click on Back to return to th...

Page 917: ...error message displayed in the window Max 1 000 account entries can be registered An error message will be displayed if the above limit is exceeded An error message may be displayed when the data ent...

Page 918: ...the Web Utilities window 2 Click on Machine Manager Setting The Enter Network Password dialogue box will be displayed 3 Enter admin in the User Name text box and an 8 digit administrator password in...

Page 919: ...Utilities setting 19 Oc CS620 CS650 Pro 19 11 4 Click on Volume Track setting The Volume Track Setting menu will be displayed 5 Click on Volume Track data list The Volume Track Data List will be displ...

Page 920: ...19 Web Utilities setting 19 12 Oc CS620 CS650 Pro 6 Change the Volume Track Data Click on the number of the data to be edited The Volume Track Data Change window will be displayed...

Page 921: ...Output Permission or Useable Function as desired For details in entering procedure refer to page 8 6 Click on Registration The edited content will be displayed in the window The edited data will be tr...

Page 922: ...s to select the account track data of the counter to be cleared If all the counters are to be cleared click on Select All Click on the radio button a white circle heading the Copy Printer Count reset...

Page 923: ...S620 CS650 Pro 19 15 Click on Apply to immediately reset the counters to zero The message Setting was changed will be displayed Click on Back to return to the Account Track Data List or any menu item...

Page 924: ...elect the account track data to be deleted If all the data are to be cleared click on Select All Click on the radio button a white circle heading the Delete Except for Another user count Click on Appl...

Page 925: ...Oc CS620 CS650 Pro 19 17 The message Setting was deleted will be displayed Click on Back to return to the Volume Track Data List or any menu item to jump to the desired window 9 Save Counter Click on...

Page 926: ...19 Web Utilities setting 19 18 Oc CS620 CS650 Pro Click on Save...

Page 927: ...data then click on Save 2 Note The account track data will be stored in CSV format The data cannot be saved while the machine is in operation In this case try this procedure again after the machine st...

Page 928: ...19 Web Utilities setting 19 20 Oc CS620 CS650 Pro Example Account track data list stored as a file The Public User will be stored by the name of PUBLIC in the last line...

Page 929: ...Panel functions Touch panel screens can be displayed on the web browser and operated using a mouse Control panel keys can be displayed on the web browser and operated using a mouse Passwords can be en...

Page 930: ...t administrator password in the password text box then click on OK The Administrator Setting menu will be displayed 4 Click on Remote Panel setting The Remote Panel Setting menu will be displayed 5 Sp...

Page 931: ...Oc CS620 CS650 Pro 19 23 6 Click on Registration The IP address will be applied to the machine immediately so that is valid for the user operations 7 Click on Administrator Setup Menu to restore the A...

Page 932: ...you cannot newly register an E mail HDD FTP SMB address or group the entries The Scan transmission setting key appears in the Scan Transmission Setting window only when the optional Image Controller i...

Page 933: ...er admin in the User Name text box and an 8 digit administrator password in the password text box then click on OK The Administrator Setting menu will be displayed 4 Click on Scan transmission setting...

Page 934: ...19 Web Utilities setting 19 26 Oc CS620 CS650 Pro 5 Register the E Mail HDD FTP and SMB as required...

Page 935: ...e entry The registered content will be displayed Click on Back to return to the Scan Transmission Setting window 7 Display the Entry List Click on Entry List of the desired item under the entry box to...

Page 936: ...of the desired item as described in step 7 Click on the entry name to be changed The window for changing the selected item will be displayed Change the contents as desired then click on Registration...

Page 937: ...heck box in the Delete column of the item to be deleted then click on Delete If all the data are to be cleared click on Select All The window for deleting the selected item will be displayed Confirm t...

Page 938: ...itted to a PC being converted to a file type for batch processing can be edited efficiently and returned to the machine The file transmitted to a PC normally contains the four data types mentioned abo...

Page 939: ...Enter Network Password dialogue box will be displayed 3 Enter admin in the User Name text box and an 8 digit administrator password in the password text box then click on OK The Machine Manager Setti...

Page 940: ...lities setting 19 32 Oc CS620 CS650 Pro 5 Export the machine setting file Select the desired file type from the pull down menu then click on Export The File Download dialogue box will be displayed Cli...

Page 941: ...splayed when the saving operation is completed Click on Close 6 Edit the machine setting file The machine setting file transmitted to a PC is a TAB separated text file which can be edited using an app...

Page 942: ...te the machine setting file to be imported then click on Import The result message will be displayed when the registration is completed 2 Note The file cannot be accessed when the machine is operating...

Page 943: ...file Data size is too large Confirm that the data is the machine setting file Check if the file size exceeds 100 000 bytes The data cannot be registered Check if inappropriate description is made in...

Page 944: ...ark DAILY USE with 1 or DAILY NOT USE with 0 in each column HDD data setting file Begin the file name with IP_HDD A line should include NAME NUMBER REFERENCE or DAILY separated by a tab NAME should be...

Page 945: ...EPATH LOGINNAME PASSWORD REFERENCE or DAILY being separated by a tab NAME should be 24 bytes or less ADDRESS should be 63 bytes or less FILEPATH should be 96 bytes or less LOGINNAME should be 47 bytes...

Page 946: ...19 Web Utilities setting 19 38 Oc CS620 CS650 Pro...

Page 947: ...20 Security functions...

Page 948: ......

Page 949: ...ftware Image control program version mentioned above can be confirmed by using the service representative CE service mode ROM version display function When you display the firmware version the Image c...

Page 950: ...ual so that users can have a safe operating environment Your machine administrator is the only one who can turn the Security Strengthen mode ON and OFF and make other changes and your service represen...

Page 951: ...l ability and experience as a machine administrator to whom to delegate administration of the device Guarantee of service representative CE A supervisor or a machine administrator can use Security Str...

Page 952: ...20 Security functions 20 6 Oc CS620 CS650 Pro...

Page 953: ...21 Security strengthen mode...

Page 954: ......

Page 955: ...operation and results of the operation will be saved enabling analysis of unauthorized access This log will be overwritten if the audit area is depleted Machine Administrator authentication A service...

Page 956: ...gthen mode The data protected by Security Strengthen mode is the document data stored in the machin To turn security strengthen mode on off The machine administrator can turn Security Strengthen mode...

Page 957: ...22 Machine administrator security functions...

Page 958: ......

Page 959: ...ve to set up a Machine Administrator password To change this password the machine administrator himself should operate the procedure described in chapter 17 Machine administrator setting To protect da...

Page 960: ...d or fewer than 8 alphanumerical characters are entered and the OK key is touched the warning message Password does not match will appear and no key will work for five seconds Enter the right password...

Page 961: ...ons 22 Oc CS620 CS650 Pro 22 5 3 Enter the password Use the touch screen keypad to enter the 8 digit Machine Administrator password then touch OK The Machine Administrator Setting Menu screen will be...

Page 962: ...unctions 22 6 Oc CS620 CS650 Pro 5 Touch 04 Security Strengthen Set 6 Turn Security Strengthen mode ON or OFF If you want to turn Security Strengthen mode ON touch On to highlight it If you want to tu...

Page 963: ...chine administrator security functions 22 Oc CS620 CS650 Pro 22 7 7 Touch OK The Restart Confirmation popup screen will appear 8 Touch Yes The machine will restart and the new setting will be activate...

Page 964: ...lock password functions only when the Security Strengthen mode is ON When turned OFF the message Please set Security Strengthen mode will be displayed 2 Note Passwords are case sensitive If a wrong pa...

Page 965: ...control panel to display the Utility screen 2 Touch 03 Machine Admin Setting The Input Password screen will be displayed 3 Enter the password Use the touch screen keypad to enter the 8 digit Machine A...

Page 966: ...22 Machine administrator security functions 22 10 Oc CS620 CS650 Pro 4 Touch 10 Security Setting 5 Touch 02 HDD Lock Password The HDD Lock Password Menu screen will be displayed...

Page 967: ...password 13 digit alphanumeric serial number of the main body 7 If authentication is succeeded touch New Password to enter the new password The key will not be active until authentication is succeeded...

Page 968: ...al characters are entered and the OK key is touched the warning message Password does not match will appear and no key will work for five seconds Enter the right password after five seconds If authent...

Page 969: ...ons 22 Oc CS620 CS650 Pro 22 13 3 Enter the password Use the touch screen keypad to enter the 8 digit Machine Administrator password then touch OK The Machine Administrator Setting Menu screen will be...

Page 970: ...e administrator security functions 22 14 Oc CS620 CS650 Pro 5 Touch 06 List Count The Management List Print screen will be displayed 6 Touch Audit Log Report then touch COPY 7 Press Start on the contr...

Page 971: ...strator regularly once per month or when unauthorized access and tampering of data saved in the machine in Security Strengthen mode is noticed The machine is supposed to store up 750 logs per month If...

Page 972: ...ect to security protection can be specified 1 Operation by CE service representative 2 Operation by the machine administrator Other integer Indicates subjects for security protection action Used to sp...

Page 973: ...f attack For specific analysis methods see the next page No Operation ID Stored action Result 1 CE authentication CE ID 01 OK NG 2 Manager authentication Machine Administrator ID 02 OK NG 3 Set change...

Page 974: ...r created the action You need to check carefully when successful authentication occurs after series of failures especially during times other than normal operating hours Specify unauthorized actions a...

Page 975: ...23 Troubleshooting...

Page 976: ......

Page 977: ...se Call Service C message indicates a machine condition that requires the attention of your service representative The Call for Service screen usually displays the telephone and facsimile numbers of y...

Page 978: ...vice representative and report the condition and report code number Detail The machine administrator can call for service using the Utility setting For details see page 17 139 In this case you don t h...

Page 979: ...arrange for machine repair immediately 1 If the limited use of the copier is available the following message is displayed in the message area instead of the report code ex Tray 2 failure Press Reset t...

Page 980: ...sition of the highest priority Action to remove mishandled paper is displayed in the message area and touching Illustration will display subsequent screens for the disposal action Follow the procedure...

Page 981: ...o torn paper inside the machine Do not touch or damage the drum surface 3 When completed the Machine Status screen will be restored If any misfeed location is left the Jam Position screen will be rest...

Page 982: ...23 Troubleshooting 23 8 Oc CS620 CS650 Pro 7 CAUTION Precaution for getting injured Be careful of removing staples stuck inside the machine so as not to get injured...

Page 983: ...e load paper With the above message the Detail Check key will be displayed on the Machine Status screen Touch Detail Check and follow the instruction on the screen Paper misfeed If a paper misfeed occ...

Page 984: ...Pro Tray empty If the popup screen shown below is displayed after touching Detail Check the selected tray has become empty Follow the procedure below to change the tray selection for the current job o...

Page 985: ...3 Press Start Copy paper will be delivered from newly selected tray to continue the printing operation To supply the empty tray with paper 1 Load paper in the empty tray 2 Touch Close to restore the M...

Page 986: ...lected tray should be replaced according to the paper setting specified in print data setting and displays the following popup screen Follow the procedure for each to continue the machine operation 1...

Page 987: ...overflow In certain modes this machine uses memory to make operations convenient and smooth flowing Occasional memory overflow may occur if the installed memory is inadequate for the copy conditions...

Page 988: ...23 Troubleshooting 23 14 Oc CS620 CS650 Pro Touch Stop All the scanned data will be cleared to terminate the job...

Page 989: ...al signal of the copier Please turn power Off On will be displayed in the message area Follow the procedure below to turn the machine power off then on To turn machine power off on 1 Turn OFF the sub...

Page 990: ...T BE CHANGED Reduce Shift is incompatible with magnification Press Reset and set desired copying conditions without using Reduce Shift DUPLEX MODES CANNOT BE SELECTED Fully close ADF then select the d...

Page 991: ...epresentative to enable the machine to default to 1 000 magnification in this situ ation SHEET INSERTION RE SULT IS NOT AS EXPECT ED Blank insertion Be sure manuscript originals do not already in clud...

Page 992: ...S620 CS650 Pro USING TRIMMING COP IES CANNOT BE TRIMMED Check to see if the Trim Waste indicator lights in red on the Ma chine Status screen Empty the waste basket of saddle stitcher or contact the ma...

Page 993: ...24 Maintenance...

Page 994: ......

Page 995: ...to clean the following areas Cleaning the original glass Raise the ADF then clean the original glass with a soft dry cloth The glass may also clean with a soft cloth dampened slightly with water if it...

Page 996: ...may be copied resulting in dark lines on the copies Raise the original cover then clean it with a soft dry cloth Cleaning the machine external Clean the external surface of the machine with a soft cl...

Page 997: ...control panel Clean the control panel with a soft dry cloth 2 Reminder Pressing too hard on the control panel or the touch panel may damage them Never use a household detergent glass cleaner benzine o...

Page 998: ...er total count Copy total count Scanner total count The product life cycle such as of the drum developer transfer belt charged electrode etc can also be checked and printed from the Copy screen if des...

Page 999: ...ormation The counter information is displayed on the left side of the screen Touching Exit will exit the Utility mode and restore the previous screen 3 Touch Detail The product life cycle such as of t...

Page 1000: ...Print the counter list Touch COPY tab to display the Copy screen Select the desired paper size then press Start After the Counter list is printed out the Utility mode will be released automatically a...

Page 1001: ...e soil marks may be copied Follow the procedure below to clean the conveyance belt In order to maintain optimum copy quality we recommend to clean it every time before using the saddle stitcher tray T...

Page 1002: ...the belt higher than need be or never fail to pull the two belts at the same time otherwise machine trouble may be caused Clean the belts in the same way as above using a soft cloth dampened with alc...

Page 1003: ...Maintenance 24 Oc CS620 CS650 Pro 24 11 2 Reminder Be sure to clean the whole round of the conveyance belt Never return the saddle stitcher tray to its original position with the tray stand opened...

Page 1004: ...eiver exchange message appears on the right side of Trim Waste indicator in the option status area of Machine Status screen If the above message is displayed please contact your service representative...

Page 1005: ...imal performance When preventive maintenance is due a message and the PM icon will prompt you to contact your service representative for maintenance Detail The machine manager can call for service usi...

Page 1006: ...24 Maintenance 24 14 Oc CS620 CS650 Pro...

Page 1007: ...25 Specifications...

Page 1008: ......

Page 1009: ...866 e 0 816 e 0 707 Zoom with constant X and Y ratio e 0 250 to 4 000 in 0 001 increments Independent zoom vertical e 0 250 to 4 000 in 0 001 in crements horizontal e 0 250 to 4 000 in 0 001 incre me...

Page 1010: ...RA3 w SRA4 w v A3 w B4 w A4 w v B5 w v A5 w v B6 w A6 w 13 e 19 w 12 e 18 w 11 e 17 w 8 5 e 11 w v Custom sizes Max 330 e 487 mm to min 100 e 148 mm Image blank Leading edge front and rear Less than 2...

Page 1011: ...feeder Max 100 sheets 80 g m2 Power source Supplied from main body Dimensions 588 W e 519 D e 135 H mm Weight Approx 14 5 kg Item Description Name PF 601 Function Feed paper into main body Configurat...

Page 1012: ...Stacker 50 to 244 g m2 Secondary sub tray 50 to 300 g m2 Paper sizes Stacker SRA3 w SRA4 w v A3 w B4 w A4 w v B5 w v A5 w 13 e 19 w 12 e 18 w 11 e 17 w 8 5 e 14 w 8 5 e 11 w v and custom sizes max 33...

Page 1013: ...d tab paper Straight and offset delivery SRA3 w SRA4 w v A3 w B4 w F4 w A4 w v B5 w v A5 w v B6 w 1 A6 w 8K w 16K w v 13 e 19 w 1 12 e 18 w 11 e 17 w 8 5 e 14 w 8 5 e 11 w v 5 5 e 8 5 w v custom size...

Page 1014: ...ary sub tray 200 sheets max See p 3 3 for details Power source Supplied from finisher Dimensions 400 W e 723 D e 1 231 H mm Width including primary main tray 667 mm 784 mm pulled out Weight Approx 130...

Page 1015: ...105g m2 color paper coated paper Paper Types Primary main tray 60 to 105 g m2 See Paper information on page 3 3 for details Paper Sizes See Paper size on page 3 9 for details Paper tray capacity See P...

Page 1016: ...l cover OC 506 Dehumidification fan heater HT 503 504 Hard disk unit HD 506 Relay unit RU 503 504 Image controller Item Description Name OT 502 Function Paper output tray for main body Output tray cap...

Page 1017: ...26 Appendix...

Page 1018: ......

Page 1019: ...About keys on the caracter input screen Keys on the character input screen are described here This key moves a cursor Delete This key deletes the character on the left of the cursor OK This key determ...

Page 1020: ...t The followings describe basic steps to input characters on the character input screen 1 Touch the corresponding key to input the desired character 2 Touch OK The character input screen closes The in...

Page 1021: ...9 Administrator Password 17 141 Advanced information 10 3 AES Level Adjustment 17 28 Air assist 13 5 Application functions 8 3 Applying filters 7 12 ATS Permit Setting 16 11 Audit log Analyze 22 15 Pr...

Page 1022: ...ut to the secondary sub tray 9 16 Color adjustment 7 3 Color Balance 7 44 Color copy quality 7 6 Color Mode 6 26 Combine Originals 8 18 Common Setting 16 43 17 132 Compress Method Color Gray 16 48 17...

Page 1023: ...djustment FS 503 14 23 Finisher Adjustment FS 607 14 81 Finisher Adjustment LS 501 14 55 Finisher Adjustment RU 503 RU 504 14 79 Finisher Adjustment SD 501 14 59 Finisher FS 503 2 8 Finisher FS 607 2...

Page 1024: ...er safety 1 48 Lead Edge Erase Adjustment 17 42 Legal restrictions on copying 1 35 Limited use of the copier in trouble 23 5 Line screen 7 10 7 41 List Count 17 71 Loading paper 4 3 Loading tabbed she...

Page 1025: ...134 Original information 3 14 Original Set Bind Direction 16 18 Original setting 6 3 Output Applications 9 3 Output history 11 7 Output modes using folding unit FD 501 9 18 Output modes using saddle...

Page 1026: ...35 Program Overlay 8 91 Proof Copy 10 7 Proof Copy key 5 4 10 6 10 7 Punch 9 18 9 49 Punch Adjustment 14 86 Punch Waste Basket indicator 4 41 4 43 Punching file holes 9 19 Q Quality Adjustment 17 57 R...

Page 1027: ...81 Setting account track data 19 5 Setting job during warmup 5 22 Setting scan transmission function 19 24 Sharpness 7 12 7 34 Shift 8 61 Short cut Key Setting 16 33 Side 2 Lens Adjustment mode 16 43...

Page 1028: ...4 12 Trimming 9 27 Trimming Adjustment 14 75 Trimming Receiver Adj 14 77 Troubleshooting 23 3 23 16 Turning on off the power 2 23 U Uncollate 9 9 9 36 Un compressing mode 16 43 17 132 Unit Setting 16...

Page 1029: ...Appendix 26 Oc CS620 CS650 Pro 26 13 Zoom proportional 6 29...

Page 1030: ...26 Appendix 26 14 Oc CS620 CS650 Pro...

Page 1031: ...s 1 52 1 13 Space requirements 1 55 1 14 Operation precautions 1 61 2 Preparation for use 2 1 Machine configuration 2 3 2 2 Turning on off the power 2 23 2 3 Automatically returning to the default set...

Page 1032: ...Bind Direction 6 3 6 1 2 Specifying orientation of the original Direction 6 5 6 1 3 Specifying original type Image Type 6 7 6 1 4 Copying mixed size originals Mixed 6 11 6 1 5 Copying Z folded origin...

Page 1033: ...el 7 38 7 9 Selecting screen type or compression 7 41 7 10 Changing colors using CMYK value 7 44 7 11 Selecting glossy 7 46 7 12 Copy conditions incompatible with color adjustment 7 48 8 Application f...

Page 1034: ...ting watermark onto copies Watermark 8 79 8 17 6 Printing distribution number as watermark Set Numbering 8 81 8 17 7 Detailed setting in Stamp Watermark 8 83 8 18 Overlaying image onto printed pages I...

Page 1035: ...applications 9 58 10 Advanced information 10 1 Checking feature selections before copying Mode Check 10 3 10 2 Making sample set for checking results Proof Copy 10 7 10 3 Interrupting job in progress...

Page 1036: ...6 02 Scanner Adjustment 02 Centering Adjustment 14 16 14 1 7 02 Scanner Adjustment 03 FD Mag Adjustment 14 18 14 2 02 Image Quality Stability 14 21 14 3 03 Execute Adjust Operation 14 22 14 4 04 Fini...

Page 1037: ...her Adj 08 Trimming Receiver Adj 14 77 14 8 04 Finisher Adjustment RU 503 RU 504 14 79 14 8 1 07 RU Adjustment 01 Curl Reform Direction 14 79 14 9 Finisher Adjustment FS 607 14 81 14 9 1 01 Saddle Sti...

Page 1038: ...17 5 04 User Auth Account Track 17 98 17 6 05 Network Setting 17 128 17 7 06 Common Setting 17 132 17 8 07 Copy Setting 17 134 17 9 08 Scan Setting 17 137 17 10 09 System Connection 17 139 17 11 10 Se...

Page 1039: ...isplayed 23 3 23 2 Clearing mishandled paper 23 6 23 3 If MACHINE tab blinks in orange 23 9 23 4 If Memory Full message is displayed Memory overflow 23 13 23 5 If Power off on screen is displayed 23 1...

Page 1040: ...1 10 Oc CS620 CS650 Pro...

Page 1041: ...nformation 10 3 AES Level Adjustment 17 28 Air assist 13 5 Application functions 8 3 Applying filters 7 12 ATS Permit Setting 16 11 Audit log Analyze 22 15 Print 22 12 Authentication Method 17 98 Auto...

Page 1042: ...ance 7 44 Color copy quality 7 6 Color Mode 6 26 Combine Originals 8 18 Common Setting 16 43 17 132 Compress Method Color Gray 16 48 17 137 Compression 7 41 Continuation print 16 43 17 132 Contrast 7...

Page 1043: ...LS 501 14 55 Finisher Adjustment RU 503 RU 504 14 79 Finisher Adjustment SD 501 14 59 Finisher FS 503 2 8 Finisher FS 607 2 16 Finisher Mode by Full auto 16 18 Fixing pressure 6 61 Fixing unit 2 5 6...

Page 1044: ...tions on copying 1 35 Limited use of the copier in trouble 23 5 Line screen 7 10 7 41 List Count 17 71 Loading paper 4 3 Loading tabbed sheets 4 20 Loading sorting a volume of copies 9 56 Lock Delete...

Page 1045: ...inal Set Bind Direction 16 18 Original setting 6 3 Output Applications 9 3 Output history 11 7 Output modes using folding unit FD 501 9 18 Output modes using saddle stitcher SD 501 9 27 Output Quantit...

Page 1046: ...1 Proof Copy 10 7 Proof Copy key 5 4 10 6 10 7 Punch 9 18 9 49 Punch Adjustment 14 86 Punch Waste Basket indicator 4 41 4 43 Punching file holes 9 19 Q Quality Adjustment 17 57 R Recalling previous jo...

Page 1047: ...unt track data 19 5 Setting job during warmup 5 22 Setting scan transmission function 19 24 Sharpness 7 12 7 34 Shift 8 61 Short cut Key Setting 16 33 Side 2 Lens Adjustment mode 16 43 17 132 Simplex...

Page 1048: ...27 Trimming Adjustment 14 75 Trimming Receiver Adj 14 77 Troubleshooting 23 3 23 16 Turning on off the power 2 23 U Uncollate 9 9 9 36 Un compressing mode 16 43 17 132 Unit Setting 16 8 Unsuitable ADF...

Page 1049: ...1 9 Zoom proportional 6 29...

Page 1050: ...ovide sufficient background information O Yes O No Is the format of this manual convenient in size readability and arrangement page layout chapter order etc O Yes O No Could you find the information y...

Page 1051: ...omment sheet is completed by If you prefer to remain unknown please do fill in your occupation Name Occupation Company Phone Address City Country Please return this sheet to Oc Technologies B V For th...

Page 1052: ...o Paulo SP 04578 000 Brasil http www oce brasil com br Oc Canada Inc 4711 Yonge Street Suite 1100 Toronto Ontario M2N 6K8 Canada http www oce ca Oc Office Equipment Beijing Co Ltd Xu Mu Cheng Chaoyang...

Page 1053: ...rada Padana Superiore 2 B 20063 Cernusco sul Naviglio MI Italia http www oce it Oc Japan Corporation 3 25 1 Nishi Shinbashi Minato Ku Tokyo 105 0003 Japan http www ocejapan co jp Oc Belgium S A Rue As...

Page 1054: ...nia 2128 South Africa Oc Espa a SA Business Park Mas Blau Osona 2 08820 El Prat de Llobregat Barcelona Spain http www oce es Oc Svenska AB Sollentunav gen 84 191 27 Sollentuna Sweden http www oce se O...

Page 1055: ...resses of local Oc organisations for information about the Wide Format Printing Systems and the Production Printing Systems can be different from the addresses above Refer to the web site http www oce...

Reviews: