background image

No paper at S10

Introduction

Symbol

Type of symbol

Indicates

CAUTION

In order to guarantee hazard-free operations it is strongly rec-
ommended that any maintenance or repair work is only car-
ried out by trained personnel. Ignoring this warning could
cause injury or damage to property.

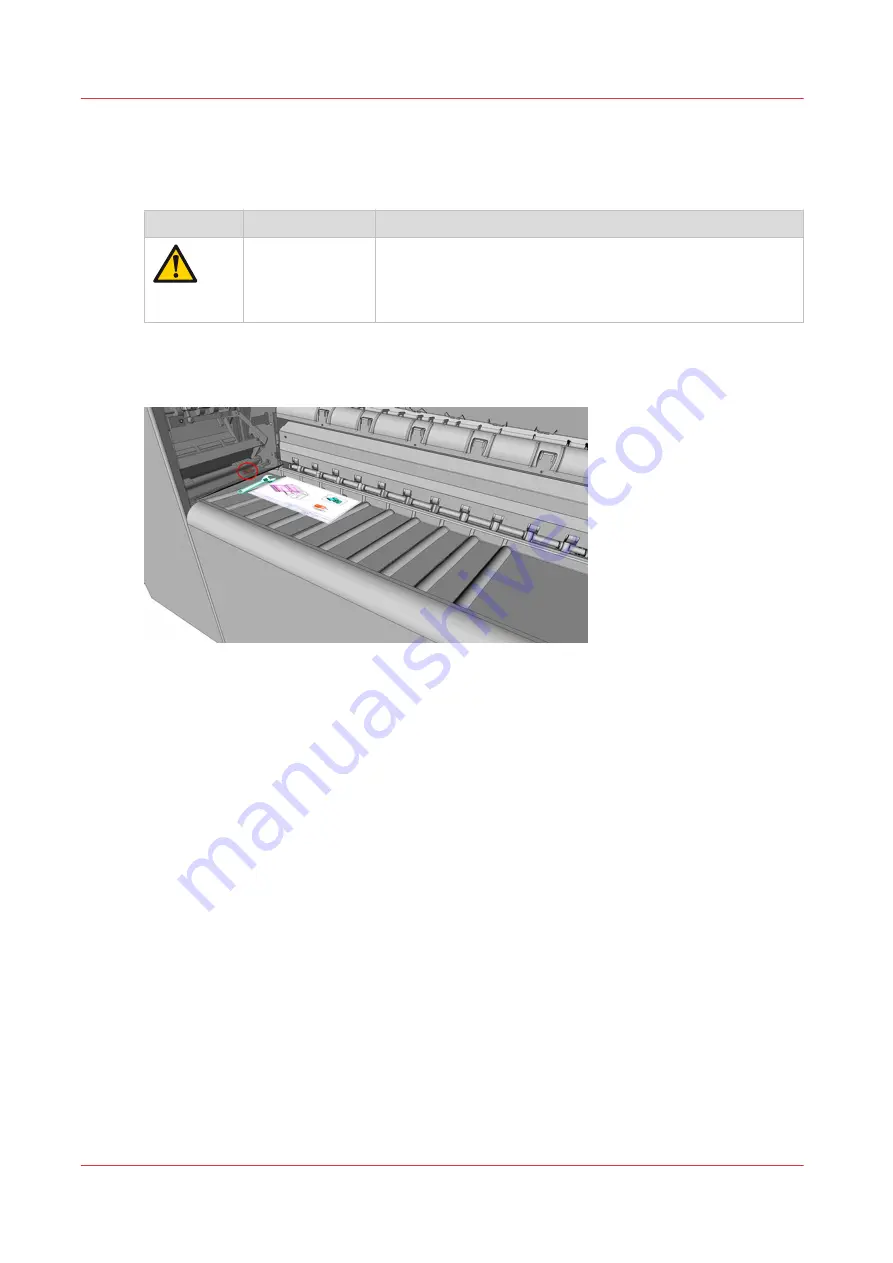
This error occurs because sensor S10 did not detect paper.

Mostly something blocks the paper path, the curl is too high, or the package is to thick.

Act on following steps to clear the jam

• Remove all packages from the machine.
• Load a new paper roll in the printer to prevent high paper curl.
• Restart the machine from the user interface, see 

Introduction to trouble shooting on page 62

.

No paper at S10

86

Chapter 8 - Trouble shooting

Summary of Contents for Folder Professional 6011

Page 1: ...User guide Océ Folder Professional 6011 6013 ...

Page 2: ...Edition 2019 02 US ...

Page 3: ...vailable options 23 Mapfold 24 Long plot Unlimited paper length 26 Chapter 5 Tablet PC tutorial 27 Graphical User Interface via Android device 28 Select a folding program 29 Add a folding program from the list of available programs 31 Create or customize a style 35 Customize a folding program 35 Create a folding program 38 Create or customize a free style program 39 Chapter 6 Folding 41 Online fol...

Page 4: ...remote service 64 How to clean start up errors 22 xx 82 xx 65 Error code list 66 How to use the purge function 69 Cover open 70 Sensor S0 is blocked 74 Sensor S1 is blocked 76 Sensor S2 is blocked 78 Sensor S3 is blocked 80 Sensor S4 is blocked 82 Sensor S5 is blocked 84 No paper at S10 86 Contents 4 ...

Page 5: ...Chapter 1 Introduction ...

Page 6: ... the finished fold package is deployed onto a conveyor belt Prints which are not supposed to be folded will be deployed onto the top of the transfer bridge The paper feed can also be done manually A 7 Android Tablet PC gives a range of opportunities to control and customize the folding device Supported standard fold styles are DIN 824 ANSI ARCH AFNOR JPN Nearly every desired fold style beside the ...

Page 7: ...fety instructions and the manual completely before operating the machine Carefully observe all warnings precautions and instructions on the machine or the ones described in the operating instructions In order to guarantee hazard free operations it is strongly recommended that any maintenance or repair work is only carried out by trained personnel Safety instructions Chapter 1 Introduction 7 ...

Page 8: ...s to be placed should be dry and dust free Humidity should be about 20 80 with room temperature of 15 C to 35 C 59 F 95 F The folder must stand horizontally aligned and very stable without shaking Make sure to place the folder in a way that does not block exits and allows an ergonomic workflow Installation and environment 8 Chapter 1 Introduction ...

Page 9: ...Chapter 2 Specifications ...

Page 10: ...st sheet Sensor 1 last sheet for copies 420 530mm Sensor 2 last sheet for copies 540 710mm Sensor 3 last sheet for copies 720mm Sensor 4 entry sensor bridge Sensor 5 entry interface Sensor 6 flap sensor Overview parts 10 Chapter 2 Specifications ...

Page 11: ...Fan Folder Cross Folder Overview parts Chapter 2 Specifications 11 ...

Page 12: ... cross folder Sensor 11 first sheet lower start Sensor 12 first sheet upper start Sensor 14 exit sensor cross folder Sensor 15 home position knife 1 Sensor 16 home position knife 2 Overview parts 12 Chapter 2 Specifications ...

Page 13: ...Dimensions Europe metric Dimensions Chapter 2 Specifications 13 ...

Page 14: ...USA UK imperial USA UK imperial 14 Chapter 2 Specifications ...

Page 15: ...Folded package Folded package Chapter 2 Specifications 15 ...

Page 16: ...Folded package with tab Folded package with tab 16 Chapter 2 Specifications ...

Page 17: ...Tab position NOTE Bigger copies have to be unfolded before the tab position can be measured Tab position Chapter 2 Specifications 17 ...

Page 18: ...r curl cut a 200 mm long piece from the copy and lay it face down on a table Measure the distance between the tables surface and the highest point of the copy Curl related issues Curl in mm Curl in inches 30 mm 1 18 without issues 30 50 mm 0 59 1 18 in 1 18 1 97 possible jams unstable tab position 50 mm 1 97 out of specification Maximum paper curl 18 Chapter 2 Specifications ...

Page 19: ...Chapter 3 Power and switch on ...

Page 20: ... be near to the machine and easy to access Power supply box The power supply box is at the fan folder s right bottom side The machine can be completely switched off by disconnecting the power cable itself This area must be accessible at all times Power supply 100V 120V 200V 240V AC 50 60Hz 10A Find the folders serial number on the rating plate next to the switch 20 Chapter 3 Power and switch on ...

Page 21: ...art screen appears in the display if the test runs without any problem Error code In case a problem has been detected during the self test the screen shows an error code Please refer to the chapter Trouble shooting for more information Chapter 3 Power and switch on 21 ...

Page 22: ...22 Chapter 3 Power and switch on ...

Page 23: ...Chapter 4 Available options ...

Page 24: ...ed Maybe there are things possible beyond the limita tions mentioned below but this could cause bad folding quality or paper jams Every map needs a folding style which fits to the paper size Specifications Maximum document length 15 fan fold layers 80 gsm paper e g panel size 100 mm 15 x 100 mm 1500 mm Maximum document width 3 cross fold layers Paper weight Best quality with 60g m 90g m 75g m 80g ...

Page 25: ...increase the size of the last panel by increasing the paper length or chang ing the panel size If we reduce the panel size for 1 mm to 104 mm the last page will grow with every layer for 1 mm in the example 10 x 1 mm 10 mm 104 mm x 200 mm Mapfold Chapter 4 Available options 25 ...

Page 26: ...he first part of the folding starts with the entered number of maximum panels no 1 Thereafter the package gets 3 unfolded panels and lay the first part out at fan fold exit no 2 This part needs to be folded manually The third part is the same like the first part It folds the sheet as long as the panels reach the number of maximum panels no 3 1 First folding part 2 3 x panel size unfolded 3 Next fo...

Page 27: ...Chapter 5 Tablet PC tutorial ...

Page 28: ...ting as soon as the folder has been switched on Folder Bluetooth Wifi Service laptop During a service visit the service technician can start a wifi connection with the folder to diagnose check devices update firmware and customize the folder NOTE The wifi connection needs to be enabled manually on the tablet and will be disabled automatically for security reasons when the folder is rebooted Graphi...

Page 29: ...by the printer controller the screen displays this folding program during the folding process The selected folding program on the folder is ignored Procedure 1 Tap on the folding program name to display all available programs 2 Tap on the desired folding program The display will show the selected program Select a folding program Chapter 5 Tablet PC tutorial 29 ...

Page 30: ...ws the program number name and parameters Fan fold panel the number below the fold style picture Cross fold panel the number right beside the fold style picture Select a folding program 30 Chapter 5 Tablet PC tutorial ...

Page 31: ...ing program from the list of available programs Procedure 1 Tap on the login icon 2 Type the password in the login screen Add a folding program from the list of available programs Chapter 5 Tablet PC tutorial 31 ...

Page 32: ...ed folding programs 1 Light gray numbers show deactivated folding programs 2 4 Tap on the number to activate the folding program 5 Tap on the exit icon to close the program editor The machine will restart Add a folding program from the list of available programs 32 Chapter 5 Tablet PC tutorial ...

Page 33: ...hine restarts 7 Tap on the folding program name to display all available programs The prior activated folding program is now visible Add a folding program from the list of available programs Chapter 5 Tablet PC tutorial 33 ...

Page 34: ...olding programs with the highest numbers in the program editor will not be presented in the list and therefore cannot be selected Deactivate non used folding programs with lower numbers in the program editor in order to make the missing folding programs visible Add a folding program from the list of available programs 34 Chapter 5 Tablet PC tutorial ...

Page 35: ...Create or customize a style Customize a folding program Procedure 1 Tap on the login icon 2 Type the password in the login screen Create or customize a style Chapter 5 Tablet PC tutorial 35 ...

Page 36: ...the packet width of the fan fold 3 Edit the packet height of the cross fold 4 Edit the binding margin 5 Select between compensated DIN B or regular DIN C folding style 6 Choose to stick a tab or not for Océ Folder Professional 6013 7 Delete folding program 8 Save changes and exit A Discard changes and exit Customize a folding program 36 Chapter 5 Tablet PC tutorial ...

Page 37: ...Customize a folding program Chapter 5 Tablet PC tutorial 37 ...

Page 38: ... on an empty slot 2 Choose between free style see Create or customize a free style program on page 39 and standard program 3 Edit the program to your needs see Customize a folding program on page 35 Create a folding program 38 Chapter 5 Tablet PC tutorial ...

Page 39: ...ot lead to a desired packet Illustration Procedure 1 Set dimension for each layer of the fan fold 2 Set dimension for each layer of the cross fold 3 Choose the starting direction of the cross folder depending on the exit direction of the fan folder Create or customize a free style program Chapter 5 Tablet PC tutorial 39 ...

Page 40: ...Create or customize a free style program 40 Chapter 5 Tablet PC tutorial ...

Page 41: ...Chapter 6 Folding ...

Page 42: ...to be portrait see drawing The title block position has to be set in the plot software you are using If the printer reports the size of the copy it is possible to print A1 and A2 C size and D size in landscape orientation In this case title block has to be on the leading edge for A1 or D size and on the trailing edge for A2 or C size Online folding 42 Chapter 6 Folding ...

Page 43: ...n the pre set program the folder produces either calculated folding styles or non calculated ones which could cause non matching last sheets Procedure 1 Choose the folding program you want to use from the Graphical User Interface see Select a folding program on page 29 2 Tap on the computer icon in the bottom right corner of the screen to switch the folder to manual mode A hand icon is displayed 3...

Page 44: ...he sheet centered on the table The insertion rail on the table can be slid into an optimized position for the document you are feeding 5 Feed the paper as straight as possible Manual folding 44 Chapter 6 Folding ...

Page 45: ...Chapter 7 The tab applicator ...

Page 46: ...Insert new tab roll Procedure 1 Open the door of the tab applicator 2 Pull the lower handle to slide the tab unit outward Insert new tab roll 46 Chapter 7 The tab applicator ...

Page 47: ...by turning the knob counterclockwise 4 Properly place the new tab material 1 Place the tab roll 2 Pay attention that the edge of the tab is routed as shown on the following image Insert new tab roll Chapter 7 The tab applicator 47 ...

Page 48: ...5 Place the tab reel cover behind the white guiding roller 1 and fasten the knob 2 6 Pull the upper handle to tilt out the tab unit Insert new tab roll 48 Chapter 7 The tab applicator ...

Page 49: ...7 Insert the tab material as shown 8 Move the material to the spike roller Insert new tab roll Chapter 7 The tab applicator 49 ...

Page 50: ...he tab material 10 Turn the spike roller further until the edge of the tab material is inside the highlighted area 1 11 1 Remove the cover strip from the tab material 1 2 Lift the pressure roller 2 Insert new tab roll 50 Chapter 7 The tab applicator ...

Page 51: ...12 Route the cover strip as shown Insert new tab roll Chapter 7 The tab applicator 51 ...

Page 52: ...13 Push the upper handle to tilt in the tab unit 14 Push the lower handle to slide in the tab unit Insert new tab roll 52 Chapter 7 The tab applicator ...

Page 53: ...15 Close the door of the tab applicator Insert new tab roll Chapter 7 The tab applicator 53 ...

Page 54: ...ion screen 2 Choose the action from 1 Tap this button if a new tab roll was inserted 2 Tap this button if the inserted tab roll was used before the tab counter will not work 3 Tap this button to clear the cover open error if the tab roll was not changed Initialize new tab roll 54 Chapter 7 The tab applicator ...

Page 55: ...Clean the knifes Procedure 1 Open the door of the tab applicator 2 Pull the lower handle to slide the tab unit outward Clean the knifes Chapter 7 The tab applicator 55 ...

Page 56: ...3 Pull the upper handle to tilt out the tab unit 4 Turn the knob counterclockwise to lift the stamp Clean the knifes 56 Chapter 7 The tab applicator ...

Page 57: ...5 Clean both blades with lint free cloth and adhesive solvent 6 Apply oil to the felt until it is completely soaked and apply a little oil to the blades Clean the knifes Chapter 7 The tab applicator 57 ...

Page 58: ...7 Turn the knob clockwise to lower the stamp 8 Push the upper handle to tilt in the tab unit Clean the knifes 58 Chapter 7 The tab applicator ...

Page 59: ...r handle to slide in the tab unit 10 Close the door of the tab applicator 11 Restart the machine from the user interface see Introduction to trouble shooting on page 62 Clean the knifes Chapter 7 The tab applicator 59 ...

Page 60: ...Clean the knifes 60 Chapter 7 The tab applicator ...

Page 61: ...Chapter 8 Trouble shooting ...

Page 62: ...between fold rollers or other turning parts close the covers and hold the purge button 2 All transport belts and rollers will be switched on until you release the button After taking out the jammed paper or closing the cover the folder needs to be restarted by clicking on the exit button 3 The folder will reboot now and check the paper path again This takes approximately 20 seconds Thereafter the ...

Page 63: ...he conveyor belt is full the user interface displays this message Procedure 1 Empty the conveyor belt 2 Tap on the OK button 1 or briefly press the conveyor switch 2 to reset the message Conveyor belt full Chapter 8 Trouble shooting 63 ...

Page 64: ...When the machine is in remote service the user interface displays this message Procedure 1 Make sure no one is working at the machine 2 Tap the restart button 1 to restart the machine Logged into remote service 64 Chapter 8 Trouble shooting ...

Page 65: ...paper remains by hand see How to use the purge function on page 69 In case of Fan Folder errors open the red highlighted cover 1 open the bridge 2 look inside the fan fold only paper path 3 and remove every piece of paper from the paper path Close all covers In case of Cross Folder errors open cover 4 lift the fan unit 5 and remove every piece of paper between the transport belts inside and below ...

Page 66: ...ion 02 03 No contact to CF during initialization 03 Result codes 03 02 FF result code is TIMEOUT 03 05 CF result is TIMEOUT 03 08 Too many sheets are in the folder 09 Start up and initialization errors 09 02 Time out while resetting FF 09 03 Time out while resetting CF 09 10 Checking EEPROM in FF or CF failed 13 Printer messages 13 01 Printer sends an error and folder stops Location 2 Fan Folder e...

Page 67: ...Folder errors 82 Sensor errors on start up 82 01 Sensor S10 is blocked 82 02 Sensor S11 is blocked 82 03 Sensor S12 is blocked 82 04 Sensor S14 is blocked 82 12 Sensor S18 is blocked home position tilt tray 82 17 Error initialization tilt tray 84 Time out errors 84 01 No paper at sensor S10 No paper at S10 on page 86 84 02 No paper at sensor S11 or S12 84 04 Jam at sensor S11 or S12 84 12 Jam betw...

Page 68: ...41 Tab errors 41 04 Jam close to the knife Error code list 68 Chapter 8 Trouble shooting ...

Page 69: ...ould cause injury or damage to property CAUTION Do not open the bridge and do not remove the prints manually Always use the purge function first When to do On the screen of the folder there is an error message for example 3 82 01 Procedure 1 Tap and hold the purge button 2 If the cleaning phase is passed you can stop to hold the button 3 Finally check the folder It should be empty of any packages ...

Page 70: ...rantee hazard free operations it is strongly rec ommended that any maintenance or repair work is only car ried out by trained personnel Ignoring this warning could cause injury or damage to property Basic folder Océ Folder Professional 6011 Cover open 70 Chapter 8 Trouble shooting ...

Page 71: ...eboot the folder see Introduction to trouble shooting on page 62 If all covers are closed and the error still occurs please call your service engineer Tab folder Océ Folder Professional 6013 Cover open Chapter 8 Trouble shooting 71 ...

Page 72: ...Cover open 72 Chapter 8 Trouble shooting ...

Page 73: ... marked covers and reboot the folder see Introduction to trouble shooting on page 62 If all covers are closed and the error still occurs please call your service engineer Cover open Chapter 8 Trouble shooting 73 ...

Page 74: ...air work is only car ried out by trained personnel Ignoring this warning could cause injury or damage to property The error occurs if the sensor S0 is blocked by paper at booting phase Procedure 1 At first use the purge function See How to use the purge function on page 69 2 If purge does not work perfectly open the bridge Sensor S0 is blocked 74 Chapter 8 Trouble shooting ...

Page 75: ...ually 4 Clean the paper path with antistatic fluid NOTE Do not clean the belts 5 Restart the machine from the user interface see Introduction to trouble shooting on page 62 Sensor S0 is blocked Chapter 8 Trouble shooting 75 ...

Page 76: ...air work is only car ried out by trained personnel Ignoring this warning could cause injury or damage to property The error occurs if the sensor S1 is blocked by paper at booting phase Procedure 1 At first use the purge function See How to use the purge function on page 69 2 If purge does not work perfectly open the bridge Sensor S1 is blocked 76 Chapter 8 Trouble shooting ...

Page 77: ...ually 4 Clean the paper path with antistatic fluid NOTE Do not clean the belts 5 Restart the machine from the user interface see Introduction to trouble shooting on page 62 Sensor S1 is blocked Chapter 8 Trouble shooting 77 ...

Page 78: ...air work is only car ried out by trained personnel Ignoring this warning could cause injury or damage to property The error occurs if the sensor S2 is blocked by paper at booting phase Procedure 1 At first use the purge function See How to use the purge function on page 69 2 If purge does not work perfectly open the bridge Sensor S2 is blocked 78 Chapter 8 Trouble shooting ...

Page 79: ...ually 4 Clean the paper path with antistatic fluid NOTE Do not clean the belts 5 Restart the machine from the user interface see Introduction to trouble shooting on page 62 Sensor S2 is blocked Chapter 8 Trouble shooting 79 ...

Page 80: ...air work is only car ried out by trained personnel Ignoring this warning could cause injury or damage to property The error occurs if the sensor S3 is blocked by paper at booting phase Procedure 1 At first use the purge function See How to use the purge function on page 69 2 If purge does not work perfectly open the bridge Sensor S3 is blocked 80 Chapter 8 Trouble shooting ...

Page 81: ...ually 4 Clean the paper path with antistatic fluid NOTE Do not clean the belts 5 Restart the machine from the user interface see Introduction to trouble shooting on page 62 Sensor S3 is blocked Chapter 8 Trouble shooting 81 ...

Page 82: ...air work is only car ried out by trained personnel Ignoring this warning could cause injury or damage to property The error occurs if the sensor S4 is blocked by paper at booting phase Procedure 1 At first use the purge function See How to use the purge function on page 69 2 If purge does not work perfectly open the bridge Sensor S4 is blocked 82 Chapter 8 Trouble shooting ...

Page 83: ...ually 4 Clean the paper path with antistatic fluid NOTE Do not clean the belts 5 Restart the machine from the user interface see Introduction to trouble shooting on page 62 Sensor S4 is blocked Chapter 8 Trouble shooting 83 ...

Page 84: ...air work is only car ried out by trained personnel Ignoring this warning could cause injury or damage to property The error occurs if the sensor S5 is blocked by paper at booting phase Procedure 1 At first use the purge function See How to use the purge function on page 69 2 If purge does not work perfectly open the bridge Sensor S5 is blocked 84 Chapter 8 Trouble shooting ...

Page 85: ...ually 4 Clean the paper path with antistatic fluid NOTE Do not clean the belts 5 Restart the machine from the user interface see Introduction to trouble shooting on page 62 Sensor S5 is blocked Chapter 8 Trouble shooting 85 ...

Page 86: ...e injury or damage to property This error occurs because sensor S10 did not detect paper Mostly something blocks the paper path the curl is too high or the package is to thick Act on following steps to clear the jam Remove all packages from the machine Load a new paper roll in the printer to prevent high paper curl Restart the machine from the user interface see Introduction to trouble shooting on...

Page 87: ......

Page 88: ...nada Inc www canon ca Canon Europe Ltd www canon europe com Canon Latin America Inc www cla canon com Océ Australia Pty Ltd www oce com au Canon China Co Ltd www canon com cn Canon Singapore Pte Ltd www canon com sg Canon Hongkong Co Ltd www canon com hk Océ 2018 2019 ...

Reviews: