VarioLink 6022/7522
12-20
Authentication Unit (Biometric Type AU-101)
12
7
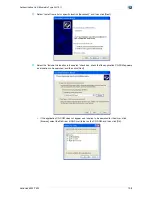
Select "Recipient User", and then enter the user name and password.
8
Click [Verify] to check the user ID.
9
Click [OK].
–
If the user name or the password is incorrect, type in the correct information.
10
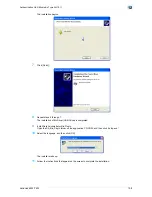
Click the [OK] button.
11
Specify the desired settings, and then click [OK].
12
Click [Print].
13
The print job is sent.
14
Position the registered finger on the authentication unit.
–
Make sure that "Begin Printing" is selected.
–
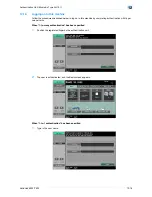
To select the print job to be printed, touch [Screen Operation]. For details, refer to
"Selecting the
print job to be printed from the control panel" on page 12-22
.
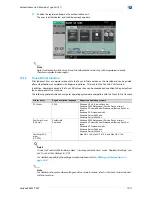
The user is authenticated, and the print job is printed.
Summary of Contents for VarioLink 6022
Page 1: ...Océ VarioLink 6022 VarioLink 7522 Copy Operations User s Guide Printing for Professionals ...
Page 18: ...VarioLink 6022 7522 x 15 Explanation of manual conventions ...
Page 19: ...VarioLink 6022 7522 x 16 ...
Page 22: ...1 Before Making Copies ...
Page 80: ...2 Basic copy operations ...
Page 151: ...VarioLink 6022 7522 2 72 Basic copy operations 2 4 Touch OK and then touch OK again ...
Page 159: ...3 Additional copy operations ...
Page 189: ...4 Troubleshooting ...
Page 237: ...5 Specifications ...
Page 248: ...6 Copy paper originals ...
Page 278: ...7 Application functions ...
Page 300: ...VarioLink 6022 7522 7 23 Application functions 7 6 Press the Start key ...
Page 318: ...VarioLink 6022 7522 7 41 Application functions 7 7 Press the Start key ...
Page 357: ...8 Replacing toner cartridges and staple cartridges and emptying hole punch scrap box ...
Page 378: ...9 Care of the machine ...
Page 385: ...10 Managing jobs ...
Page 399: ...11 Utility mode ...
Page 478: ...12 Authentication Unit Biometric Type AU 101 ...
Page 503: ...13 Authentication Unit IC Card Type AU 201 ...
Page 529: ...14 Appendix ...
Page 536: ...15 Index ...
Page 540: ...Printing for Professionals Beyond the Ordinary ...


