background image

18

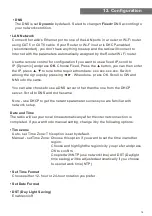
• DNS

The DNS is set 

Dynamic

 by default. Select to change 

<Fixed>

 DNS according to 

your network condition.

• LAN Network

Connect the radio's Ethernet port to one of the LAN ports in a router or Wi-Fi router 
using CAT 5 or CAT 6 cable. If your Router or Wi-Fi router is DHCP-enabled 
(recommended), you don't have anything to setup and the radio will connect to 
Internet with the parameters automatically assigned by the Router/Wi-Fi router.

Use the remote control for configuration if you want to use a fixed IP, scroll to 
IP:[Dynamic] and press 

OK

. Choose Fixed. Press the ▲ button, you can then enter 

the IP, press ▲, ▼ to tune to the required numbers: xxx.xxx.xxx.xxx. Switch 
among the 4 groups by pressing  ◄► . When done, press OK. Scroll to GW and 
NM to do the same.

You can also choose to use a DNS server other than the one from the DHCP 
server. Scroll to DNS and do the same.

Note - Use DHCP to get the network parameters unless you are familiar with 
network setup.

Date and Time

The radio will set your local time automatically after the internet connection is 
completed. If you want to do manual setting, change it by the following options:

• Time zone

Auto - set Time Zone: This option is set by default.
Manual - set Time Zone: Choose this option if you want to set the time in another 

region.
Choose and highlight the region/city you prefer and press 
OK to confirm.
Coupled with NTP (use network time) and DST (Daylight 
time saving) will be adjusted automatically if you choose 
to use network time (NTP).

• Set Time Format

Choose either 12-hour or 24-hour notation you prefer.

• Set Date Format

• DST (Day Light Saving)

Enable on/off

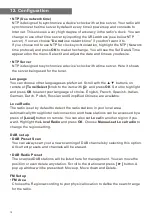
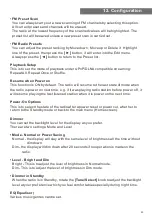
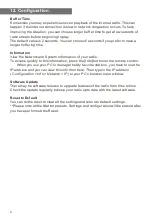
12. Configuration

Summary of Contents for WR-230S

Page 1: ...WR 230S Internet Radio User Manual Please read this user manual carefully before using the receiver...

Page 2: ......
Page 3: ...nd functions 7 4 Internet Radio 8 5 Media Centre 10 6 DAB DAB Radio 11 7 FM Radio 12 8 Bluetooth playback 13 9 Aux In 13 10 Alarm Setting 14 11 Sleep Timer Setting 15 12 Con guration 16 13 Remote cont...

Page 4: ...s this button to return to the playing screen 7 Tune Select Volume Dial Select Rotate to scroll up down on the main menu Push to con rm select menu options Push to stop resume playback of radio channe...

Page 5: ...th Media Centre 11 Local Access the local station list Local area set up in Configuration 12 Press to toggle between Standby and Operation 13 Recall the favorite list 14 OK confirm button 15 Cursor ri...

Page 6: ...tton 1 1 and different kind of symbols _ Button 2 2ABCabc Button 3 3DEFdef Button 4 4GHIghi Button 5 5JKLjkl Button 6 6MNOmno Button 7 7PQRSpqrs Button 8 8TUVtuv Button 9 9WXYZwxyz Button 0 0 Using co...

Page 7: ...ork for you The radio can work via Wireless network connection Wi Fi connection and Wired connection Ethernet RJ45 Precautions The radio should not be used in a high temperature or high humidity envir...

Page 8: ...er and switch the Power on off switch on the rear cabinet to ON Press button on the front Caution Use only the adaptor supplied with the radio Connecting a power supply with a different rating will ca...

Page 9: ...ill appear on the top left corner Wireless LAN Wi Fi If this is rst time use the Con gure Network wizard will be displayed Choose Yes to start con guring network Press the button to highlight Yes and...

Page 10: ...LNA Compatible devices DAB DAB Radio Pick up DAB and DAB radio signal if available in your local area no internet connection required FM Radio Receive ordinary FM radio stations in your local area no...

Page 11: ...ng list input the index number on the remote control to quickly jump to that point For example on the remote control input 2 8 and press OK it will highlight the station no 28 Search Instead of browsi...

Page 12: ...is added to the Favorite list The new added station will always show in the last item on the Favorite list You can store up to 99 presets Recall a station Press the button on the remote control or pre...

Page 13: ...may take a few seconds for the radio to complete the scan for available UPnP servers If no UPnP servers are found it will show Empty List After a successful scan is done select your UPnP server The ra...

Page 14: ...number of channels received When it is done a preset page will be displayed for your action You can select the channel and start listening to it Whenever you want to add to My Favourite press the butt...

Page 15: ...ay the list for your action You can select the channel and start listening to it Whenever you want to add to My Favourite press the button on remote or press and hold the button on the unit and it wil...

Page 16: ...ll be restored automatically when both devices are in range and Bluetooth operation has been selected on the radio Pairing does not have to be repeated This function may need to be activated in your B...

Page 17: ...s you desire Everyday Once or multiple days Alarm Volume Adjust the volume of the alarm as you like by rotating the Tune Select knob or button on remote Alarm duration Set the duration of the alarm fr...

Page 18: ...et the timer to let the radio goes standby after the selected time elapsed in the range of 15 minutes to 180 minutes Press button on the remote control to set the timer You will see the icon appeared...

Page 19: ...ment in different countries Choose the country you are staying from the list to get the correct channel Wi Fi Network Add Remove AP Add AP It will scan out a list of routers around Add AP WPS button C...

Page 20: ...f the Wi Fi router for setup AP If you have added more than one routers on the radio and want to switch to another one select this option to change Signal This is to show the strength of the Wi Fi Sig...

Page 21: ...s OK Scroll to GW and NM to do the same You can also choose to use a DNS server other than the one from the DHCP server Scroll to DNS and do the same Note Use DHCP to get the network parameters unless...

Page 22: ...lect knob to the item with and press OK Scroll to highlight and press OK to select your language of choice English French Spanish Italian German Dutch Polish Russian and Simpli ed Chinese are availabl...

Page 23: ...me e g if it was playing radio station before power off it will resume playing the last listened station when it is power on the next time Power On Options This is to select the state of the radio aft...

Page 24: ...this information press the Info button on the remote control When you use your PC to manage the My favorite stations you have to use the IP address and you can view this info from here Then type in t...

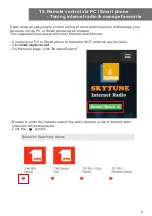
Page 25: ...favourite list via PC or Smart phone s web browser The supported browsers are Internet Explorer and Chrome Connect your PC or Smart phone to the same Wi Fi network as your radio Visit www skytune net...

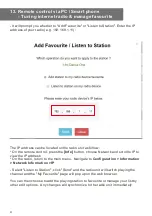
Page 26: ...ress the Info button choose Network and scroll to IP to view the IP address On the radio return to the main menu Navigate to Con guration Information Network Information IP Select Listen to Station cl...

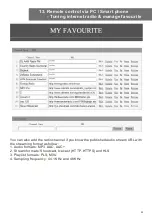
Page 27: ...vourite You can also add the radio channel if you know the published audio stream URL with the streaming format as follow 1 Audio formats MP3 AAC AAC 2 Stream formats Shoutcast Icecast HTTP HTTPS and...

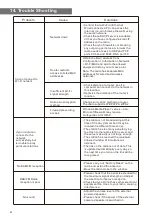
Page 28: ...venting access If your radio can connect to the network successfully but is unable to play particular stations The station is not broadcasting at this time of the day remember it may be located in a d...

Page 29: ...gaps in the stream that may occur if the internet or the wireless network is busy The Internet Radio streams music data from the PC while you are listening If a stream gets blocked or experiences Inte...

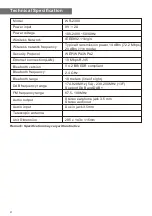
Page 30: ...ps 20 dBm 11b mode Security Protocol WEP WPA WPA2 Ethernet connection LAN 10 Mbps RJ45 Bluetooth version V4 2 BR EDR compliant Bluetooth frequency 2 4 GHz Bluetooth range 10 meters line of sight DAB f...

Page 31: ...ort oceandigital com hk WEEE and Recycling The European laws do not allow any more the disposal of old or defective electric or electronic devices with the household waste Return your product to a mun...

Reviews: