


Recorder Buoy User Guide
April 2020
P.10
Testing the Buoy
It is recommended that the buoy is tested with deployment settings before the deployment.
To prevent wasting battery power during testing the buoy can be powered through a 36V
adapter plugged into a wall outlet. This power attaches to the serial cable (MCBH8 to USB
cable) that is used for setup.
It is also recommended to perform a short test (10 minutes) on battery power to ensure there
are no problems with complete setup of system running on buoy battery power.
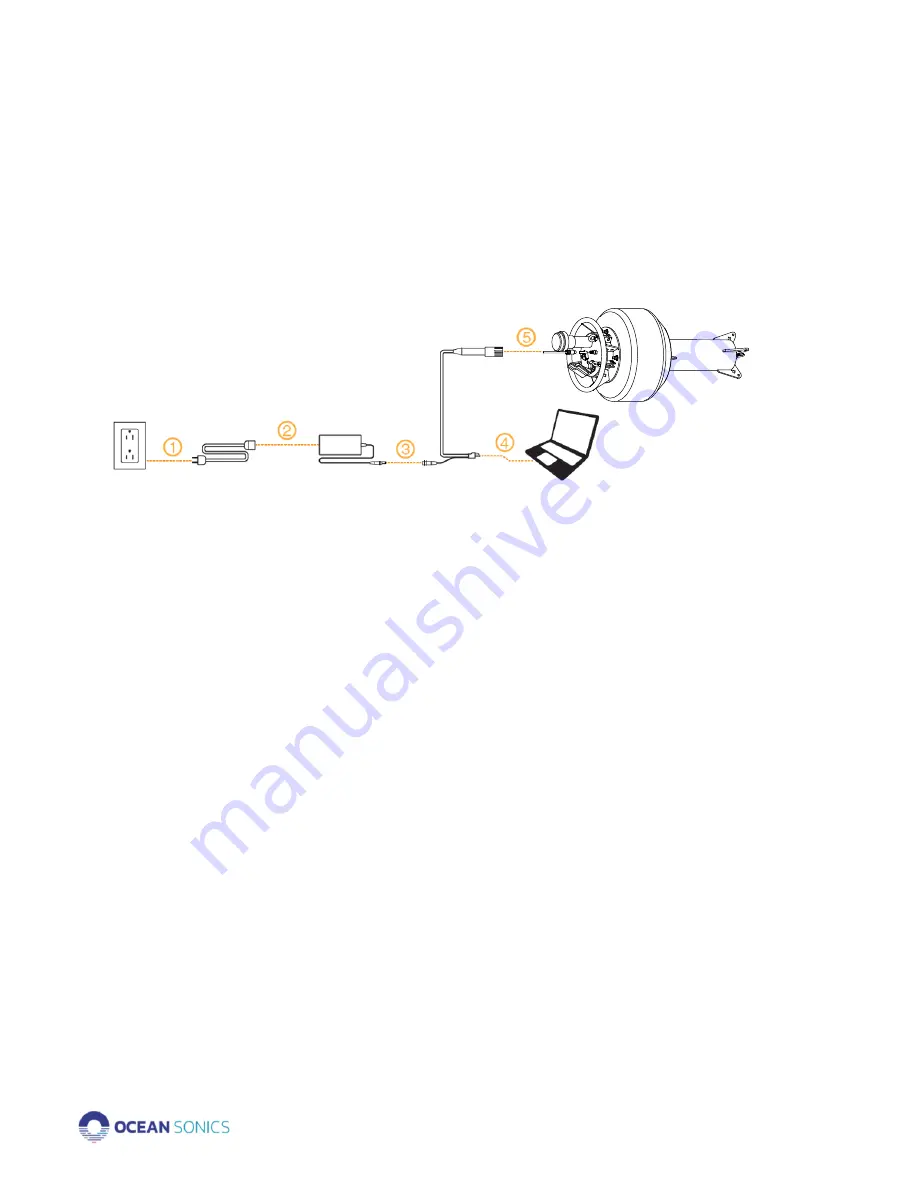
Power through Wall Outlet
1.
Plug power cord into the wall outlet.
2.
Plug the power cord into the 36V power adapter.
3.
Plug the power adapter barrel connector into the serial cable.
4.
Plug the serial cable USB end into a computer USB port.
5.
Connect the serial cable to the MCBH8 connector on the Recorder Buoy.
6.
Setup for deployment, record and review data on hard drive.
Power with Buoy Batteries
1.
Setup the buoy with the field deployment configuration.
2.
Allow the buoy to record a total of 10 minutes.
3.
Retrieve the data.
4.
Review the data to ensure all data recorded properly.


