¨
54
back far enough to scoop the module out with your index finger. Otherwise, it
may be necessary to insert a blunt screwdriver until the tip rests just under-
neath the module. DO NOT pry the module from the console! Slowly increase
the pressure under the module by releasing the tension on the rubber boot. The
module will slide up the screwdriver and exit the console.
WARNING: The following procedure must be closely adhered to,
Damage due to improper battery replacement is not covered by
the Data100's limited 2 year warranty.
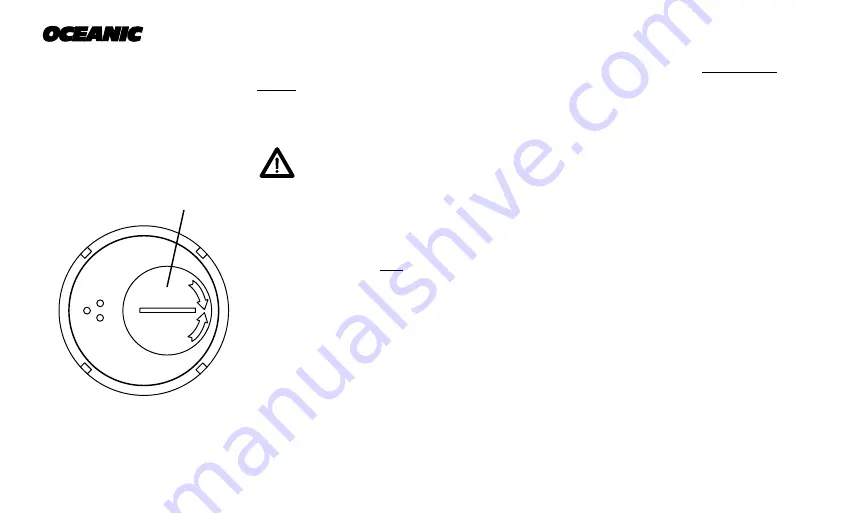
Examine the case back to find the battery hatch (Fig. 49a), and proceed as
follows to remove the batteries:
• Apply a coin (not a screwdriver) to the recessed slot of the battery hatch,
and turn the hatch out counterclockwise to remove it from the housing. The
battery compartment should only be opened in a dry and clean environment,
with extreme care taken to prevent the entrance of moisture or dust.
• Inspect the o-ring for any signs of deterioration. If found, remove the o-ring
by pressing the sides with your fingertips to cause it to protrude slightly
from the groove of the battery hatch and discard. DO NOT use tools to
remove.
• Closely check the threads of the battery hatch and the housing for any signs
of damage which might impair proper threading. If found, return your
Data100 to your Authorized Oceanic Dealer, and DO NOT attempt to use
until it has received factory service.
Fig. 49 - Battery Hatch
H
A
N
D
TIG
HTEN
0P
EN
USE
COIN ONLY
a
Summary of Contents for Data 100
Page 1: ...owner s guide Data 100 OCEANIC...
Page 2: ......
Page 11: ...THE DATA100 IS EASY TO USE...
Page 23: ...DETAILED OPERATIONS GUIDE...
Page 43: ...HANDLING THE EXTREMES...
Page 57: ...CARE and MAINTENANCE...
Page 69: ...REFERENCE...
Page 87: ...DATA100 77 NOTES...
Page 91: ......


