background image

English

   - 6 -

option. Press 

OK

 and enter a key word using the virtual 

keyboard. Then highlight 

OK

 and press 

OK

 to start 

the search. Results will be displayed on the screen. 

Highlight the desired result using the directional 

buttons and press 

OK

 to open.

3. TV
3.1. Guide

You can access the electronic programme guide menu 

using this option. Refer to 

Electronic Programme 

Guide

 section for more information.

3.2. Channels

You can access the 

Channels

 menu using this option. 

Refer to 

Using the Channel List

 section for more 

information.

3.3. Timers

You can set timers for future events using the options of 

this menu. You can also review the previously created 

timers under this menu.
To add a new timer select the 

Add Timer

 tab using the 

Left/Right buttons and press 

OK

. Set the sub-menu 

options as desired and when finished press 

OK

.


A new 

timer will be created. 
To edit a previously created timer, highlight that timer,  

select the 

Edit Selected Timer

 tab and press 

OK

Change the sub-menu options as desired and press 

OK

 to save your settings.

To cancel an already set timer, highlight that timer, 

select 

Delete Selected Timer

 tab and press 

OK

. A 

confirmation message will be displayed. Highlight 

Yes


and press 

OK

 to proceed. The timer will be cancelled.

It is not possible to set timers for two or more events 

that will broadcasted in different channels at the same 

time interval. In this case you will be asked to choose 

one of these timers and cancel others. Highlight the 

timer you want to cancel and press 

OK

,

 Options 

menu 

will be displayed. Then highlight 

Set/Cancel

 and press 

OK

 to cancel that timer. You will have to save changes 

after that. In order to do that press 

OK

, highlight 

Save 

Changes

 and press 

OK

 again.

3.4. Recordings

You can manage your recordings using the options 

of this menu. You can playback, edit, delete or sort 

previously recorded events. Highlight a tab by using 

the Left or Right direction button and press 

OK

 to see 

available options.

3.5. 

More Apps

In order to manage the apps installed on your TV, 

you can use this option. Highlight and press 

OK

. You 

can add an installed app to 

Home

 menu, launch or 

remove it. Highlight an app and press 

OK

 to see the 

available options.

3.6. Market

You can add new apps from the application market 

using this option. Highlight and press 

OK

. Available 

apps will be displayed. You can also access the 

application market from within the 

More Apps

 menu.

3.7. Reset Apps

You can reset your customisations on the 

Home

 menu 

to defaults using this


option (availability depends on 

TV model and its features). Highlight and press 

OK

A confirmation message will be displayed. Highlight 

Yes

 and press 

OK

 to proceed. Note that you will not 

be able to perform this operation again within the next 

few minutes.

3.8. Accessibility

You can access the accessibility settings menu directly 

using this option.

3.9. Privacy Settings

You can access the privacy settings menu directly 

using this option. This option may not be available 

depending on the model of your TV and the selected 

country during the first time installation process.

4. Settings

You can manage the settings of your TV using the 

options of this menu. Refer to 

Settings Menu Content 

section for more information.

5. 

Sources

You can manage your input source preferences using 

the options of this menu. To change the current source 

or use your TV as a wireless display device highlight 

one of the options and press 

OK

5.1. 

Source Settings

You can access the source settings menu directly using 

this option. 

Edit the names, enable or disable selected 

source options.

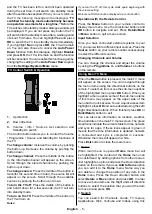
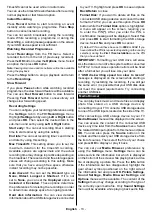
Inserting the Batteries into the Remote

Remove the back cover to reveal the battery compart-

ment. You need to do the followings in order to do that:
•  Place the tip of a pen or some other pointed object in 

the hole above the cover and press it down.

•  Then press firmly on the cover and slide in the 

direction of the arrow.

Insert two size 

AAA

 batteries. Make sure the (+) and 

(-) signs match (observe correct polarity). Do not mix 

old and new batteries. Replace only with same or 

equivalent type. Place the cover back on. 
A message will be displayed on the screen when the 

batteries are low and must be replaced. Note that when 

the batteries are low, the performance of the remote 

control may be impaired.
Batteries should not be exposed to excessive heat 

such as sunshine, fire or the like.

Summary of Contents for OCEA32SFHD21B3

Page 1: ......

Page 2: ......

Page 3: ...n ral de la TV 24 Utilisation de la liste de cha nes 24 Configuration des param tres parentaux 24 Guide des programmes lectroniques 24 Services t l texte 25 Mise jour logicielle 25 D pannage et astuc...

Page 4: ...la peut causer un court circuit ou un choc lectrique Ne nouez et n attachez jamais le cordon d alimentation d autres cordons Si le c ble d alimentation est endommag il doit tre remplac par le fabrican...

Page 5: ...ter le t l viseur en toute s curit TOUJOURS vous assurer que le t l viseur ne d passe pas le bord du meuble de support TOUJOURS informer les enfants des dangers de grimper sur les meubles pour atteind...

Page 6: ...ermettra galement de r duire la consommation d nergie Fonctions TV couleur avec t l commande TV num rique par c ble satellite enti rement int gr e DVB T2 C Entr es HDMI pour connecter d autres apparei...

Page 7: ...oit aucun signal d entr e par exemple une antenne ou une source HDMI pendant 3 minutes il passe en veille Lors de la prochaine mise en marche le message suivant s affiche l cran Le t l viseur passe au...

Page 8: ...et que la synchronisation s effectue avec succ s Sinon les ic nes appara tront en blanc Appuyez sur le bouton Quitter pour fermer le menu principal 1 ACCUEIL Lorsque le menu principal est ouvert la b...

Page 9: ...cette op ration dans les prochaines minutes 3 8 Accessibilit Vous pouvez acc der directement au menu des param tres d accessibilit en utilisant cette option 3 9 Param tres de confidentialit Vous pouv...

Page 10: ...e Microsoft Corporation L utilisation ou la distribution d une telle technologie en dehors de ce produit est interdite sans une licence de Microsoft ou d une filiale Microsoft agr e Informations de la...

Page 11: ...W 5470 5725 MHz CH100 CH140 200 mW Restrictions pays Cet appareil est destin un usage domestique et de bureau dans tous les pays de l UE ainsi que d autres pays qui appliquent les directives europ enn...

Page 12: ...oit ou gauche 8 OK Confirme les s lections de l utilisateur maintient la page en mode TXT affiche le menu des Cha nes en mode DTV 9 Pr c dent Retour Retourne l cran pr c dent le menu pr c dent ouvre l...

Page 13: ...sque vous utilisez le kit de montage au mur fourni par un tiers du contrat si non fourni nous vous recommandons de connecter tous vos c bles l arri re du t l viseur avant l installation murale Ins rez...

Page 14: ...res Syst me Autres et vous pouvez l activer la d sactiver plus tard Faites votre choix et appuyez sur OK pour continuer L cran de s lection du mode image s affiche alors Pour que votre t l viseur cons...

Page 15: ...r es USB de votre TV IMPORTANT Sauvegardez les fichiers sur vos p riph riques de stockage avant de les raccorder au t l viseur La responsabilit du fabricant ne saurait tre engag e en cas de dommage de...

Page 16: ...u l option d avance rapide Enregistrement instantan Appuyez sur le bouton Enregistrer pour d marrer l enregistrement d un v nement tout en visionnant un programme Appuyez sur le bouton Stop pour annul...

Page 17: ...via votre menu R glages Le menu Param tres est accessible via la barre d informations qui s affiche en bas de l cran lors de la lecture d une vid o ou d un fichier audio ou de l affichage d un fichier...

Page 18: ...e Permet d utiliser l optionAmplificateur r cepteur audio avec le t l viseur Vous pouvez r gler le volume l aide de la t l commande de votre t l viseur Pour activer cette fonction d finissez l option...

Page 19: ...GA utilisez cette option pour ajuster automatiquement la position de l image Appuyez sur OK pour lancer le r glage automatique Position H Cette option d place l image horizontalement vers le c t droit...

Page 20: ...e teinte de couleur et de luminosit Cartographie de Gamme Vous pouvez utiliser cette option pour r gler la gamme de couleurs affich es sur l cran de votre t l viseur Lorsqu elle est activ e les couleu...

Page 21: ...au de sortie pr vu entre les programmes Si l option du menu Dolby Audio est r gl e sur une option autre que D sactiv les options de r glage de l AVL seront modifi s Les options Auto Nuit Normal et D s...

Page 22: ...le syst me de diffusion D A rien Recherche les cha nes d antenne r seau D C ble Recherche les cha nes de c ble r seau R glage analogique avec pr cision Vous pouvez utiliser ce r glage pour la recherc...

Page 23: ...onctionnalit de description audio du son ne peut pas tre disponible lors de l enregistrement ou lorsque vous tes en mode d calage temporel Am lioration du Dialogue Cette fonction offre de solides opti...

Page 24: ...D connexion seront disponibles R f rez vous la section Alexa Pr t pour plus d informations Alexa En Attente Active ou d sactive la fonction Alexa En Attente Si cette option est activ e Alexa sera disp...

Page 25: ...du menu du t l viseur peuvent tre indisponibles Partage Audio Vid o Cela vous permet de partager les fichiers sauvegard s sur votre Smartphone ou votre tablette pc Si vous poss dez un Smartphone ou u...

Page 26: ...n permet d autoriser ou de verrouiller l acc s tous les menus ou menus d installation du t l viseur Verrouillage de Maturit Si cette option est activ e le t l viseur obtient les informations de maturi...

Page 27: ...ment en question et appuyez sur le bouton OK Ensuite s lectionnez l option Supprimer la minuterie de l v nement La minuterie sera annul e Enreg Annuler Enreg Minuterie S lectionnez l option Enregistre...

Page 28: ...il votre vendeur Pas de son V rifiez si le t l viseur est en mode Muet Appuyez sur le bouton Muet ou augmentez le volume pour v rifier Le son sort d un seul haut parleur V rifiez les param tres d quil...

Page 29: ...440x900 60Hz 18 1440x900 75Hz 19 1920x1080 60Hz Compatibilit des signaux AV et HDMI Source Signaux pris en charge Disponible Retour AV PAL O secam O NTSC4 43 O NTSC3 58 O YPbPr 480i 480p 60Hz O 576 i...

Page 30: ...3gpp MPEG1 2 H 263 MPEG4 H 264 mkv NIVEAU 1 2 MPEG4 H 264 flv Sorenson Sp MPEG4 H 264 asf wmv MPEG4 WMV3 VC1 webm VP9 VP8 mp4 mov 3gpp 3gp ts trp tp mkv HEVC H 265 Format de Fichier Image Extension S...

Page 31: ...tions mkv VOBSub mkv ASS SSA TEXTE dat mpg mpeg vob Sous titrage DVD mp4 Sous titrage DVD TEXTE R solutions DVI prises en charge Reportez vous aux r solutions suivantes au moment de raccorder des p ri...

Page 32: ...la fin Param tres Avanc s S lectionnez l option Param tres Avanc s puis appuyez sur le bouton OK l cran suivant vous pouvez modifier les param tres IP et DNS du t l viseur S lectionnez les param tres...

Page 33: ...directement vous connecter au modem routeur sans avoir entrer le mot de passe ou ajouter le r seau au pr alable S lectionnez Appuyer sur WPS sur l option de votre routeur Wi Fi et appuyez sur OK Appuy...

Page 34: ...patibilit peuvent se poser avec des versions de syst me d exploitation commercialis es apr s la production de ce t l viseur La recherche et la connexion des processus varient selon le programme que vo...

Page 35: ...e manuel d instructions de votre modem sans fil pour obtenir des informations sur la zone de service interne la vitesse de la connexion la qualit du signal et d autres param tres Vous devez avoir une...

Page 36: ...wd sont disponibles Pour ajouter un site web d sir la liste de num ros abr g s pour un Acc s Rapide d placez le curseur en haut de la page ou appuyez sur La barre du navigateur appara t S lectionnez l...

Page 37: ...eur Lorsqu une application HbbTv est lanc e le contr le de certaines touches revient l application titre d exemple la s lection des cha nes num riques peut ne pas fonctionner sur une application t l t...

Page 38: ...lectionn e est disponible elle sera utilis e dans l application No de Version Affiche la version de l application en cours D tail de Page Pour ouvrir la page de d tail saisissez un programme Sur l cra...

Page 39: ...ns le menu Para m tres Syst me Assistant Vocal Effectuez la premi re installation sur votre t l viseur L assistant d installation s affiche une fois le proces sus d installation termin L assistant vou...

Page 40: ...t l viseur commute sur la cha ne avec le nom sp cifi Alexa cha ne vers le haut sur FN Le t l viseur passe la cha ne sup rieure suivante s il y en a un disponible Alexa cha ne vers le bas sur FN Le t l...

Page 41: ...r passe sur la cha ne avec le num ro sp cifi par exemple cha ne 200 change channel to chan nel_name on FN Le t l viseur commute sur la cha ne avec le nom sp cifi channel up on FN Le t l viseur passe l...

Page 42: ...Menu Content 15 General TV Operation 22 Using the Channel List 22 Configuring Parental Settings 22 Electronic Programme Guide 22 Teletext Services 23 Software Upgrade 23 Troubleshooting Tips 23 PC Inp...

Page 43: ...r cords When damaged it must be replaced this should only be done by qualified personnel Do not expose the TV to dripping or splashing of liquids and do not place objects filled with liquids such as v...

Page 44: ...ion or through other apparatus with a connection to protective earthing and to a television distribution system using coaxial cable may in some circumstan ces create a fire hazard Connection to a tele...

Page 45: ...storage device to your TV Press the Standby button on the remote briefly to switch your TV into standby picture mode Note that once the Standby Picture option is set as On the function of the Standby...

Page 46: ...th the Remote Control Press the Menu button on your remote control to display main menu Use the directional buttons and OK button to navigate and set Press Return Back or Menu button to quit a menu sc...

Page 47: ...ou can add an installed app to Home menu launch or remove it Highlight an app and press OK to see the available options 3 6 Market You can add new apps from the application market using this option Hi...

Page 48: ...nt If you decline an upgrade you will not be able to access content that requires the upgrade The CI Plus Logo is a trademark of CI Plus LLP This product is protected by certain intellectual property...

Page 49: ...8 200 mW 5250 5350 MHz CH52 CH64 200 mW 5470 5725 MHz CH100 CH140 200 mW Country Restrictions This device is intended for home and office use in all EU countries and other countries following the rele...

Page 50: ...s frames backwards in media such as movies 14 Record Records programmes 15 Play Starts to play selected media 16 Pause Pauses the media being played starts timeshift recording 17 Stop Stops the media...

Page 51: ...C audio cable for audio connection When using the wall mounting kit available from a third party in the market if not supplied we recommend that you plug all your cables into the back of the TV before...

Page 52: ...s menu may appear at this point Using this menu you can set your privacy privileges Highlight a feature and use Left and Right directional buttons to enable or disable Read the related explanations di...

Page 53: ...MPORTANT When using a new USB hard disk drive it is recommended that you first format the disk using your TV s Format Disk option in the TV Recordings Settings menu To record a programme you should fi...

Page 54: ...your TV Highlight and press OK to see and press Back Return to close Format Disk If you want to delete all files on the connected USB storage device and convert the disk format to FAT32 you can use t...

Page 55: ...r 1 etc The TV remote is automatically able to perform the main functions after the connected HDMI source has been selected To terminate this operation and control the TV via the remote again press an...

Page 56: ...he top or bottom of the screen Dot Clock Dot Clock adjustments correct the interference that appear as vertical banding in dot intensive presentations like spreadsheets or paragraphs or text in smalle...

Page 57: ...tion Note This option may not be available depending on the TV model and its features HDMI Full Range While watching from a HDMI source this feature will be visible You can use this feature to enhance...

Page 58: ...he sound to obtain fixed output level between programmes If the Dolby Audio menu item is set to an option other than Off the AVL setting options will change Auto Night Normal and Off options will be a...

Page 59: ...broadcast entry Network channel scan Searches for the linked channels in the broadcast system D Aerial Searches for aerial network channels D Cable Searches for cable network channels Analogue fine t...

Page 60: ...post processing options for speech gated dialogue enhancement Off Low Medium and High options will be available Set according your preference Note This feature has an effect only if input audio format...

Page 61: ...feature will be disabled Google Assistant Starts the setup process to enable your TV to work with Google Assistant devices Highlight Start and press OK If the setup is priorly completed Sign Out opti...

Page 62: ...Application Priority You can set your preference regarding the priority between the broadcast applications and CICAM AppMMI applications using this option In case a CICAM is inserted into the TV and...

Page 63: ...to 18 as default Child Lock If this option is set to On the TV can only be controlled by the remote control In this case the control buttons on the TV will not work Internet Lock If this option is se...

Page 64: ...sing the coloured buttons Follow the instructions displayed on the screen Digital Teletext Press the Text button to view digital teletext information Operate it with the coloured buttons cursor button...

Page 65: ...on the screen while starting a recording try restarting the recording If you still get the same error it is possible that your USB storage device does not meet the speed requirements Try using a diffe...

Page 66: ...MPEG1 2 H 263 MPEG4 H 264 mkv MPEG 1 2 MPEG4 H 264 flv Sorenson Sp MPEG4 H 264 asf wmv MPEG4 WMV3 VC1 webm VP9 VP8 mp4 mov 3gpp 3gp ts trp tp mkv HEVC H 265 Picture File Formats Extension Specificati...

Page 67: ...n mkv VOBSub mkv ASS SSA TEXT dat mpg mpeg vob DVD Subtitle mp4 DVD Subtitle TEXT Supported DVI Resolutions When connecting devices to your TV s connectors by using DVI converter cable DVI to HDMI cab...

Page 68: ...d DNS settings of the TV Highlight the desired one and press Left or Right button to change the setting from Automatic to Manual Now you can enter the IP and or DNS values manually Select the related...

Page 69: ...Other Information The status of the connection will be displayed as Connected or Not Connected and the current IP address if a connection is established Connecting to your mobile device via WLAN If yo...

Page 70: ...on is successfully established If the connection fails try it again Image transfer and audio streaming You can also use this type of connection to transfer images or stream audio from your mobile devi...

Page 71: ...ted to your home network 1 Server Software Installation The Audio Video Sharing feature cannot be used if the server programme is not installed onto your PC or if the required media server software is...

Page 72: ...o the initial red button icon state by pressing the red button again You can toggle between the red button icon mode and full UI mode of the application via pressing red button It should be noted that...

Page 73: ...st connected TV and skips the TV search screen Change TV Only in IOS Shows the currently connected TV You can press on this setting to go to the TV search screen and change to a different TV Edit cust...

Page 74: ...The setup wizard will be displayed after the installation process is completed The wizard will guide you through the setup process Refer to the user manual of the Microphone Box for detailed informat...

Page 75: ...iances Works With Hey Google By means of this feature you can control the functions of your TV with GoogleAssistant devices In order to do this the setup process should be completed Before the setup C...

Page 76: ...V switches to the next lower channel if any available FN is the abbreviation for Friendly Name Google is a trademark of Google LLC DVB functionality information This DVB receiver is only suitable for...

Page 77: ...derlands VESAWANDMONTAGEMETINGEN Groottebooropening mm Schroefgroote Lengte X Draad Y Suomi VESA SEIN ASENNUKSENMITAT Reik kuvionkoot mm Ruuvinkoot Pituus x Kierre Y Norsk VESAVEGGMONTERINGSM L Hullm...

Page 78: ...TFT IDTV t pus r di berendez s megfelel a 2014 53 EU ir nyelvnek Az EU megfelel s gi nyilatkozat teljes sz vege el rhet a k vetkez internetes c men doc vosshub com IT Il fabbricante VESTEL Elektronik...

Page 79: ......

Page 80: ......

Reviews: