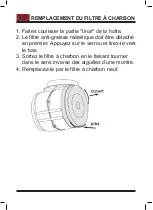


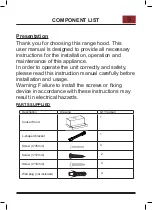
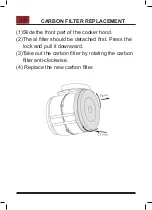
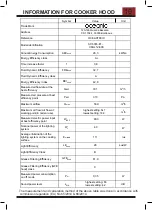


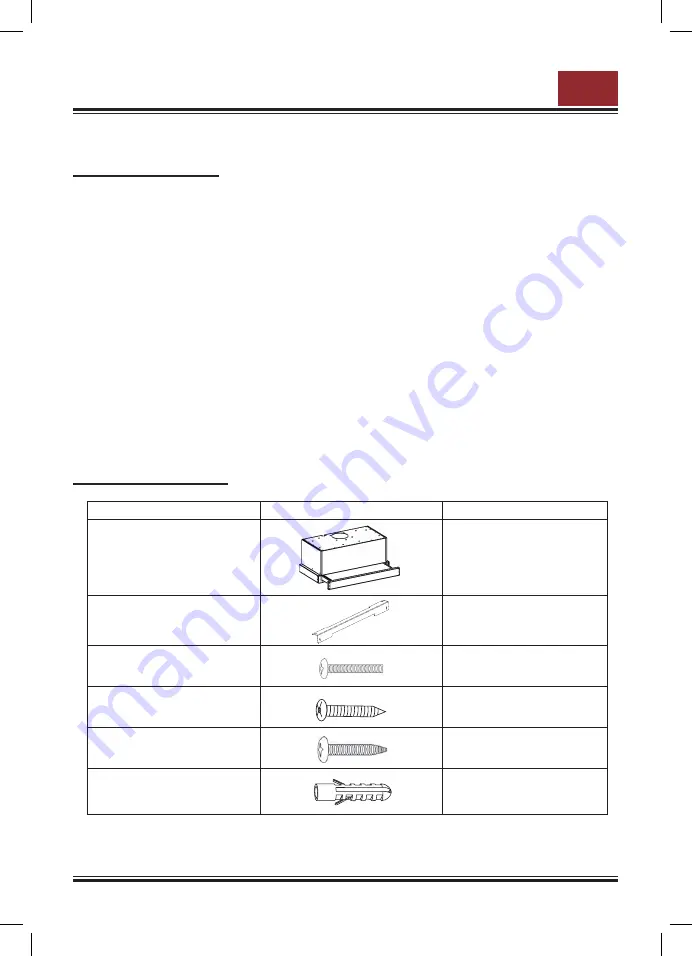
COMPONENT LIST
Presentation
Thank you for choosing this range hood� This
user manual is designed to provide all necessary
instructions for the installation, operation and
maintenance of this appliance�
In order to operate the unit correctly and safety,
please read this instruction manual carefully before
installation and usage�
Warning: Failure to install the screws or fixing
device in accordance with these instructions may
result in electrical hazards�
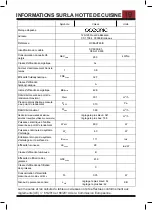
PARTS SUPPLIED
Description
Drawing
QTY(pc/set)
Cooker Hood
1
L-shaped bracket
1
S
crew (4*35mm
) 4
S
crew (3*12mm)
2
Screw (4*
3
0mm)
4
Wall plug
(not included)
4
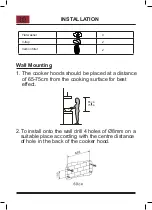
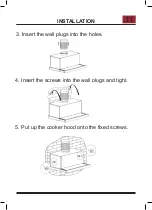
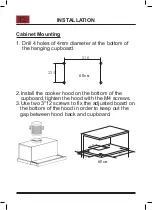
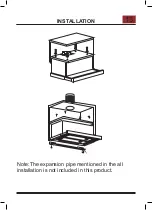
9


