16
4.
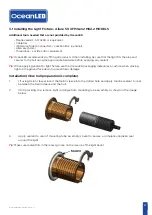
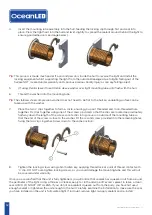
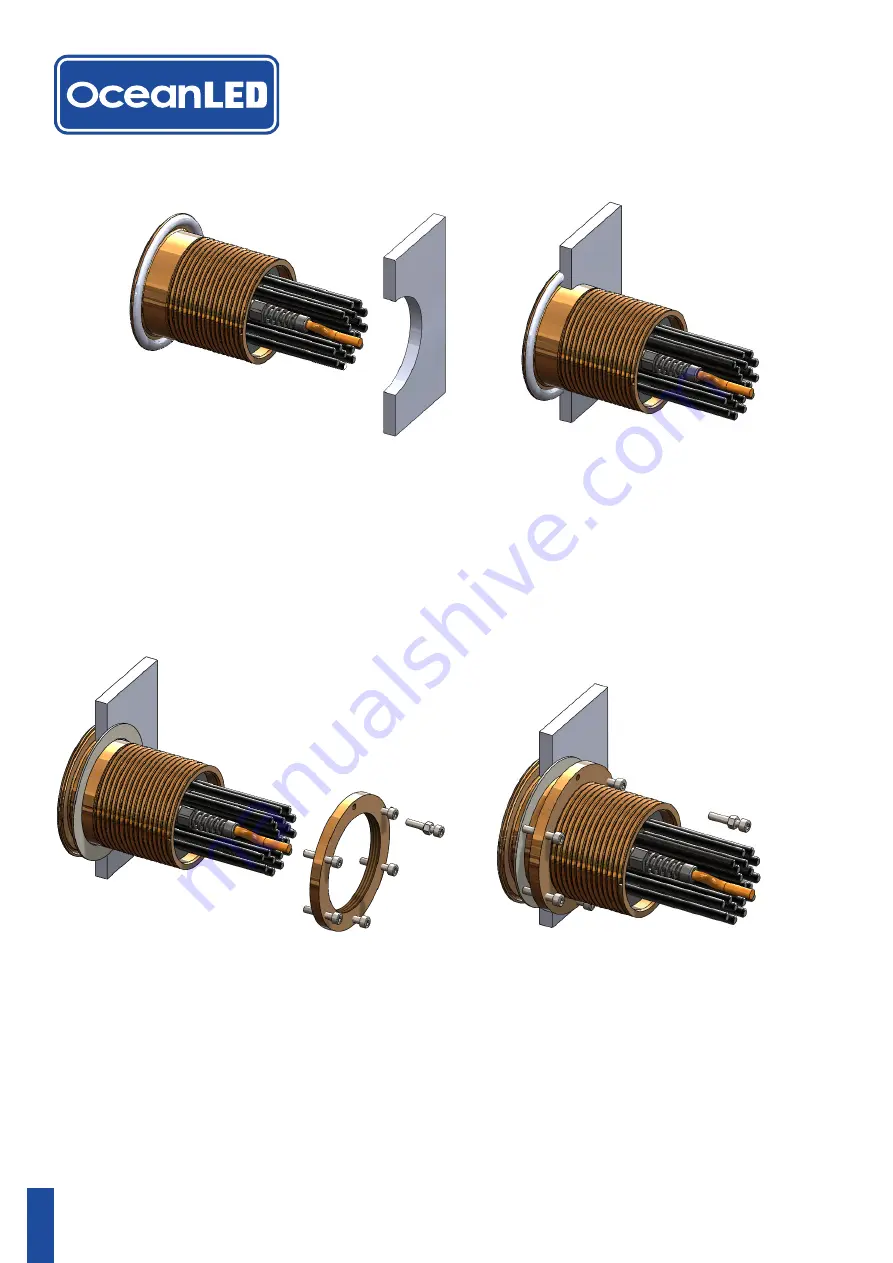
Insert the complete light unit (mounting tube as light cartridge) into the hull, pressing the light
hard into the hull and twist slightly to spread the sealant around behind the light to ensure good adhesion.
Tip
: This process is made much easier if a second person is inside the hull to receive the light and install the
locking equipment whilst supporting the light from the outside. Breakages due to lights falling out of the
hull are NOT covered under warranty and can cause serious bodily injury as can any falling object.
5.
(If using Delrin sleeve) thread Delrin sleeve washer over mounting tube until flush with the hull.
6.
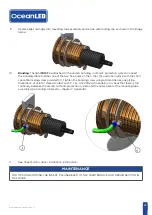
Thread 5 of the 6 screws provided into the locking ring
, so the locking ring is positioned approximately
halfway along the screw threads.
Leave one screw out
(will be used later for bonding).
7.
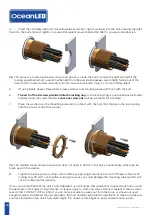
Place the washer over the mounting tube until in contact with the hull, then thread on the locking ring
until the screws contact the washer.
Tip
: The stainless steel compression washer does not need to be flat to the hull, an undulating surface can be
taken up with the washer.
8.
Tighten the locking screws using a 4mm Allen key, applying thread lock at point of thread contact with
locking ring. DO NOT over-tighten locking screws, as you could damage the mounting tube and this will
not be covered under warranty.
Once you are satisfied that the unit is fully tightened, you will notice that sealant has squeezed out from around
the perimeter of the light. Using a thinner or cleaner, apply to cloth and wipe off excess sealant to leave a clean
seal. AVOID CONTACT WITH LENS. If you do not see sealant squeeze out from the body, you have not used
enough sealant or tightened the unit enough to the hull. Carefully examine the installation to make sure the seal
you have installed on the unit is fully water-tight. If in doubt, remove light, re-apply sealant and re-install.
OceanLED INSTALL / ALLURE / 240717 / 7.1

