background image

22

Tip

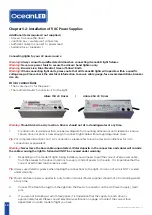
:  Always use dielectric grease when making the connections to the light. Corrosion of wire is NOT covered 

under warranty. 

Connect the Deutsch plug from the light into the multi pin port on the driver.

 If you are not installing a custom fuse panel, it is imperative that a correctly rated fuse is installed on the 

power line from each light. Please consult electrical specification on page 4 to select the correct fuse.

5  

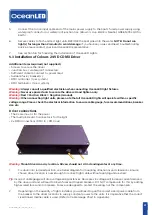
Using waterproof connections or a waterproof junction box, make the connections from the fused 

24V DC power source to the 2 core power cable (RED is positive, BLACK is ground).

6. 

Continue to section 5.5 for DMX control connection

5.4 

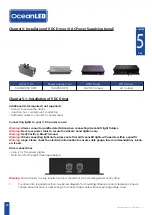
Installation of Colours AC DMX Driver


Additional items required (not supplied) 

• Screws to secure the driver 

• Junction box / waterproof connectors 

• Sufficient cable to connect to power lead. 

• Suitable fuse / breaker(s) 

• DMX controller (1 per system) 
• DMX terminator (1 per system)


Warning

: Always consult a qualified electrician when connecting OceanLED light fixtures.  

Warning

: Never use power tools to secure the drivers: hand tighten only.  

Warning

Brown=Live; Blue=Neutral; Green/Yellow=Earth


Warning

: When connecting light units, please note that all OceanLED lights will operate within a specific 

voltage range. Please check the electrical information to ensure cable gauge, fuse recommendations, break-

er size etc. 


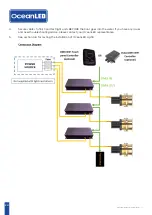
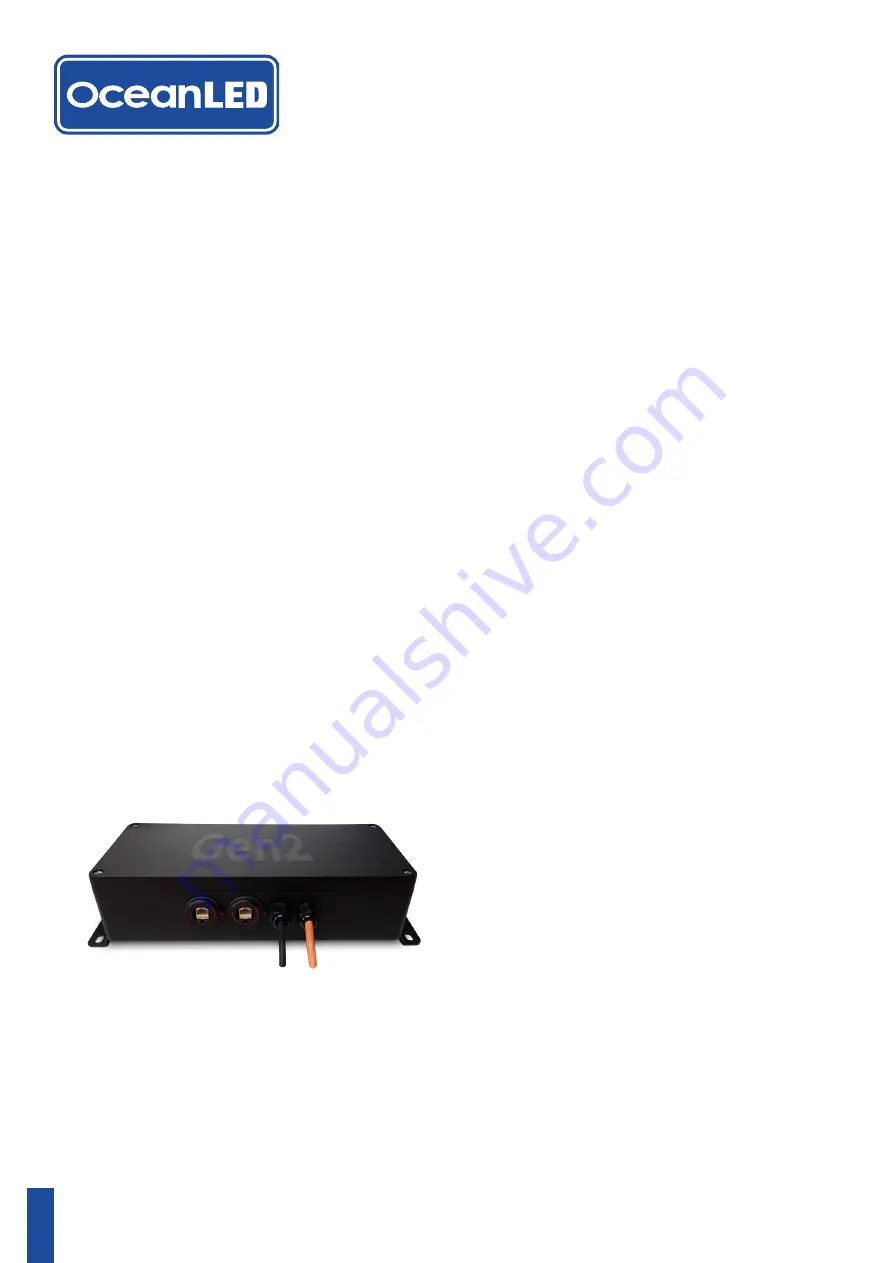
Driver connections 

• The 3 core input is for the power  

• The multi pin Deutsch connector is for the light 

• 2x DMX connections (DMX in / DMX out) 


Warning

: Mount drivers in a dry location. Drivers should not sit in standing water at any time.  


1. 

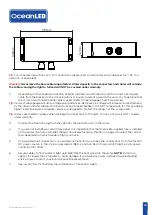
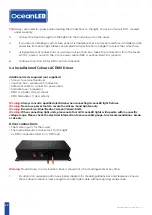
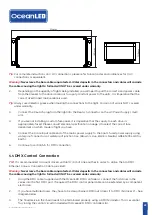
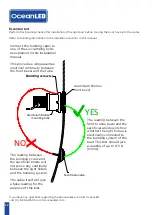
 Fix driver into required position, see below diagram for mounting dimensions and clearances. Ensure 

chosen driver location is near enough to connect light cable without applying undue stress

OceanLED INSTALL / ALLURE / 240717 / 7.1

Summary of Contents for ALLURE XFM Series

Page 1: ...FM HD Gen2 MK2 2 ALLURE XFM INSTALLATION MANUAL Allure Xchangeable Flush Mount XFM Gen2 MK2 2 50 XFM HD 150 XFM HD 250 XFM HD Colours XFM HD OceanLED This installation manual covers the following prod...

Page 2: ...D Gen2 MK2 2 Chapter 5 15 Installation of V DC Driver V AC Power Supply Chapter 6 23 Operation Maintenance Repair Parts Troubleshooting Chapter 7 28 Warranty Statement PRETEST Always test the lights p...

Page 3: ...Metal parts and certain natural and man made surfaces are particularly susceptible to corrosion and deterioration when used in and around salt water Some OceanLED lights contain combinations of plast...

Page 4: ...uctuations to ensure your lights are always receiving the proper voltage and to ensure the power supply is not overworked causing premature failure Use chart below in determining power supplies Model...

Page 5: ...speed and brightness Choose between standard static cycle or strobe modes Alternatively use audio or wave motion modes to control the colour scheme of your choice The OceanDMX App has been custom des...

Page 6: ...or example the XFM unit requires an additional 160mm 6 3 from the rear of the mounting tube to allow the insert to be removed Depth Ideal mounting depth is 100 200mm 4 8 from the water line to the top...

Page 7: ...ence boat manufacturer s specifications 2 1 Preparing a Solid Fiberglass Hull Tip Always wear safety goggles and a dust mask 1 Drill a 3mm 1 8 pilot hole perpendicular to the waterline from inside the...

Page 8: ...rial from inside the outer and inner layers of hull Be careful at this point to not damage the outer hull layers This process should leave a recess 5 Completely seal the hull to prevent water seepage...

Page 9: ...elaxing the action to ensure an even cut through the hull and the saw s longevity If cutting through Kevlar shield or metal be careful of overheating the hole saw 3 Sand the area around the hole using...

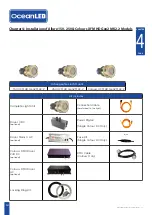
Page 10: ...llure XFM HD Gen2 MK2 2 Models Xchangeable Flush Mount 50 XFM HD Gen2 MK2 2 Kit Includes 50 XFM HD Gen2 MK2 2 Light Connection Cable hard wired to the light Driver V DC Gen2 Power Pigtail Locking Ring...

Page 11: ...applying sealant to light fixture use the OceanLED packaging material as a cushion when placing light on the ground face down to prevent lens damage Installation Once hull preparation is complete 1 I...

Page 12: ...ips together using one of the screws provided so that the clips are located approximately half way down the length of the screw Locate clips into grooves on outside of the mounting tube so that the en...

Page 13: ...ing screw provided 4 Tighten the bonding screw using a 5mm Allen key applying thread lock at point of thread contact with C clip Once fitted it mandatory to check that there is full continuity between...

Page 14: ...2 2 Colours XFM HD Gen2 MK2 2 Kit Includes Complete Light Unit Connection Cable hard wired to the light Driver V DC optional Power Pigtail Single Colour DC Only Driver Mains V AC optional Fuse Kit Sin...

Page 15: ...Tip When applying sealant to light fixture use the OceanLED packaging material as a cushion when placing light on the ground face down to prevent lens damage Installation Once hull preparation is comp...

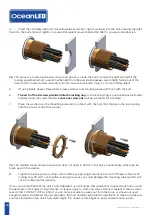
Page 16: ...tube until in contact with the hull then thread on the locking ring until the screws contact the washer Tip The stainless steel compression washer does not need to be flat to the hull an undulating su...

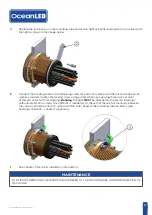
Page 17: ...t point of thread contact with locking ring Bonding The light MUST be attached to the vessels bonding cathodic protection system Once fitted it is mandatory to check that there is full continuity betw...

Page 18: ...e power tools to secure the drivers hand tighten only Warning Red Positive Black Ground Warning When connecting light units please note that all OceanLED lights will operate within a specific Warning...

Page 19: ...esigned to protect the wiring not the components Tip Always use dielectric grease when making the connections to the light Corrosion of wire is NOT covered under warranty 3 Connect the Deutsch plug fr...

Page 20: ...s near enough to connect light cable without applying undue stress Tip For complete instructions on V AC connections please refer to local codes and ordinances for V AC connections or equivalent Warni...

Page 21: ...please note that all OceanLED lights will operate within a specific voltage range Please check the electrical information to ensure cable gauge fuse recommendations breaker size etc Driver connections...

Page 22: ...cient cable to connect to power lead Suitable fuse breaker s DMX controller 1 per system DMX terminator 1 per system Warning Always consult a qualified electrician when connecting OceanLED light fixtu...

Page 23: ...rrect fuse dependant on which model of light you have 5 Connect the 3 core input cable end of the mains power supply to the boat s fused power supply using waterproof connectors or waterproof junction...

Page 24: ...units BEFORE the boat goes into the water If you have any issues and need troubleshooting advice please contact your OceanLED representative 5 See section 5 6 for testing the installation of OceanLED...

Page 25: ...stem is operational If you have any issues please contact your local OceanLED representative Warning Never install a new light fixture then leave the boat in the water unchecked for several days When...

Page 26: ...r applied as irreversible damage may occur 6 1 1 Single Colour 1 Once fully installed lights will illuminate when power is applied to the driver 6 1 2 DMX Colours 1 Once fully installed and power is a...

Page 27: ...te your warranty 2 Check connections annually for corrosion if necessary replace connections 3 Check light installations periodically for signs of corrosion 6 3 Removing light cartridge from mounting...

Page 28: ...ip NOTE Verify that the light assembly is still conected to the bonding cathodic protection system of the vessel See Chapter 3 and 4 Installing or replacing the 150 or 250 XFM cartridge 1 Check that t...

Page 29: ...r dealer Check lights to see if water is present inside the light Water present Contact your dealer Check cable connections for corrosion If corrosion is present It is not advised to reuse the cable i...

Page 30: ...at must be traced and rectified If no external short can be located contact your dealer Exchange the interlink cable between light and driver with one from a working light Light works faulty cable Con...

Page 31: ...WG 8 AWG 35 40 18 AWG 14 AWG 12 AWG 12 AWG 10 AWG 10 AWG 8 AWG 8 AWG 40 45 16 AWG 14 AWG 12 AWG 10 AWG 10 AWG 8 AWG 8 AWG 8 AWG 45 50 16 AWG 14 AWG 12 AWG 10 AWG 10 AWG 8 AWG 8 AWG 8 AWG 50 55 16 AWG...

Page 32: ...ture and the bonding system The cable itself will give a false reading for the purpose of this test Connect the bonding cable to one of the six clamping bolts as explained in this installation manual...

Page 33: ..._____________________________ __________________________________________________________________________ __________________________________________________________________________ ____________________...

Page 34: ...Beach Florida FL 33442 3025 Tel 1 954 523 2250 Fax 1 954 523 2249 sales oceanledusa com 2017 Ocean LED Marine LTD All Rights Reserved Specifications are subject to change without notice Trademarks ar...

Reviews: