DISCOVER
D3
.
INSTALL & OPERATION MANUAL
8
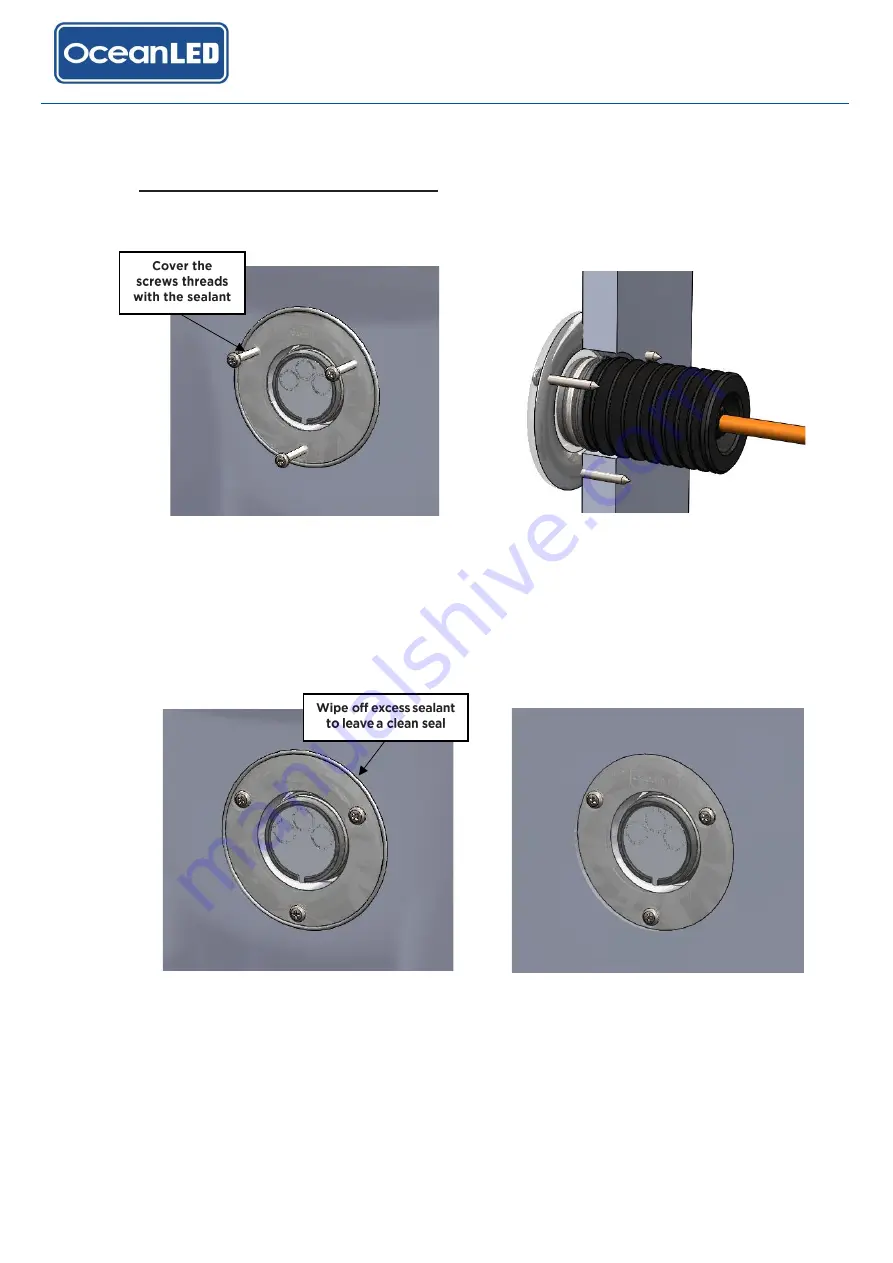
3. Cover the screws threads with the sealant and screw into the pre-drilled pilot holes.
4.
Tighten the screws with a hand tool ONLY!
DO NOT
over-tighten the screws, as you could damage the
front bezel, and will void your warranty.
5. Once you are satisfied that the unit is fully tightened, you will notice that sealant has squeezed out from
around the perimeter of the light. Using a cloth, wipe off excess sealant to leave a clean seal. If you do not
see sealant squeeze out from the body, you have not used enough sealant or possibly tightened the unit
enough to the hull. Carefully examine the installation to make sure the seal you have installed on the unit is
fully watertight. If in doubt, remove light, re-apply sealant and re-install.


