INSTALLATION (QUICK START GUIDE):
SUSTAINABILITY
OceanLED is committed to a sustainable future. Through constant product and design innovation, establishing better
working practices, and evaluating our supply chains, we are able to take measurable steps to creating true sustainability
in our business.
1.
Test light(s) before fitting.
2.
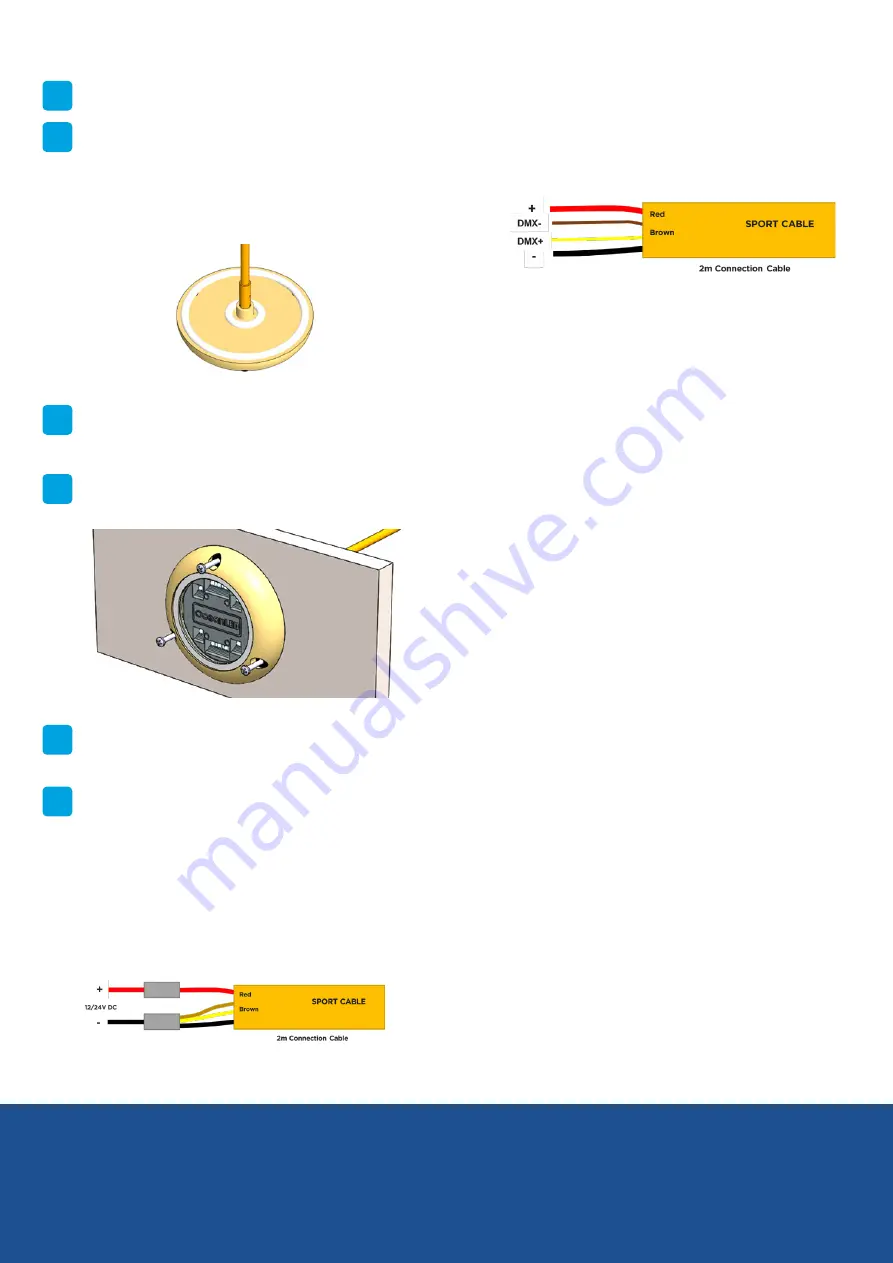
Apply a generous amount of the chosen sealant to
the back perimeter of the light body (1). Ensure that
the cable of the light is thoroughly coated where it
meets the back of the light (2). There should be a
continuous and unbroken bead of sealant around the
perimeter of the light unit, including the screw holes
and cable exit.
3.
Insert the light on to the hull, feeding the cable
through first, and then seat it into place. Press the
light firmly onto the hull to ensure a secure and
adhesive attachment.
4.
ELECTRICAL INSTALLATION:
Connecting light/s to your DC Power Source
OceanLED Sport models require a 12 or 24V DC
supply. This supply should be a minimum of 6A @12V
or 3A @ 24V DC per light.
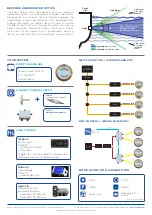
Sport DMX Colours operated by switch
To use in DC switched mode; connect DC power +Ve
to the RED wire, and DC power -Ve to the BLACK,
BROWN & YELLOW wires
FOR FULL INSTALLATION INSTRUCTIONS, SEE THE
INSTALLATION MANUAL.
5.
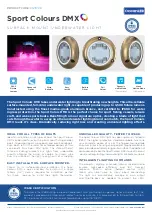
Cover the screw (4) threads with the sealant and
screw into the pre-drilled pilot holes. Tighten the
screws with a hand tool ONLY!
6.
Sport DMX Colours operated by DMX controller
Please refer to the table below and consult the
installation manual of the 2-way DMX Junction Box
for connection method. This light requires a 2-way
DMX Junction Box for efficient distribution of power
and the DMX signal.
To ensure proper dispersion of light underwater,
make sure all Sport Lights are mounted with the
correct orientation, with the logo (3) facing upwards.


