38
Octane Fitness Confidential
1-800-68-634
3.10 Brake Assembly/Pulley Replacement
1. Use the Level - key to make sure the resistance of the machine is set to level 1 (the lowest level).
2. Unplug the unit and remove the access panel and side shrouds.
3. Loosen the belt tensioner bolt enough to allow you to remove the belt.
4. Loosen the axle bolt that holds the brake flywheel in place (Figure 3.16).
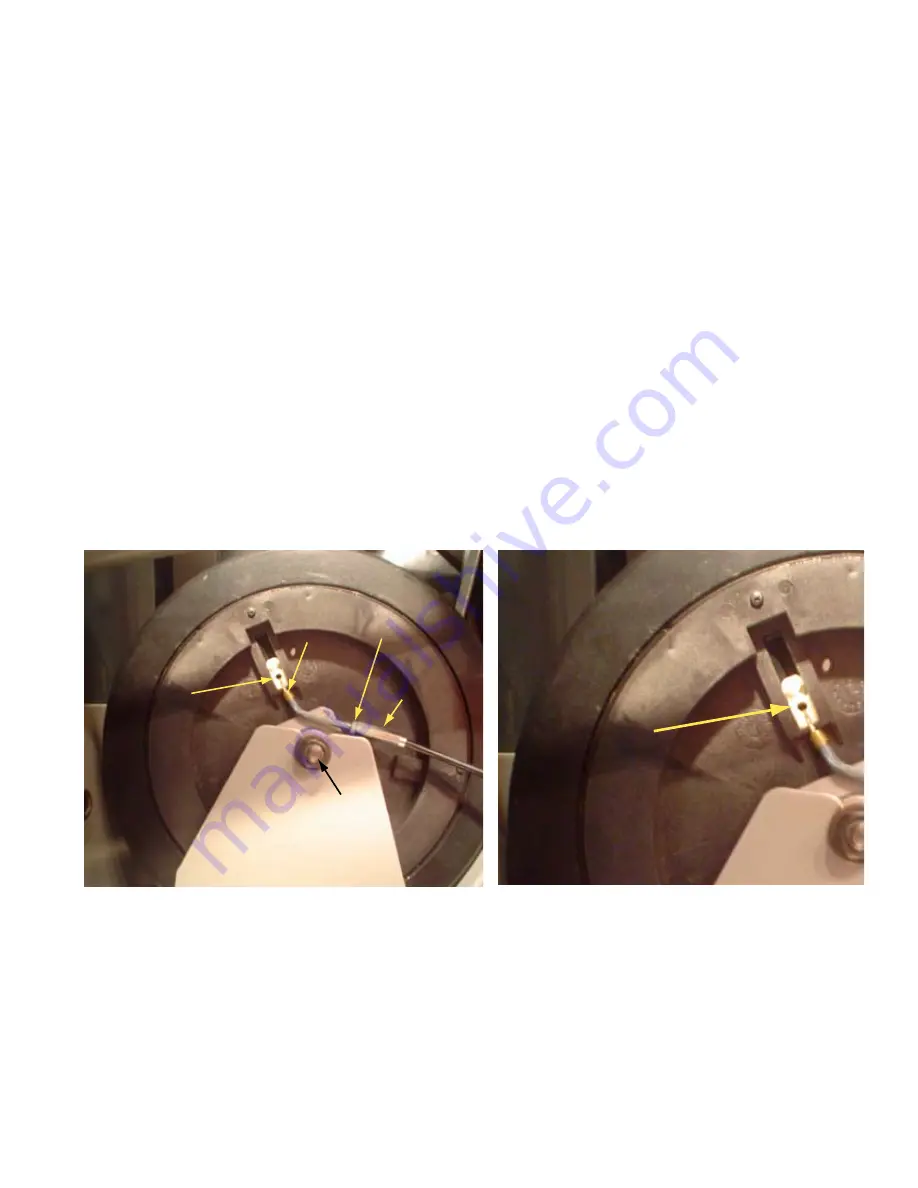
5. Remove the brake cable from the plastic sliding piece on the brake (Figure 3.17).
6. Lift the brake and remove it from the unit.
7. Slide the new brake into its slot.
8. Put the belt drive on the new brake and re-tighten the belt tensioner bolt.
9. Replace the brake cable into the sliding piece on the brake. The sliding piece should be at the bottom of its slot and
the brake cable should be coming out of the slot at the “5 o’clock” position (Figure 3.17).
10. Tighten the axle bolt to hold the brake flywheel in place.
11. Twist the drive belt with your fingers. It should move approximately 90º. Adjust as necessary so that slippage does
not occur between the belt and the pulley while pedaling the unit and when changing direction while pedaling.
12. Plug in the unit and test.
Cable installed
correctly; brake
adjuster at level 1
Lock Nut
Adjuster
Barrel
Brass
Nipple
Axle
Bolt
Figure 3.16
Cable installed
correctly; brake
adjuster at level 1
Figure 3.17


