4
Replacing Virtuo Jukebox Touchscreen Glass
Replacing the Touchscreen Glass
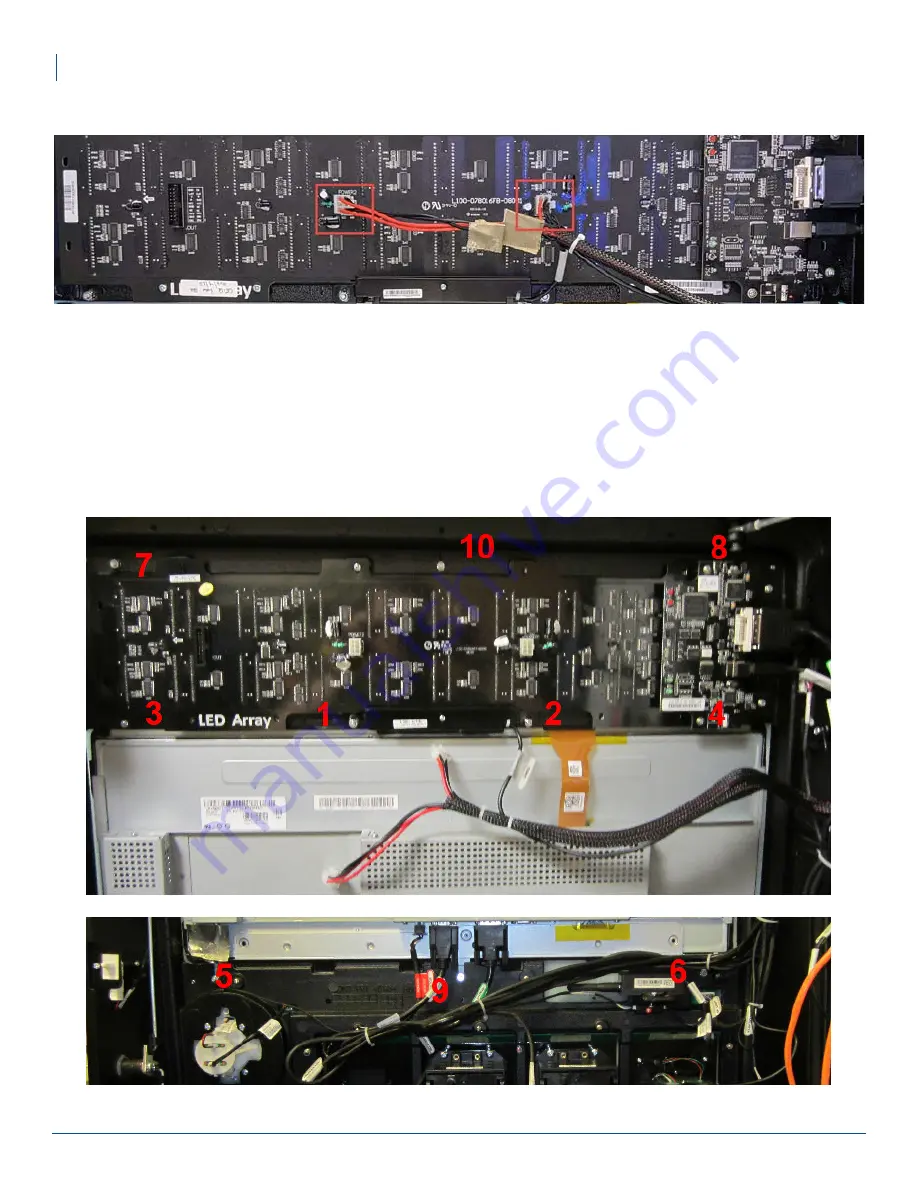
6 Disconnect the cables that connect to the LED array to facilitate access to the touchscreen monitor and glass.
Connections on the LED Array
7 Mark the level where the camera is currently installed. This should be done to ensure that the camera will be
at the same level when you re-install it later in this procedure.
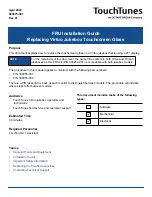
8 The touchscreen is secured to the inside of the door with 10 nuts fastened to studs on the rear of the unit,
and is removed by lifting it away from the exterior of the Virtuo jukebox. Using a torque-limiting nut driver,
remove the nuts that secure the touchscreen glass and monitor to the Virtuo front door, starting with the two
nuts that hold the camera in place. Follow the numbered sequence shown in the following figure for removing
the nuts. The numbered sequence follows an X pattern.
Sequence of nuts to remove (300955-001 monitor model shown)


