background image

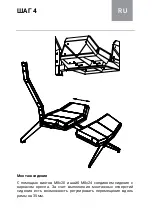
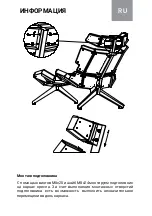
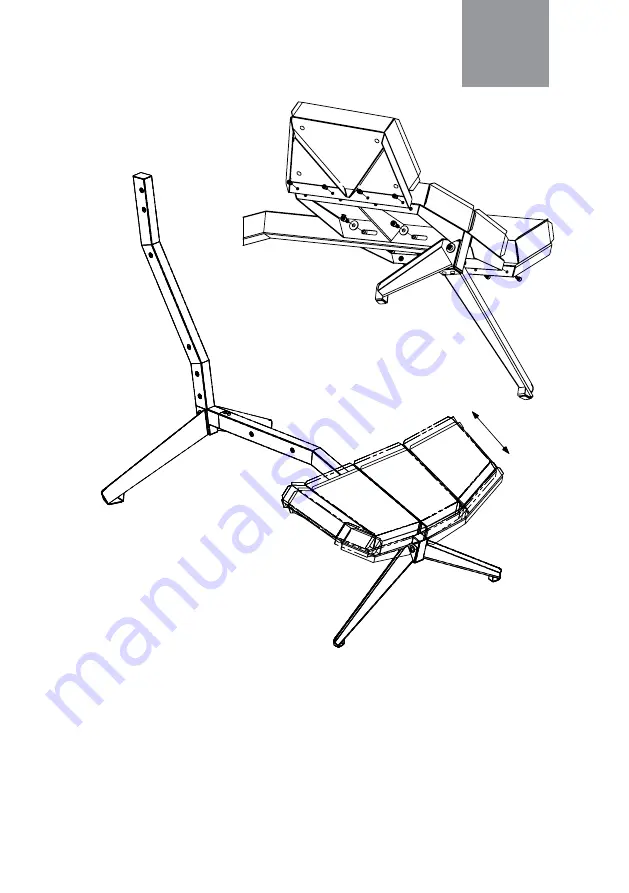
За допомогою гвинтів М8х20 та шайб М8х24 з'єднуємо оттоманку 

з  каркасом  крісла.  За  рахунок  виконання  монтажних  отворів 

оттоманки є можливість регулювати  переміщення вздовж рами на 

35 мм. Також конструктивом передбачено від'єднання бічних частин 

оттоманки.

Çà äîïîìîãîþ ãâèíò³â Ì8õ20 òà øàéá Ì8 õ24 ç'ºäíóºìî îòòîìàíêó ç êàðêàñîì êð³ñëà.

Çà ðàõóíîê âèêîíàííÿ ìîíòàæíèõ îòâîð³â îòòîìàíêè º ìîæëèâ³ñòü ðåãóëþâàòè

 ïåðåì³æåííÿ âçäîâæ ðàìè íà 35 ìì.

Òàêîæ êîíñòðóêòèâîì ïåðåäáà÷åíî â³ä'ºäíàííÿ á³÷íèõ ÷àñòèí îòòìàíêè.

Ëèñò³â 8

Ëèñò 4

Ìàñøòàá

Ìàñà

Ëèò.

Çàòâåðäèâ

Äèçàéíåð

Ïåðåâ³ðèâ
Ò. êîíòð.

Ðîçðîáèâ

Äàòà

ϳäï.

¹ äîêóì.

Ëèñò

Èçì.

Справ. № 

Инв. № дубл.

Взам. инв. №

Подп. и дата

Инв. № подл.

Формат А4

Õ1

Ìîíòàæ îòòîìàíêè

Ãëóøåíêî

Çáðîé

Перв. примен.

Подп. и дата

Çáðîé

КРОК 3

UA

Монтаж оттоманки

Summary of Contents for X1

Page 1: ...X1 ASSEMBLY INSTRUCTION...

Page 2: ...rt 1 3 X1 right front leg 1 4 X1 left front leg 1 5 X1 left back leg 1 6 X1 right back leg 1 7 X1 ottoman 1 8 X1 seat 1 9 X1 bottom back 1 10 X1 upper back 1 11 X1 headrest 1 12 M6x10 DIN 912 screw 1...

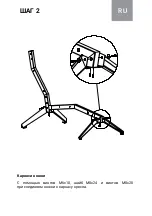
Page 3: ...Assemble the upper and bottom part of the tube frame with the M6x10 screws Assembly of the pipe frame 6 10 8 2 4 1 STEP 1 EN...

Page 4: ...Using the M6x10 screws M8x24 washers and M8x20 screws attach the legs to the frame 6 10 8 24 8 20 8 3 4 1 STEP 2 EN Frame with legs...

Page 5: ...ottoman to the frame Because of the mounting holes in the ottoman it is possi ble to adjust movement along the frame by 35 mm Also the construc tive gives ability to disconnect the side parts of the...

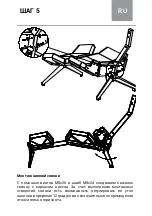
Page 6: ...M8x20 screws and M8x24 washers connect the seat with the frame of the chair Because of the mounting holes in the seat it is possible to adjust movement along the frame by 35 mm 8 20 8 24 35 8 5 1 EN S...

Page 7: ...the bottom back to the frame Because of the mounting holes in the back it is possible to adjust the angle of inclination within 12 degrees and move slightly relative to the horizon 8 20 8 24 12 8 6 4...

Page 8: ...connect the upper back to the frame Because of the mounting holes in the back it is possible to adjust the angle of inclination within 4 5 degrees and move slightly relative to the horizon 8 20 8 24 4...

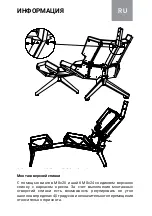
Page 9: ...he M8x20 screws and M8x24 washers mount the headrest to the frame Because of the mounting holes in the headrest it is possible to move it slightly along the frame 8 20 8 24 8 8 4 1 INFO EN Mounting he...

Page 10: ...1 1 1 2 1 1 3 1 1 4 1 1 5 1 1 6 1 1 7 1 1 8 1 1 9 1 1 10 X1 1 11 1 1 12 M6x10 DIN 912 1 13 8 20 DIN 912 24 14 8 24 24 1 UA...

Page 11: ...6 10 6 10 8 2 4 1 1 UA...

Page 12: ...6 10 8 24 8 20 6 10 8 24 8 20 8 3 4 1 2 UA...

Page 13: ...8 20 8 24 35 8 20 8 24 35 8 4 1 3 UA...

Page 14: ...4 8 20 8 24 35 8 20 8 24 35 8 5 1 UA...

Page 15: ...8 20 8 24 12 8 20 8 24 12 8 6 1 5 UA...

Page 16: ...8 20 8 24 4 5 8 20 8 24 4 5 8 7 1 UA...

Page 17: ...8 20 8 24 8 20 8 24 8 8 4 1 UA...

Page 18: ...1 1 1 2 1 1 3 1 1 4 1 1 5 1 1 6 1 1 7 1 1 8 1 1 9 1 1 10 X1 1 11 1 1 12 M6x10 DIN 912 1 13 8 20 DIN 912 24 14 8 24 24 1 UA...

Page 19: ...6 10 6 10 8 2 4 1 1 RU...

Page 20: ...6 10 8 24 8 20 6 10 8 24 8 20 8 3 4 1 2 RU...

Page 21: ...8 20 8 24 35 8 20 8 24 35 8 4 1 3 RU...

Page 22: ...4 8 20 8 24 35 8 20 8 24 35 8 5 1 RU...

Page 23: ...8 20 8 24 12 8 20 8 24 12 8 6 1 5 RU...

Page 24: ...8 20 8 24 4 5 8 20 8 24 4 5 8 7 1 RU...

Page 25: ...8 20 8 24 8 20 8 24 8 8 4 1 RU...

Reviews: