background image

 ODYS MP3 Player X60 

14 

EN 

4.3 

Music Mode


4.3.1 

 Select Playback


  Connect the earphones to the 

earphones jack and turn the player on. 
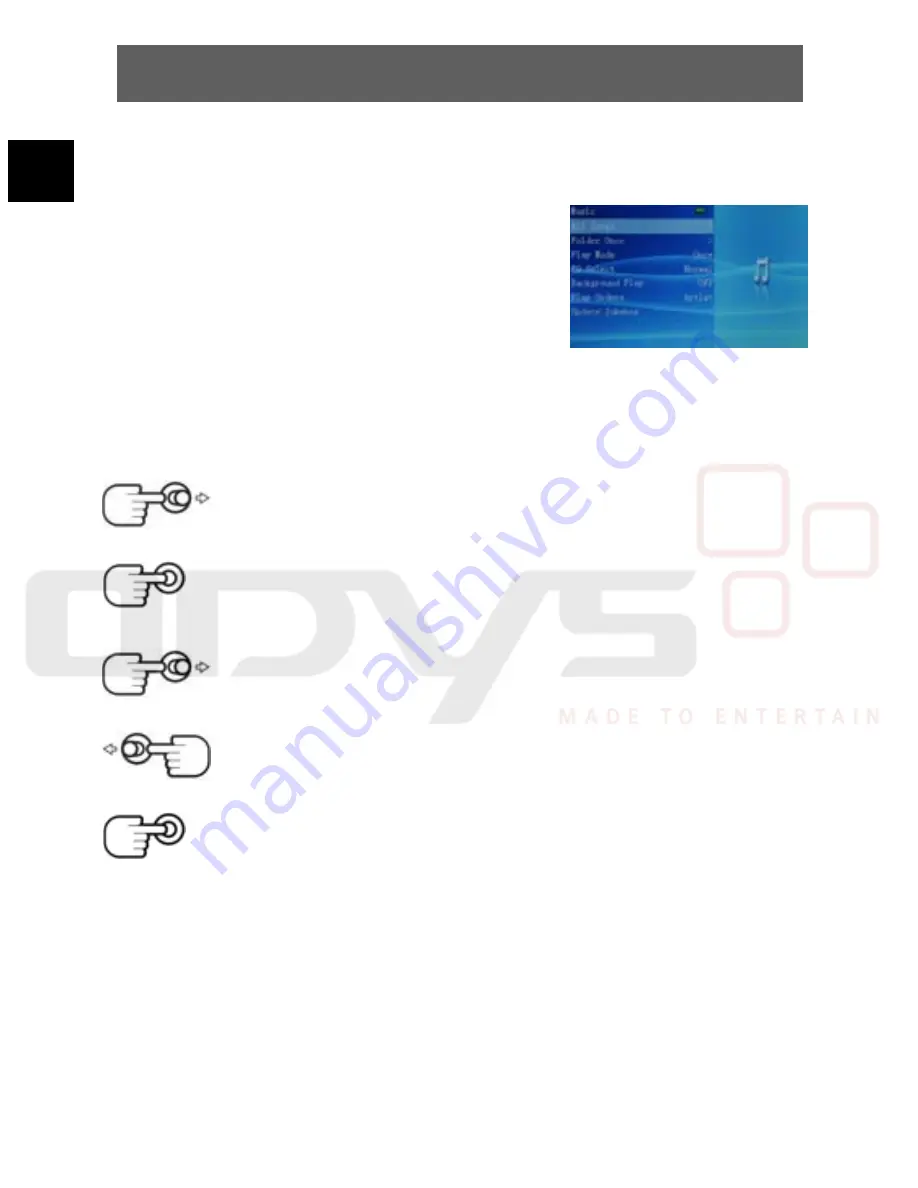
In the main menu select music mode 
and tilt the navigation button to the 

right


once

All Songs  

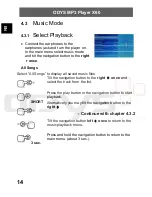
Select “All Songs” to display all saved music files. 


Tilt the navigation button to the 

right 

 once

 and 

select the track from the list. 

SHORT 


Press the play button or the navigation button to start 
playback.


Alternatively you may tilt the navigation button to the 

right 

- Continue with chapter 4.3.2


Tilt the navigation button 

left 

 once 

to return to the 

music playback menu. 

3 sec. 

Press and hold the navigation button to return to the 
main menu. (about 3 sec.). 


Summary of Contents for X60

Page 1: ...n to navigate the menu Tilt the navigation button right to select menu items alternatively press the button Submenus will open if they are available If no submenus are available the setting changes Press and hold or tilt the navigation button left to exit the current menu step by step until returning to the main menu Select Your Language Default Language is English Tilt the navigation button up on...

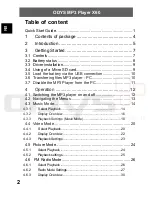
Page 2: ... 3 7 Disable the MP3 Player from the PC 11 4 Operation 12 4 1 Switching the MP3 player on and off 12 4 2 Navigating the Menus 13 4 3 Music Mode 14 4 3 1 Select Playback 14 4 3 2 Display Overview 16 4 3 3 Playback Settings Music Mode 18 4 4 Video Mode 20 4 4 1 Select Playback 20 4 4 2 Display Overview 22 4 4 3 Playback Settings 23 4 5 Picture Mode 24 4 5 1 Select Playback 24 4 5 2 Playback settings...

Page 3: ...S MP3 Player X60 3 EN 4 7 Voice Recording and Playback 32 4 8 E Book Mode 34 4 9 Explorer 36 4 10System Settings 38 5 Troubleshooting 40 6 Specification 41 7 Safety instruction 42 8 Warranty conditions 44 ...

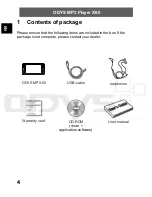
Page 4: ...ntents of package Please ensure that the following items are included in the box If the package is not complete please contact your dealer ODYS MP X60 USB cable earphones Warranty card CD ROM driver application software User manual ...

Page 5: ...es Caution Please read the general safety instructions in Section 7 before using the MP3 player Pay particular attention to the instructions on safely concluding the digital transfer between the MP3 player and computer in Section 3 7 Product properties 2 8 widescreen TFT color display 400 x 240 Pixel 262 000 colors Fast data transfer thanks to USB 2 0 Build in Li ion battery Adjustable power savin...

Page 6: ...rmation on this MP3 player on other products by our company and on our company itself Any firmware updates for this MP3 player are also made available on our website If you have questions or problems please read the FAQs on our website or contact our customer support service support odys de ...

Page 7: ...e Navigationstaste Long press 3 Sec 3 Sec Back to Menu leave current mode short press Enter menu select A B repeat Navi key up Increase volume VOL upwards Navi key down Reduce volume VOL downwards Navi key right Enter menu fast forward next file select Navi key left Leave menu rewind previous file Play key Playback pause On Off main switch On off button Resetting the player after operating faults ...

Page 8: ...rechargeable The charge state of the battery is indicated by various symbols to enable you to estimate how long the player will operate The electricity indicating decrease with the increase of service time Full Approx half full Nearly empty Empty The middle of electricity icon will display empty when the electricity is almost exhausted so you should charge up for it in time at this time The intern...

Page 9: ... the correspondding driver found on the CD ROM before connecting the MP3 player to your computer 3 4 Using of a Micro SD card Inserting the card To insert the micro SD card look at the front of the player and hold the micro SD card with contacts facing upwards as shown in the diagram Push the card into the card slot and push the edge of the card in with your fingernail until the card clicks audibl...

Page 10: ...y The player keys do not function during recharging The player s battery life is influenced by play volume battery life is decreased significantly by loud playback The battery life may change depending on the file type played and how often the buttons are used 3 6 Transferring files MP3 player PC Connect the MP3 player to your PC using the supplied USB cable Open the Windows Explorer or double cli...

Page 11: ...xplorer and right click on the player s removable data storage symbol Then click on the Format option in the context menu 3 7 Disable the MP3 Player from the PC Disable the digital MP3 player from the operating system correctly using the Remove Hardware Safely option Click the task bar on the right hand side below the symbol and select the Remove USB Mass Storage Device Drive X in the following di...

Page 12: ...urrent operating state of the player The player is now in standby mode which still uses a small amount of energy Only use the standby function for short shutdown periods to avoid unnecessarily draining the battery Turn off the main power switch OFF on the left side to shut down the player completely Key lock function Hold the device with both hands and press the Navi key and the Play key Simultane...

Page 13: ...ation button up or down to select the desired option SHORT Briefly press the navigation button to confirm or tilt it to the right Tilt the navigation button left to return to the previous menu In the main menu this brings you directly back to music mode 3 sec Press and hold the navigation button to return to the main menu about 3 sec ...

Page 14: ... Songs to display all saved music files Tilt the navigation button to the right once and select the track from the list SHORT Press the play button or the navigation button to start playback Alternatively you may tilt the navigation button to the right Continue with chapter 4 3 2 Tilt the navigation button left once to return to the music playback menu 3 sec Press and hold the navigation button to...

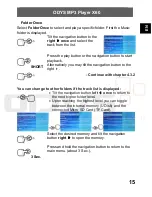
Page 15: ... may tilt the navigation button to the right Continue with chapter 4 3 2 You can change to other folders if the track list is displayed Tilt the navigation button left once to return to the next higher folder level Upon reaching the highest level you can toggle between the internal memory U Disk and the connected Micro SD Card TF Card Select the desired memory and tilt the navigation button right ...

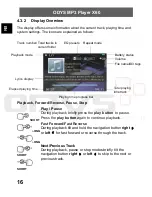
Page 16: ...ue playback LONG LONG Fast Forward Fast Reverse During playback tilt and hold the navigation button right or left for fast forward or reverse through the track SHORT SHORT Next Previous Track During playback pause or stop modes briefly tilt the navigation button right or left to skip to the next or previous track Playing time progress bar Volume Repeat mode EQ presets File name ID3 tags Battery st...

Page 17: ...arted playback in music mode the playback is continued even after exiting the mode In this way you may change settings or view image or text files while listening to music You can deactivate this function by setting the Background Play option in the music settings to Off You cannot change the volume outside the music or radio modes Please return to the music or radio mode to change the volume sett...

Page 18: ...n button up or down to select a setting Repeat Functions Play Mode Tilt the navigation button to the right once Select the desired repeat function from the list Briefly press the navigation button to confirm The following settings are available All Repeat All tracks are played repeatedly Order All tracks are repeated once in normal order Shuffle All tracks are played once in random order Repeat On...

Page 19: ...continue music playback when exiting the music mode when activated On Music playback ends when exiting the music mode if you set the function to Off Select the desired option Tilt the navigation button to the right once to change the setting Play Order Select in which order the tracks are to be played Select the desired option as described above Tilt the navigation button to the right once to disp...

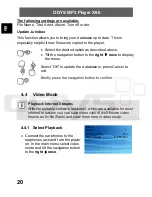
Page 20: ...nu Select OK to update the database or press Cancel to exit Briefly press the navigation button to confirm 4 4 Video Mode Playback Internet Streams With the suitable software add ons which are available for most Internet browsers you can save video clips of well known video forums as flv file flash and view them here in video mode 4 4 1 Select Playback Connect the earphones to the earphones jack a...

Page 21: ...Continue with chapter 4 4 2 You can change to other folders if the title list is displayed Tilt the navigation button left once to return to the next higher folder level Upon reaching the highest level you can toggle between the internal memory U Disk and the connected Micro SD Card TF Card Select the desired memory and tilt the navigation button right to open 3 Sec Press and hold the navigation b...

Page 22: ...ast Forward Fast Reverse During playback tilt and hold the navigation button right or left for fast forward or reverse through the title SHORT SHORT Next Previous Title During playback pause or stop modes briefly tilt the navigation button right or left to skip to the next or previous title Volume Tilt the navigation button up or down to set the volume in 31 steps 0 30 SHORT Briefly press the navi...

Page 23: ...bed above Tilt the navigation button to the right once to change the setting Zoom Mode Here you set the display format for video playback Select the desired option as described above Tilt the navigation button to the right once to display the menu Select the desired setting from the list Briefly press the navigation button to return to the main menu The following settings are available Normal View...

Page 24: ...e navigation button to start playback Playback Forward Reverse Pause Stop In the main menu select picture mode and tilt the navigation button to the right once Select the picture from the list as described above and press the play button to view During image view briefly tilt the navigation button right or left to skip to the next or previous image Briefly press the navigation button to display th...

Page 25: ... FM Radio Background Pic Selects the current image as background during radio mode Recording Background Pic Selects the current image as background during recording mode E Book Background Pic Selects the current image as background during e book mode Briefly press the navigation button during image preview to display the picture menu Select this option as described above Press the navigation butto...

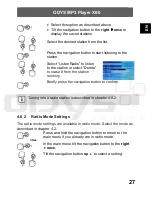
Page 26: ...ion button once to confirm 4 6 FM Radio Mode 4 6 1 Select Playback Connect the earphones to the earphones jack and turn the player on In the main menu select radio mode and tilt the navigation button to the right once Listen Radio Select Listen Radio and press the navigation button to start listening to the radio The previously selected station is tuned into again FM List Select FM List to select ...

Page 27: ...select Delete to erase it from the station memory Briefly press the navigation button to confirm Tuning into a radio station is described in chapter 4 8 2 4 6 2 Radio Mode Settings The radio mode settings are available in radio mode Select the mode as described in chapter 4 2 3 Sec Press and hold the navigation button to return to the main menu if you already are in radio mode In the main menu til...

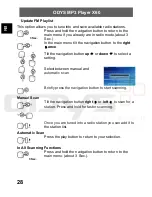
Page 28: ... navigation button up or down to select a setting Select between manual and automatic scan Briefly press the navigation button to start scanning Manual Scan Tilt the navigation button right or left to scan for a station Press and hold for faster scanning Once you are tuned into a radio station you can add it to the station list Automatic Scan Press the play button to return to your selection In Al...

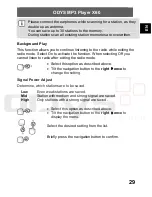
Page 29: ...When selecting Off you cannot listen to radio after exiting the radio mode Select this option as described above Tilt the navigation button to the right once to change the setting Signal Power Adjust Determine which stations are to be saved Low Even weak stations are saved Mid Station with medium and strong signal are saved High Only stations with a strong signal are saved Select this option as de...

Page 30: ...ation button to the right once to change the setting FM Region Select the region for scanning for a station Select this option as described above Tilt the navigation button to the right once to display the menu Select the desired setting from the list Briefly press the navigation button to confirm 4 6 3 Display Overview The display shows information with regard to frequency and station memory of t...

Page 31: ...quency adjust and preset mode Manual adjust Radio Frequency Tilt the navigation button right or left to scan for a station Press and hold for faster scanning Preset Mode No Separate Display Tilt the navigation button right or left to tune into the next station memory For recording from the radio please follow the descriptions in chapter 4 9 You cannot change the volume outside the music or radio m...

Page 32: ... the navigation button to the right once to display the menu Press the play button to start the recording Press the play button again to save the recording and return to the recording menu 3 Sec Press and hold the navigation button to return to the main menu about 3 Sec Play Rec Select this option as described above Tilt the navigation button to the right once to display the menu Tilt the navigati...

Page 33: ...g Press the play button again to save the recording and return to the recording menu 3 Sec Press and hold the navigation button to return to the main menu about 3 Sec Rec Quality Select this option as described above Tilt the navigation button to the right once to display the menu Select the desired setting from the list Low Low recording quality WAV file 64kbps Middle Medium recording quality MP3...

Page 34: ...ion is similar to video mode chapter 4 4 1 In e book mode first the folder TXT in the internal memory is accessed Functions in E Book Mode SHORT Access submenu Read text page by page Read text line by line Return to file view 3 Sec Press and hold the navigation button to return to the main menu about 3 Sec ...

Page 35: ...navigation button to confirm Press the play button to exit the submenu without changes Auto Play Set This activates the text feed rate The text moves with the selected speed and you can read without further pushing the button Bookmark You can mark up to four positions in the text Set bookmark Access the function and select Jump to bookmark to access one of your bookmarks Auto next Page Activates t...

Page 36: ...the menu Tilt the navigation button up or down to select the folder Briefly press the navigation button to confirm Playback A menu is displayed after selecting a file Select Play or On to play or view the file If you selected a file format which is not supported by this player Cancel is displayed instead of Play or On This file can only be deleted it cannot be played or viewed Briefly press the na...

Page 37: ...e is automatically deleted after confirming Delete with the navigation button Tilt the navigation button left to exit the menu without changes 3 Sec Press and hold the navigation button to return to the main menu about 3 Sec You can also delete files and folders via the file manager of your PC if the player is connected via USB cable ...

Page 38: ... be activated or deactivated the menu is not displayed Briefly press the navigation button to confirm 3 Sec Press and hold the navigation button to return to the main menu about 3 Sec About Here you learn details regarding system data Current firmware version Used and total capacity of the internal memory Used and total capacity of the external memory card Briefly press the navigation button to ex...

Page 39: ...re you can select how long the backlight stays on after last pushing a button If you select Always On the backlight is constantly on Auto Off This function turns the player automatically off if no button was pressed for a certain period of time This function can also be used as a sleep timer The player stays constantly on if you select Switch Off Language Here you select your language The language...

Page 40: ...not play music Please confirm the complete files Try another pair of headphones Cannot download music normally Whether the installation of driver is OK Check whether damaged the connection of USB and the connection is OK Check whether there s any empty memory space Be sure that button lock is deactivated No USB connection is established to the PC Check cable plug connection to the PC Windows syste...

Page 41: ... BMP GIF TIFF PCX ICO Record format MP3 Voice recording Record time approx 32 hours 512 MB Battery Lithium Ionen Battery life approx 6 Hours Power supply externally USB Dimensions 89 mm x 41 mm x 6 mm Temperature range 5 to 40 C Display 2 8 TFT 400 x 240 Pixel 232 000 Farben USB Typ USB 2 0 S N ratio 85 dB Headphone output 2 x 10 mW Languages Chinese simple Chinese trad English Japanese German Fre...

Page 42: ...e Promptly load the device s internal battery Do not use the MP3 player while driving a vehicle Never press two buttons simultaneously and handle the display carefully Do not carry the MP3 player with other metal objects coins or keys in your pocket Clean the device only using a soft dry cloth and do not use any volatile substances such as solvents to avoid damaging the surface Do not open the cas...

Page 43: ...a defective MP3 player in normal household waste disposal containers internal battery Take the defective device to your retailer or to an appropriate waste collection site This will ensure that the device is disposed of in an environmentally friendly way ...

Page 44: ...y will be performed in such a way that we shall decide whether to repair the defective parts or to replace them with working parts free of charge AXDIA reserves the right to exchange the product for a replacement product of equal value if the product that is sent in cannot be repaired within a reasonable time or at reasonable cost The product can also be exchanged for a different model of the same...

Page 45: ...and insurance paid Do not enclose any accessories with the products no cables CD s memory cards manuals etc unless the AXDIA Service Centre specifies otherwise 2 Mark the RMA number on the outside of the package in such a way that it is visible and clearly legible 3 You must enclose a copy of the sales slip as proof of purchase 4 Once AXDIA has received the product it will meet its warranty obliga...

Reviews: